
The one that fixes Expeditions
Author: sick skills
Next steps for apps distributed in Texas

Today we’re releasing more details about the tools we’re making available for developers to help them meet their compliance obligations under upcoming U.S. state laws, including SB2420 in Texas. While we’re providing these tools to help developers navigate the evolving legal landscape, Apple remains concerned about the potential implications of laws like SB2420 in Texas. Specifically, we worry they could undermine the privacy of all users by requiring the collection of sensitive personal information just to download an app – even those that simply provide weather forecasts or sports scores.
Starting January 1, 2026, new Apple Accounts in Texas will be subject to new requirements. This includes age assurance and parent or guardian consent on behalf of minors under the age of 18 for downloads, purchases, and significant changes associated with an app. Parents or guardians will also be able to revoke their consent for any app they previously approved.
To meet their obligations under the law, developers may need to adopt new capabilities to receive age category information, trigger consent for a significant change, and learn when a parent or guardian revokes their approval for a child or teen to use their app. Developers can use the following APIs available in the beta versions of iOS 26.2 and iPadOS 26.2 to help them meet their obligations. Sandbox testing is also available to help test the user experience when implementing these APIs to comply with Texas state law.
Age category information
Developers can use the updated Declared Age Range API to obtain a user’s age category, which is defined by Texas state law as under 13, 13-15, 16-17, or over 18. Age categories for users with new Apple Accounts in Texas as of January 1, 2026, will be shared with a developer’s app when they request it. The API will also return a signal from the user’s device about the method of age assurance, such as credit card or government ID, and if consent is required when there’s a significant change to an app.
Obtaining consent for significant changes
Certain types of changes to an app may be considered significant changes under age assurance laws, such as Texas SB2420. It’s the developer’s responsibility to determine when there’s a significant change to their app.
When a developer determines they have made a significant change to their app, they’ll need to use the Significant Change API under the PermissionKit framework to ask the parent or guardian to provide consent for the child or teen to continue using the app or new feature within the app. When the API is called, the child or teen user will see a system dialog to request parental consent and developers can restrict access until consent is obtained.
Texas state law considers a change in the age rating of an app to be a significant change, and developers should keep their age rating selections current in App Store Connect. When a developer updates their app’s age rating, the rating is updated on all user devices once the version is live. Developers can use a new property type in StoreKit to automatically check when their app’s age rating has changed on a user’s device and then use the Significant Change API to request parental consent.
App consent revocation
A parent or guardian in Texas can withdraw consent for any app, which will block launching of the app on the child or teen’s device. The App Store will provide a server notification that developers can configure to receive notifications that the parent or guardian has withdrawn consent for their app on a child or teen’s device.
Sandbox testing
Sandbox testing is now available for the Declared Age Range API and Significant Change API in the beta versions of iOS 26.2 and iPadOS 26.2.
Next steps
- Review documentation and implement the following:
- Use Apple’s sandbox testing environment to validate that the APIs have been implemented correctly.
- When the Release Candidates of iOS 26.2 and iPadOS 26.2 become available, submit your apps to App Store Connect so users can update their devices with your updated apps with the customer releases.
- Stay tuned for additional communication about future tools to help developers meet upcoming legal obligations in Utah, Louisiana, and Brazil.
Announcing Flock to Fedora 2026 (14-16 June): Join Us in Prague!

The official dates and location are set for Flock to Fedora 2026, the premier annual conference for Fedora Project contributors. The event will take place from 14-16 June 2026, in Prague, Czechia.
For Flock 2026, we are returning to the Vienna House by Wyndham Andel’s Prague, located at:
Stroupeznickeho 21
Prague, 150 00
Czech Republic
While all three days will be full conference days, the arrangement of the schedule will change slightly in 2026. Sunday, 14 June, will be designated as Day 0, featuring workshops, team meetups, and hands-on contributor sessions. The main conference activities, including streamed content, the opening keynote, and other sessions, are scheduled for Monday, 15 June, and Tuesday, 16 June.
Coordinated Scheduling with DevConf CZ
Following community feedback from last year, Flock 2026 has been scheduled to align more closely with DevConf.CZ. The conference will conclude just before DevConf.CZ begins in Brno (18-20 June 2026). This compressed travel schedule is intended to make it easier for community members who wish to attend both events.
Call for Proposals & Conference Themes
The Call for Proposals (CFP) for Flock 2026 will open in early December 2025 and close shortly after FOSDEM 2026 (31 January – 1 February). Speaker confirmations are scheduled to be sent in March 2026.
For Flock 2026, we are taking a more focused approach to session content. The Fedora Council, FESCo, and the Mindshare Committee are shaping key themes for the CFP. All presentation and workshop submissions should align with one of these themes. More details will be shared when the CFP opens.
Planning for Flock 2026
Here is what you need to know to plan your attendance:
- Registration: Conference registration is scheduled to open in January 2026.
- Sponsorship: Is your company or organization interested in sponsoring Flock 2026? Our sponsorship prospectus for Flock 2026 is now available on the Flock 2026 website. Organizations interested in supporting Flock and the Fedora community are encouraged to review the prospectus and contact the organizing team with any questions.
- Hotel Block: A discounted block of rooms is arranged at the conference hotel. More information about the discounted hotel block can be found on the Flock website.
- Travel Day & Connections: 17 June is designated as a free travel day between Flock to Fedora 2026 and DevConf.CZ. Frequent bus and train connections are available for travel between Prague and Brno.
- Sponsored Travel: We intend to offer sponsored travel again for Flock to Fedora 2026. More details will follow in December 2025.
Get Involved & Ask Questions
The official Flock to Fedora 2026 Matrix room, #flock:fedoraproject.org, is the best place to connect with organizers and other community members. We encourage you to join the channel for the latest updates and to ask any questions you may have.
A Note on Our Flock to Fedora 2026 & 2027 Plans
We recognize that returning to the same city and venue for a second consecutive year is a departure from Flock’s tradition. This decision was made intentionally with two key goals in mind.
First, by working with a familiar venue, our organizing team can optimize its processes and plan further in advance. This stability for Flock to Fedora 2026 will give us more opportunity to improve our internal processes and explore new ways to incorporate community input into the design of Fedora’s flagship contributor conference.
Second, this allows us to plan for a significant change in 2027. The Flock organizing team is committed to exploring new locations for Flock 2027, with a particular focus on regions outside of North America and Europe. We acknowledge the travel difficulties many of our contributors in regions like LATAM and APAC face. We learned valuable lessons from past planning cycles and are eager to achieve this goal, while also recognizing that unforeseen circumstances can impact our plans. We will work with community members in these regions to explore possible options and conduct thorough research on pricing and availability for 2027.
We look forward to seeing you in Prague for Flock 2026, 14-16 June.
— The Flock to Fedora Planning Team
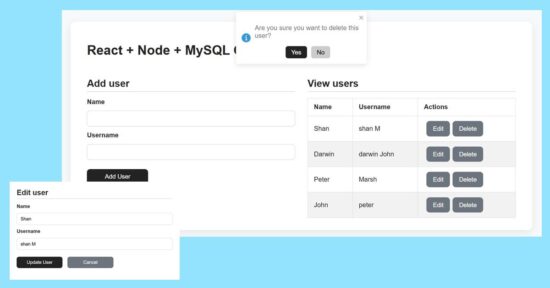
React + Node + MySQL CRUD App Tutorial (Full-Stack API Integration)

by Vincy. Last modified on November 6th, 2025.
This tutorial has a React NodeJS example for building a full-stack CRUD application. It gives easy guidelines to design the frontend and backend. The frontend React connects the NodeJS API controllers to interact for creating, reading, updating, and deleting. This will provide persistent storage with a MySQL database connected via API DAOs.
Add form design and user creation with NodeJS and MySQL
The user-create form contains only two fields to simplify the example. So, the React frontend assets manages states and props to carry these inputs’ data to post.
The addUser() props triggers the add action request to post the form data to the server.
It executes the insert query on clicking the ‘Add User’ button. The response will have the auto-generated key created on successful insert action of the CRUD functionality.
src/components/form/AddUserForm.jsx
import { useState } from 'react'
const AddUserForm = props => { const initialFormState = { id: null, name: '', username: '' } const [ user, setUser ] = useState(initialFormState) const handleInputChange = event => { const { name, value } = event.target setUser({ ...user, [name]: value }) }
return ( <form onSubmit={event => { event.preventDefault() if (!user.name || !user.username) return props.addUser(user) setUser(initialFormState) }}> <label>Name</label> <input type="text" name="name" value={user.name} onChange={handleInputChange} /> <label>Username</label> <input type="text" name="username" value={user.username} onChange={handleInputChange} /> <div className="action-buttons"> <button type="submit">Add User</button> </div> </form>
)
}
export default AddUserForm
part of userControllers.js
export const addUser = (req, res) => { const { name, username } = req.body; db.query("INSERT INTO users (name, username) VALUES (?, ?)", [name, username], (err, result) => { if (err) return res.status(500).json({ error: err.message }); res.json({ id: result.insertId, name, username }); });
};

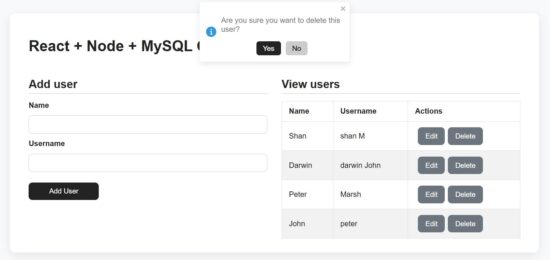
Displaying user data rows with edit and delete action controls
The UserTable component displays the data table dynamically from the MySQL database. The prop.users tree map is used to form these rows to the UI.
Each row contains edit and delete controls that are bound to editRow and deleteUser functions respectively.
src/components/table/UserTable.jsx
import React from 'react'
const UserTable = props => ( <table> <thead> <tr> <th>Name</th> <th>Username</th> <th>Actions</th> </tr> </thead> <tbody> {props.users.length > 0 ? ( props.users.map(user => ( <tr key={user.id}> <td>{user.name}</td> <td>{user.username}</td> <td> <button onClick={() => { props.editRow(user) }} className="button muted-button" > Edit </button> <button onClick={() => props.deleteUser(user.id)} className="button muted-button" > Delete </button> </td> </tr> )) ) : ( <tr> <td colSpan={3}>No users</td> </tr> )} </tbody> </table>
)
export default UserTable
In NodeJS the getUsers() module reads all users into an JSON response array as built below.
part of userControllers.js
export const getUsers = (req, res) => { db.query("SELECT * FROM users", (err, results) => { if (err) return res.status(500).json({ error: err.message }); res.json(results); });
};
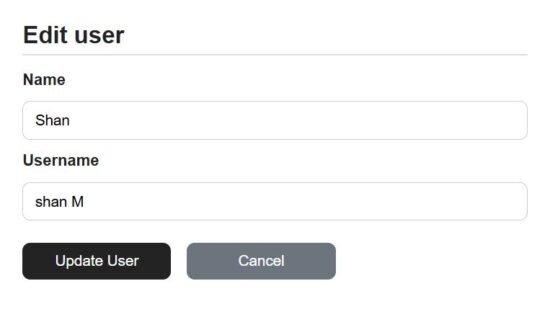
Updating current user by ID using update API in NodeJS
The add and edit forms are exactly same except that this edit form populated the existing user data. The currentUser props contains the exiting user details read by id.
On clicking the ‘Edit’ button the user id is passed to send the read request with the id.
Once the enduser edits the detail and submit, it request the NodeJS API to perform the update operation of the CRUD module.
Both add and edit button clicks prevents the default submit and requests the API via network call.
The edit form is used to view or edit the user details. When clicking cancel the editing directive is set to false to switch to the view mode.
src/components/form/EditUserForm
import { useState, useEffect } from 'react'
const EditUserForm = props => { const [user, setUser] = useState(props.currentUser) useEffect( () => { setUser(props.currentUser) }, [props] ) const handleInputChange = event => { const { name, value } = event.target setUser({ ...user, [name]: value }) }
return ( <form onSubmit={event => { event.preventDefault() props.updateUser(user.id, user) }} > <label>Name</label> <input type="text" name="name" value={user.name} onChange={handleInputChange} /> <label>Username</label> <input type="text" name="username" value={user.username} onChange={handleInputChange} /> <div className="action-buttons"> <button type="submit">Update User</button> <button onClick={() => props.setEditing(false)} className="button muted-button"> Cancel </button> </div> </form>
)
}
export default EditUserForm
In the NodeJS, the backend user controller has an exclusive handle to prepare the user update query.
It binds the request parameter to the update query to go with the update operation.
part of userControllers.js
export const updateUser = (req, res) => { const { id } = req.params; const { name, username } = req.body; db.query("UPDATE users SET name=?, username=? WHERE id=?", [name, username, id], (err) => { if (err) return res.status(500).json({ error: err.message }); res.json({ id, name, username }); });
};
Deleting a user row via NodeJS controller
As like as an edit request, the delete action is also receives the user’s unique id in the request parameter.
The backend Node API receives the id and process the delete operation.
In the React frontend, it shows confirmation message in a toast box to avoid the mistakes.
part of userControllers.js
export const deleteUser = (req, res) => { const { id } = req.params; db.query("DELETE FROM users WHERE id=?", [id], (err) => { if (err) return res.status(500).json({ error: err.message }); res.json({ message: "User deleted" }); });
};
How to run the React + NodeJS example?
Set up the MySQL database:
First find the /api/sql/users.sql file from the downloadable source code given in this React + NodeJS CRUD example.
Create a database and import that SQL script into that. Then Configure the database details to the db.js file in the NodeJS API root.
Start the backend NodeJS server:
Go to the NodeJS api path and start the server via npm. It will return the server running path http://localhost:5000/
In this example this backend api URL is configured with a specific constant for convenience. It avoid the overhead of changing in multiple places based on the environment.
cd /path/api npm install npm start node server.js
Start the frontend React dev:
Go to the app location path and start the dev server. This will start the dev server http://localhost:5173/
cd react-node-mysql-crud-full-stack-tutorial npm install npm run dev
Conclusion
This tutorial built a simple code for React + Node.js + MySQL CRUD. The code for designing frontend and connecting the NodeJS API together gives a full stack execution sample. I hope, you learned how to read and display dynamic data from backend to React components and also how to manipulate them. The server controller is with appropriate cases to handle the CRUD with MySQL to store, retrieve, update, and delete data. With this base, it is easy to add more features to this CRUD utility.
References:

Written by Vincy, a web developer with 15+ years of experience and a Masters degree in Computer Science. She specializes in building modern, lightweight websites using PHP, JavaScript, React, and related technologies. Phppot helps you in mastering web development through over a decade of publishing quality tutorials.
This Week In Destiny – 10/30/2025
I’m the Candy-Guardian!
React JWT Authentication Tutorial with PHP Backend (Login, Register & Protected Routes)

by Vincy. Last modified on November 28th, 2025.
The JWT authentication is a secure way of implementing a web login process without session management. This tutorial is for implementing React JWT authentication with PHP. It has the following steps to understand the process easily.
Additionally, this example code provides a user registration code to create new user to the database. With the registration and login code you are getting a base for your websites authentication module from this tutorial.
- React login form submits the registered username and password.
- PHP backend script validates the login details with the database.
- PHP login success case generates JWT signed encoded user profile data.
- React frontend receives the JWT token and stores to localStorage.
- React validates the existence of the token with the ProtectedRoutes component.
- If the ProtectedRoutes failed to find the JWT token, it denies the access.

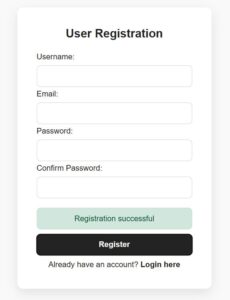
React User Registration
This registration code helps to create data for your login process. Also, with registration this authentication example will be a more complete version to deploy in your application.
This example has a registration form with very few fields. React builds the formData state when the user enters the data. On submit, it passes the entered data to the PHP page register-action.php. It stores the user login name, email and the password to the database.
In the below JSX script, the formData, success/error state variables are managed. The handleSubmit hook handles the client-side form validation. This hook posts the data to the server once the validation returns true.
Part of RegisterForm.jsx with React states and hooks
import axios from "axios";
import { useNavigate } from "react-router-dom";
import SERVER_SIDE_API_ROOT from "../config";
import "../styles/style.css";
const RegisterForm = () => { const [formData, setFormData] = useState({ username: "", email: "", password: "", confirmPassword: "", }); const [errorMessage, setErrorMessage] = useState(""); const [successMessage, setSuccessMessage] = useState(""); const navigate = useNavigate(); const handleSubmit = async (e) => { e.preventDefault(); const { username, email, password, confirmPassword } = formData; if (!username || !email || !password || !confirmPassword) { setErrorMessage("Please fill in all fields"); setSuccessMessage(""); return; } const emailRegex = /^[^\s@]+@[^\s@]+\.[^\s@]+$/; if (!emailRegex.test(email)) { setErrorMessage("Please enter a valid email address"); return; } if (password.length < 6) { setErrorMessage("Password must be at least 6 characters"); return; } if (password !== confirmPassword) { setErrorMessage("Passwords do not match"); setSuccessMessage(""); return; } try { const res = await axios.post( `${SERVER_SIDE_API_ROOT}/registration-action.php`, { username, email, password }, { headers: { "Content-Type": "application/json" } } ); console.log("Server response:", res.data); if (res.data.status === "success") { setSuccessMessage(res.data.message); setErrorMessage(""); setFormData({ username: "", email: "", password: "", confirmPassword: "", }); setTimeout(() => { navigate("/login"); }, 2000); } else { setErrorMessage(res.data.message || "Registration failed"); setSuccessMessage(""); } } catch (err) { console.error("Axios Error:", err); setErrorMessage("Server error or CORS issue"); setSuccessMessage(""); }
};
Returning Form UI code with RegisterForm.jsx
<div className="admin-wrapper"> <div className="card-container" style={{ maxWidth: "400px", margin: "95px auto" }}> <h2>User Registration</h2> <form onSubmit={handleSubmit}> <div> <label>Username:</label> <input value={formData.username} onChange={(e) => setFormData({ ...formData, username: e.target.value }) }/> </div> <div> <label>Email:</label> <input type="email" value={formData.email} onChange={(e) => setFormData({ ...formData, email: e.target.value }) } /> </div> <div> <label>Password:</label> <input type="password" value={formData.password} onChange={(e) => setFormData({ ...formData, password: e.target.value }) } /> </div> <div> <label>Confirm Password:</label> <input type="password" value={formData.confirmPassword} onChange={(e) => setFormData({ ...formData, confirmPassword: e.target.value, }) }/> </div> {errorMessage && ( <div className="alert alert-danger" role="alert"> {errorMessage} </div> )} {successMessage && ( <div className="alert alert-success" role="alert"> {successMessage} </div> )} <button type="submit">Register</button> <p style={{ textAlign: "center", marginTop: "10px" }}> Already have an account?{" "} <a href="/login" style={{ color: "#232323", fontWeight: "600",textDecoration: "none" }}> Login here </a> </p> </form> </div> </div>
);
};
export default RegisterForm;
PHP backend handles the registration request and stores the entered password in an encrypted form. It validates the user email uniqueness. If the entered email is already in the database, then this code rejects the user’s insertion.
react-jwt-login-register-api/registration-action.php
<?php
header("Access-Control-Allow-Origin: *");
header("Access-Control-Allow-Headers: Content-Type, Authorization");
header("Access-Control-Allow-Methods: POST, OPTIONS");
header("Content-Type: application/json"); if ($_SERVER['REQUEST_METHOD'] === 'OPTIONS') { http_response_code(200); exit; }
include "db.php";
$input = file_get_contents("php://input");
$data = json_decode($input);
if ( !isset($data->username) || !isset($data->email) || !isset($data->password)
) { echo json_encode(["status" => "error", "message" => "Invalid input"]); exit;
}
$username = mysqli_real_escape_string($conn, $data->username);
$email = mysqli_real_escape_string($conn, $data->email);
$password = password_hash($data->password, PASSWORD_BCRYPT);
$check = $conn->query("SELECT * FROM users WHERE email='$email'");
if ($check->num_rows > 0) { echo json_encode(["status" => "error", "message" => "Email already exists"]); exit;
}
$sql = "INSERT INTO users (username, email, password) VALUES ('$username', '$email', '$password')";
if ($conn->query($sql) === TRUE) { echo json_encode(["status" => "success", "message" => "Registration successful"]);
} else { echo json_encode(["status" => "error", "message" => $conn->error]);
}
?>
React login JWT authentication
If the user submits the correct username and password, the client receives success response from the server. The response will contain a JWT signed user profile data array.
In the client-side, the jwt-decode is used to decode the JWT response. The jwt-decode is the JavaScript library which can read and decode the JWT encoded string.
Run the following command to install this library into the application repository.
npm install jwt-decode [OR] yarn add jwt-decode
In the below script, if the response status is success it sets the JWT authentication token to a JavaScript localStorage. Then, it redirects to the dashboard. The dashboard is a protected page that can be accessed if a user is JWT-authenticated.
src/components/LoginForm.jsx
import React, { useState } from "react";
import { Link } from "react-router-dom";
import SERVER_SIDE_API_ROOT from "../config";
import "../styles/style.css";
import axios from "axios"; const LoginForm = () => { const [formData, setFormData] = useState({ username: "", password: "", }); const [errorMessage, setErrorMessage] = useState(""); const handleLogin = (e) => { e.preventDefault(); const { username, password } = formData; if (!username || !password) { setErrorMessage("Please enter both username and password"); return; } axios.post(`${SERVER_SIDE_API_ROOT}/login-action.php`, { username, password, }) .then((res) => { if (res.data.status === "success") { localStorage.setItem("token", res.data.token); setErrorMessage(""); setTimeout(() => { window.location.href = "/dashboard"; }, 1000); } else { setErrorMessage(res.data.message); } }) .catch((err) => { setErrorMessage("Server error: " + err.message); });
};
return (
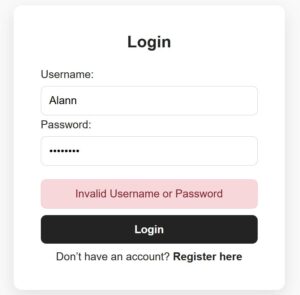
<div className="admin-wrapper"> <div className="card-container" style={{ maxWidth: "400px", margin: "154px auto" }}> <h2>Login</h2> <form onSubmit={handleLogin}> <div> <label>Username:</label> <input value={formData.username} onChange={(e) => setFormData({ ...formData, username: e.target.value })} /> </div> <div> <label>Password:</label> <input type="password" value={formData.password} onChange={(e) => setFormData({ ...formData, password: e.target.value }) } /> </div> {errorMessage && ( <div className="alert alert-danger" role="alert"> {errorMessage} </div> )} <button type="submit">Login</button> <p style={{ textAlign: "center", marginTop: "10px" }}> Don’t have an account?{" "} <Link to="/registerform" style={{ color: "#232323", fontWeight: "600", textDecoration: "none" }}> Register here </Link> </p> </form> </div>
</div>
);
};
export default LoginForm;
In PHP the firebase/php-jwt library is installed by using this composer command. Once the logged-in details matched, this library is used to generate the JWT token with the profile array.
composer require firebase/php-jwt
react-jwt-login-register-api/login-action.php
<?php
header("Access-Control-Allow-Origin: *");
header("Access-Control-Allow-Headers: Content-Type, Authorization");
header("Access-Control-Allow-Methods: POST, OPTIONS");
header("Content-Type: application/json"); include "db.php";
require 'vendor/autoload.php'; use Firebase\JWT\JWT;
use Firebase\JWT\Key; $secret_key = "MY_SECRET_KEY_12345"; if ($_SERVER['REQUEST_METHOD'] == 'OPTIONS') { http_response_code(200); exit;
}
$data = json_decode(file_get_contents("php://input"));
if (!isset($data->username) || !isset($data->password)) { echo json_encode(["status" => "error", "message" => "Missing credentials"]); exit;
}
$username = $conn->real_escape_string($data->username);
$password = $data->password;
$result = $conn->query("SELECT * FROM users WHERE username = '$username' LIMIT 1");
if ($result->num_rows === 0) { echo json_encode(["status" => "error", "message" => "Invalid Username or Password"]); exit;
}
$user = $result->fetch_assoc();
if (!password_verify($password, $user['password'])) { echo json_encode(["status" => "error", "message" => "Invalid password"]); exit;
}
$payload = [ "iss" => "http://localhost", "aud" => "http://localhost", "iat" => time(), "exp" => time() + (60 * 60), "user" => [ "id" => $user['id'], "username" => $user['username'], "email" => $user['email'] ]
];
$jwt = JWT::encode($payload, $secret_key, 'HS256');
echo json_encode([ "status" => "success", "message" => "Login successful", "token" => $jwt
]);
?>
Protected Route Component that validates JWT token to permit
This component validates if the localStorage has the JWT token. If not, then it will stop the user from accessing a requested page. Instead, it redirects to the login page.
src/components/ProtectedRoute.js
import { Navigate } from "react-router-dom"; const ProtectedRoute = ({ children }) => { const token = localStorage.getItem("token"); if (!token) { return <Navigate to="/login" replace />; } return children;
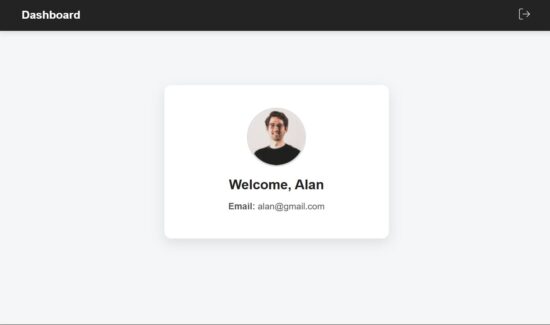
}; export default ProtectedRoute; Dashboard with profile information
The React main App component imports the ProtectedRoutes to bring the validation process at the top layer. This ProtectedRoutes wrapper around the Dashboard will help to permit only a JWT-authenticated user to the dashboard.
This React dashboard script gets the user details from the decoded JWT token. Then, those details are rendered to the UI as shown below.
A simple header is created for this dashboard view with a logout option. On clicking logout, it clears the localStorage and redirects to the login page.
src/pages/Dashboard.jsx
import React, { useEffect, useState } from "react";
import { useNavigate } from "react-router-dom";
import { jwtDecode } from "jwt-decode";
import "../styles/style.css"; const Dashboard = () => { const [user, setUser] = useState(null); const navigate = useNavigate(); useEffect(() => { const token = localStorage.getItem("token"); if (!token) { navigate("/login"); return; } try { const decoded = jwtDecode(token); setUser(decoded.user); } catch (error) { console.error("Invalid token:", error); localStorage.removeItem("token"); navigate("/login"); } }, [navigate]); if (!user) return <p>Loading...</p>; const handleLogout = () => { localStorage.removeItem("token"); navigate("/login"); }; return ( <div className="dashboard-wrapper"> <nav className="navbar"> <div className="navbar-left"> <h2>Dashboard</h2> </div> <div className="navbar-right"> <button className="logout-btn" onClick={handleLogout}> <img src="./logout.svg" alt="Logout" className="logout-icon" /> </button> </div> </nav> <div className="card"> <img src="/profile.jpg" alt="" className="profile-pic" /> <h2>Welcome, {user.username}</h2> <p> <strong>Email:</strong> {user.email} </p> </div> </div> );
};
export default Dashboard;
conclusion
With this login authentication base, you can have a good start to create a React JWT login. The user registration involves PHP and MySQL connection to generate backend data for this login. It can be enhanced by adding server-side JWT validation to improve the security. The concept of securing application pages with protected routes helps to reuse the wrapper for more components.
References:
- About JWT (JSON Web Token)
- PHP JWT backend library to encode decode JWT token
- Client side JWT decoding library
Written by Vincy, a web developer with 15+ years of experience and a Masters degree in Computer Science. She specializes in building modern, lightweight websites using PHP, JavaScript, React, and related technologies. Phppot helps you in mastering web development through over a decade of publishing quality tutorials.
Price updates for apps, In-App Purchases, and subscriptions

The App Store is designed to make it easy to sell your digital goods and services globally, with support for 44 currencies across 175 storefronts.
From time to time, we may need to adjust prices or your proceeds due to changes in tax regulations or foreign exchange rates. These adjustments are made using publicly available exchange rate information from financial data providers to help make sure prices for apps and In-App Purchases stay consistent across all storefronts.
Price updates
Beginning November 17:
Pricing for apps and In-App Purchases will be updated for Poland, Switzerland, and Türkiye if you haven’t selected one of these storefronts as the base storefront for your app or In‑App Purchase.¹
If you’ve selected Poland, Switzerland, or Türkiye as the base storefront for your app or In-App Purchase, prices won’t change. On other storefronts, prices will be updated to maintain equalization with your chosen base price.
Prices won’t change in any region if your In‑App Purchase is an auto‑renewable subscription. Prices also won’t change on the storefronts where you manually manage prices instead of using the automated equalized prices.
The Pricing and Availability section of Apps has been updated in App Store Connect to display these upcoming price changes. As always, you can change the prices of your apps, In‑App Purchases, and auto‑renewable subscriptions at any time.
Learn more about managing your prices
View or edit upcoming price changes
Edit your app’s base country or region
Pricing and availability start times by country or region
Set a price for an In-App Purchase
¹ Excludes auto-renewable subscriptions.
Enhancements to help you submit and market your apps and games

As part of our ongoing commitment to helping developers succeed on the App Store, we’re introducing new options for submitting content and updates while your app is in review, double the number of custom product pages, and offer codes for all In-App Purchase types.
Submit additional items to App Review
Now you can send additional items to App Review independent of an existing submission, giving you greater flexibility when submitting your apps and games. For example, you can now submit:
- One or more In-App Events in a separate submission if you have an app version under review.
- An app version to address a critical bug that’s separate from any existing custom product pages under review.
- One or more Game Center features — including achievements, leaderboards, challenges, and more — in a submission that’s separate from an app version under review.
Create double the number of custom product pages and add keywords
Custom product pages let you highlight different content and features within your app or game using unique screenshots, app previews, and promotional text. To provide you with even more flexibility, you can now create and publish up to 70 custom pages at a given time. Additionally, you can now assign keywords to each custom product page so they’re more discoverable on the App Store. Custom product pages with keywords assigned to them can appear in search results for those selected keywords instead of your default product page.
Learn more about custom product pages
Offer codes expand to all In-App Purchase types
Offer codes now support all In-App Purchase types, including consumable, non-consumable, and non-renewing subscriptions, in addition to expanded support for auto-renewable subscriptions. With offer codes, you can present people with a limited-time offer for a free or discounted In-App Purchase. This allows you to share the value of your In-App Purchases and encourage engagement and purchases within your apps and games. This expanded support includes the ability to create offer codes for:
- Consumable, non-consumable, and non-renewing subscriptions.
- Auto-renewable subscriptions that don’t auto-renew once the promotional period ends.
Schedule 1 and the Paid Applications Agreement (Schedules 2 and 3) will be updated to indicate that offer codes are available for all In-App Purchase types.¹
Promo codes for In-App Purchases
Offer codes build on the functionality of promo codes and provide improved configuration and customer eligibility options. As a result, starting March 26, 2026, you’ll no longer be able to create promo codes for In-App Purchases in App Store Connect. Any existing promo codes for In-App Purchases you’ve created can be redeemed until they expire. You can continue to use promo codes in order to provide people with a free download of your app.
Learn about creating offer codes
Learn about offer codes for auto-renewable subscriptions
¹ Translations of the updated agreement will be available on the Apple Developer website within one month.
Destiny 2 Update 9.1.5.3
The one about Festival of the Lost soft lock fixes and more
How to rebase to Fedora Linux 43 on Silverblue

Fedora Silverblue is an operating system for your desktop built on Fedora Linux. It’s excellent for daily use, development, and container-based workflows. It offers numerous advantages such as being able to roll back in case of any problems. If you want to rebase to Fedora Linux 43 on your Fedora Silverblue system, this article tells you how. It not only shows you what to do, but also how to revert things if something unforeseen happens.
Update your existing system
Prior to actually doing the rebase to Fedora Linux 43, you should apply any pending updates. Enter the following in the terminal:
$ rpm-ostree update
or install updates through GNOME Software and reboot.
Note
rpm-ostree is the underlying atomic technology that all the Fedora Atomic Desktops use. The techniques described here for Silverblue will apply to all of them with proper modifications for the appropriate desktop.
Rebasing using GNOME Software
GNOME Software shows you that there is new version of Fedora Linux available on the Updates screen.
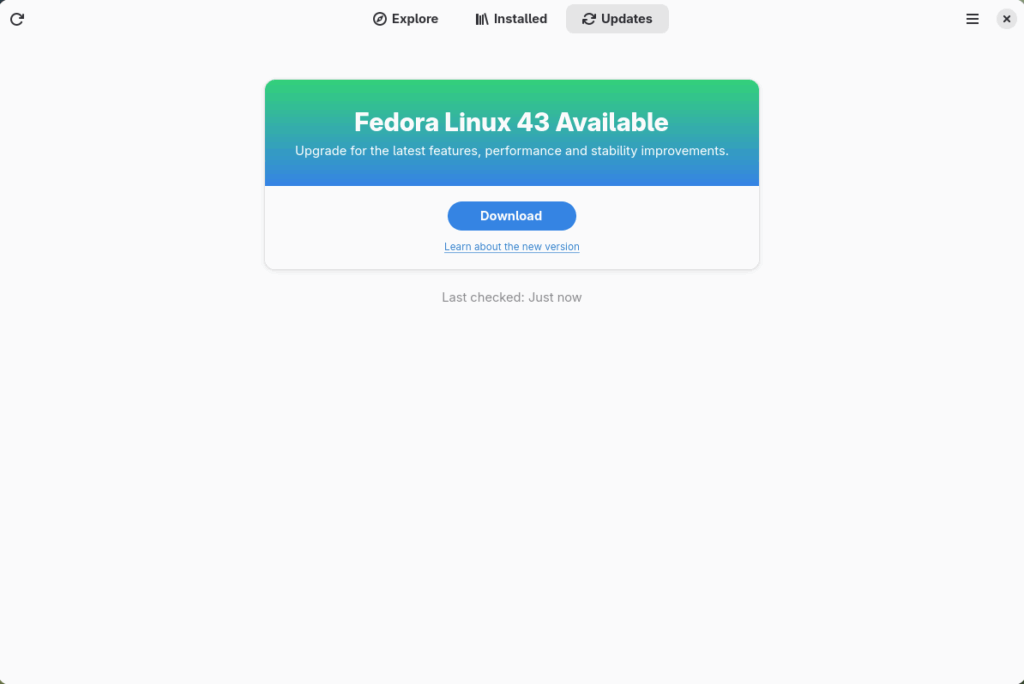
First thing to do is download the new image, so select the Download button. This will take some time. When it is done you will see that the update is ready to install.
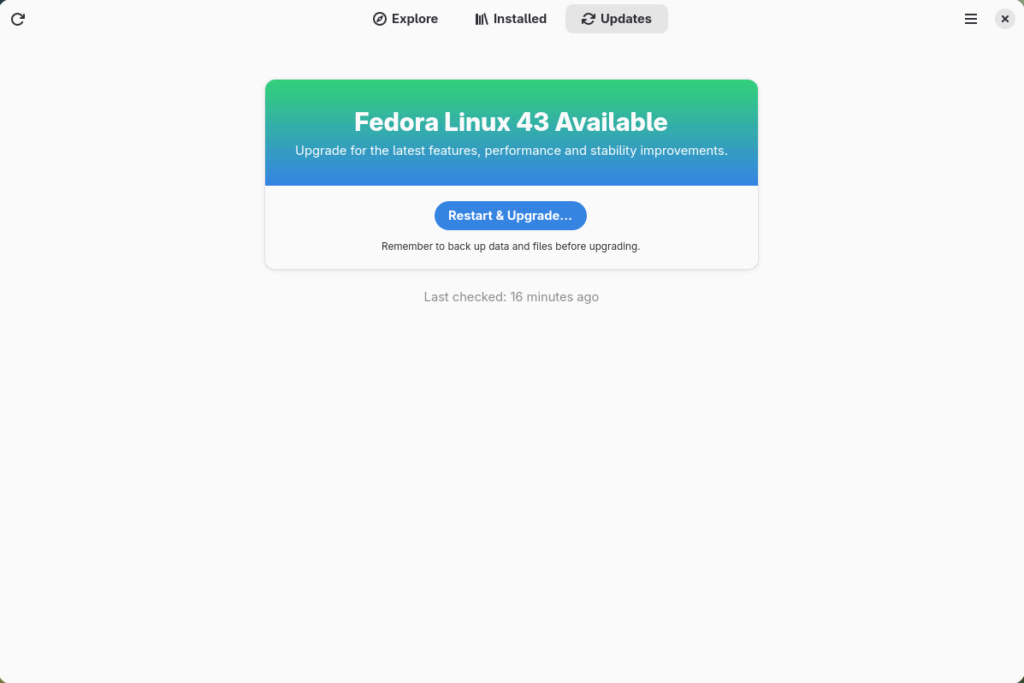
Select the Restart & Upgrade button. This step will take only a few moments and the computer will restart when the update has completed. After the restart you will end up in a new and shiny release of Fedora Linux 43. Easy, isn’t it?
Rebasing using terminal
If you prefer to do everything in a terminal, then this part of the guide is for you.
Rebasing to Fedora Linux 43 using the terminal is easy. First, check if the 43 branch is available:
$ ostree remote refs fedora
You should see the following in the output:
fedora:fedora/43/x86_64/silverblue
If you want to pin the current deployment (meaning that this deployment will stay as an option in GRUB until you remove it), you can do this by running this command:
# 0 is entry position in rpm-ostree status
$ sudo ostree admin pin 0
To remove the pinned deployment use the following command:
# 2 is entry position in rpm-ostree status
$ sudo ostree admin pin --unpin 2
Next, rebase your system to the Fedora Linux 43 branch.
$ rpm-ostree rebase fedora:fedora/43/x86_64/silverblue
Finally, the last thing to do is restart your computer and boot to Fedora Linux 43.
How to roll back
If anything bad happens (for instance, if you can’t boot to Fedora Linux 43 at all) it’s easy to go back. At boot time, pick the entry in the GRUB menu for the version prior to Fedora Linux 43 and your system will start in that previous version rather than Fedora Linux 43. If you don’t see the GRUB menu, try to press ESC during boot. To make the change to the previous version permanent, use the following command:
$ rpm-ostree rollback
That’s it. Now you know how to rebase Fedora Silverblue to Fedora Linux 43 and roll back. So why not do it today?
Known Issues
FAQ
Because there are similar questions in comments for each blog about rebasing to newer version of Silverblue I will try to answer them in this section.
Question: Can I skip versions during rebase of Fedora? For example from Fedora 40 Silverblue to Fedora 43 Silverblue?
Answer: Although it could sometimes be possible to skip versions during rebase, it is not recommended. You should always update to one version above (40->41->42->43 for example) to avoid unnecessary errors.
Question: I have rpm-fusion layered and I get errors during rebase. How should I do the rebase?
Answer: If you have rpm-fusion layered on your Silverblue installation, you should do the following before rebase:
$ rpm-ostree update --uninstall rpmfusion-free-release --uninstall rpmfusion-nonfree-release --install rpmfusion-free-release --install rpmfusion-nonfree-release
After doing this you can follow the guide in this blog post.
Question: Could this guide be used for other ostree editions (Fedora Atomic Desktops) as well like Kinoite, Sericea (Sway Atomic), Onyx (Budgie Atomic),…?
Yes, you can follow the Rebasing using the terminal part of this guide for every Fedora Atomic Desktop. Just use the corresponding branch. For example, for Kinoite use fedora:fedora/43/x86_64/kinoite