If you run this code, instead of the desired plot, you get the following TypeError: 'AxesSubplot' object is not subscriptable:
Traceback (most recent call last): File "C:\Users\xcent\Desktop\code.py", line 4, in <module> axes[0, 0].plot([1, 2, 3], [5, 5, 5])
TypeError: 'AxesSubplot' object is not subscriptable
Question: How to resolve the TypeError: 'AxesSubplot' object is not subscriptable in your Python script?
Don’t panic! The solution is easier than you think…
Fix Not Subscriptable TypeError on ‘AxesSubplot’ Object
Generally, Python raises the TypeError XXX object is not subscriptable if you use indexing with the square bracket notation on an object that is not indexable. In this case, you tried to index an Axes object because you thought it was an array of Axes objects.
Let’s go over the code to understand why the error happened!
First, you assign the result of the plt.subplots() function to the two variables fig and axes.
fig, axes = plt.subplots()
If you don’t pass an argument in the plt.subplots() function, it creates a Figure with one Axes object.
So if you try to subscript using axes[0,0], axes[0], or any other indexing scheme, Python will raise an error. It’s simple: axes doesn’t hold a container type so it cannot be indexed using the square bracket notation!
So to fix the TypeError: 'AxesSubplot' object is not subscriptable, simply remove the indexing notation on the axes object obtained by plt.subplots() called without arguments.
However, this error is tough to spot because if you pass any other argument into the plt.subplot() function, it creates a Figure and a Numpy array of Subplot/Axes objects which you store in fig and axes respectively.
For example, this creates a non-subscriptable axes because you don’t pass any argument:
fig, axes = plt.subplots()
For example, this creates a subscriptable array of axes that is a one-dimensional array of subplots because you pass an argument:
fig, axes = plt.subplots(3)
For example, this creates a subscriptable array of axes that is a two-dimensional array of subplots because you passed two arguments
fig, axes = plt.subplots(3, 2)
No wonder did you think that you can call axes[0,0] or axes[0] on the return value of the plt.subplot() function! However, doing so is only possible if you didn’t pass an argument into it.
Make sure you never run into similar errors by spending a couple of minutes understanding the plt.subplot() function once and for all!
Learn More about plt.subplot()
To further understand the subplots() function, check out our detailed guide on the Finxter blog and the following video:
To print all values of a Python list without the trailing newline character or line break, pass the end='' argument in your print() function call. Python will then avoid adding a newline character after the printed output. For example, the expression print(*[1, 2, 3], end='') will print without newline.
lst = [1, 2, 3]
print(*lst, end='')
# 1 2 3
If you print anything afterward, it’ll be added right to the list.
To print all values of a Python list without newline character pass the end='' argument in your print() function call. To overwrite the default empty space as a separator string, pass the sep=’…’ argument with your separator. For example, the expression print(*[1, 2, 3], sep='|', end='') will print without newline.
Also, check out the following video tutorial on printing something and using a separator and end argument:
Python Print Raw List Without Newline
If you don’t want to print the individual elements of the list but the overall list with square brackets and comma-separated, but you don’t want to print the newline character afterwards, the best way is to pass the list into the print() function along with the end='' argument such as in print([1, 2, 3], end='').
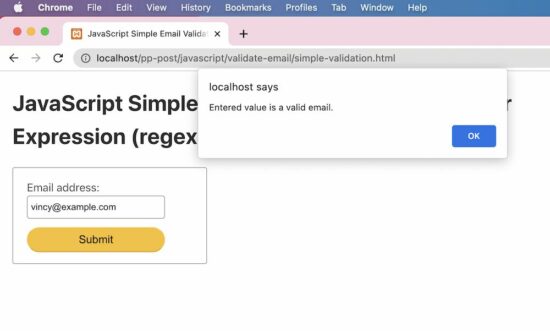
This tutorial helps to learn how to validate email using regular expression (regex) in JavaScript. It has more than one example of how to do email validation.
The below quick example uses a regex pattern with a JavaScript match() function to validate email. Before finding the match, it converts the input email to lowercase.
This simple email validation script does a basic check with the input email string.
It validates the input email if it has the expected format regardless of the length and the data type.
I have added this example just to understand how to do pattern-based validation with regex in JavaScript.
I prefer to use the quick example and the strict validation example follows.
simple-validation.html
<!DOCTYPE html>
<html lang="en">
<head>
<meta charset="utf-8">
<title>JavaScript Simple Email Validation using Regular Expression (regex)</title>
<link rel='stylesheet' href='style.css' type='text/css' />
<link rel='stylesheet' href='form.css' type='text/css' />
</head>
<body> <div class="phppot-container"> <h1>JavaScript Simple Email Validation using Regular Expression (regex)</h1> <div class="tile-container"> <form name="form"> <div class="row"> <label for="email">Email address: </label> <input id="email" name="email" /> </div> <div class="row"> <input type="submit" name="submit" value="Submit" onclick="validateEmail(document.form.email)" /> </div> </form> </div> </div> <script> function matchEmailRegex(emailStr) { var emailRegex = /\S+@\S+\.\S+/; return emailStr.match(emailRegex); }; // validates in the form anystring@anystring.anystring // no more fancy validations function validateEmail(emailField) { var emailStr = emailField.value; if (matchEmailRegex(emailStr)) { alert("Entered value is a valid email."); } else { alert("Entered value is not an email."); } return false; } </script>
</body>
</html>
Test results
Input: vincy
Output: Entered value is not an email. Input: vincy@example.c
Output: Entered value is a valid email.
How to do strict email validation in JavaScript
This example uses an almost similar regex pattern that is used in the quick example. But, it handles the return value of the JavaScript match to output the validation message.
It gives a code to directly include in an application validation script to validate a form email input.
The alert() can be replaced with any form of letting the end user know about the validation status.
strict-validation.html
<!DOCTYPE html>
<html lang="en">
<head>
<meta charset="utf-8">
<title>JavaScript Validate Email using Regular Expression (regex)</title>
<link rel='stylesheet' href='style.css' type='text/css' />
<link rel='stylesheet' href='form.css' type='text/css' />
</head>
<body> <div class="phppot-container"> <h1>JavaScript Validate Email using Regular Expression (regex)</h1> <div class="tile-container"> <form name="form"> <div class="row"> <label for="email">Email address: </label> <input id="email" name="email" /> </div> <div class="row"> <input type="submit" name="submit" value="Submit" onclick="validateEmail(document.form.email)" /> </div> </form> </div> </div> <script> function matchEmailRegex(emailStr) { var emailRegex = /^(([^<>()[\]\\.,;:\s@\"]+(\.[^<>()[\]\\.,;:\s@\"]+)*)|(\".+\"))@((\[[0-9]{1,3}\.[0-9]{1,3}\.[0-9]{1,3}\.[0-9]{1,3}\])|(([a-zA-Z\-0-9]+\.)+[a-zA-Z]{2,}))$/; return emailStr.match(emailRegex); }; function validateEmail(emailField) { var emailStr = emailField.value; if (matchEmailRegex(emailStr)) { alert("Entered value is a valid email."); } else { alert("Entered value is not an email."); } return false; } </script>
</body>
</html>
Test results
Unlike the simple example, it strictly validates the email prefix with the allowed special characters.
It also checks the domain name format to validate the email. The following results show the test cases and respective outputs of the JavaScript email validation.
Input: vincy
Output: Entered value is not an email. Input: vincy@example.c
Output: Entered value is not an email. Input: vincy@example.com
Output: Entered value is a valid email.
The idea of BitcoinVows.com is to create an immortal message, i.e., a “vow”, promise, love message, dedication, or just a simple note to your (future) kids that shall outlast civilizations.
Bitcoiners believe that the Bitcoin Blockchain will exist for hundreds of years.
The last Bitcoin will be mined in the year 2140. So, the “launch” process of the Bitcoin token distribution was set to roughly 132 years by Satoshi. After that, all 21 million tokens will have been distributed, and the Bitcoin network will start to converge to its steady state in which it may operate forever.
One day not too far in the future, we’ll all be dead. But the Bitcoin network will still produce block, after block, after block.
Tick, tock, next block. Forever.
Becoming Immortal
Nations collapse. Religions come and go. Stories and legends will eventually be forgotten.
If you craved immortality and glory in the years 10, 100, or 1000 BB (Before Bitcoin), you had to win epic battles such as Julius Caesar, create groundbreaking technologies and artworks such as Leonardo DaVinci, or launch whole new religions such as Jesus Christ.
Too much work, you say? I agree. Fortunately, there’s an easier solution to becoming immortal today and it doesn’t involve effort. Just some imagination…
How to Become Immortal as a Lazy Early Adopter?
If you crave immortality and glory today, your best shot is to become an early adopter of the Bitcoin network and engrave your message into the Blockchain — rest assured: your message will be read by generations of humans far in the future!
Why not send your partner a love message, renew your vows, or write a note to your future children into the Blockchain?
Today, it’s still possible. In only a few years, Blockspace will be too expensive for us mere mortals. Blockspace will be so expensive that only higher-layer protocols can afford to pay for it in order to batch thousands or even millions of second-layer transactions into a single first-layer Bitcoin transaction.
Only the richest of the rich will compete for the right to become immortal by writing to the Bitcoin network in the year 2140!
So, if you agree with this futuristic outlook and you also believe that Bitcoin will endure, write your partner a love message like I did:
Figure: See the message I sent to my partner using BitcoinVows.com!
You can order the full service on our new offering: BitcoinVows.com. We’ll handle all the technical difficulties of creating OP_RETURN scripts and all that. You just send us the 30-character message to be included in the Blockchain!
Challenge: How to convert a Parquet file 'my_file.parquet' to a CSV file 'my_file.csv' in Python?
In case you don’t know what a Parquet file is, here’s the definition:
Info: Apache Parquet is an open-source, column-oriented data file format designed for efficient data storage and retrieval using data compression and encoding schemes to handle complex data in bulk. Parquet is available in multiple languages including Java, C++, and Python.
The most simple way to convert a Parquet to a CSV file in Python is to import the Pandas library, call the pandas.read_parquet() function passing the 'my_file.parquet' filename argument to load the file content into a DataFrame, and convert the DataFrame to a CSV using the DataFrame to_csv() method.
import pandas as pd
df = pd.read_parquet('my_file.parquet')
df.to_csv('my_file.csv')
Here’s a minimal example:
import pandas as pd
df = pd.read_parquet('my_file.parquet')
df.to_csv('my_file.csv')
For this to work, you may have to install pandas and pyarrow. But if I were you, I’d just try it because chances are you’ve already installed them or don’t explicitly need to install the PyArrow library.
The purpose of this article is to help you refresh your knowledge of all the basic Python keywords, data structures, and fundamentals. I wrote it for the intermediate Python programmer who wants to reach the next level of programming expertise.
The way of achieving an expert level is through studying the basics.
Computer science professors usually have an extremely profound knowledge of the basics in their field. This enables them to argue from “first principles” rather than from the state-of-the-art—it’s easier for them to identify research gaps because they know about the ground rules in their field rather than being blinded by the latest technology and state-of-the-art.
Tip: If you want to reach the next level in coding, take your time and study the basics carefully.
This article provides you with the most important Python basics which serve as a foundation for more advanced topics.
Click the image to register and download all Python cheat sheets.
Python Keywords
Like any other programming language, Python has many keywords with special meaning. For instance, Python 3.7 comes with 33 special keywords:
False
class
finally is return
None
continue
for
lambda
try
True
def
from nonlocal while
and del global not with
as elif if or yield
assert else import pass break except in raise
Exercise: Quickly glance over the list of keywords and try to explain their meaning.
In the following, you will study the most important Python
keywords with short examples.
Keywords: False, True
These keywords represent the only two data values from the Boolean data type.
In Python, Boolean and integer data types are closely related: the Boolean data type internally uses integer values. Per default, the Boolean value False is represented by integer 0, and the Boolean value True is represented by integer 1.
The following code snippet gives you an example of these two Boolean keywords.
x = 1 > 2
print(x)
# False y = 2 > 1
print(y)
# True
After evaluating the given expressions, variable name x refers to the Boolean value False , and variable y refers to the Boolean value True.
Keywords: and, or, not
These keywords represent basic logical
operators.
Keyword and: The expression x and y evaluates to True if both values x and y evaluate to True. If one or both evaluate to False, the overall expression becomes False.
Keyword or: The expression x or y evaluates to True if x is True or y is True (or both are True). If one of those is True, the overall expression becomes True.
Keyword not: The expression not x evaluates to True if x evaluates to False.
Consider the following Python code example:
x, y = True, False print((x or y) == True)
# True print((x and y) == False)
# True print((not y) == True)
# True
By using these three operations—and, or, and not—you can express all logical expressions you’ll ever need.
Learn More: The following three tutorials guide you into those crucial Python logical operators:
Algorithms are often compared to cooking recipes. Imagine a cooking recipe that consists only of a sequential list of commands: fill water into a pot, add the salt, add the rice, get rid of the water, and serve the rice.
Strictly speaking, without a conditional execution, the sequence of commands would take only a few seconds to execute and the rice would not be ready for sure.
For example, you would fill in water, salt, and rice and immediately get rid of the water without waiting for the water to be hot and the rice to be soft.
We need to respond in a different way to different circumstances: we need to remove the water from the pot only if the rice is soft, and we need to put in the rice if the water is hot.
It’s almost impossible to write programs in a way that anticipates what happens in the real world in a deterministic manner.
Instead, we need to write programs that respond differently if different conditions are met. This is precisely why we need conditional execution with the keywords if, else, and elif.
x = int(input("your value: "))
if x > 3: print("Big")
elif x == 3: print("Medium")
else: print("Small")
It then tests the variable value whether it is larger than, equal to, or smaller than the value 3. In other words, the code responds to real-world input that is unpredictable in a differentiated manner.
Keywords: for, while
Computers are extremely fast—they execute billions of instructions per second.
Now imagine a world without a way of executing the same code snippet multiple times (with modified input). A program that runs only for a day would have to consist of trillions of lines of code (otherwise it would quickly run out of code to be executed). And the code would look like a mess because it would be highly redundant and not readable.
To allow for repeated execution of similar code snippets, Python (like any other major programming language) allows for two types of loops: for loops and while loops.
This way, you can easily write a program consisting only of two lines of code that executes forever. It’s hard to do this without loops–the only alternative is recursion.
# For loop declaration
for i in [0, 1, 2]: print(i) '''
0
1
2 ''' # While loop - same semantics
j = 0
while j < 3: print(j) j = j + 1 '''
0
1
2 '''
Both loop variants achieve the same thing: they print the integers 0, 1, and 2 to the shell.
The loops accomplish this in two different ways.
The for loop repeatedly executes the loop body by declaring a loop variable i that iteratively takes on all values in the list [0, 1, 2].
The while loop executes the loop body as long as a certain condition is met—in our case j < 3.
Keyword: break
There are two fundamental ways of terminating a loop: (i) define a loop condition that evaluates to False, or (ii) use the keyword break at the exact position in the loop body.
The following code snippet shows an example of the latter.
while True: break # no infinite loop print("hello world")
# hello world
We create a while loop with a loop condition that will always evaluate to True.
For example, this is common practice when developing web servers that repeat the following procedure forever: wait for a new web request and serve the request.
However, in some cases, you still want to terminate the loop prematurely.
In the webserver example, you would stop serving files for security reasons when your server detects that it is under attack. In these cases, you can use the keyword break to immediately stop the loop and execute the code that follows.
In the example, the code executes print("hello world")after the loop ends prematurely.
Keyword: continue
The break statement is not the only statement that allows you to modify the execution flow of Python loops.
It is also possible to force the Python interpreter to skip certain areas in the loop while not ending it prematurely.
In the previously considered web server example, you may just want to skip malicious web requests instead of halting the server completely. This can be achieved using the continue statement that finishes the current loop iteration and brings the execution flow back to the loop condition.
while True: continue print("43") # dead code
The code executes forever without executing the print statement once. The reason is that the continue statement finishes the current loop iteration.
The effect of using the continue statement in this way is that there exists dead code that will never be executed.
That’s why the continue statement (as well as the break statement) is commonly used under a certain condition by using a conditional if-else environment.
Keyword: in
The membership operator, i.e., in keyword, checks whether a certain element exists in a given sequence or container type.
print(42 in [2, 39, 42])
# True print("21" in {"2", "39", "42"})
# False
The code snippet shows that the keyword in can be used to test the membership of an integer value 42 in a list of integer values or to test the membership of a string value "21" in a set of strings.
Beginners in Python are often confused about the exact meaning of the keyword is.
However, if you take the time to properly understand it now, you won’t belong to this group for long. The keyword simply checks whether both variables refer to the same object in memory.
y = x = 3 print(x is y)
# True print([3] is [3])
# False
If you create two lists—even if they contain the same elements—they still refer to two different list objects in memory. Modifying one list object does not affect the other list object.
We say that lists are mutable because they can be modified after creation. Therefore, if you check whether one list refers to the same object in memory, the result is False.
However, integer values are immutable, so there is no risk of one variable changing the object which will then accidentally change all other variables.
The reason is that you cannot change the integer object 3—trying it will only create a new integer object and leave the old one unmodified.
The keyword returnterminates the execution of a function and passes the flow of execution to the caller of the function. An optional value after the return keyword specifies the function result.
def appreciate(x, percentage): return x + x * percentage / 100 print(appreciate(10000, 5))
# 10500.0
We create a function appreciate() that calculates how much a given investment appreciates at a given percentage of return.
To this end, we use the keyword return to specify the result of the function as the sum of the original investment and the nominal return in one unit of time. The return value of the function appreciate() is of type float.
Keyword: None
The keyword None is a Python constant with the meaning “the absence of a value”.
Other programming languages such as Java use the value null instead. But the term null often confuses beginners assuming it’s equal to the integer value 0.
Instead, Python uses the keyword None to indicate that it’s a different value than any numerical value for zero, an empty list, or an empty string.
An interesting fact is that the value None is of its own data type.
def f(): x = 2 print(f() is None)
# True print("" == None)
# False print(0 == None)
# False
The code snippet shows several examples of the None data value (and what it is not). If you don’t define a return value for a function, the default return value is None.
However, the value None is different from the empty string or the numerical zero value.
Keyword: lambda
The keyword lambda is used to define lambda functions in Python. Lambda functions are anonymous functions that are not defined in the namespace (roughly speaking: they have no names).
The syntax is:
lambda <arguments> : <return expression>
The lambda function can have one or multiple arguments (comma-separated). After the colon (:), you define the return expression that may (or may not) use the defined argument. It can be any expression or even another function.
Lambda functions are very important in Python. You’ll see them a lot in practical code projects: for example to make code shorter and more concise, or to create arguments of various Python functions (such as map() or reduce()).
print((lambda x: x + 3)(3))
# 6
Consider the code.
First, we create a lambda function that takes value x and returns the result of the expression x + 3. The result is a function object that can be called like any other function. Because of its semantics, we denote this function as incrementor function.
Second, when calling this incrementor function with the argument x=3, the result is the integer value 6.
At this point, you’ve learned about the Python keywords which I view as the bare minimum every Python coder must know.
However, writing code is more than using keywords correctly. Source code operates on data. But data can be represented in various ways—a thorough understanding of data structures is one of the most fundamental skills you can acquire as a programmer.
It will help you in every single of your future endeavors—no matter whether you create machine learning projects, work on large codebases, set up and manage websites, or write algorithms.
Data structures are fundamental to those areas.
The Boolean Data Type
A variable of type Boolean can only take two values—either True or False. You have already studied both keywords above.
## 1. Boolean Operations
x, y = True, False print(x and not y)
# True print(not x and y or x)
# True ## 2. If condition evaluates to False
if None or 0 or 0.0 or '' or [] or {} or set(): print("Dead code") # Not reached
The code snippet shows two important points:
First, Boolean operators are ordered by priority—the operator not has the highest priority, followed by the operator and, followed by the operator or.
Second, the following values are evaluated to the Boolean value False: the keyword None, the integer value 0, the float value 0.0, empty strings, or empty container types.
Numerical Data Types
The two most important numerical data types are integer and float.
An integer is a positive or negative number without floating point (for example 3).
A float is a positive or negative number with floating point precision (for example 3.14159265359).
Python offers a wide variety of built-in numerical operations, as well as functionality to convert between those numerical data types.
Study the examples carefully to master these highly important numerical operations.
Most of the operators are self-explaining. Note that the //operator performs integer division. The result is an integer value that is rounded toward the smaller integer number (for example 3 // 2 == 1).
The String Data Type
Python strings are sequences of characters. Strings are immutable so they cannot be changed, once created.
While there are other ways, these are the five most commonly
used.
Oftentimes, you want to explicitly use whitespace characters in strings. These are the most important ones: the newline character '\n', the space character '\s', and the tab character '\t'.
The following code snippet shows the most important string methods.
## Most Important String Methods
y = " This is lazy\t\n " print(y.strip())
# Remove Whitespace: 'This is lazy' print("DrDre".lower())
# Lowercase: 'drdre' print("attention".upper())
# Uppercase: 'ATTENTION' print("smartphone".startswith("smart"))
# True print("smartphone".endswith("phone"))
# True print("another".find("other"))
# Match index: 2 print("cheat".replace("ch", "m"))
# meat print(','.join(["F", "B", "I"]))
# F,B,I print(len("Rumpelstiltskin"))
# String length: 15 print("ear" in "earth")
# Contains: True
This non-exclusive list of string methods shows that the string data type is very powerful in Python and you can solve many common string problems with built-in Python functionality.
If in doubt about how to achieve a certain result regarding string problems, consult the following resource to learn about all built-in string methods.
In the last section, you’ve learned about the basic Python data types.
But Python also ships with so-called container data types that handle complex operations efficiently while being easy to use.
List
The list is a container data type that stores a sequence of elements. Unlike strings, lists are mutable. This means that you can modify them at runtime.
The use of the list data type is best described with a series of examples:
l = [1, 2, 2]
print(len(l))
# 3
This code snippet shows how to create a list and how to populate it with three integer elements. You can also see that some elements may arise multiple times in a single list.
Recommended Tutorial: The len() function returns the number of elements in a list.
All operations generate the same list [1, 2, 2, 4] but the append() operation is the fastest because it neither has to traverse the list to insert an element at the correct position (such as insert), nor create a new list out of two sublists (such as list concatenation).
Note that a fourth method is extend()which allows you to append multiple elements to the given list in an efficient manner.
Removing Elements
Removing an element x from a list can be easily achieved using the list method list.remove(x):
l = [1, 2, 2, 4]
l.remove(1)
print(l)
# [2, 2, 4]
Note that the method operates on the list object itself—no new
list is created.
Reversing Lists
You can reverse the order of the list elements using the method list.reverse().
Much like the method to remove an element from a list, reversing the
list modifies the original list object and does not merely create a new list
object.
Sorting Lists
You can sort the list elements using the method list.sort().
l = [2, 1, 4, 2]
l.sort()
print(l)
# [1, 2, 2, 4]
Again, sorting the list modifies the original list object.
The resulting list is sorted in an ascending manner.
You can also specify a key function and pass it as the parameter key to the sort() method to customize the sorting behavior. This way, you can also sort lists of custom objects (for example, sort a list of customer objects regarding their age).
The key function simply transforms one list element into an element that is sortable (such as an integer, float, or string element).
Indexing List Elements
You can determine the index of a specified list element x using the method list.index(x).
The stack data structure is a natural way of storing data items. Much like an unstructured person handles their paperwork: first in, first out.
Every new paper is placed at the top of a stack of papers. When working through the stack, they remove the topmost paper from the stack. As a result, the paper at the bottom never sees the daylight.
While this application does not seem to be a favorable way of using the stack data structure, the stack is still an extremely important fundamental data structure in computer science used in operating system management, algorithms, syntax parsing, and backtracking.
Python lists can be used intuitively as stacks via the two list operations append() and pop():
Definition: A set is an unordered collection of unique elements.
Let’s break this definition into its main pieces.
(1) Collection: A set is a collection of elements like a list or a tuple.
The collection consists of either primitive elements (e.g. integers, floats, strings), or complex elements (e.g. objects, tuples).
However, all data types must be hashable (a hash value of an object does never change and is used to compare the object to other objects).
Let’s have a look at an example.
hero = "Harry"
guide = "Dumbledore"
enemy = "Lord V."
print(hash(hero))
# 6175908009919104006 print(hash(guide))
# -5197671124693729851 ## Can we create a set of strings?
characters = {hero, guide, enemy}
print(characters)
# {'Lord V.', 'Dumbledore', 'Harry'} ## Can we create a set of lists?
team_1 = [hero, guide]
team_2 = [enemy]
teams = {team_1, team_2}
# TypeError: unhashable type: 'list'
As you can see, we can create a set of strings because strings are hashable. But we cannot create a set of lists because lists are unhashable.
The reason is that lists are mutable: you can change a list by appending or removing elements. If you change the list data type, the hash value changes (it is calculated based on the content of the list). This violates the above definition (the hash value does not change). As mutable data types are not hashable, you cannot use them in sets.
(2) Unordered: Unlike lists, sets are unordered because there is no fixed order of the elements. In other words, regardless of the order in which you put stuff into the set, you can never be sure in which order the set stores these elements.
You put in the hero first, but my interpreter prints the enemy first (the Python interpreter is on the dark side, obviously). Note that your interpreter may print yet another order of the set elements.
(3) Unique: All elements in the set are unique. Each pair of values (x,y) in the set produces a different pair of hash values (hash(x)!=hash(y)).
Hence, every two elements x and y in the set are different—as a result, we cannot create an army of Harry Potter clones to fight Lord V:
Note that an extension of the normal set data structure is the multiset data structure that can store multiple instances of the same value. However, it is seldom used in practice, so I don’t introduce it here.
Dictionary
The dictionary is a useful data structure for storing (key, value)
pairs.
A Python tuple is an immutable, ordered, and iterable container data structure that can hold arbitrary and heterogeneous immutable data elements.
Here’s a basic example of tuple creation and usage:
t = (1, 2, 'Python', tuple(), (42, 'hi')) for i in range(5): print(t[i]) '''
1
2
Python
()
(42, 'hi') '''
The tuple data structure is a built-in data structure of the Python language with the following characteristics:
Tuples are containers, you can store data in them. The Python documentation defines a container as an object which implements the method __contains__. In other words a container is something you can use the in operator on. Other examples of containers in Python are list, dict, set or frozenset. The module collection contains more container types.
Tuples are ordered, each element has its position or, the other way round, the position has meaning.
Tuples are iterable, so you can use them, for example, in a for loop.
Tuples are immutable which means, you can’t change a tuple once it was created. Once a tuple was created you can’t modify it anymore. Another example of an immutable data type in Python is string. You can’t modify tuples or strings in Python, instead, Python creates a new instance with the modified values. However, if a tuple contains mutable data types such as lists, the elements of those lists can change! Yet, the references in the tuple to those lists can’t.
Tuples are heterogenous because they can contain elements of several different data types at once. An example of a homogenous data type are strings because they can only contain characters.
Python’s “in” operator is a reserved keyword to test membership of the left operand in the collection defined as the right operand. For example, the expression x in my_list checks if object x exists in the my_list collection, so that at least one element y exists in my_list for that x == y holds. You can check membership using the “in” operator in collections such as lists, sets, strings, and tuples.
Check with the keyword in whether the set, list, or dictionary contains an element. Note that set membership is faster than list membership.
basket = {'apple', 'eggs', 'banana', 'orange'} print('eggs' in basket)
# True print('mushroom' in basket)
# False
This article gave you a concise Python crash course to refresh your basic Python education.
You studied the most important Python keywords and how to use them in code examples.
As a result, you learned how to control the program execution flow using if-elif-else statements, as well as the while and the for loop.
Moreover, you revisited the basic data types in Python—Boolean, integer, float, and string—and which built-in operations and functions are commonly used in practice.
Most code snippets in practice and non-trivial algorithms are built around more powerful container types such as lists, stacks, sets, and dictionaries. By studying the given examples, you learned how to add, remove, insert, and reorder elements.
Finally, you learned about membership operators and list comprehension: an efficient and powerful built-in method to create lists programmatically in Python.
I wrote this 5000—word article for my best-selling book “Python One-Liners” with the San Francisco-based publisher NoStarch.
Python One-Liners Book: Master the Single Line First!
Python programmers will improve their computer science skills with these useful one-liners.
Python One-Linerswill teach you how to read and write “one-liners”: concise statements of useful functionality packed into a single line of code. You’ll learn how to systematically unpack and understand any line of Python code, and write eloquent, powerfully compressed Python like an expert.
The book’s five chapters cover (1) tips and tricks, (2) regular expressions, (3) machine learning, (4) core data science topics, and (5) useful algorithms.
Detailed explanations of one-liners introduce key computer science concepts and boost your coding and analytical skills. You’ll learn about advanced Python features such as list comprehension, slicing, lambda functions, regular expressions, map and reduce functions, and slice assignments.
You’ll also learn how to:
Leverage data structures to solve real-world problems, like using Boolean indexing to find cities with above-average pollution
Use NumPy basics such as array, shape, axis, type, broadcasting, advanced indexing, slicing, sorting, searching, aggregating, and statistics
Calculate basic statistics of multidimensional data arrays and the K-Means algorithms for unsupervised learning
Create more advanced regular expressions using grouping and named groups, negative lookaheads, escaped characters, whitespaces, character sets (and negative characters sets), and greedy/nongreedy operators
Understand a wide range of computer science topics, including anagrams, palindromes, supersets, permutations, factorials, prime numbers, Fibonacci numbers, obfuscation, searching, and algorithmic sorting
By the end of the book, you’ll know how to write Python at its most refined, and create concise, beautiful pieces of “Python art” in merely a single line.
Given the following Markdown table stored in 'my_file.md':
| 1 | 2 | 3 | 4 | 5 |
|-------|-----|------|------|------|
| 0 | 0 | 0 | 0 | 0 |
| 5 | 4 | 3 | 2 | 1 |
| alice | bob | carl | dave | emil |
Python Challenge: How to convert the Markdown table to a CSV file 'my_file.csv'?
Solution
To convert a Markdown table .md file to a CSV file in Python, first read the Markdown table file by using the f.readlines() method on the opened file object f, by splitting along the markdown table separator symbol '|'. Clean up the resulting list (row-wise) and add all rows to a single list of lists. Then create a DataFrame from the list of lists and use the DataFrame.to_csv() method to write it to a CSV file.
An example is shown in the following script that you can use for your own conversion exercise by replacing only the in-file and out-file names highlighted below:
import pandas as pd # Convert the Markdown table to a list of lists
with open('my_file.md') as f: rows = [] for row in f.readlines(): # Get rid of leading and trailing '|' tmp = row[1:-2] # Split line and ignore column whitespace clean_line = [col.strip() for col in tmp.split('|')] # Append clean row data to rows variable rows.append(clean_line) # Get rid of syntactical sugar to indicate header (2nd row) rows = rows[:1] + rows[2:] print(rows)
df = pd.DataFrame(rows)
df.to_csv('my_file.csv', index=False, header=False)
Remove all matching elements by value from JavaScript array.
Remove elements from JavaScript array using filter (an alternate).
Remove first element from array javascript.
Remove last element from array javascript.
1) Remove an element from JavaScript array (by index and value)
This quick example gets the first index of the given element. Then, it applies JavaScript splice() by sending the first index position. The splice() removes the item in the specified index.
Quick example
// this JavaScript example removes first occurrence of the matching element from array
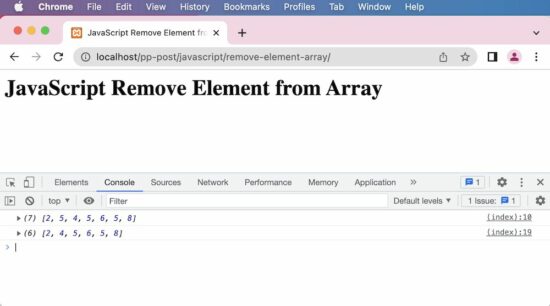
const elements = [2, 5, 4, 5, 6, 5, 8];
console.log(elements);
// returns the index of the first match of value '5' from an array
const index = elements.indexOf(5);
// when the element is found the index will be non-negative
if (index > -1) { // the second parameter '1' asks to remove one element elements.splice(index, 1);
}
// result array after delete is [ 2, 4, 5, 6, 5, 8 ]
console.log(elements);
This screenshot shows the output of the above example. It shows first the original array and then the modified array after the removal of an item.
2) Remove all matching elements by value from JavaScript array
This example creates a custom JavaScript function to remove all the occurrences of a given element. It iterates all the array elements in a loop.
On each iteration, it compares and calls array.splice() by the current index. In PHP, it is about one line to remove all the occurrences by using array_diff() function.
remove-all-item.html
<html>
<head>
<title>JavaScript Remove All Matching Element from Array</title>
</head>
<body> <h1>JavaScript Remove All Matching Element from Array</h1> <script> function removeAllItem(elementsArray, element) { var i = 0; // iterate the elements array and remove matching element // till the end of the array index while (i < elementsArray.length) { if (elementsArray[i] === element) { elementsArray.splice(i, 1); } else { ++i; } } return elementsArray; } // this JavaScript example removes all occurence of the matching element from array const elements = [ 2, 5, 4, 5, 6, 5, 8 ]; console.log(elements); elementAfterRemoval = removeAllItem(elements, 5); console.log(elementAfterRemoval); </script>
</body>
</html>
3) Remove elements from JavaScript array using filter (an alternate)
This is an alternate method that returns the same array output as the result of removing an item.
Instead of a loop, it parses the input array by using a JavaScript filter. The filter callback checks the condition to find the element match to remove.
If the match is not found, the current element will be pushed to an output array.
remove-alternate.html
<html>
<head>
<title>JavaScript Remove Element from Array - Alternate Method using filter</title>
</head>
<body> <h1>JavaScript Remove Element from Array - Alternate Method using filter</h1> <script> const elements = [ 2, 5, 4, 5, 6, 5, 8 ]; console.log(elements); var value = 5 // filter function does not change the original array // but the splice function changes the original array newElements = elements.filter(function(item) { return item !== value }) console.log(newElements) // result is [ 2, 4, 6, 8 ] </script>
</body>
</html>
In JavaScript, the array.shift() function removes the first element of an input array. The shift() function returns the remove element which is 2 in this example.
remove-first-element.html
<html>
<head>
<title>JavaScript Remove First Element from Array</title>
</head>
<body> <h1>JavaScript Remove First Element from Array</h1> <script> // the JavaScript shift function moves elements to the left // this is like pop from a stack // splice function can also be used to achieve this var elements = [ 2, 5, 4, 5, 6, 5, 8 ]; console.log(elements); // removedElement is 2 var removedElement = elements.shift(); // result array after delete is [ 5, 4, 5, 6, 5, 8 ] console.log(elements); </script>
</body>
</html>
5) Remove the last element from array using JavaScript
JavaScript has a function array.pop() to remove the last item of an array. It also returns the removed item to the calling point as like like array.shift().
Note: If the input array is empty then the shift() and pop() will return undefined.
remove-last-element.html
<html>
<head>
<title>JavaScript Remove Last Element from Array</title>
</head>
<body> <h1>JavaScript Remove Last Element from Array</h1> <script> // the JavaScript pop function removes last element from an array var elements = [ 2, 5, 4, 5, 6, 5, 8 ]; console.log(elements); // removedElement is 8 var removedElement = elements.pop(); // result array after delete is [ 2, 5, 4, 5, 6, 5 ]; console.log(elements); </script>
</body>
</html>
This example created custom functions in JavaScript to remove all the occurrences of the specified element. Instead, there should be a native function in JavaScript for doing this. PHP, Python and most of the languages have the native function for this.
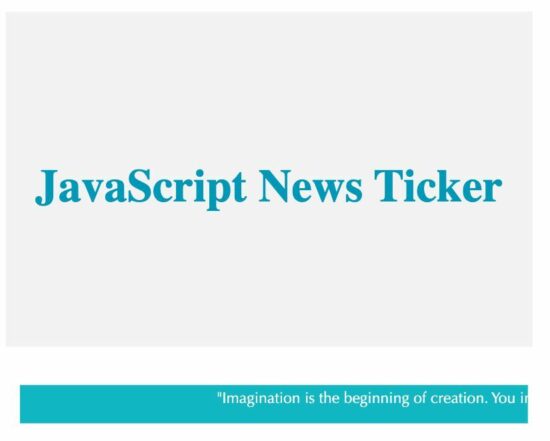
This article provides a lightweight JavaScript plugin to display news tickers on a website. The news ticker is a way of showing content in marquee mode either in horizontal or vertical scroll. It is useful to display content like the latest updates and upcoming events.
It saves the site space real estate by occupying less portion of the screen. It also reduces the user effort of scrolling to see more content by keeping on ticking the content display.
In a way it is an older thing. Couple of decades back we cannot see a website without a scrolling ticker. Over a period its eradicated as a bad UI/UX practice. But it is still widely used in news websites and in particular in stock price display. If you use it wisely, it provides good advantages.
The following examples will remind you of the places that require news tickers on screen.
Online news bytes display headlines in a ticker.
Stock prices.
Online shops that show ‘what is new’ on a ticker board.
This tutorial shows a simple news ticker on a webpage. On hovering the ticker box, it stops the content marquee and releases on mouse out.
It will look like a carousal effect but applied to an element with text content.
STEP 3: Call startTicker JavaScript function immediately next to ticker-box div.
This step is to call the library function with reference to the ticker box id attribute.
The startTicker() function has an optional parameter to supply the speed and interval between news contents. The default speed is 5 and the default interval is 500 milliseconds.
This library contains functions to enable a news ticker on a web page. The startTicker() function iterates the ticker <li> elements and let it slides horizontally.
It applies styles to change the position of the ticker element based on the speed. The extend() function changes the default speed and interval with the specified option.
function applyStyles(obj, styles) { var property; var styleLength = Object.keys(styles).length; for (var i = 0; i < styleLength; i++) { property = Object.keys(styles)[i]; obj.style[property] = styles[property]; }
} function extend(object1, object2) { for (var attrname in object2) { object1[attrname] = object2[attrname]; } return object1;
} function startTicker(id, param) { var tickerBox = document.getElementById(id); var defaultParam = { speed: 5, delay: 500, rotate: true }; var extendedParam = extend(defaultParam, param); applyStyles(tickerBox, { overflow: "hidden", 'min-height': '40px' }); var ul = tickerBox.getElementsByTagName("ul"); var li = ul[0].getElementsByTagName("li"); applyStyles(ul[0], { padding: 0, margin: 0, position: 'relative', 'list-style-type': 'none' }); for (i = 0; i < li.length; i++) { applyStyles(li[i], { position: 'absolute', 'white-space': 'nowrap', display: 'none' }); } var li_index = 0; var trans_width = tickerBox.offsetWidth; var chunk_width = 1; var iterateTickerElement = function(trans_width) { li[li_index].style.left = trans_width + "px"; li[li_index].style.display = ''; var t = setInterval(function() { if (parseInt(li[li_index].style.left) > -li[li_index].offsetWidth) { li[li_index].style.left = parseInt(li[li_index].style.left) - chunk_width + "px"; } else { clearInterval(t); trans_width = tickerBox.offsetWidth; li_index++; if (li_index == li.length && extendedParam.rotate == true) { li_index = 0; iterateTickerElement(trans_width); } else if (li_index < li.length) { setTimeout(function() { iterateTickerElement(trans_width); }, extendedParam.delay); } } }, extendedParam.speed); tickerBox.onmouseover = function() { clearInterval(t); } tickerBox.onmouseout = function() { iterateTickerElement(parseInt(li[li_index].style.left)); } } iterateTickerElement(trans_width);
}
Note:
Presently the news ticker is available only in a horizontal direction. For the next release, a vertical direction is planned.
Ticker movement can be paused on mouseover.
Contact me, if you have any feature requests or for any special customization needs.

 five minutes ago, and you want to create a Matplotlib plot using the following (genius) code snippet:
 Question: How to resolve the
  The solution is easier than you think…
 Generally, Python raises the

 Full Tutorial: Matplotlib Subplots – A Helpful Illustrated Guide

 Forever.
 If you craved immortality and glory in the years 10, 100, or 1000 BB (Before Bitcoin), you had to win epic battles such as Julius Caesar, create groundbreaking technologies and artworks such as Leonardo DaVinci, or launch whole new religions such as Jesus Christ.


 Exercise: Quickly glance over the list of keywords and try to explain their meaning.
 Definition: A set is an unordered collection of unique elements.


 Python Challenge: How to convert the Markdown table to a CSV file