In this final part of our series about interactive storytelling, we’ll talk about the future of storytelling in videogames.
Non-Linear Interactive Storytelling
Or the Philosopher’s Stone
Non-linear interactive storytelling is similar to the philosopher’s stone: everybody talks about it, everybody wants it, but no one has found it yet.
Let’s start with the definition: what is non-linear interactive storytelling?
It’s simple: this is storytelling that changesbased on the player’s choices. In the previous article, we discussed linear interactive storytelling and how it gives the player only the illusion of choice. Of course, there are some really sophisticated games that give a betterillusion about freedom and choices and even the chance to really change the course of the story. But still, it is an illusion.
Bioshock gives players some interesting choices, but they are gameplay and narrative related, not story related.
So the best definition of non-linear interactive storytelling is a way to break this illusion and give the player real choices. However, this requires some advanced technology: Artificial Intelligence.
That’s because true non-linear interactive storytelling requires an AI capable of reacting to the player’s actions. As in real life. The theory is quite simple, on paper. The player does something in the game’s world, and the world and everybody inside it will react.
But, of course, creating a system like that is nearly impossible with the current technology, because of the complex calculations needed. We’re talking about totally removing the scripted part from a game! And right now at least 90% of a game is scripted.
In the second part, we talked about Zelda Breath of the Wild. That, I think, is a starting point: a game where the developers set out rules about the world, and the player can play with them freely.
Extend this idea to all elements, and you’ll have the illusion broken.
Again: this has never been done, but I’m sure somebody will do it in the future. Maybe with the next console generation, when the calculation power increases.
Okay, that’s the future. But what about today?
Today, there are some games that are trying to create a non-linear experience. I’ll talk about two of them, as examples.
The first is an AAA game. Everybody knows it: Detroit Become Human. In his most recent game, David Cage is trying really hard to give the player a lot of forks and choices. Yes, it’s still an illusion, but it’s the game that I know with the highest number of narrative forks. While playing this game, you have the feeling that every choice matters. Even the small ones.
This flowchart shows all the choices in one scene of Detroit Become Human
Don’t get me wrong: it’s allscripted. And I think that’s the wrong way to achieve real non-linear storytelling. But it’s one of the games that comes closest. It’s great to play without trying to discover the hidden script, just to “live” the experience.
Of course, the game itself, chapter after chapter, will show you a flowchart about the forks. And you will know where the narrative joints are. But, really: if you can, try it without thinking about that, and you’ll have a better illusion of choice in the game.
The second game is an indie experiment: Avery. It’s an experimental game based on an AI. It’s free, it’s for both iOS and Android, and you must try it. It’s a game where the AI will respond to the player dynamically. And that’s the right way, I’m sure, to achieve true non-linear interactive storytelling.
Avery in all its splendor
Of course, keep in mind that it’s an indie game and it’s free. But it’s amazing. It’s an “Artificial Intelligence Conversation”. Those among you who are a little older (like me) will surely remember Eliza, the first chatterbot. Avery is an evolution of that. You’ll talk with an AI that has lost its memory and is scared because something is wrong. Again: try it because, playing Avery, you can see one of the first steps towards our philosopher’s stone.
Direct and Indirect Mode
As I said at the start of the article, we have the theory. More theory than we really need, probably—that’s because we can’t work on the real part, so we’re talking, writing and thinking too much about it.
But a good part of this theory is found in some interesting papers and books. In those you will find two main definitions: direct mode and indirect mode. These are the ways in which the storytelling should react to the player’s actions.
Direct mode is quite simple: the player does something, and the story will change in response. Action -> reaction. This is the way, for example, most tabletop role-playing games work.
The Game Master explains a situation -> the player makes a choice -> the Game Master tells how the story reacts to that choice.
The two games that I gave as examples before also work in this way. And when we have a full non-linear interactive storytelling game, I guess this mode will be the most common.
Also note that the majority of linear storytelling works this way: there is a setting, with a conflict, the character does something, and the story (the ambient environment, the villain, or some other character) reacts.
But there is a more sophisticated way to tell a non-linear story: indirect mode.
This is more like how the real world works. You do something, which causes a small direct reaction, which engages a chain reaction that can go on to have effects in distant places.
This is the so-called “butterfly effect”. You will discover that this type of story-telling works only if there is not a real “main character”. Because, in the real world, everyone is the main character of his or her own story. But there are billions of stories told every second around the world. And each story, somehow, is influenced by all the other stories.
Back to gaming, there are already games that use this concept: MMOs. Think about World of Warcraft: there is no main character, and the “total story” (the sum of all stories about all characters) is a complex web that links all individual stories. So actually, in the first part of this article, I lied: there is already a way to create non-linear interactive storytelling, and that’s to put the domain of the story in the players’ hands!
World of Warcraft is a place where the stories are told between players.
Of course, in World of Warcraft, there are still scripted parts (the enemies, the quests, the NPCs, etc.), and that’s why WoW is not an example of true non-linear interactive storytelling. But when the players have the ability to create their own story, there is not only non-linear storytelling, but also it’s told in indirect mode.
So think about this: some day, in the near future, we’ll have a game where the AI will be so advanced that we’ll play with it in the same way we play with the other humans in WoW.
That’s the goal. That’s true non-linear interactive storytelling.
Conclusion
I started writing this series of articles almost six months ago. It’s been a labour of love, and I’m thankful to Envato Tuts+ for encouraging me to pursue it. This is a topic I really care about, and there are a lot of things that I had to cut to keep the series to only three parts.
If you are interested, though, there are lots of articles and videos on this topic. For example, I could have talked about the dissonance ludonarrative (look it up!). I also had to cut a big part about Florence (a really great linear interactive storytelling game—again, try it if you can). And so on.
However, I’m happy to have this series wrapped up, and I hope you’ve enjoyed the articles and will find them useful.
Interactive storytelling is, in my opinion, one of the big challenges that the industry will face in its next step. In the last two console generations, we saw incredible advances in graphics and gameplay. Now it’s time to think about the story. Because, you know, stories matter.
Wolfenstein II: The New Colossus, the Video Game Awards’ ‘Best Action Game of 2017’ winner, comes to Nintendo Switch this Summer. Fight through post-nuclear Manhattan, occupied Roswell, New Mexico, and the embattled bayous and boulevards of New Orleans as you liberate the American people from the Nazis.
As BJ Blazkowicz, experience an unforgettable action-packed story brought to life by extraordinary characters. Reunite with your friends and fellow freedom fighters as you take on the evil Frau Engel and her Nazi army. Wage the second American Revolution your way – at home or on the go. And, for the perfect blend of immersion and accuracy, utilize the Nintendo Switch’s unique motion controls to stop the Nazi threat.
Features
Fight through post-nuclear Manhattan, occupied Roswell, New Mexico, and the embattled bayous and boulevards of New Orleans as you liberate the American people from the Nazis.
Experience an unforgettable action-packed story brought to life by extraordinary characters. Reunite with your friends and fellow freedom fighters as you take on the evil Frau Engel and her Nazi army.
Full motion aiming support for Joy-Cons and Pro Controllers allows players the option to fine-tune their shots with the flick of a wrist.
Crash is back! The Crash Bandicoot N. Sane Trilogy is now available
Play Crash Bandicoot™ anywhere!
Crash™ is enhanced, entranced and ready-to-dance with the N. Sane Trilogy game collection. Spin, jump, wump and repeat as you take on the epic challenges and adventures through the three games that started it all: Crash Bandicoot™, Crash Bandicoot™ 2: Cortex Strikes Back and Crash Bandicoot™ 3: Warped. Relive all your favorite Crash moments in their fully-remastered graphical glory.
The YO-KAI WATCH series is back with two new co-op action games
On Sept. 7, two new games in the YO-KAI WATCH series are coming to the Nintendo 3DS family of systems. And these new YO-KAI WATCH games are unlike anything the series has seen before!
In the YO-KAI WATCH BLASTERS: Red Cat Corps and YO-KAI WATCH BLASTERS: White Dog Squad games, team up with up to three other friends either locally* or online to fight towering Big Bosses, using skills and powerful Soultimate Moves. While previous YO-KAI WATCH games focused on turn-based battles, YO-KAI WATCH BLASTERS drops you into real-time skirmishes in the first ever action-RPG for the series. During these battles, you directly control your Yo-kai as you strategize with different skills and equipment to defeat huge bosses. By taking on various fast-paced missions, you will embark on a journey to meet, befriend and battle more than 400 new and returning Yo-kai.
Training Yo-kai will also affect your team’s strength in battle. By training, you can create items and equipment to use on your personal Yo-kai team! By completing missions, more powerful and useful items can be earned.
To keep the action and content going, a free post-launch update to the game will add additional side stories, Yo-kai, bosses and missions.
YO-KAI WATCH BLASTERS: Red Cat Corps and YO-KAI WATCH BLASTERS: White Dog Squad launch exclusively for the Nintendo 3DS family of systems on Sept. 7 at a suggested retail price of $39.99 each. Which version will you choose?
Comic Mischief Fantasy Violence
*Additional games and systems are required for multiplayer mode and are sold separately.
Welcome back to this three-part series on creating stylized toon water in PlayCanvas using vertex shaders. In Part 2 we covered buoyancy & foam lines. In this final part, we’re going to apply the underwater distortion as a post-process effect.
Refraction & Post-Process Effects
Our goal is to visually communicate the refraction of light through water. We’ve already covered how to create this sort of distortion in a fragment shader in a previous tutorial for a 2D scene. The only difference here is that we’ll need to figure out which area of the screen is underwater and only apply the distortion there.
Post-Processing
In general, a post-process effect is anything applied to the whole scene after it is rendered, such as a colored tint or an old CRT screen effect. Instead of rendering your scene directly to the screen, you first render it to a buffer or texture, and then render that to the screen, passing through a custom shader.
In PlayCanvas, you can set up a post-process effect by creating a new script. Call it Refraction.js, and copy this template to start with:
//--------------- POST EFFECT DEFINITION------------------------//
pc.extend(pc, function () { // Constructor - Creates an instance of our post effect var RefractionPostEffect = function (graphicsDevice, vs, fs, buffer) { var fragmentShader = "precision " + graphicsDevice.precision + " float;\n"; fragmentShader = fragmentShader + fs; // this is the shader definition for our effect this.shader = new pc.Shader(graphicsDevice, { attributes: { aPosition: pc.SEMANTIC_POSITION }, vshader: vs, fshader: fs }); this.buffer = buffer; }; // Our effect must derive from pc.PostEffect RefractionPostEffect = pc.inherits(RefractionPostEffect, pc.PostEffect); RefractionPostEffect.prototype = pc.extend(RefractionPostEffect.prototype, { // Every post effect must implement the render method which // sets any parameters that the shader might require and // also renders the effect on the screen render: function (inputTarget, outputTarget, rect) { var device = this.device; var scope = device.scope; // Set the input render target to the shader. This is the image rendered from our camera scope.resolve("uColorBuffer").setValue(inputTarget.colorBuffer); // Draw a full screen quad on the output target. In this case the output target is the screen. // Drawing a full screen quad will run the shader that we defined above pc.drawFullscreenQuad(device, outputTarget, this.vertexBuffer, this.shader, rect); } }); return { RefractionPostEffect: RefractionPostEffect };
}()); //--------------- SCRIPT DEFINITION------------------------//
var Refraction = pc.createScript('refraction'); Refraction.attributes.add('vs', { type: 'asset', assetType: 'shader', title: 'Vertex Shader'
}); Refraction.attributes.add('fs', { type: 'asset', assetType: 'shader', title: 'Fragment Shader'
}); // initialize code called once per entity
Refraction.prototype.initialize = function() { var effect = new pc.RefractionPostEffect(this.app.graphicsDevice, this.vs.resource, this.fs.resource); // add the effect to the camera's postEffects queue var queue = this.entity.camera.postEffects; queue.addEffect(effect); this.effect = effect; // Save the current shaders for hot reload this.savedVS = this.vs.resource; this.savedFS = this.fs.resource;
}; Refraction.prototype.update = function(){ if(this.savedFS != this.fs.resource || this.savedVS != this.vs.resource){ this.swap(this); }
}; Refraction.prototype.swap = function(old){ this.entity.camera.postEffects.removeEffect(old.effect); this.initialize(); };
This is just like a normal script, but we define a RefractionPostEffect class that can be applied to the camera. This needs a vertex and a fragment shader to render. The attributes are already set up, so let’s create Refraction.frag with this content:
Now attach the Refraction.js script to the camera, and assign the shaders to the appropriate attributes. When you launch the game, you should see the scene exactly as it was before. This is a blank post effect that simply re-renders the scene. To verify that this is working, try giving the scene a red tint.
In Refraction.frag, instead of simply returning the color, try setting the red component to 1.0, which should look like the image below.
Distortion Shader
We need to add a time uniform for the animated distortion, so go ahead and create one in Refraction.js, inside this constructor for the post effect:
var RefractionPostEffect = function (graphicsDevice, vs, fs) { var fragmentShader = "precision " + graphicsDevice.precision + " float;\n"; fragmentShader = fragmentShader + fs; // this is the shader definition for our effect this.shader = new pc.Shader(graphicsDevice, { attributes: { aPosition: pc.SEMANTIC_POSITION }, vshader: vs, fshader: fs }); // >>>>>>>>>>>>> Initialize the time here this.time = 0; };
Now, inside this render function, we pass it to our shader and increment it:
RefractionPostEffect.prototype = pc.extend(RefractionPostEffect.prototype, { // Every post effect must implement the render method which // sets any parameters that the shader might require and // also renders the effect on the screen render: function (inputTarget, outputTarget, rect) { var device = this.device; var scope = device.scope; // Set the input render target to the shader. This is the image rendered from our camera scope.resolve("uColorBuffer").setValue(inputTarget.colorBuffer); /// >>>>>>>>>>>>>>>>>> Pass the time uniform here scope.resolve("uTime").setValue(this.time); this.time += 0.1; // Draw a full screen quad on the output target. In this case the output target is the screen. // Drawing a full screen quad will run the shader that we defined above pc.drawFullscreenQuad(device, outputTarget, this.vertexBuffer, this.shader, rect); }
});
Now we can use the same shader code from the water distortion tutorial, making our full fragment shader look like this:
If it all worked out, everything should now look like as if it’s underwater, as below.
Challenge #1: Make the distortion only apply to the bottom half of the screen.
Camera Masks
We’re almost there. All we need to do now is to apply this distortion effect just on the underwater part of the screen. The most straightforward way I’ve come up with to do this is to re-render the scene with the water surface rendered as a solid white, as shown below.
This would be rendered to a texture that would act as a mask. We would then pass this texture to our refraction shader, which would only distort a pixel in the final image if the corresponding pixel in the mask is white.
Let’s add a boolean attribute on the water surface to know if it’s being used as a mask. Add this to Water.js:
We can then pass it to the shader with material.setParameter('isMask',this.isMask); as usual. Then declare it in Water.frag and set the color to white if it’s true.
// Declare the new uniform at the top
uniform bool isMask; // At the end of the main function, override the color to be white // if the mask is true if(isMask){ color = vec4(1.0); }
Confirm that this works by toggling the “Is Mask?” property in the editor and relaunching the game. It should look white, as in the earlier image.
Now, to re-render the scene, we need a second camera. Create a new camera in the editor and call it CameraMask. Duplicate the Water entity in the editor as well, and call it WaterMask. Make sure the “Is Mask?” is false for the Water entity but true for the WaterMask.
To tell the new camera to render to a texture instead of the screen, create a new script called CameraMask.js and attach it to the new camera. We create a RenderTarget to capture this camera’s output like this:
// initialize code called once per entity
CameraMask.prototype.initialize = function() { // Create a 512x512x24-bit render target with a depth buffer var colorBuffer = new pc.Texture(this.app.graphicsDevice, { width: 512, height: 512, format: pc.PIXELFORMAT_R8_G8_B8, autoMipmap: true }); colorBuffer.minFilter = pc.FILTER_LINEAR; colorBuffer.magFilter = pc.FILTER_LINEAR; var renderTarget = new pc.RenderTarget(this.app.graphicsDevice, colorBuffer, { depth: true }); this.entity.camera.renderTarget = renderTarget;
};
Now, if you launch, you’ll see this camera is no longer rendering to the screen. We can grab the output of its render target in Refraction.js like this:
Refraction.prototype.initialize = function() { var cameraMask = this.app.root.findByName('CameraMask'); var maskBuffer = cameraMask.camera.renderTarget.colorBuffer; var effect = new pc.RefractionPostEffect(this.app.graphicsDevice, this.vs.resource, this.fs.resource, maskBuffer); // ... // The rest of this function is the same as before };
Notice that I pass this mask texture as an argument to the post effect constructor. We need to create a reference to it in our constructor, so it looks like:
//// Added an extra argument on the line below
var RefractionPostEffect = function (graphicsDevice, vs, fs, buffer) { var fragmentShader = "precision " + graphicsDevice.precision + " float;\n"; fragmentShader = fragmentShader + fs; // this is the shader definition for our effect this.shader = new pc.Shader(graphicsDevice, { attributes: { aPosition: pc.SEMANTIC_POSITION }, vshader: vs, fshader: fs }); this.time = 0; //// <<<<<<<<<<<<< Saving the buffer here this.buffer = buffer; };
Finally, in the render function, pass the buffer to our shader with:
Now to verify that this is all working, I’ll leave that as a challenge.
Challenge #2: Render the uMaskBuffer to the screen to confirm it is the output of the second camera.
One thing to be aware of is that the render target is set up in the initialize of CameraMask.js, and that needs to be ready by the time Refraction.js is called. If the scripts run the other way around, you’ll get an error. To make sure they run in the right order, drag the CameraMask to the top of the entity list in the editor, as shown below.
The second camera should always be looking at the same view as the original one, so let’s make it always follow its position and rotation in the update of CameraMask.js:
CameraMask.prototype.update = function(dt) { var pos = this.CameraToFollow.getPosition(); var rot = this.CameraToFollow.getRotation(); this.entity.setPosition(pos.x,pos.y,pos.z); this.entity.setRotation(rot);
};
Both cameras are currently rendering the same thing. We want the mask camera to render everything except the real water, and we want the real camera to render everything except the mask water.
To do this, we can use the camera’s culling bit mask. This works similarly to collision masks if you’ve ever used those. An object will be culled (not rendered) if the result of a bitwise AND between its mask and the camera mask is 1.
Let’s say the Water will have bit 2 set, and WaterMask will have bit 3. Then the real camera needs to have all bits set except for 3, and the mask camera needs to have all bits set except for 2. An easy way to say “all bits except N” is to do:
To set up the camera culling masks, we can put this inside CameraMask.js’s initialize at the bottom:
// Set all bits except for 2 this.entity.camera.camera.cullingMask &= ~(1 << 2) >>> 0; // Set all bits except for 3 this.CameraToFollow.camera.camera.cullingMask &= ~(1 << 3) >>> 0; // If you want to print out this bit mask, try: // console.log((this.CameraToFollow.camera.camera.cullingMask >>> 0).toString(2));
Now, in Water.js, set the Water mesh’s mask on bit 2, and the mask version of it on bit 3:
// Put this at the bottom of the initialize of Water.js // Set the culling masks var bit = this.isMask ? 3 : 2; meshInstance.mask = 0; meshInstance.mask |= (1 << bit);
Now, one view will have the normal water, and the other will have the solid white water. The left half of the image below is the view from the original camera, and the right half is from the mask camera.
Applying the Mask
One final step now! We know the areas underwater are marked with white pixels. We just need to check if we’re not at a white pixel, and if so, turn off the distortion in Refraction.frag:
// Check original position as well as new distorted position
vec4 maskColor = texture2D(uMaskBuffer, pos);
vec4 maskColor2 = texture2D(uMaskBuffer, vUv0);
// We're not at a white pixel?
if(maskColor != vec4(1.0) || maskColor2 != vec4(1.0)){ // Return it back to the original position pos = vUv0;
}
And that should do it!
One thing to note is that since the texture for the mask is initialized on launch, if you resize the window at runtime, it will no longer match the size of the screen.
Anti-Aliasing
As an optional clean-up step, you might have noticed that edges in the scene now look a little sharp. This is because when we applied our post effect, we lost anti-aliasing.
We can apply an additional anti-alias on top of our effect as another post effect. Luckily, there’s one available in the PlayCanvas store we can just use. Go to the script asset page, click the big green download button, and choose your project from the list that appears. The script will appear in the root of your asset window as posteffect-fxaa.js. Just attach this to the Camera entity, and your scene should look a little nicer!
Final Thoughts
If you’ve made it this far, give yourself a pat on the back! We covered a lot of techniques in this series. You should now be comfortable with vertex shaders, rendering to textures, applying post-processing effects, selectively culling objects, using the depth buffer, and working with blending and transparency. Even though we were implementing this in PlayCanvas, these are all general graphics concepts you’ll find in some form on whatever platform you end up in.
All these techniques are also applicable to a variety of other effects. One particularly interesting application I’ve found of vertex shaders is in this talk on the art of Abzu, where they explain how they used vertex shaders to efficiently animate tens of thousands of fish on screen.
You should now also have a nice water effect you can apply to your games! You could easily customize it now that you’ve put together every detail yourself. There’s still a lot more you can do with water (I haven’t even mentioned any sort of reflection at all). Below are a couple of ideas.
Noise-Based Waves
Instead of simply animating the waves with a combination of sine and cosines, you can sample a noise texture to make the waves look a bit more natural and unpredictable.
Dynamic Foam Trails
Instead of completely static water lines on the surface, you could draw onto that texture when objects move, to create a dynamic foam trail. There are a lot of ways to go about doing this, so this could be its own project.
Nintendo reveals Nintendo Labo functionality for Mario Kart 8 Deluxe, plus a playful new contest
3 … 2 … 1 … Nintendo Labo! Starting today, a free software update is available for the Mario Kart 8 Deluxe game for the Nintendo Switch system, allowing you to use the Toy-Con Motorbike from the Nintendo Labo: Variety Kit to control your in-game vehicles. Enjoy every game mode and every vehicle type with this immersive, interactive controller option that makes you feel like you’re really in the driver’s seat! Click here to view a preview video of the new feature.
But that’s not the only exciting news for Nintendo Labo owners this week! Nintendo is happy to announce the categories for the second Nintendo Labo Creators Contest*: “Best Gaming Experience using Toy-Con Garage” and “Best Toy-Con Musical Instrument.”
Fans who submit creations to either of these contests have the opportunity to win some cool limited-edition prizes, including a specially designed, collectible cardboard-inspired Nintendo Switch system! Fans in the U.S. or Canada (excluding Quebec) who are 13 years old or older can enter their creations in the Nintendo Labo Creators Contest No. 2. Learn more about the contest and upload your submissions here: https://labo.nintendo.com/share/#!/contest/.
After downloading the update for Mario Kart 8 Deluxe, simply select the “Nintendo Labo” icon on the game’s title screen to access a menu where you can select Toy-Con as the control type. When racing, turning the handlebars changes direction, twisting the right handlebar accelerates, and the various Joy-Con buttons are used for items, brakes and drifting. Up to four players can play at the same time with Toy-Con Motorbike with their own Toy-Con and Joy-Con controllers. (Nintendo Labo kits and additional Joy-Con are sold separately. Toy-Con Motorbike is part of the Nintendo Labo: Variety Kit.)
Mario Kart 8 Deluxe is the first game outside of Nintendo Labo software to receive Toy-Con support, and more titles will be compatible with Nintendo Labo in the future.
*Void where prohibited. Open to legal residents of the U.S. and Canada (excluding Quebec), ages 13+. Nintendo Switch system and Nintendo Labo kit required. Contest begins 11AM PT on 7/19/18 and ends at 10:59AM PT on 8/20/18. To enter, upload a video of your Toy-Con creation or invention as detailed in the Official Rules. 2 Grand Prize winners will each receive one (1) collectible Nintendo Switch system (ARV: $ $1,000 USD), one (1) Nintendo Labo Creators Jacket (ARV: $ 70.00 USD), and one (1) award certificate (ARV: $ 70.00 USD). 8 Runner-Up winners will each receive one (1) collectible pair of Joy-Con controllers, one (1) Nintendo Labo Creators Jacket (ARV: $ 70.00 USD), and one (1) award certificate (ARV: $ 70.00 USD). Total ARV of all prizes: $3,640 USD. Chances of winning a prize depend on eligibility and quality of entries received, and how well each meets the judging criteria. Details and restrictions apply. For Official Rules, visit https://labo.nintendo.com/share/#!/contest-rules/. Sponsor: Nintendo of America Inc.
Welcome back to this three-part series on creating stylized toon water in PlayCanvas using vertex shaders. In Part 1, we covered setting up our environment and water surface. This part will cover applying buoyancy to objects, adding water lines to the surface, and creating the foam lines with the depth buffer around the edges of objects that intersect the surface.
I made some small changes to my scene to make it look a little nicer. You can customize your scene however you like, but what I did was:
Added the lighthouse and the octopus models.
Added a ground plane with color #FFA457.
Added a clear color for the camera of #6CC8FF.
Added an ambient color to the scene of #FFC480 (you can find this in the scene settings).
Below is what my starting point now looks like.
Buoyancy
The most straightforward way to create buoyancy is just to create a script that will push objects up and down. Create a new script called Buoyancy.js and set its initialize to:
Buoyancy.prototype.initialize = function() { this.initialPosition = this.entity.getPosition().clone(); this.initialRotation = this.entity.getEulerAngles().clone(); // The initial time is set to a random value so that if // this script is attached to multiple objects they won't // all move the same way this.time = Math.random() * 2 * Math.PI;
};
Now, in the update, we increment time and rotate the object:
Buoyancy.prototype.update = function(dt) { this.time += 0.1; // Move the object up and down var pos = this.entity.getPosition().clone(); pos.y = this.initialPosition.y + Math.cos(this.time) * 0.07; this.entity.setPosition(pos.x,pos.y,pos.z); // Rotate the object slightly var rot = this.entity.getEulerAngles().clone(); rot.x = this.initialRotation.x + Math.cos(this.time * 0.25) * 1; rot.z = this.initialRotation.z + Math.sin(this.time * 0.5) * 2; this.entity.setLocalEulerAngles(rot.x,rot.y,rot.z);
};
Apply this script to your boat and watch it bobbing up and down in the water! You can apply this script to several objects (including the camera—try it)!
Texturing the Surface
Right now, the only way you can see the waves is by looking at the edges of the water surface. Adding a texture helps make motion on the surface more visible and is a cheap way to simulate reflections and caustics.
You can try to find some caustics texture or make your own. Here’s one I drew in Gimp that you can freely use. Any texture will work as long as it can be tiled seamlessly.
Once you’ve found a texture you like, drag it into your project’s asset window. We need to reference this texture in our Water.js script, so create an attribute for it:
Now go into Water.frag and declare our new uniform:
uniform sampler2D uSurfaceTexture;
We’re almost there. To render the texture onto the plane, we need to know where each pixel is along the mesh. Which means we need to pass some data from the vertex shader to the fragment shader.
Varying Variables
A varyingvariable allows you to pass data from the vertex shader to the fragment shader. This is the third type of special variable you can have in a shader (the other two being uniformand attribute). It is defined for each vertex and is accessible by each pixel. Since there are a lot more pixels than vertices, the value is interpolated between vertices (this is where the name “varying” comes from—it varies from the values you give it).
To try this out, declare a new variable in Water.vert as a varying:
varying vec2 ScreenPosition;
And then set it to gl_Position after it’s been computed:
ScreenPosition = gl_Position.xyz;
Now go back to Water.frag and declare the same variable. There’s no way to get some debug output from within a shader, but we can use color to visually debug. Here’s one way to do this:
uniform sampler2D uSurfaceTexture;
varying vec3 ScreenPosition; void main(void)
{ vec4 color = vec4(0.0,0.7,1.0,0.5); // Testing out our new varying variable color = vec4(vec3(ScreenPosition.x),1.0); gl_FragColor = color;
}
The plane should now look black and white, where the line separating them is where ScreenPosition.x is 0. Color values only go from 0 to 1, but the values in ScreenPosition can be outside this range. They get automatically clamped, so if you’re seeing black, that could be 0, or negative.
What we’ve just done is passed the screen position of every vertex to every pixel. You can see that the line separating the black and white sides is always going to be in the center of the screen, regardless of where the surface actually is in the world.
Challenge #1: Create a new varying variable to pass the world position instead of the screen position. Visualize it in the same way as we did above. If the color doesn’t change with the camera, then you’ve done this correctly.
Using UVs
The UVs are the 2D coordinates for each vertex along the mesh, normalized from 0 to 1. This is exactly what we need to sample the texture onto the plane correctly, and it should already be set up from the previous part.
Declare a new attribute in Water.vert (this name comes from the shader definition in Water.js):
attribute vec2 aUv0;
And all we need to do is pass it to the fragment shader, so just create a varying and set it to the attribute:
// In Water.vert
// We declare this along with our other variables at the top
varying vec2 vUv0; // ..
// Down in the main function, we store the value of the attribute // in the varying so that the frag shader can access it vUv0 = aUv0;
Now we declare the same varying in the fragment shader. To verify it works, we can visualize it as before, so that Water.frag now looks like:
And you should see a gradient, confirming that we have a value of 0 at one end and 1 at the other. Now, to actually sample our texture, all we have to do is:
color = texture2D(uSurfaceTexture,vUv0);
And you should see the texture on the surface:
Stylizing the Texture
Instead of just setting the texture as our new color, let’s combine it with the blue we had:
This works because the color of the texture is black (0) everywhere except for the water lines. By adding it, we don’t change the original blue color except for the places where there are lines, where it becomes brighter.
This isn’t the only way to combine the colors, though.
Challenge #2: Can you combine the colors in a way to get the subtler effect shown below?
Moving the Texture
As a final effect, we want the lines to move along the surface so it doesn’t look so static. To do this, we use the fact that any value given to the texture2D function outside the 0 to 1 range will wrap around (such that 1.5 and 2.5 both become 0.5). So we can increment our position by the time uniform variable we already set up and multiply the position to either increase or decrease the density of the lines in our surface, making our final frag shader look like this:
uniform sampler2D uSurfaceTexture;
uniform float uTime;
varying vec2 vUv0; void main(void)
{ vec4 color = vec4(0.0,0.7,1.0,0.5); vec2 pos = vUv0; // Multiplying by a number greater than 1 causes the // texture to repeat more often pos *= 2.0; // Displacing the whole texture so it moves along the surface pos.y += uTime * 0.02; vec4 WaterLines = texture2D(uSurfaceTexture,pos); color.rgba += WaterLines.r; gl_FragColor = color;
}
Foam Lines & the Depth Buffer
Rendering foam lines around objects in water makes it far easier to see how objects are immersed and where they cut the surface. It also makes our water look a lot more believable. To do this, we need to somehow figure out where the edges are on each object, and do this efficiently.
The Trick
What we want is to be able to tell, given a pixel on the surface of the water, whether it’s close to an object. If so, we can color it as foam. There’s no straightforward way to do this (that I know of). So to figure this out, we’re going to use a helpful problem-solving technique: come up with an example we know the answer to, and see if we can generalize it.
Consider the view below.
Which pixels should be part of the foam? We know it should look something like this:
So let’s think about two specific pixels. I’ve marked two with stars below. The black one is in the foam. The red one is not. How can we tell them apart inside a shader?
What we know is that even though those two pixels are close together in screen space (both are rendered right on top of the lighthouse body), they’re actually far apart in world space. We can verify this by looking at the same scene from a different angle, as shown below.
Notice that the red star isn’t on top of the lighthouse body as it appeared, but the black star actually is. We can tell them apart using the distance to the camera, commonly referred to as “depth”, where a depth of 1 means it’s very close to the camera and a depth of 0 means it’s very far. But it’s not just a matter of the absolute world distance, or depth, to the camera. It’s the depth compared to the pixel behind.
Look back to the first view. Let’s say the lighthouse body has a depth value of 0.5. The black star’s depth would be very close to 0.5. So it and the pixel behind it have similar depth values. The red star, on the other hand, would have a much larger depth, because it would be closer to the camera, say 0.7. And yet the pixel behind it, still on the lighthouse, has a depth value of 0.5, so there’s a bigger difference there.
This is the trick. When the depth of the pixel on the water surface is close enough to the depth of the pixel it’s drawn on top of, we’re pretty close to the edge of something, and we can render it as foam.
So we need more information than is available in any given pixel. We somehow need to know the depth of the pixel that it’s about to be drawn on top of. This is where the depth buffer comes in.
The Depth Buffer
You can think of a buffer, or a framebuffer, as just an off-screen render target, or a texture. You would want to render off-screen when you’re trying to read data back, a technique that this smoke effect employs.
The depth buffer is a special render target that holds information about the depth values at each pixel. Remember that the value in gl_Position computed in the vertex shader was a screen space value, but it also had a third coordinate, a Z value. This Z value is used to compute the depth which is written to the depth buffer.
The purpose of the depth buffer is to draw our scene correctly, without the need to sort objects back to front. Every pixel that is about to be drawn first consults the depth buffer. If its depth value is greater than the value in the buffer, it is drawn, and its own value overwrites the one in the buffer. Otherwise, it is discarded (because it means another object is in front of it).
You can actually turn off writing to the depth buffer to see how things would look without it. You can try this in Water.js:
material.depthTest = false;
You’ll see how the water will always be rendered on top, even if it is behind opaque objects.
Visualizing the Depth Buffer
Let’s add a way to visualize the depth buffer for debugging purposes. Create a new script called DepthVisualize.js. Attach this to your camera.
All we have to do to get access to the depth buffer in PlayCanvas is to say:
this.entity.camera.camera.requestDepthMap();
This will then automatically inject a uniform into all of our shaders that we can use by declaring it as:
uniform sampler2D uDepthMap;
Below is a sample script that requests the depth map and renders it on top of our scene. It’s set up for hot-reloading.
var DepthVisualize = pc.createScript('depthVisualize'); // initialize code called once per entity
DepthVisualize.prototype.initialize = function() { this.entity.camera.camera.requestDepthMap(); this.antiCacheCount = 0; // To prevent the engine from caching our shader so we can live-update it this.SetupDepthViz();
}; DepthVisualize.prototype.SetupDepthViz = function(){ var device = this.app.graphicsDevice; var chunks = pc.shaderChunks; this.fs = ''; this.fs += 'varying vec2 vUv0;'; this.fs += 'uniform sampler2D uDepthMap;'; this.fs += ''; this.fs += 'float unpackFloat(vec4 rgbaDepth) {'; this.fs += ' const vec4 bitShift = vec4(1.0 / (256.0 * 256.0 * 256.0), 1.0 / (256.0 * 256.0), 1.0 / 256.0, 1.0);'; this.fs += ' float depth = dot(rgbaDepth, bitShift);'; this.fs += ' return depth;'; this.fs += '}'; this.fs += ''; this.fs += 'void main(void) {'; this.fs += ' float depth = unpackFloat(texture2D(uDepthMap, vUv0)) * 30.0; '; this.fs += ' gl_FragColor = vec4(vec3(depth),1.0);'; this.fs += '}'; this.shader = chunks.createShaderFromCode(device, chunks.fullscreenQuadVS, this.fs, "renderDepth" + this.antiCacheCount); this.antiCacheCount ++; // We manually create a draw call to render the depth map on top of everything this.command = new pc.Command(pc.LAYER_FX, pc.BLEND_NONE, function () { pc.drawQuadWithShader(device, null, this.shader); }.bind(this)); this.command.isDepthViz = true; // Just mark it so we can remove it later this.app.scene.drawCalls.push(this.command);
}; // update code called every frame
DepthVisualize.prototype.update = function(dt) { }; // swap method called for script hot-reloading
// inherit your script state here
DepthVisualize.prototype.swap = function(old) { this.antiCacheCount = old.antiCacheCount; // Remove the depth viz draw call for(var i=0;i<this.app.scene.drawCalls.length;i++){ if(this.app.scene.drawCalls[i].isDepthViz){ this.app.scene.drawCalls.splice(i,1); break; } } // Recreate it this.SetupDepthViz();
}; // to learn more about script anatomy, please read:
// http://developer.playcanvas.com/en/user-manual/scripting/
Try copying that in, and comment/uncomment the line this.app.scene.drawCalls.push(this.command); to toggle the depth rendering. It should look something like the image below.
Challenge #3: The water surface is not drawn into the depth buffer. The PlayCanvas engine does this intentionally. Can you figure out why? What’s special about the water material? To put it another way, based on our depth checking rules, what would happen if the water pixels did write to the depth buffer?
Hint: There is one line you can change in Water.js that will cause the water to be written to the depth buffer.
Another thing to notice is that I multiply the depth value by 30 in the embedded shader in the initialize function. This is just to be able to see it clearly, because otherwise the range of values are too small to see as shades of color.
Implementing the Trick
The PlayCanvas engine includes a bunch of helper functions to work with depth values, but at the time of writing they aren’t released into production, so we’re just going to set these up ourselves.
Define the following uniforms to Water.frag:
// These uniforms are all injected automatically by PlayCanvas
uniform sampler2D uDepthMap;
uniform vec4 uScreenSize;
uniform mat4 matrix_view;
// We have to set this one up ourselves
uniform vec4 camera_params;
Define these helper functions above the main function:
Pass some information about the camera to the shader in Water.js. Put this where you pass other uniforms like uTime:
if(!this.camera){ this.camera = this.app.root.findByName("Camera").camera;
}
var camera = this.camera; var n = camera.nearClip;
var f = camera.farClip;
var camera_params = [ 1/f, f, (1-f / n) / 2, (1 + f / n) / 2
]; material.setParameter('camera_params', camera_params);
Finally, we need the world position for each pixel in our frag shader. We need to get this from the vertex shader. So define a varying in Water.frag:
varying vec3 WorldPosition;
Define the same varying in Water.vert. Then set it to the distorted position in the vertex shader, so the full code would look like:
Now we’re finally ready to implement the technique described at the beginning of this section. We want to compare the depth of the pixel we’re at to the depth of the pixel behind it. The pixel we’re at comes from the world position, and the pixel behind comes from the screen position. So grab these two depths:
Challenge #4: One of these values will never be greater than the other (assuming depthTest = true). Can you deduce which?
We know the foam is going to be where the distance between these two values is small. So let’s render that difference at each pixel. Put this at the bottom of your shader (and make sure the depth visualization script from the previous section is turned off):
color = vec4(vec3(screenDepth - worldDepth),1.0);
gl_FragColor = color;
Which should look something like this:
Which correctly picks out the edges of any object immersed in water in real time! You can of course scale this difference we’re rendering to make the foam look thicker/thinner.
There are now a lot of ways in which you can combine this output with the water surface color to get nice-looking foam lines. You could keep it as a gradient, use it to sample from another texture, or set it to a specific color if the difference is less than or equal to some threshold.
My favorite look is setting it to a color similar to that of the static water lines, so my final main function looks like this:
We created buoyancy on objects floating in the water, we gave our surface a moving texture to simulate caustics, and we saw how we could use the depth buffer to create dynamic foam lines.
To finish this up, the next and final part will introduce post-process effects and how to use them to create the underwater distortion effect.
In the last article we saw where the need for storytelling comes from, which is something intrinsic to humankind, and we said that telling a story means basically to convey a messagein order to obtain a responsein our listener.
We also started to examine the tools that we, as game designers, have available to learn how to tell stories. Finally, we mentioned the birth of interactive stories, typical of videogames.
However, in order to thoroughly address this issue, we have to take a step back and start analysing the classic narrative (or passive narrative).
Passive Narrative
In the past, storytelling has traditionally been considered as a one-way relationship: the author of a story chooses a medium (book, theatrical play, movie, etc.) and uses it to tell a story that will be passively received by the audience.
But is it really like that?
Leaving aside the fact that in ancient times attempts were made to directly engage the public during theatrical performances (such as in experimental Greek theatre), passive narrative must actually be considered, more correctly, a two-stage narrative.
Because, if it is true that the author tells us a story to convey a message and to generate a response in us, then two different stages must be taken into account: reception and elaboration.
The Greek theatre was often experimental.
Whenever we assist a story, we are passive, it’s true. For example, while watching a movie in the theater, we’re usually sitting in the dark, in silence, ready to just “live” the experience that the director and the authors have prepared for us. This first stage, reception, is one-way: the author tells, we listen. We become receivers of the message from the author.
However, it’s not unusual to go out of the theater and talk about what we just watched, maybe with our friends or our partner. We comment on the movie, discuss our personal opinions (“I liked it”, “I got bored”, etc.), and often elaborate on the scenes, underlining the details we were most impressed by.
Therefore, we analyse the parts of the message from the author that were etched in our brains, the ones that have generated most of a response in us.
It doesn’t matter what kind of movie we just watched; this kind of after reception interaction happens anyway: whether it’s a comedy, drama, documentary or action movie, the second stage, the elaboration one, always happens. Even if we went to the movie by ourselves, we would think about particular scenes and elaborate on them.
The length and intensity of this stage, clearly, can vary depending on how much we liked the movie (that is to say, depending on how much the message from the author managed to create a response in us).
The most famous franchises in the world are the ones that push their fans to wonder and speculate, for example, in between movies, about a character’s origins that haven’t been revealed yet. Thousands of Twitter messages, Facebook groups, YouTube videos, and Redditthreads, for example, have been created by fans after watching Star Wars Episode VII, proposing theories dealing with the mystery of Rey’s parents.
For two years, Star Wars fans talked every day about Rey’s character for Episode VII
When we develop a passion for a story that excites us, it usually happens that we dedicate ten or a hundred times as much time to the second stage compared to the first one.
Let’s ask ourselves: why does this second stage even exist? Why does reading a book, closing it, putting it on our nightstand and forgetting about it not seem to be enough? Why do we want, instead, be directly involved, letting the suspension of disbelief make us live the responses that the author wants to create in us? And then why do we keep trying to interact with that story, reliving and analysing specific parts?
The keyword here is precisely interaction: it is one of the needs of humankind. Without going into too much detail about a complex field such as the human psyche (a field that, however, is increasingly being studied by game designers and authors of movies and books because it is obviously extremely useful in order to calibrate our messages and get exactly the desired responses), one of the fundamental parts of human personality is the ego. And it’s precisely our ego that makes us want to be in the center of the story, or pushes us to discover some contact points between the characters in a story and ourselves. It’s our ego that lets us relate to the characters and make our reactions to the story we’re being told so powerful that they become able to actually affect our reality.
Without the ego, we wouldn’t be moved by reading a dramatic book.
At the same time, the ego leads us to not want to play just a minor role in the story—that is to say, to be just a passive audience.
Without the ego, we wouldn’t be moved by reading a dramatic book
We want, by instinct, to be at the center of the scene (and let’s say that we are also living in a time in which society and technology push us in this direction). Thus, if we can’t edit the story while it’s being told to us, we wish to interact with it anyway, at a later stage.
One of the first authors who understood this mechanism was David Lynch. Perhaps one of the most important authors of the modern era, he is certainly the father of TV series as we know them today. In 1990, when David Lynch began telling the story of an unknown (and fictional) town in the northern United States, Twin Peaks, he was following a hunch: he created a mystery that engaged viewers all over the world and led them to look for a solution.
The dreamlike puzzle created by Lynch and Frost (the other author of Twin Peaks) kept viewers glued to that story for two and a half years (and later for 30 solid years, because the fans never gave up on that unsolved mystery until the release of a very long-awaited third season just last year). The story brought viewers to interact among themselves: they shared theories and possible scenarios. For the first time in the history of television, the second stage became actually important and, clearly, contributed to the success of Lynch’s work.
Then how can we call this experience passive if, sometimes, the second stage lasts longer and is more intense than the first one?
Twin Peaks changed forever the way to tell stories on TV
You’ll agree with me that the definition is inadequate at least. However, it’s true that during the narration the audience is passive: throughout the duration of the transmission of the message from the author, whoever is receiving that message can only passively listen to it. The audience is not able to intervene in the events or shift their focus to minor details that look interesting to them. Furthermore, in the case of media such as cinema and theater, the audience doesn’t even have the chance to choose the narrative rhythm: the message from the author is shown in an unstoppable way, like a river in flood that overwhelms the viewers.
From this point of view, videogames are deeply different, and their interactive narration opens up countless possibilities that, before videogames became an established medium, used to be unthinkable.
The Evolution of Storytelling
It’s interesting to note how, looking at the videogame world, older media have always felt a little bit of envy. The authors of a movie or a TV series are clearly aware of how charming interaction can be for the audience, and they know that, generation after generation, classic storytelling is getting less and less appealing.
In the last 30 years, many attempts have been made to hybridize the classic nature of certain media, and some have been more successful than others.
One of the most famous attempts of this kind is the book series Choose Your Own Adventure: books where the story is made of forks in the road in which the reader/player can make choices and often fight against enemies or use a style of interaction very similar to that of tabletop role-playing games.
In the eighties all nerds (like me) read dozens of books like that
Another example is the eighties TV series Captain Power and the Soldiers of the Future that allowed players, using infra-red devices, to fight against the enemies on the screen and score points, and the player’s action figure reacted based on the results.
A legendary tagline
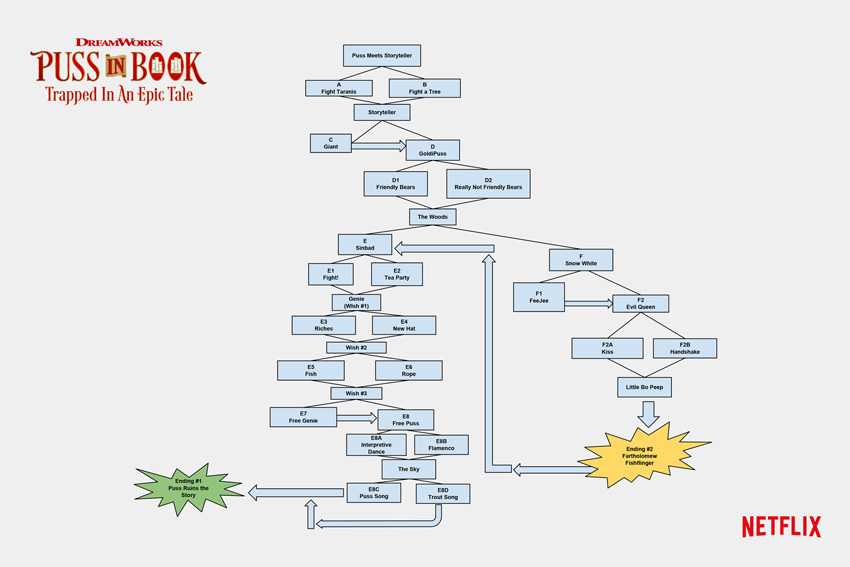
A recent example is the interactive episode of Puss in Boots, published on Netflixand designed for tablet: it’s a cartoon for children with choices to make and forks in the road in the story.
The diagram of the Puss in Boots’ branches on Netflix
I’m really curious about what will happen in the future in this respect.
What about you?
Interactive Storytelling
Now that we have looked at traditional (to a certain extent, passive) storytelling, it’s time to go into the very subject of these articles: interactive storytelling.
First of all, let’s try to set things straight: are all games narrative?
To answer, let’s look at a few examples.
Chessis one of the oldest and most popular games in the world. It represents a conflict on a battlefield between two armies and, as many of you will know, chess and go are considered the most strategic games in the world.
However, is let’s simulate a battle enough to define chess as a narrative game?
No.
Because all the elements we highlighted as fundamental to narration are missing: the narrator is missing, and so is the message.
The same goes for videogames.
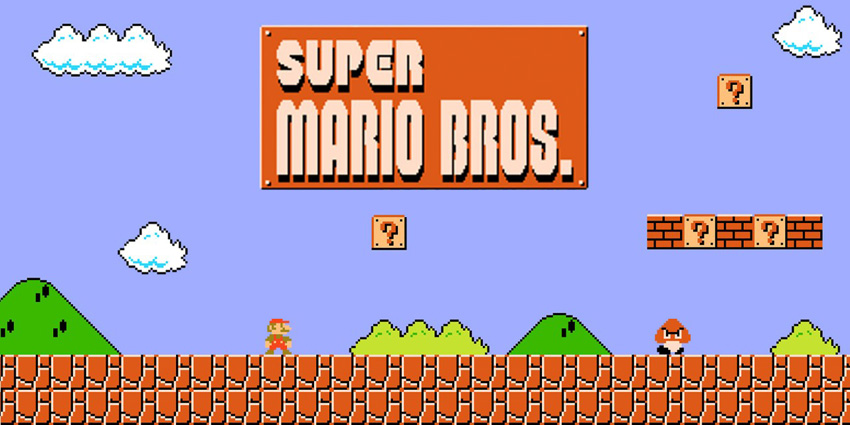
There are completely abstract games (like Tetris) and games in which storytelling is a simple expedient for the setting of the game. Consider Super Mario Bros, in its first version. There was a basic story (Bowser has kidnapped Princess Peach and Mario must save her). But there’s no actual storytelling, no narrator, no message.
The reason for the success of Super Mario Bros was certainly not its narrative structure
There are responses, but they are directly provoked by gameplay. In fact, taking away the story from Super Mario Bros doesn’t affect the user experience at all.
The lack of any actual storytelling, however, doesn’t invalidate the quality of the game. On the other hand, adding narration to the structure of the game as it is would probably burden the experience and ruin the perfect balance of the design.
Not for nothing, even though in more modern Super Mario games texts and cut-scenes have appeared, the story keeps working as a mere expedient, as a corollary to the gameplay.
When we as designers, therefore, start approaching the design of a new game, we have to ask ourselves a couple of questions:
Does my story (my message) need interactive storytelling?
How can interactive storytelling improve my story?
Answering these questions in the first place will let us understand if and how to include interactive storytelling in our game.
We may realise that a simple story used as an expedient is enough, or that the game doesn’t need a story at all! The assumption that any modern game should have interactive storytelling is a mistake we have to avoid.
If, instead, the answers are positive, then it’s time to learn how to master the art of interactive storytelling.
Linear Interactive Storytelling
The first kind of interactive storytelling that we are going to consider is the linearone. This definition might, at first sight, appear to be counterintuitive, but it’s actually the most common kind of interactive storytelling.
Videogames using this kind of storytelling allow the player to interact with the events, choosing the narrative rhythm (in the case, for example, of a quest that won’t proceed without the player’s intervention), choosing the order in which to go through the events (for example, when there are two parallel quests active at the same time and the player can decide which one to complete first), or setting the desired level of accuracy (for example, when reading documents and clues in a game is not mandatory but increases the player’s knowledge about the story or the game’s setting).
However, as much as the player feels free, the story is eventually going precisely how the author meant.
It’s as if the game designer had taken his message and split it into many different pieces to be put together by the player.
Developing this kind of interaction is clearly more complicated than classic storytelling: certain tricks of the trade commonly used in book-writing, for example, cannot be used here.
Consider this game with a linear interactive storytelling (maybe one of the most famous in the world): The Secret of Monkey Island. It allows players, on a number of occasions, to explore the story and interact with it in the order and rhythm they prefer. There are at least two large open sections where players have multiple tasks to do, following their own hunches and preferences.
Probably the first game thanks to which I approached interactive storytelling
A more recent example is The Legend of Zelda: Breath of the Wild, in which the story is told through flashbacks but it is up to the player to decide which parts of the game will be handled first and thus which pieces of the puzzle will be put together first.
Each part of the story, however, had been written in order to coexist without contradicting or hindering each other.
There’s no need to deal with this kind of problem when writing a book.
In order to be sure to create a correct interaction, therefore, a game designer has to use certain tools.
When writing a book, one often takes notes and sketches diagrams. Not all authors, I know, take this approach. Some of them are way more spontaneous: they sit in front of the keyboard and start writing.
But when you’re dealing with interactive storytelling, the spontaneous approach is simply not feasible: outlining the story, using flow charts, creating tables and summaries about every character of the story is the necessary starting point.
All these documents, in fact, will be part of the Game Design Document (GDD), which contains all the elements of the game.
Writing this kind of story, without losing track or making mistakes, is definitely complicated. The more diagrams and notes you’ve got, the more you’ll limit the risk of mistakes.
But it won’t be enough.
When writers finish their work, they will usually hand it to a proofreader who will thoroughly read it and point out mistakes and inconsistencies in the text. Likewise, designers will have to entrust their work to a QA department, made of different people that will check the story and test in a systematic way all cases of interaction—looking for every possible loophole.
Conclusion
And yet… what if we want more? What if we want to give the players the freedom to affect the events and make their experience even more intimate and personal, providing each player with a different response?
In this case we would have to resort to non-linear interactive storytelling that, along with the direct method and the indirect method, will be the subject of the third and last article of this series.
Mario and his friends are ready to take center court in the Mario Tennis™ Aces game! Unleash a volley of fun by challenging your friends and family locally* or by hopping online** to take on the world. In Adventure mode, experience a new flavor of tennis gameplay, with a variety of missions, boss battles and more. Intense matches await!
Features
Rally against other players in singles or doubles as one of 15+ Mushroom Kingdom characters.
Up your game with new tricks like Zone Speed and Zone Shot. Slow down time to pull off near-impossible returns or aim your shots with pinpoint precision. With careful planning, you can even break your opponent’s racket for an instant KO.
Set out to rescue Luigi from the Legendary Racket in Adventure Mode! Equip different rackets and take on challenges and bosses that will put your tennis skills to the test.
Play with up to 4 players locally* or online**.
Swing your Joy-Con™ controller like a real racket in Swing Mode.
Take on CPU opponents in the Mushroom Cup, Flower Cup, or Star Cup in Tournament Mode.
*Additional accessories may be required for multiplayer mode. Sold separately.
**Nintendo Account required. Online services and features, including online gameplay, are free until the paid Nintendo Switch Online Service launches in September 2018.
Mario and his friends are ready to take center court in the Mario Tennis Aces game! Unleash a volley of fun by challenging your friends and family locally or by hopping online to take on the world. In Adventure mode, experience a new flavor of tennis gameplay, with a variety of missions, boss battles and more. Intense matches await! Read More
Mario and his friends are ready to take center court in the Mario Tennis Aces game! Unleash a volley of fun by challenging your friends and family locally or by hopping online to take on the world. In Adventure mode, experience a new flavor of tennis gameplay, with a variety of missions, boss battles and more. Intense matches await! Read More