If you have a Nintendo Switch™ console, you may already know about its handy news feed, which delivers articles on games, updates, and more right to your console. Whether you’re a regular reader or a news newbie, there are a few updates you may want to check out.
Channels: You can now follow game-specific channels, so you don’t miss any info on your favorite games. To see the available channels, select the “+” button from your Nintendo Switch console’s Home Menu. Just select “Follow Channel” to subscribe to the ones you like.
In-game items: The Legend of Zelda™: Breath of the Wild has its own special channel called “Tips from the Wild.” Follow this channel for articles with tips directly from the game’s director, Hidemaro Fujibayashi.
If you own the game, you may even get free in-game items from these articles. For example, a recent article about befriending dogs in the game gave readers some treats to feed their new furry friends. To receive these in-game items, be sure your game is version 1.3.1 and above.
New channels and articles are being added all the time, so check out your news feed often.
Game Rated: Fantasy Violence Mild Suggestive Themes Use of Alcohol
Nintendo brings Super Mario Odyssey, other anticipated games to PAX West
Super Mario Odyssey and Nintendo Switch are two must-haves for the holiday season, so Nintendo is planning lots of activities for both at the upcoming PAX West gaming event Sept. 1-4 in Seattle. Not only will attendees be able to play the Super Mario Odyssey game, but they’ll also get the chance to participate in the Super Mario Odyssey Fan Challenge, which runs every day of the show. Fans must complete certain activities related to the game to receive a passport stamp. Once players collect all stamps, they will receive a Super Mario Odyssey-themed gift, while supplies last. Fans at PAX West will also be the first members of the public to play competitive Nintendo Switch games like Rocket League and NBA 2K18. Nintendo will also have fun activities for fans in attendance to keep them busy, including a live filming of Nintendo Minute focused on the Metroid: Samus Returns game, a Pokkén Tournament DX Virtual Academy fan event and the return of Nindies@Night.
“PAX West is a special event for Nintendo since it takes place right in our backyard. It’s one of the places we get to interact directly with our amazing and passionate fans,” said Doug Bowser, Nintendo of America’s Senior Vice President of Sales and Marketing. “In addition to the fun games we’re bringing, we have multiple events and giveaways planned to make everyone’s Nintendo experience a great one.”
To kick things off before the show starts, Nintendo is bringing back the Nindies@Night event, from 8:30 p.m. to midnight on Aug. 31 at Museum of Pop Culture (MoPOP) in Seattle. The event is open to the public and offers a chance for people interested in speaking to developers and checking out unreleased indie games coming to Nintendo Switch. For anyone unable to make it to Nindies@Night at MoPOP, there will be a livestream from the event, including deep dives with developers and a sneak peek at first-ever gameplay.
The indie festivities continue in the Nindie Arcade at PAX West, where Nintendo is bringing upcoming indie games to the convention center on the third floor in room 3B. Stop by to play great games and chat with the developers who created them. The Nindie Arcade hours are noon-9 p.m. Friday to Sunday, and noon-6 p.m. on Monday.
On Saturday, Sept. 2, up to 600 fans can attend a live filming of a Nintendo Minute segment that will be focused on the Metroid: Samus Returns game. The episode will be filmed 10-11 a.m. in the Hydra Theatre Leonesa I-III Ballroom at the Grand Hyatt Seattle hotel. Kit, Krysta and members from the Nintendo Treehouse will show off new gameplay, reveal new game content and feature fan art. They’ll also have exclusive giveaways of collectable Nintendo Power cover-inspired posters for people in attendance, while supplies last.
Nintendo is also hosting a Pokkén Tournament DX Virtual Academy fan event from 6 to 8 p.m. on Sept. 1 at the Sheraton Hotel in the Willow ballroom (second floor). Visitors will have the chance to play the Pokkén Tournament DX game before its launch on Sept. 22. The event will include a tournament, as well as exhibition matches featuring professional video gamers and members of Nintendo’s Treehouse.
Games like ARMS, Splatoon 2 and Mario Kart 8 Deluxe have demonstrated how the Nintendo Switch console is the home of social competitive fun. At PAX West, attendees will be able to play additional competitive games like Pokkén Tournament DX, Rocket League from Psyonix, NBA 2K18 from 2K Games and FIFA 18 from Electronic Arts.
The Nintendo 3DS family of systems will be on hand at the show, and attendees will be able to play some of the new games headed to the system’s already-huge library. Visitors can check out both Mario & Luigi: Superstar Saga + Bowser’s Minions and Metroid: Samus Returns.
For the first time at PAX West, visitors that are also My Nintendo members have an opportunity to check in with their QR Code pattern to receive a My Nintendo Pass. A My Nintendo Pass allows the pass holder to access a priority line with shorter wait times for the Nintendo booth and the Nindies Arcade during specified times. Passes will be distributed on a first-come, first-served basis, and while supplies last. More details will be shared on https://my.nintendo.com/, so stay tuned.
Remember that the Nintendo 3DS family of systems and Nintendo Switch feature parental controls that let adults manage the content their children can access. For more information about other features, visit http://www.nintendo.com/3ds and http://www.nintendo.com/switch/.
Nintendo reveals video game news ahead of Gamescom Show
Nintendo of Europe’s participation in the Gamescom event in Cologne, Germany, is producing news with relevance to fans here in the Americas.
In Splatoon 2 news, Nintendo detailed new free content coming to the game soon: Manta Maria joins the lineup of Turf War* and Ranked Battle stages this weekend, while the new Lost Outpost stage joins the rotation of Salmon Run stages later today. Both stages will also become available in The Shoal for local multiplayer matches. Also announced was that the Bubble Blower special weapon will be available first in a set with the Forge Splattershot Pro starting Sept. 1.
Fans of Nintendo Switch fighter game ARMS will soon have a new character to use as part of the next free update: street performing pugilist Lola Pop. A well-traveled clown with a personality as colorful as her clothing, Lola Pop’s key ability is inflating her body like a balloon, providing her with great defensive qualities. With three new Arms and a new stage, players can look forward to developing new strategies whether competing locally against friends or taking on the world online*.
Those who haven’t yet sampled the fast and fun fighting action of the ARMS game can do so for free this weekend with the ARMS Global Testpunch, which runs 8 a.m. PT Friday, Aug. 25, through 2 p.m. PT Sunday, Aug. 27. To participate, simply download the free ARMS Global Testpunch software from Nintendo eShop on Nintendo Switch, then fire it up and jump into online multiplayer matches.
Nintendo also revealed that the upcoming Super Nintendo Entertainment System: Super NES Classic Edition system includes a Rewind feature that lets players rewind their gameplay to retry tricky sections, pick up missed items or simply run through an area again to see if anything was missed. The rewind time depends on the kind of game: Players can go back a few minutes in role-playing games such as Super Mario RPG: Legend of the Seven Stars, while action titles such as Super Mario World offer around 40 seconds, ideal for re-trying short segments of gameplay. The system also comes with optional frames that can be wrapped around the on-screen display for each game.
The following is a schedule of some of the online events taking place in Germany. These sessions, as well as others featuring other Nintendo games, will be featured at https://www.nintendo-europe.com/gamescom and archived on Nintendo UK’s YouTube channel at http://www.youtube.com/nintendouk.
For a closer look at new ARMS character Lola Pop, visit the site at 2 a.m. PT on Aug. 23.
Super Mario Odyssey Producer Yoshiaki Koizumi will give an in-depth talk about his game at 6 a.m. PT on Aug. 23.
At 3 a.m. PT on Aug. 24, Producer Yoshio Sakamoto and MercurySteam Creative Director José Luis Márquez will present new details about Samus Aran’s upcoming Nintendo 3DS adventure, Metroid: Samus Returns .
A livestream of Fire Emblem Warriors gameplay highlighting newly revealed characters will be featured at 2 a.m. PT on Aug. 25.
For a complete schedule of live shows happening throughout the week, and more information about all the games playable at this year’s Gamescom show, visit Nintendo of Europe’s Gamescom website at https://www.nintendo-europe.com/gamescom.
*Nintendo Account required. Online services and features, including online gameplay, are free until the paid Nintendo Switch Online Service launches in 2018.
PayPal is now available as a payment option for digital content
Customers in the U.S. and Canada can now use their PayPal accounts to purchase digital games and content for the Nintendo Switch™ system, both on the system and in the Game Store on the Nintendo website.
This convenient way to pay joins the current payment methods of credit cards or Nintendo eShop Cards. When purchasing content, you’ll see a new PayPal payment option at checkout. The first time you select this option, you will be asked to link your PayPal account with your Nintendo Account via your PC or smart device. Once you complete this step, you’ll be able to use your PayPal account as a payment option for future purchases.
Linking your accounts will also allow you to use PayPal as a payment option on the Nintendo website when purchasing content for the Wii U console and the Nintendo 3DS family of systems.
Please note that users must be 18 or older to link their PayPal account with a Nintendo Account. The country setting of a user’s Nintendo Account must match the country setting of their PayPal account.
New details announced for upcoming games Pokémon Ultra Sun and Pokémon Ultra Moon
The Pokémon Company International and Nintendo have revealed more details for Pokémon Ultra Sun and Pokémon Ultra Moon, including a new story, Z-Power Ring information and new main character styles!
In Pokémon Sun and Pokémon Moon, the story centered heavily around the Legendary Pokémon Solgaleo and Lunala. In Pokémon Ultra Sun and Pokémon Ultra Moon, a new story unfolds featuring Necrozma alongside the Legendary duo. Ominous dark clouds begin to spread and the secrets of Necrozma and the Alola region, which were never disclosed in the previous games, will finally come to light.
The main characters that appear in Pokémon Ultra Sun and Pokémon Ultra Moon will feature brand new styles. Players can pick their appearance at the beginning of the game and choose either Rowlet, Litten or Popplio to begin their as-yet-unknown adventure in style. Also discovered in the story is a new Z-Power Ring which players will acquire in the game and can activate to use an even wider variety of Z-Moves. A physical toy of the new Z-Power Ring will be available at launch to purchase and interacts with the video games.
Pokémon Ultra Sun and Pokémon Ultra Moon launch exclusively on the Nintendo 3DS family of systems on 17 November and a special Pokémon Ultra Sun and Pokémon Ultra Moon – Ultra Dual Edition will also be available. The Ultra Dual Edition features exclusively designed packaging and contains a copy of both Pokémon Ultra Sun and Pokémon Ultra Moon.
Nintendo Switch Splatoon 2 Edition Bundle heads exclusively to Walmart Stores
Walmart will be the exclusive retail partner for a new Nintendo Switch bundle that includes a download code for the Splatoon 2 game, a fresh carrying case and colorful new Joy-Con controllers in Neon Pink and Neon Green. The bundle will be available starting Sept. 8 at a suggested retail price of $379.99 and offers fans in North America their first chance to get their hands on that Joy-Con color combination.
“Consumers in Japan and Europe have already had a strong response to Splatoon 2 bundles in their territories,” said Doug Bowser, Nintendo of America’s Senior Vice President of Sales and Marketing. “This exclusive Walmart bundle gives people who have been waiting to buy a Nintendo Switch a great value and incentive to get splatting.”
Nintendo also announced the topic of its next Splatfest competition, which will run Sept. 1-2. Participants will pick a side to fight alongside in online Turf War battles by choosing which superpower they would prefer: flight or invisibility. Additional details about the Splatfest will be announced in the future.
The Splatfest is just one of many new elements in the slate of ongoing content updates and in-game events keeping Splatoon 2 fans engaged, with more and more players jumping into battle every day. There have already been more than 400 million online battles fought across the global player base, and after less than a month on store shelves, Splatoon 2 joins other global million-selling Nintendo Switch hits like The Legend of Zelda: Breath of the Wild, Mario Kart 8 Deluxe, 1-2-Switch and ARMS. For additional details about Splatoon 2, visit http://splatoon.nintendo.com. Remember that Nintendo Switch features parental controls that let adults manage the content their children can access. For more information about other features, visit http://www.nintendo.com/switch.
Blizzard Entertainment’s sci-fi classic emerges from the warp gate with 4K Ultra HD graphics, enhanced audio, and the same timeless real-time strategy gameplay that captivated a generation
Reexperience the war between the terrans, protoss, and zerg NOW atwww.starcraft.com
IRVINE, Calif.–(BUSINESS WIRE)– Battlecruisers are operational, the Corsairs stand ready, and the Zerglings are boosted for the rush. StarCraft®: Remastered, Blizzard Entertainment’s lovingly crafted upgrade of the real-time strategy classic and its legendary expansion Brood War®, is NOW LIVE and available to purchase digitally at www.starcraft.com and through the Blizzard Shop.
StarCraft: Remastered upgrades the original sci-fi classic with 4K graphics, enhanced music sound, and more. (Graphic: Business Wire)
Widely regarded as one of the most influential strategy games of all time, StarCraft and Brood War tell the story of the first interstellar war between three distinctive factions: the Earth-born terrans, psi-powered protoss, and hive-minded zerg. StarCraft: Remastered lets players reexperience the saga of iconic characters like Jim Raynor, High Templar Tassadar, and Kerrigan, through upgraded 4K visuals, enhanced audio and music, and new illustrated story interludes.
StarCraft: Remastered continues to use the same legendary gameplay engine that’s made StarCraft a competitive gaming and esports staple for nearly two decades. The classic gameplay is reinforced with new online features that propel the multiplayer experience into the modern era and beyond. Remastered provides players with matchmaking and leaderboards, cloud saves, as well as full multiplayer compatibility with the original versions of StarCraft and Brood War.
“We know how much StarCraft and Brood War mean to our community around the world, and our primary mission with StarCraft: Remastered was to enhance as much as we could while keeping the core StarCraft experience intact,” said Mike Morhaime, CEO and cofounder of Blizzard Entertainment. “Whether you’re a StarCraft veteran or you’re experiencing the beginning of the saga for the first time, we hope you enjoy revisiting the Koprulu Sector as much as we did.”
StarCraft: Remastered provides players with an arsenal of new updates and features, including:
Full graphical upgrade of the original StarCraft and the StarCraft: Brood War expansion
Widescreen UHD support for up to 4K resolution
Matchmaking and leaderboards
Player profiles that track individual statistics
Cloud saving for campaign progress, hotkeys, and replays
Improved high fidelity music and sound
Ability to switch between Remastered and the original StarCraft with the click of a button
StarCraft: Remastered is available now digitally for Windows® and Mac® PCs for $14.99 USD, and is available in English, Brazilian Portuguese, Latin American Spanish, French, German, European Spanish, Italian, Polish, Russian, Korean, Japanese, and simplified and traditional Chinese. To purchase or learn more about StarCraft: Remastered, visit www.starcraft.com.
About Blizzard Entertainment, Inc.
Best known for blockbuster hits including World of Warcraft®, Hearthstone®, Overwatch®, the Warcraft®, StarCraft®, and Diablo® franchises, and the multi-franchise Heroes of the Storm®, Blizzard Entertainment, Inc. (www.blizzard.com), a division of Activision Blizzard (NASDAQ: ATVI), is a premier developer and publisher of entertainment software renowned for creating some of the industry’s most critically acclaimed games. Blizzard Entertainment’s track record includes twenty-one #1 games* and multiple Game of the Year awards. The company’s online-gaming service is one of the largest in the world, with millions of active players.
*Sales and/or downloads, based on internal company records and reports from key distribution partners.
Blizzard Entertainment, Inc. Andrew Reynolds Global PR Director 949.955.1380 x14301 areynolds@blizzard.com or Bob Colayco PR Manager 949.955.1380 x14198 bcolayco@blizzard.com
Backgrounds are an important—if sometimes underappreciated—element for many designers. Whether you’re creating a game, visual novel, or website, the backgrounds you choose play a huge part in setting the mood and scene for your work.
Part of the reasons backgrounds don’t always get the love they deserve is that, despite their importance, backgrounds are sometimes slow and tedious work. Luckily, there’s always a faster way to get the job done.
In this tutorial, I’ll be showing you how to create three dramatically different backgrounds from photos using resources from Envato Elements. These resources are a combination of Photoshop Actions and Photoshop Brushes that, when combined, save you countless hours you would otherwise use to create these backgrounds from scratch. So let’s get started!
What You’ll Need
Here are the following assets you’ll need for this tutorial:
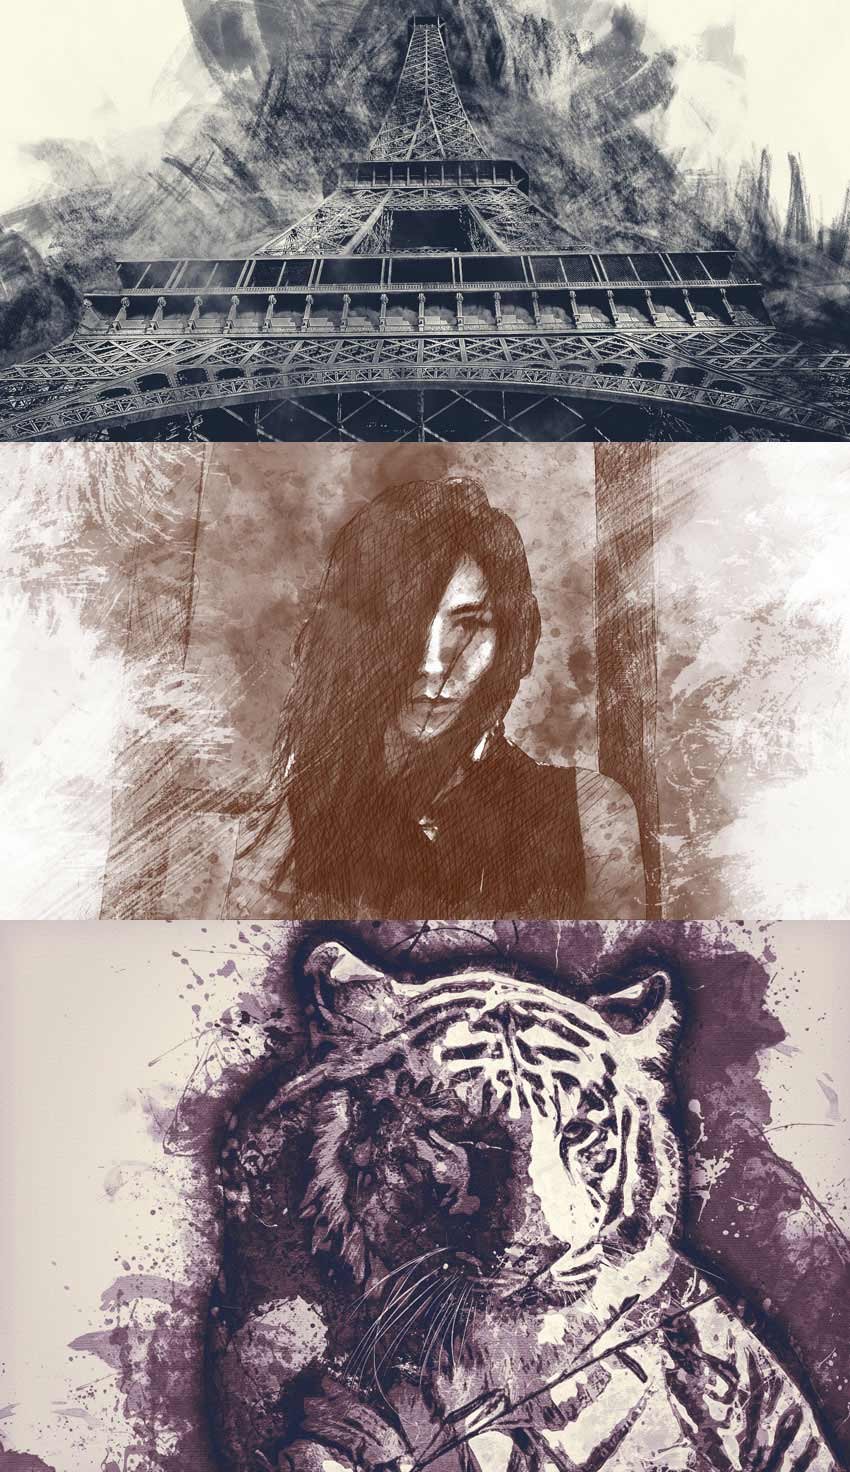
First up is the charcoal background. I’ll be using this amazing Charcoal Photoshop Action to help achieve the final result. Start by opening this Eiffel Tower reference into Photoshop, making sure that you select the 1920×999 pixels size.
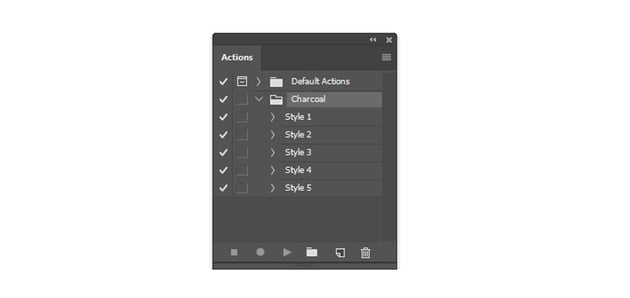
Now let’s set up the action. Go to Window > Actions and load your charcoal action into the Actions palette.
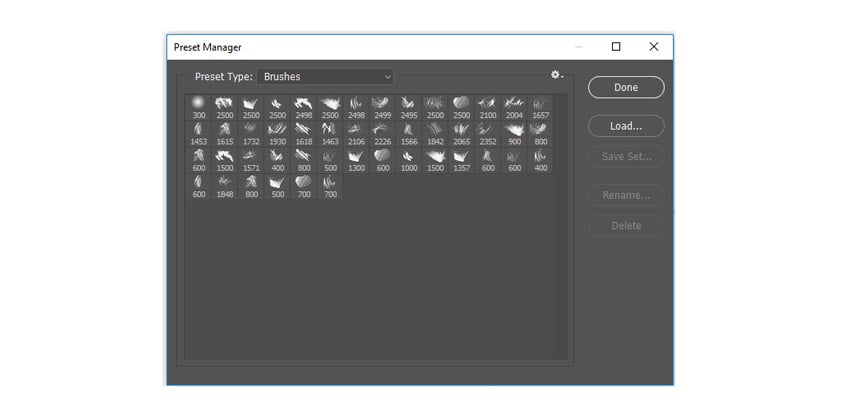
Because there’s a brush set included with this action, you’ll need to load it as well. So hit B on your keyboard to bring up the Brush Tool. Select Replace Brushes from the drop down menu then select the .abr file to replace your current brushes with the new charcoal ones.
Here is a look at the charcoal brushes you should now have in the Preset Manager.
Step 3
Many Photoshop actions come with a set of instructions you’ll need to follow exactly in order to avoid any program errors. So make sure you pay attention to the attached “Readme” file before you begin.
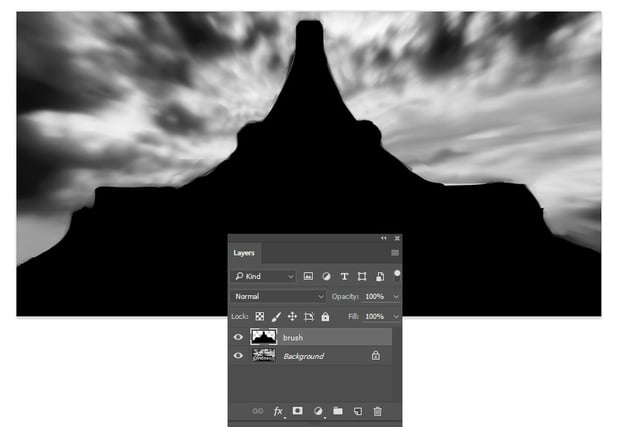
Now create a New Layer and name it “brush.” With the Brush Tool (B) selected, paint black all over the Eiffel Tower since it’s where I would like to apply the charcoal effect. It’s important to keep the brush part as clean as possible, otherwise it will affect how this action plays out.
When you’re ready, select Style 1 under the Charcoal Action, then hit the Play button on the Actions palette.
Step 4
Here is the initial result after you play the action.
Since it looks quite messy, let’s tweak some of the Adjustment Layers found within the new Group created by the action.
First Hide the Visibility of the Sketch Lines 2 Group. Then select all three photo layers and set their Layer Blend Modes to Pin Light and their Opacity to 100%. Follow up by select the Contrast layer and changing the Opacity to 100%. This will allow your subject to show through the smudges more.
To add more texture to the background, create a New Layer above the second photo layer.Select the Brush Tool (B) and use one of the charcoal brushes from the set to paint a large smudge of gray on the layer. Right-click to go to Blending Options and apply a Gradient Overlay with the following settings:
Step 5
For a tint of color, add a New Adjustment Layer for Color Lookup at the top of your layers. Go to Layer > New Adjustment Layer > Color Lookup. Then set the 3DLUTFile to FoggyNight.
Here is the final charcoal background below. See how simple that was?
Now go to Window > Action and load the artist action into the Actions palette.
Just like before, we’ll need to also load all of the brushes attached to this action. So select the Brush Tool (B), Right-click to bring up your brushes, then select Replace Brushes from the drop down options. Choose the artist brush file located from the same folder as the action.
Here is the new set you should have.
Step 3
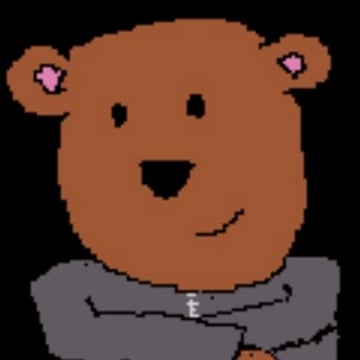
To run the action, create a New Layer and name it “brush.” Select the Brush Tool (B) at 100% Hardness, and use the brush to Fill in the areas with black where you’d like the effect to take place. Here I painted the woman and the bars behind her.
With the brush layer still selected, hit the Play button on the Actions palette to run your artist action. Here is the initial result.
Step 4
Even though we’re going for a watercolor effect, let’s clean up the result a bit. First, Hide the Visibility of the Watercolor Edge Splatter Group. Then go into the Watercolor and Watercolor Texture Groups and Hide some of the layers to allow the portrait to breathe. Feel free to experiment with this for the result you prefer.
Step 5
To create a better color palette, add a Gradient Map Adjustment Layer. Go to Layer > New Adjustment Layer > Gradient Map. Create a gradient that transitions from a deep red color #491802 to white.
Step 6
Finish this background with a little more texture. Load the Handcrafted Watercolor Brushes we mentioned earlier into the Brush Tool (B).
Create a New Layer and use the Brush Tool (B) to paint white watercolor splashes all around the canvas. I used brushes 1,15, and 17 for the right side, and brushes 15, 26, and 72 for the left side.
Here is the final watercolor background when you’re done.
3. How to Create a Paint Splatter-Inspired Background
Step 1
For this last background, we’ll be creating another traditional art effect using this Paint Splatter Action.
Here I’ll be using this Tiger Stock, downloaded at 1920×1280 pixels. Open this photo into Photoshop.
Load your paint splatter action. Go to Window > Actions, and load the action from the drop down menu.
Just like the previous actions, you’ll need to load the brush set that comes along with it. So select the Brush Tool (B), then Right-click to bring up your brushes. Select ReplaceBrushes from the options and replace them with the paint splatter brushes found within the same folder.
Step 2
Now create a New Layer and name it “mask.” Select the Brush Tool (B) and use a SoftRound Brush with 0% Hardness to fill your subject with black.
When you’re ready, select the mask layer then hit the Play button on the Actions palette. Here is the initial result after you play the action.
Step 3
To adjust this background even further, Hide the Group for CC Option 1, and Unhide the Group for CC Option 2 instead.
Now we have a color scheme that suits this photo better. Scroll down to the bottom of the action list to find the layers for the background elements. Unhide the Visibility of the background splash layers as well as the contour fill layers in order to achieve a more dynamic result.
Finish with a New Photo Filter Adjustment Layer. Set the filter to Cooling Filter (80) and raise the Density to 91%. Change the Layer Blend Mode to Soft Light and you’re done!
Here is the final paint splatter background.
Conclusion
Let Photoshop actions do all the heavy lifting for your designs. You’ll be impressed with the incredible diversity in the effects you can achieve, all while saving countless work hours.
I hope you enjoyed this tutorial, feel free to leave any questions in the comments below. And for more tutorials on photo effects, check out the following links:
When you get stuck in a video game, you might head to GameFAQs to find a walkthrough to help you get through it. When you get stuck making your first video game, what can you do? That’s where this article comes in: think of this as a walkthrough for developing your first game.
My First Game
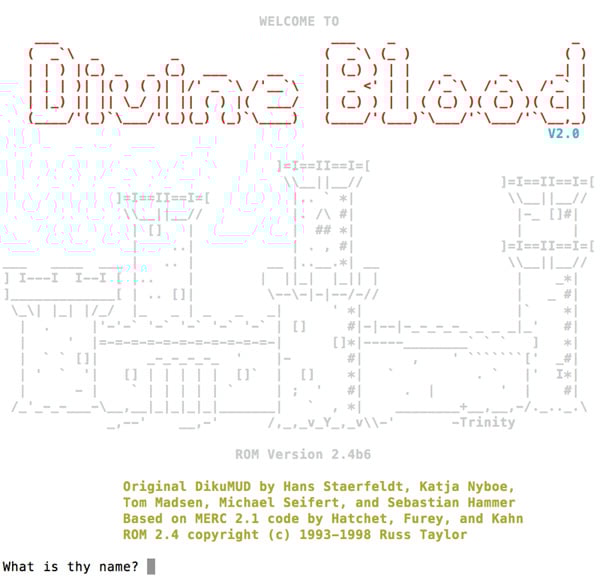
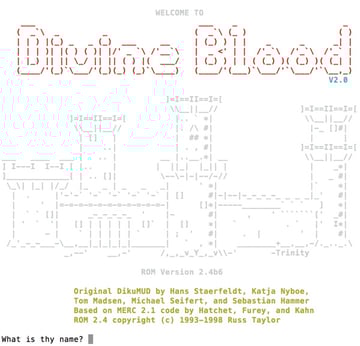
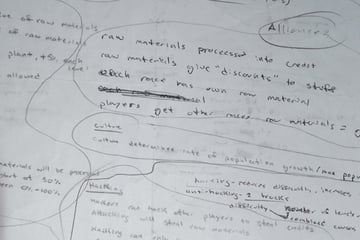
Before we get to the video game development walkthrough, I want to tell you about my first game. It was a simple text based adventure inspired by a MUD called Divine Blood:
I first programmed it as just a simple room using the TI-83+ Calculator, and later made into a full-fledged town using Java in my last year of high school. I never finished that game (it didn’t go beyond the first town) and I don’t even think I have the code any more.
Unfortunately, my experience isn’t uncommon for game developers. Many developers start a game but never finish it. So how can you increase your chances of finishing your first game? Enter this video game development walkthrough.
The Four Levels of Game Development
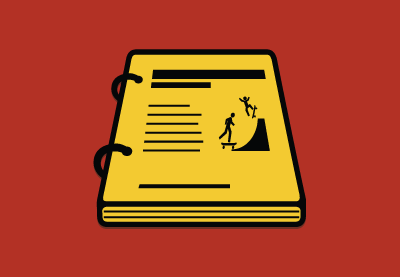
If developing a game is a game in itself, then it consists of four levels: Plan, Prototype, Develop, and Release.
Just like in a video game, each level is more difficult than the last. Each level also has its own encounters (the problems and difficulties you are likely to come up against) and its own end level boss (which signifies when you are ready to move on to the next level).
This walkthrough will guide you through the process of successfully creating your first game. It will incorporate resources and quotes from other game professionals, as well as insights about how implementing the walkthrough for my own first game would have helped me to finish it.
Level 1: Plan
Remember, the first 90% of your game takes 90% of the time; the last 10% takes the remaining 90% of the time. Plan accordingly. — Ian Schreiber
The first level, and arguably the most important level, is planning — planning out every aspect of the game before you even begin coding. The goal of this level is to consider everything about your game up front so that you don’t have to improvise later.
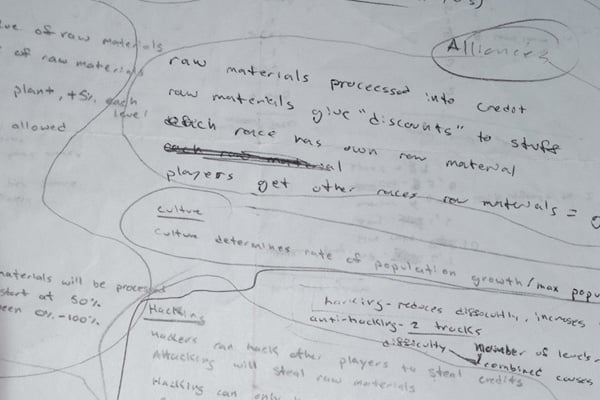
When you first start making your game, the best thing to do is write down all the details. Think about everything you want in your game, and then write it down. Usually this is pretty easy at first, as your mind races with lots of neat ideas that you will want to incorporate into your game. However, as time goes by, this level becomes increasingly harder to complete.
As you jot down your ideas, also jot down the details of these ideas: how they will work, how they will affect the player experience, and how they will affect the gameplay. You don’t want to leave any big holes in your design that will cause you to struggle later. It becomes more difficult to finish a game as the problems you encounter increases. Thus, the secret to finishing a game is to deal with problems in small amounts and without letting them pile up all at once.
Take a look at these tutorials for more advice on planning a gamedev project:
Game development is about the trade-offs — great games don’t have to do everything, they just have to a limited number of things well. — Patrick Wyatt
Because of this, it is extremely important that you do not skip this level and head straight into development (Level 3). If you did, you would encounter hard problems that would cause you to quickly become demotivated and stop. If you’ve played the Halo series, just think about how hard the game would have been if you encountered a Hunter pair during the first level of your first playthrough. You would have been hard pressed to continue playing if you kept dying over and over again to these massive obstacles.
This is why the main encounter for this level is a desire to stop planning and begin coding. Again, it is important that you plan out as much as you can before you begin coding. For you to have the greatest chance of finishing your first game, you must resist this urge and stick to Level 1.
The boss fight for this level is questions. If you review all your notes and you can’t think of any more questions, then you are ready to move on to the next level. If, however, you read over your notes and you still have a couple of questions about how things will work, you should probably work those out before moving on.
There are times when you can’t answer a question because it deals more with balancing issues rather than functional issues. In this case you are also probably ready to move on to the next level.
If I had planned out my text based adventure game properly, I would have mapped out the entire game, decided what all the items the player could purchase would be and where they could purchase them from, designed all the monsters and dungeons, and even figured out which loot would be dropped where and when. That’s a lot of detail that should be planned out before coding! For this reason, I don’t recommend making a text adventure game as your first game. Start small.
Design is a process, not an outcome. — Christopher Simmons
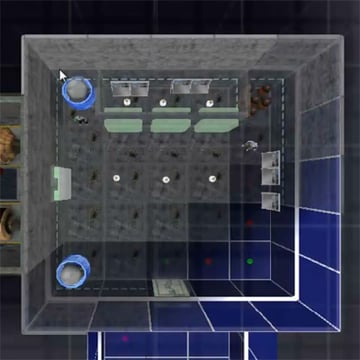
The second level of game development is prototyping. In this level, you test out the core mechanics and features of the game to work out any balancing issues. You want to flesh out your ideas quickly by using low fidelity prototyping so that you can know before you start coding what will and will not work.
If a game is fun to play at this level, you know it will be fun to play when it is finished. Remember that you will be playing this game a lot as you code it, so you’d better make sure it’s fun!
No matter what your score is, you’ll enjoy it, and want to play it again. — Stan Jarocki
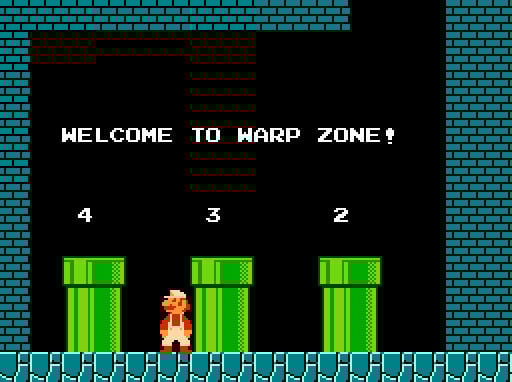
Even though this is Level 2, it is very common to prototype ideas as you are writing them down in the planning level. Now you are probably thinking: “hold on – you just told me that I shouldn’t skip levels, but here you are telling me that I can skip to this level!”
Think of it like level skipping using the secret warp pipes in Super Mario Bros. The first time you play the game, you’re probably going to play each level in order. It isn’t until the second or third playthroughs that you use the warp pipes to finish the game faster. The same thing applies with Levels 1 and 2, except that going back and forth between planning and prototyping helps you flesh out your ideas faster.
Levels 1 and 2 are interchangeable, as long as you don’t progress to Level 3 before you are ready. Maybe you want to test out your core mechanic before you spend more time on details. Perhaps you want to test out a new feature of your game to ensure that it will work as intended. These are all good reasons to want to prototype while you plan; just ensure that each prototype only focuses on one thing at a time, and that each time you prototype the gameplay it’s still fun.
Great gameplay is a stream of interesting decisions the player must resolve. — Bruce Shelley
There are two encounters that you will most likely face in this level. The first is again the desire to just skip to the next level and start coding. The second encounter will be a desire to create higher fidelity prototypes. As good as high fidelity prototypes are, they are a dangerous path as they will increase your desire to start coding when you are not ready. To fight this battle, stick to quick rapid throwaway prototypes.
You can build prototypes without any code at all if you use a beginner-friendly gamedev tool like GameSalad or Construct 2. Here are a few tutorials to help you get started with those:
The boss for this level is completeness. When you practically have the entire game planned out and fleshed out using prototypes, you are ready to move on to the next level. You want to have a good idea of how the game will play out from start to finish so that you are not dealing with these problems while coding. Again, the less problems you have while coding, the more likely you are to finish your game.
Prototyping my first game would have involved balancing the game. This includes the combat system, how much items should be worth and how much bonus they should give the player, all the stats for both the player and the monsters, and even details such as story and quests. Again, there are a lot of details that go into making an RPG that need to be worked out before coding.
Before you start the programming part, cut 90% of your intended features. — Ian Schreiber
The third level, developing, is the most difficult level to complete. It is here that many developers lose their motivation and their desire to keep going. But fear not! With the first two levels successfully completed, you should be well on your way to finishing your game.
To begin this level, you will want to figure out what platform you want to release your game on. Will you release it for the Xbox, as a mobile app, or as a web game? After you have chosen your platform, choose a development engine or programming language that will work for this platform.
This can also be done in the reverse order, if you are comfortable with a development engine or programming language. Your platform will then be determined by the capabilities of your chosen engine or language.
To help finish this level, look for “power-ups” like free code libraries, free game assets, and free online resources. Don’t try to reinvent the wheel; instead, use what is freely available to help you finish this difficult level.
‘I can’t draw’ — use clipart. ‘I can’t make sound’ — Google MIDI files. ‘I can’t code well’ — no-one cares, you don’t need to. — Rob
The main encounter for this level will be problems and discouragement. There will be times where you encounter a problem to which you don’t know how to solve. You will also become discouraged the more you work on your game as it doesn’t live up to your high expectations.
To fight this encounter, you must press on! If you have to, take a few days off from your game when you get stuck. This will allow your mind to clear and fresh new ideas to enter. Usually just sleeping on the problem helps you to find a solution the next morning. Don’t work yourself to death; pace yourself so that you don’t become too stressed or discouraged.
If you are trying to solve a really hard problem, stop. Solve a simpler problem that accomplishes the same things. — Daniel Cook
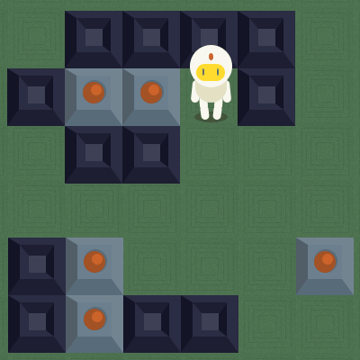
The boss for this level is a game. The game doesn’t have to be perfect or even fully finished, but it should be something that you could release and would want people to play. Once you have that done, you are nearly finished with your game.
If I had planned and prototyped before I started coding, I could easily have done more than just a single town. I would have know exactly what to code and how to code it beforehand, making it really easy to get more things completed quicker. I wouldn’t have struggled as I tried to figure out the layout to my town, deciding where to put the shops and quests, and so on. As it was, I tried to do all of this while simultaneously trying to learn how to code and make a game. Work within your limits.
Christer Kaitila has some great advice on building games quickly, thanks to his experience building one game a month:
The final level of game development is release. This level is not nearly as hard as Level 3, but it is still challenging. For this level you need to get people to play your game and to give you feedback. Based on this feedback (taken with a grain of salt), make changes that you feel will make the game more fun.
The main encounter for this level is dealing with criticism. There will be people that just don’t like your game. This is fine. Don’t let those people tear you down just because they feel the need to voice their opinion. What you will need to do is learn to focus on the people that do like your game and encourage them to keep playing, asking for their help to make it better.
The point of making games isn’t to see who is better at making games, it’s to make what you want to make. — Rob
My first finished game.
The final boss for game development is a game that you are proud of. It doesn’t have to be any good (and, honestly, as it’s your first game it probably won’t be), but you made it! You made a complete game from start to finish, which is not something a lot of people can say.
Every game developer will have a ‘bad’ game. If not yet, at some point. All of us. Things happen. — Brenda Romero
I may not have finished my first attempted game, but I am still proud of it to this day. It taught me a lot about game development and I was doing what I loved. Remember, success is paved by a road of failures. Don’t give up!
Making your first game is an exciting and fulfilling experience. And yet, it is very common for game developers to not make it through their first game, abandoning it for another game they also may never finish.
By following these four levels of game development, you help increase your chances of finishing your first game by knowing what the road ahead looks like and knowing how to deal with them. Now go out there and make your game!