Dusk is a terrific 90s-inspired horror-action shooter that, as of this writing, is rated Overwhelmingly Positive on Steam. Published by New Blood Interactive, it achieved that popularity with a combination of evocative mood, fast-paced action, and a visual style that hit the nostalgia bullseye.
After years in development including a period in Early Access, Dusk finally hit full release a month ago. We talked to creator, programmer, level builder and game designer David Szymanski about this successful Quake homage. Szymanski explains his game in his words…
At first yeah, before we watched anyone play or got the game into players’ hands. You get thrown into the deep end from moment one.
But it’s sort of a fake deep end. You have plenty of health and morale (Dusk‘s version of armor) and room to kite enemies around, and even if you do end up dying once it’s pretty obvious what you have to do the next time around. Provided they were on an appropriate difficult level and provided they have at least some basic knowledge of standard FPS controls, I don’t think I’ve ever seen a player die there more than once or give up without getting past the first room.
It’s kind of an anti-tutorial. It is giving players a chance to warm up: it gets them familiar with the basic controls, movement speed, and enemy behavior. Just in a way that encourages them to immediately engage with the game instead of spending 15 minutes responding to onscreen tool tips.
I don’t think it’s the sort of thing that would work for every game but for Dusk, a game about getting back to basics and trimming the fat, it felt like an appropriate start.
My go-to answer is always “pick any game from about 1993 to 2001 and it’s probably inspired Dusk in some way.” Obviously all the big ones: Doom, Quake, Half-Life, Duke, Blood, etc., etc., etc.
But lesser-known ones also. Like, the blood effects do the “particle arc” thing you see in older Lithtech games like Blood 2 and Shogo. Several levels take cues from Daikatana (yes really!). The climbing powerup was partially informed by the Alien in AvP/AvP2.
I basically just went nuts taking elements I liked from various 90s shooters and either referencing them or wholesale stealing them. And from other sorts of games too, from other eras. There’s a lot of Deus Ex and Thief in Dusk, as well as STALKER and even some Condemned. And that’s without even getting into Dave’s contributions: there’s an entire level layout pattered after a dungeon in Planescape: Torment, for instance.
…The reasoning [Dusk evokes classic FPS graphics] was twofold: first, I am one guy and I make my assets either from scratch or as near to scratch as I can get. Making it look like Doom 2016 was never an option. Second, I just really really love that low poly software rendered look. Even a decade ago when it was both woefully out of date and a long way from being fashionably retro, I adored how games like Quake and Chasm: The Rift looked. It’s a bit more in vogue now but when I started Dusk four-ish years ago, I think the only other game really shooting for that same thing was Strafe.
There wasn’t an established “this is new-school early 3D throwback art” look (or if there was I wasn’t seeing it), and I couldn’t find anything in the way of tutorials outlining old school modeling/texturing workflows/tech, so I basically just pored over old games staring at walls and floors and looked over Quake model UVs and tried to reach some sort of aesthetic that mooshed everything together. While, simultaneously, learning to draw textures and model things other than blocky buildings.
All that to say that Dusk‘s look is a product of both a purposeful aesthetic direction and my own weaknesses and inexperience. Which is why yeah, maybe some of the models ended up looking blockier than Quake, and some of the textures don’t pop quite as much or tile quite as well or communicate as much detail. But at the end of the day it all looks like Dusk, which I think is just as important.
We’ve definitely gotten complaints about visuals not measuring up to Quake in some areas, or to newer mods like Arcane Dimensions, and of course every so often there’s someone who just plain old isn’t on board with an early-3D look, but none of those seem to have affected the game in any meaningful way with critics or our audience, which I am very grateful for.
The idea that you have to chase cutting edge graphical tech to attract players, or as insurance against bad reviews, seems really outdated to me. We’ve had years now of lower-fidelity or even downright ugly games going toe to toe with high-fidelity professional-looking efforts.
One of the highest rated first person shooters on Steam right now is Blood and Bacon, which a passing glance could also mistake for a relic from the 90s. The greatest “bedroom programmer” success story of our generation—Minecraft—released long before low-fidelity visuals were mainstream acceptable. Five Nights at Freddy‘s looked like it could have been a budget pre-rendered point and click adventure from the early 00s. Undertale‘s basic monochromatic pixel art won hearts and minds over other games with lavish spritework. Meanwhile I’ve seen technically impressive games with middling reviews and/or very little audience draw.
Players don’t care about graphics tech as much as we think, or even probably as much as they think. Years of indie darlings have granted mainstream acceptance to lo-fi or below-par visuals, while simultaneously the rise of Unity’s asset store and Unreal’s Marketplace have normalized the high-poly/PBR-shiny look and eliminated players’ ability to judge a game’s merit based on its graphical quality.
In fact I’d say the opposite is true now. As a player, when I come across a game I’ve never heard of with a lot of high-quality assets in the screenshots and a standard acceptable art style (i.e something that could be of general use as an asset pack for a wide variety of different games), I generally assume that’s either someone’s first game and it’s jankily assembled from purchased assets, or it’s a straight up flip of an asset pack, unless something suggests otherwise.
Right now at least, in 2019, I believe it’s more important to stand out than it is to check all the boxes for what makes “good graphics.” It’s basically impossible to determine whether Dusk‘s look contributed to its success or not (who knows, maybe if it looked less like garbage it would have been the next Undertale!). But I will say this: nobody’s ever going to mistake Dusk for an asset flip. For better or for worse.
Nope no real modding experience, other than messing around with the level editor for Chasm for a few weeks as a kid, and of course the few odd Doom maps every has lying around from their childhood/teen years. Dusk is the first game I’ve made with like… actual 3D LEVEL levels, and it was quite a learning experience.
A lot of trial and error and you can kind of see everything I learned moving through each episode (a lot of the geometry in episode one is woefully basic compared with later levels). I used ProBuilder for everything, which was a third-party plugin when I started Dusk, but has since been integrated into Unity.
Heh well I don’t know that Dusk‘s endless mode quite manages to do that. It was never the main focus of the game or the main draw, so it’s not as polished a wave-based experience as you’d get in, say, Devil Daggers. At a certain point the difficulty flatlines and it’s just down to how long you can keep going without making a dumb mistake.
It’s pretty fun as a casual time waster, but a skilled player can definitely go for a long time without being overwhelmed (earlier in development one fan asked if we’d put his name in the game if he managed to get a certain score. He was able to continue playing for hours on end, and was only stopped when Dusk itself crashed, probably due to the number of corpses onscreen. He didn’t quite reach the score he wanted, but we added his name in anyway. And then we gave him a job as a QA tester :D).
Biggest movie influence would probably be The Texas Chainsaw Massacre, which is my favorite horror movie (the original 1974 one, not the remake). A lot of that in episode one, with the most obvious reference being E1M1 which is named after the film’s working title. Then there’s also the heavy Lovecraft influence and references later on. He’s one of my favorite horror authors, and it just so happens that with Quake being so Lovecraft-tinged that serves as another nod to retro FPS.
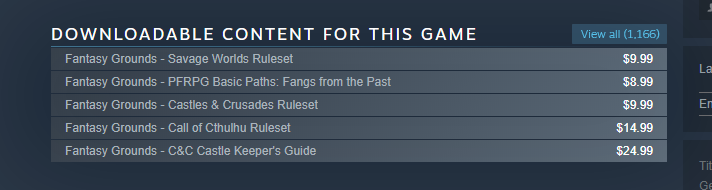
We’ve just rolled out an update that makes it easier to find downloadable content for your favorite games. Any game that offers DLC will now have a sortable, featured page of all of its DLC in one place. Furthermore, (and especially for games that have a tons of DLC) we’re providing ways for developers to customize how these pages by creating lists, adding branding and specifying which titles to feature.
The following blog post, unless otherwise noted, was written by a member of Gamasutras community. The thoughts and opinions expressed are those of the writer and not Gamasutra or its parent company.
Edit: gave more nuanced advice on ADPCM, added some details that were missing, re-phrased some unclear wording, and fixed a mistake in the Venn diagram that erroneously listed Uncompressed on Disk as being a low-RAM option.
Unity’s audio import settings are not widely understood in their entirety, and at the time of writing, I have been unable to find any comprehensive guides to their use. Unity’s documentation does a pretty good job of describing what its audio import settings do, but I would like to break these descriptions down for a wider audience, and give some more detail on how to use these settings to get better performance out of your game.
Optimising your Unity audio import settings is one of the easiest wins for optimisation, and depending on the scale of your project, should take you less than an hour to achieve significant improvements in load times, RAM use, and other areas. I hope this guide will be of use to you. Info is current as of Unity version 2018.3
Audio data is big. For many games, sound data can take the lion’s share of disk space (the drive/cartridge/optical disc/etc that the game data is stored on) and RAM (the working memory of the system). As if this weren’t bad enough, it can also take a strain on the CPU – especially if you’re using DSP (runtime audio processing) effects – and significantly increase load times.
For three of these areas (disk space, RAM use, CPU use) optimisation is a triangular tug of war, like the good-cheap-quick problem. Depending on which area is causing your game the most trouble, you can save efficiency in one area by sacrificing it in another. For example: if your raw audio is taking up too much RAM, you can store it compressed as Vorbis instead – this saves RAM space at the cost of the CPU, since it takes processing power to decode the compressed file when it is accessed. Below is a diagram of different settings and how they affect these three areas:
Please note: This diagram tells us nothing about the bandwidth of data being accessed from the disk/RAM.
In reality, it’s a little more nuanced than that, but this should give you a general idea of how these issues are interconnected. To understand how to implement these settings (and tackle problems like extended load times), we need to look at each of the audio import settings in detail.
When you select an AudioClip in the Unity editor, you are greeted by this panel in the inspector window:
Below is a list of the audio settings from top to bottom, and what they do:
Force to Mono
Yes: if AudioClip is in stereo (or another number of channels), downmixes all channels down into mono.
No: does not modify channel count.
As an audio designer, I never force to mono, because I create sounds for purpose. But if you are using stock assets and want to enable this setting, be careful to check that the mono-summed file doesn’t sound thin and weird because of phase interactions between the left and right channels. You can preview the processed sound by pressing the Play button on the bottom-right of the inspector window – if you are getting phasing issues, you may want to pull the sound apart in an audio editor and export just the left or right channel as a mono sound.
Normalize (only applicable if Force to Mono is enabled)
Yes: readjusts the gain of the AudioClip so that the now-mono sound is the same volume as the original stereo file.
No: does not readjust the gain.
It is usually advisable to enable normalization if you’re using Force to Mono. A loud stereo file when summed to mono can be even louder, going above maximum amplitude and causing hard digital clipping, which is usually undesirable.
Load in Background/Preload Audio Data
These settings have direct effects on each other, so I’m presenting them together
Load in background
Preload audio data
Outcome
Enabled
Enabled
When the scene is loaded, AudioClips with this setting begin loading but do not stall the main thread. If they have not all finished loading by the time the scene has loaded, they will continue to load in the background as the scene plays.
If a sound that hasn’t loaded yet is triggered, it will behave the same as if it had Preload disabled (see immediately below).
Enabled
Disabled
When the sound is triggered for the first time, it will load in the background and play as soon as it is ready. If the file is large, this will cause a noticeable delay between triggering and playing, but this is not an issue for subsequent plays of the sound.
Disabled
Enabled
The audio is loaded while the scene is loaded. The scene will not start until all sounds with this setting are loaded into memory.
Disabled
Disabled
When the sound is triggered for the first time, it uses the main thread to load itself into memory – if the file is large, this will cause a frame hitch, but this not an issue for subsequent plays of the sound.
I would only recommend this for very small files, and even then, make sure to measure the impact this has on performance in the profiler, and consider whether a large number of these sounds might possibly be triggered at once, multiplying the hit to performance.
Ambisonic
Check this box if the clip has ambisonic-encoded audio. Ambisonic audio is useful for VR, AR, and 360 video etc, but it’s not really germane to this guide.
Platform-specific settings
These tabs let you specify a default setting and platform-specific settings for the settings below. Some platforms have compression formats that aren’t available on other platforms, and some might just have different hardware that requires you to optimise differently. See Notes below for more on platform-specific compression formats.
Make sure to check the platform-specific settings, even if you want everything to use the general settings – Unity may set some platform-specific settings for you automatically. For example, iOS builds may default to “specify sample rate: 22kHz”, which can cause aliasing (a sound glitch introduced by downsampling incorrectly).
Load type
Decompress on Load: audio is stored on disk in the Compression Format specified, but is decompressed and loaded raw into RAM as PCM. This takes up a lot of RAM and increases load time a bit, but is very cheap in terms of CPU and very fast to access.
Compressed in Memory: audio is stored both on disk and in RAM in the Compression Format specified. This takes less RAM and less load time, but costs CPU when the sound is played, as it needs to be decompressed on the fly each time it is played.
Streaming: Audio is streamed directly off the disk without going into RAM at all. This uses some disk throughput and CPU, but on PC/console, it does not have a huge impact on performance so long as there are no more than two sounds streaming simultaneously. On mobile (particularly lower-end and old devices) streaming more than one stereo audio file simultaneously starts taking a heavy toll on CPU use (see Warnings below).
Compression Format
PCM: straight-up raw audio data, fully uncompressed and takes up loads of disk space and RAM, but playing it is basically free because it does not need to be decompressed.
ADPCM: very old compression format with a compression ratio of 3.5:1. Pretty cheap to compress/decompress compared to Vorbis or other compression formats, but introduces digital noise artifacts into the sound, so should only be used for noisy sounds in which this would not be noticed. If you are unsure whether ADPCM is right for a particular sound, preview the sound in both PCM and ADPCM formats – if you hear a difference, I recommend going for PCM instead.
Vorbis: compressed format which is compatible with most major platforms. Can handle quite high compression ratios whilst maintaining decent sound quality, but is somewhat expensive to compress and decompress on the fly.
I’ve only listed the editor default formats here, see Notes below for platform-specific types and more on compression formats.
Here is a quick comparison of the CPU use of different formats on my PC in the Unity editor:
Compression format
CPU usage with 1 voice
CPU usage with 6 voices
PCM
~0.05%
~0.3%
ADPCM (compressed in memory)
~0.2%
~1.0%
Vorbis (compressed in memory)
~0.5%
~3.2%
Quality (does not apply to PCM/ADPCM)
70-100%: Practically indistinguishable from full quality PCM to all but audiophiles with expensive audio equipment
1-69%: Varying degrees of quality, the lower values introducing a lot of gross noise artifacts, removing dynamic, and making the audio sound flat and lifeless. You can use the preview button in the inspector pane to see how noticeable the drop in quality is for that particular sound.
These quality settings are assuming that the sound will be played at 100% speed, so it cuts out some upper frequencies which are usually outside the range of hearing, but would be shifted down into hearing range of the sound is played back at a lower speed. If you plan on playing back a sound at a low pitch/slow speed, consider encoding as PCM instead .
Lower and lower quality levels give diminishing returns:
Vorbis quality
% of original size
Compression ratio
100
~20%
~5:1
75
~10%
~10:1
50
~7%
~14:1
25
~4%
~25:1
1
~2%
~50:1
Sample Rate Setting
Preserve: Just uses the sample rate at which the sound was made.
Optimise: Unity analyses the audio for the highest frequency that it contains, then uses the Nyquist theorem to determine the lowest sample rate that can be used without losing any of those frequencies. E.g. if the highest frequency that the sound contains is 10kHz, the sample rate can be lowered to 20kHz without any loss of sound content. This setting can only be used with PCM/ADPCM.
Override: If you want, you can manually apply a new sample rate to the AudioClip. I generally would not recommend this unless you know what you’re doing.
Type of sound
Load in background
Load type
Preload audio data
Compression format
Quality
Sample rate setting
Notes
Dialogue
Y
Compressed in memory
Y
Vorbis
70
Preserve
Environmental long loops
n/a
Streaming
n/a
Vorbis
70
Preserve
Environmental one-shots
Y
Decompress on load
Y
Vorbis
70
Preserve
Foley
N
Compressed in memory
Y
PCM
n/a
Optimise
Sample rate should be preserved if these sounds are ever pitched down
Footsteps
N
Compressed in memory
Y
PCM
n/a
Optimise
Music (long pieces)
n/a
Streaming
n/a
Vorbis
85
Preserve
Streaming might not be appropriate if you’re playing many music tracks simultaneously
Music (stingers)
Y
Compressed in memory
Y
Vorbis
85
Preserve
Non-dialogue vocalisations
Y
Decompress on load
Y
Vorbis
70
Preserve
Special FX (short)
N
Compressed in memory
Y
PCM
n/a
Optimise
Sample rate should be preserved if these sounds are ever pitched down
Special FX (long)
N
Decompress on load
Y
Vorbis
70
Preserve
UI sounds (long)
Y
Decompress on load
Y
Vorbis
70
Preserve
UI sounds (short)
N
Compressed in memory
Y
PCM
n/a
Optimise
These suggestions should work well for games with up to about 10,000 AudioClips. I’m suggesting Decompress on Load for most sounds, which means they will be stored as raw audio data in RAM. If the total combined file size of your uncompressed audio files is greater than your RAM limitation, you may want to change your longer files to Compressed in Memory – but be aware that this will introduce a small CPU overhead each time one of these sounds are triggered.
Type of sound
Load in background
Load type
Preload audio data
Compression format
Quality
Sample rate setting
Notes
Dialogue
Y
Compressed in memory
Y
Vorbis/MP3
50
Preserve
Environmental long loops
Y
Compressed in memory
Y
Vorbis
35
Preserve
Use higher quality for non-noisy sounds
Environmental one-shots
Y
Decompress on load
Y
Vorbis/MP3
50
Preserve
Foley
N
Compressed in memory
Y
PCM/ADPCM*
n/a
Preserve
Footsteps
N
Compressed in memory
Y
PCM/ADPCM*
n/a
Optimise
Music (long pieces)
n/a
Streaming
n/a
Vorbis
70
Preserve
See Warnings on streaming below
Music (stingers)
Y
Compressed in memory
Y
Vorbis/MP3
70
Preserve
Non-dialogue vocalisations
Y
Decompress on load
Y
Vorbis/MP3
50
Preserve
Special FX (short)
N
Compressed in memory
Y
PCM/ADPCM*
n/a
Optimise
Sample rate should be preserved if these sounds are ever pitched down
Special FX (long)
N
Decompress on load
Y
Vorbis/MP3
50
Preserve
UI sounds (long)
Y
Decompress on load
Y
Vorbis/MP3
50
Preserve
UI sounds (short)
N
Compressed in memory
Y
PCM/ADPCM*
n/a
Optimise
*See the description of the ADPCM compression format above in the Understanding the settings section if you are unsure about whether to use PCM or ADPCM. If you are not desperate to save disk space, I would advise erring on the side of PCM.
These suggestions should work well for most mobile games, or at least serve as a jumping-off point. If you think the settings above might not be right for your game, have a look at the full descriptions of settings above.
Warnings
Streaming multiple audio files at once is relatively light on CPU use for PC and consoles, but can present a big problem on mobile – especially low-end or old devices. Below is a chart of measurements I took using Unity’s profiler, comparing the effect of streaming multiple audio files on various Samsung Galaxy phones and my own PC. The first chart shows 1-12 simultaneous streaming audio sources, the second is a zoom-in on sources 1-3.
If a sound is set to Decompress on Load, using Vorbis compression will only make it 1/10th of the size on the disk, not the RAM, which still stores the raw PCM data. If you set the sound to Compressed in Memory, you do get the RAM saving, but at the cost of CPU to decompress it on the fly.
Every load type except for Streaming will by default load audio data into RAM and leave it there until the scene is unloaded. If you are running your whole game in one big scene, this could fill up all of your available RAM. To make matters worse, manually removing AudioClips from RAM is hugely inefficient and can cause a frame hitch, as can leaving it up to garbage collection. If you have a lot of audio data, you may want to optimise for lower RAM use by sacrificing in other areas, utilising Unity asset bundles. The Preload Audio Data setting has no bearing on this either, as it only determines when the data is loaded into RAM, not what happens to it afterwards..
If your target platform supports the MP3 format, be aware that it does not automatically loop seamlessly, so I do not recommend using MP3 compression for atmospheric or music loops. Because of the way MP3’s are encoded, silent padding is often added to the end of the file to make the overall number of samples perfectly divisible by “frames” of 1,152 samples. There are ways to create seamless loops with MP3’s – but that’s for another guide.
Disabling Preload Audio Data and enabling Load in Background will make a large file play late, but will not cause a CPU spike. This is because it takes time to be loaded but is also not stalling the main thread.
Disabling Preload Audio Data and disabling Load in Background will cause a large file to stall the main thread when the sound is called for the first time. However, this is not an issue if you are using FMOD, which runs decoding on a separate thread.
Notes
Compression formats:
Always make sure that the files you are about to import into Unity are in an uncompressed format like WAVE (.wav) or AIFF (.aiff). Many compressed formats are lossy, which means that information is lost when they are encoded. If you import a compressed file such as an MP3 or Vorbis into Unity, Unity will first decode it into an uncompressed format, then re-encode it into whichever format you select – even if it’s the same format that you started with. This can introduce more compression artifacts, which are generally undesirable.
There is a great write-up on various audio compression formats, their pros and cons, and which platforms support them in the documentation for AudioKinetic’s Wwise middleware.
If you’re using FMOD, you have access to its FADPCM format, which is a vast quality improvement upon the old ADPCM format. However, this is not built into standalone Unity.
You may want to use MP3 instead of Vorbis on iPhone, for example, as it has a hardware MP3 decoder which saves your CPU from having to deal with decompressing MP3 files stored in RAM or on the disk. But beware that this may not be appropriate for looping sounds (see Warnings above), and that it can only decode one MP3 at a time. If multiple MP3’s need decoding simultaneously, these will be done in software just like Vorbis. This shouldn’t present any major issues, but it is worth noting that MP3 decoding is slightly more CPU-intensive than Vorbis decoding.
If your target platform is Playstation 4, the ATRAC9 format offers a fairly high compression ratio with less CPU overhead than Vorbis or MP3.
Likewise, for Xbox One, Microsoft’s XMA format will serve well instead of Vorbis or MP3. Microsoft recommend a compression ratio of between 8:1 and 15:1 for the best performance and quality.
Misc:
In the Suggested Settings tables, I’ve listed some sounds with PCM as their compression type (actually uncompressed) and Compressed in Memory as their load type. Using Decompress on Load would also be fine, I’m just pointing out not to set these sounds to Streaming.
Some middleware solutions such as FMOD and Wwise have their own way of handling audio importing, making these Unity settings redundant (unless you also want to run some sounds without using the middleware, for some reason).
The sound types in the Suggested Settings tables include the category “Foley” which may be cause for argument, since it’s a film term with a very specific meaning, and by rights probably shouldn’t be used in games at all. However, I think it’s the most fitting term for the various sounds associated with the physical interactions between characters and objects in a game.
Although various target platforms have native Sample Rates, Unity plays around with mixing and matching sample rates all the time. What this means is that whenever a sound is played at a speed other than 100%, or if a sound is imported using Optimise Sample Rate, then the console/device has to do its own sample rate interpolation on the fly, to make everything come out at its native sample rate. This is usually a negligibly cheap operation, even on mobile, but could potentially pose a problem for some platforms, depending on how they handle it.
This guide has been compiled using the best of my current knowledge, but if you feel like there is something missing, incorrect, or not as well explained as it could be, let me know in the comments. I’m very grateful to Aaron Brown, Anne-Marie Weber, Brett Paterson, Chris Webb, Dan Treble, Frederik Max, Jeff van Dyck, Josh Sanderson, Kirk Winner, Maize Wallin, and Maris Tammik for sharing their knowledge and giving honest feedback on this guide, and to Kieran Lord for seeing my optimisation notes and saying “you should publish that!”
A new exhibition exploring the queer history of video games from 1985 to 2018 has opened at the Schwules Museum in Berlin.
Christened ‘Rainbow Arcade,’ the major exhibition will encompass over 30 years of media history, and will spotlight playable titles, concept art, fan-made mods, and documents from notable online communities.
It will also feature research from the LGBTQ Game Archive, and will attempt to dig into questions surrounding representation, cultural memory, and stereotypical and discriminatory narratives in entertainment.
“Rainbow Arcade asks not only how social discourses and developments have been reflected in video games, but also if there has been any major progress in regards of LGBTIQ+ representation in entertainment media,” explains a press release.
“In addition, the exhibition explores issues regarding our digital memory and the unique challenges posed by digital culture to archives and institutions and the archival absence of contemporary queer media history.”
Rainbow Arcade will run until May 13, with some guided tours being provided in English (for those of you worried about a language barrier). You can find out more about the exhibition over on the Schwules website.
The following blog post, unless otherwise noted, was written by a member of Gamasutras community. The thoughts and opinions expressed are those of the writer and not Gamasutra or its parent company.
I keep writing about “deep gameplay” and how it needs “complex verbs”, i.e. mechanisms that go beyond probabilities, progress bars and damage numbers. But how exactly do those systems work then? This article will explore one possible answer to this question: space.
Gameplay can get strategically interesting when you cannot “simply” calculate everything, i.e. when factors are involved that cannot, or at least not easily, be turned into some kind of “points” or “score”. If that would be possible, you would basically be facing a math puzzle. Of course that might be interesting in itself, but rather in terms of computing the correct solution and not so much in terms of intuition and decision-making.
Should the latter elements be supposed to be the game’s core, offering strong spatial interactions can go a long way in moving it away from “flat” arithmetic. Positioning and movement in space or even aspects such as momentum or inertia are essentially complex resources that can, quite literally, be “played with”. Obviously they are ultimately based on math as well, but a form of math that is both more complex than mere subtraction and yet also intuitively accessible for human beings.
This base complexity can furthermore be used to foster an emergent interplay between gameplay elements and thereby create even more depth without having to resort to more and more convoluted math. Of course the verbs in the game, i.e. the actions players are able to perform, have to be tightly connected to the game’s spatial structure, so they can properly support it and give it meaning. Dealing damage, filling bars or the much-loved mass extermination of actors in the game world usually do not belong in this category. The same goes for mere asset tourism.
The following sections will take a look at some concrete examples on how to do it better. The games described below offer strongly spatial possibilities of interaction and consistently manage to align the design of all gameplay elements in support of this aspect.
In Heat Signature you enter procedurally generated spaceships and, by making use of a diverse set of gadgets, try to reach a specific target object or person. Almost everything in the game is centered on movement. For example, there are multiple types of teleport gadgets that e.g. allow you to swap positions with an enemy (“Swapper”), to instantly move through open corridors and doors (“Sidewinder”), or to jump to any position within a certain radius for a short amount of time (“Visitor”). The “Key Cloner” lets you steal key cards if the guard carrying them is in range. Luring enemies into the “Glitch Trap” will move them to another spot, often directly into outer space. And the “Slipstream” makes everyone act super slowly – except for yourself. More agility, more options.
These are just a few examples of the verbs in the game but one thing is pretty clear already: There is no flat number crunching. Enemies, just like your avatar, do not have “health points” or “stats” and do not “deal damage”. The focus of the game lies on finding creative ways to bypass them or, if needed, take them out unnoticed in one hit. Most of the time you will not have a huge arsenal of weapons to achieve this. Hence one of the simplest tricks in the game is to let an enemy fire a bullet at you and then swap positions with him. A tactical option enabled by consistent rules and spatially meaningful verbs. Emergence.
Situations in the game can quickly get much more complex though. Therefore you always have the ability to pause the game, analyze what is going on, plan your next steps and even execute the first one of those directly from the pause menu. However, that will not make things super easy. It is just another design decision making perfect sense in the context of the core game and its depth. Players are supposed to plan ahead and think about which actions make sense in a given situation, instead of merely being challenged by their physical execution.
Spelunky is a modern classic and regarded as a game design masterpiece. Rightfully so, since basically all the elements in the game are tailored to interact with moving around its incredibly hostile environment. It starts with the two basic items: Bombs allow you to reach sealed off areas or create new connections. Ropes can be used to move upwards, which goes against the natural gravity-based direction the game usually takes. The same is true for climbing gloves and the iconic jetpack that additionally increases your horizontal reach. Jumping boots increase your jumping height. The mattock can manipulate a level’s layout. Spike shoes prevent you from sliding over ice blocks.
But it is not just the items. The behavior of each enemy and every trap in the game has an immediate spatial impact and frequently forces you to reconsider how to move forward. You cannot land on spikes or stand next to a tiki trap for too long. Boulders need to be dodged. Arrow traps can be triggered by throwing rocks or other objects into their line of sight. Crush traps try to, well, crush you in a straight line. Spiders jump around, bats can fly. Tiki men throw boomerangs that return to them on the same path. Mummies vomit poison that can make a whole corridor impassable. And so on.
Again, all these elements are spatially meaningful and follow clearly defined rules that can then be combined in all kinds of ways to generate a large variety of interesting situations and confront players with new challenges. Therefore it makes perfect sense that the procedural level generation is often praised as one of Spelunky’s greatest achievements.
At first sight, Invisible Inc. and XCOM have a lot in common. You take turns, leading a squad of characters with certain specializations through a grid of square tiles. But that is basically it. Where XCOM goes on to rely on hit probabilities and rolling damage numbers, Klei Entertainment’s title focuses much more on dynamics and level layouts.
Once again, enemies in Invisible Inc. have no hit points and lethal weapons are not only extremely rare, but also punish players by increasing the alarm level on every kill. Typically you will only use them in cases of emergency and try to deal with patrolling enemies in another way. The simples of which is to knock them out temporarily. However they then remain an active and spatially relevant element of the game world because they will wake up a couple turns later and furiously search their surroundings. Hopefully you took some precautions in the meantime!
In general traversing the levels of the game is based a lot on collecting information about the layout itself. Where are the cameras? Where can I catch enemies unprepared? Where should I place a trap? Which devices can I hack to increase my mobility? The alarm timer will also keep ticking up without you killing anyone. It pushes you forward and away from playing for safety. The game rewards clever, yet often risky maneuvers of efficient exploration. Of course the positioning of your units does play a role in XCOM as well, but one that is quickly reduced to mere arithmetic.
Other comparisons can be drawn within the realm of card games. Gwent for example has been hunting the holy grail of “row identity” for a long time now, trying to give the different rows on its battlefield as much meaning as possible. (By the way, this was a core design pillar of Crimson Company and also the recently released Artifact.) This aspect had taken a backseat during the game’s development in beta, where in most cases it didn’t really matter where you put a card on the board. With the recent full launch entitled “Project Homecoming” the team tried to put an emphasis on positioning again, e.g. by introducing effects that depend on which row a card is played on and by reducing the number of rows from 3 to 2, thus making the resource “space” more scarce.
The battlefield can get quite crowded in Minion Masters, too. However by making use of continuous space and real-time, it can go even further. Not only does the positioning of units matter when you play them, but also their autonomous behavior once they are in play. They follow very specific rules of movement. Some creatures are faster than others, some can fly past obstacles, some ignore certain enemies. The game quickly becomes a complex interplay of unit positions and mobility, always depending on the current state of the game.
Hearthstone does not have as much of a spatial structure: One row of up to 7 units, no movement. Compared to Magic: The Gathering though, the relative positioning of units can matter in some cases, e.g. when they buff adjacent targets. Prismata on the other hand refrains from using any kind of spatiality whatsoever. It simply arranges units and buildings on the screen in such a way that they can be easily perceived. Appropriately, it is the most mathematical of all mentioned examples, and arguably the least accessible.
Of course there are more examples worth discussing. The brilliant Portal is all about an unusual way of movement. Auro‘s design is a “clockwork” of spatial actions and abilities. The battle royale genre (Fortnite) is based on restricting players’ freedom of movement over time. And the core of every MOBA (League of Legends), i.e. pushing lanes, is a fundamentally spatial mechanic.
However, the overarching point should be clear by now: A design that is tightly focused on spatial interactions can quite easily lead to interesting gameplay situations, incentivize intuitive decision-making over hard mathematical solutions, and foster systemic emergence. Praise space!
The digital adaptation of popular board game Evolution has been on our radar for a while now – we were hoping it would turn up last year – but sadly it never materialised.
Looks like it’s a sure thing for 2019, however, and we won’t have to wait long! North Star Games’ digital arm, North Star Digital, has announced that Evolution will be releasing on both iOS AND Android on February 12th, alongside its PC release.
The physical game has been played by over 1.6 million people, so the digital version will have a lot to live up to. The press release mentions the digital game is “inspired by” the physical game, so don’t expect a straight 1:1 interpretation, but it sounds like they’re trying to make the best use of the potential of software:
…Evolution retains the elements which made the analog edition so popular with more than 1.6 million players worldwide but offers a swift pace and features only possible in a modern video game. Meticulously designed so even those who are completely unfamiliar with the original board game can jump in right away…
Evolution digital will be a four-player game, and will have the following features:
A Learn-as-you-Play tutorial.
A solo campaign mode with A.I.
Skill-based, cross-platform multiplayer with options for turn-based or simultaneous play.
No mention of pass-and-play, which would be a shame but perhaps it’s something that might be added in in the future.
Evolution will be $14.99 / £9.99 on Steam, where-as both mobile versions will have a ‘free-to-try’ version, with the full game available for $9.99. It’s unclear whether this will be via an IAP or a separate app SKU, but we’ll follow up. There will be a 20% launch-discount during the first week.
The game enjoyed a successful Kickstarter campaign back in October 2017, where it raised over $100,000 USD.
Are you excited for the release of this game? Let us know in the comments!
We’ve just rolled out an update that makes it easier to find downloadable content for your favorite games. Any game that offers DLC will now have a sortable, featured page of all of its DLC in one place. Furthermore, (and especially for games that have a tons of DLC) we’re providing ways for developers to customize how these pages by creating lists, adding branding and specifying which titles to feature.
We’ve just rolled out an update that makes it easier to find downloadable content for your favorite games. Any game that offers DLC will now have a sortable, featured page of all of its DLC in one place. Furthermore, (and especially for games that have a tons of DLC) we’re providing ways for developers to customize how these pages by creating lists, adding branding and specifying which titles to feature.
Catherine: a tale of love, betrayal, and the terror of commitment. Experience the mature action-adventure-puzzle game unlike any other from the makers of the Persona series, now enhanced for PC in all its Classic glory. Is love over? Climb to the top or die trying.
The following blog post, unless otherwise noted, was written by a member of Gamasutras community. The thoughts and opinions expressed are those of the writer and not Gamasutra or its parent company.
I worked on Sausage Sports Club for 3 years and learned an insane amount in the process. I was incredibly lucky to be surrounded by experienced and generous game makers in that time who were willing to give feedback, advice, and help push me and my game forward every step of the way. I know few people have that privilege, so this post is to lower the ladder a bit and hopefully make making games a little bit easier. Here are the topics I cover in this post:
Design Pillars—Defining project goals to judge decisions against
Player Select—Lessons from refining first time user experience
Adventure Mode—Building replayable seasons of a procedural sitcom
Progression—Improving engagement and retention with juice
Level Design—Workflow optimization and encouraging exploration
Camera—Reducing complexity in a multi-target, zone-based camera
Design Pillars
Every design decision made along the way was based on a few design pillars I set at the start of the project. It’s not necessary to do this, but defining pillars is useful in deciding what game you’re trying to make and in giving some semblance of objectivity to making design decisions. When faced with any question in designing your game, you can always check whether they support these pillars.
My design pillars for Sausage Sports Club were:
Depth not complexity—Whenever possible, features should add depth without adding unnecessary complexity for new players.
Fun for low-skill players—Even the worst player should be able to laugh and have a good time.
Everything is funny—Everything added should push in the direction of making players laugh.
High intensity moments—Modes and features should encourage memorable, intense moments whether scripted or created by players.
Craftsmanship—Everything in the game should be polished, feel complete, and give the perception that a larger team made it.
Player Select
One aspect of the game’s UI design I’m conflicted on is the Player Select menu. Many people playing for the first time notice and comment that it resembles the Super Smash Bros’ Player Select. I was pretty annoyed by this because getting to that design was the result of solving small UX problems over many iterations. I spent a lot of time making changes to try and differentiate it more, but most of those changes added complexity and made the menu harder to use.
Looks a bit familiar, right?
Early versions of this menu front-loaded the customization process so players had to select their character, skin, team, and hat one step at a time through a small window where you could only see one option at a time. With 14 characters, 3–4 skins per character, 8 team options, and 60 hats, this was a long, burdensome process that was intimidating for new players and boring for decisive players. It became clear I needed to focus on reducing how much information new players needed to see before getting started, which meant fewer required choices and that getting through this menu should take as few clicks as possible.
Here are some ways I reduced complexity of this important initial menu while retaining the depth of customization:
Screen space is limited and showing the same information multiple times wastes it. Sausage Sports Club has a fairly large pool of characters to choose from, so it makes more sense to show all of them at once instead of forcing each player to cycle through them one at a time. I show a grid of all available characters in the center of the screen and each player’s individual information in widgets along the bottom of the screen.
Using a paradigm of cursors as each player’s avatar and tokens as each player’s selection has a lot of benefits. The most important of these is that it helps smooth the flow of getting into the game by allowing advanced players to help get newbies started. Before this change, when families with younger kids played, parents would often have to take their kid’s controller to help and I wanted to avoid that condescending break in game flow.
Having a cursor that’s free to move around the screen is also inherently more fun than locking your selection to a widget. It gives players room to play because they can steal from each other, change each other’s selections, and even hide tokens. It makes adding and managing bots easier since everyone can help pick characters for bots. It also establishes an interaction language that can be used in other parts of the game, like the Team Select menu which happens just before a match starts and lets players drop their token onto different team slices.
Team Select also uses the cursor-token paradigm!
Starting players off with tokens in-hand makes it so someone can play after only hitting one button to select their character. And if they’re overwhelmed and another player wants to help them, they don’t need to do anything or even pass their controller. If you can’t find your token, that’s fine too- the cancel button will retrieve it, even if another player is holding it.
Hiding advanced, optional customization and options behind small, relatively hidden buttons keeps them from distracting new, overwhelmed players without adding the extra complexity of a new menu. In Sausage Sports Club, players have advanced options like skins and player names that aren’t needed to play, but add depth for advanced users. By auto assigning the first available skin when a player picks a character, we let players get started without having to teach about skins or giving players too many choices before they’re ready. Player names are also auto-assigned because they carry player’s save data including hat progress and input rebinds but not until a player has played enough that those become relevant.
Some other notes about player names: Because Sausage Sports Club is family friendly I wanted to limit how dirty players could make their names. I noticed by limiting names to 3 characters, basically every curse word is left out and there’s a few bonuses. With only 3 letters, a much high proportion of the names you can make are funny without players having to be clever. This limit also gives a hard cap to how many players saves can be created, which keeps me from having to implement and communicate a cap even on platforms with limited save data size.
Here are the biggest lessons I learned from designing Sausage Sports Club’s first time user experience (FTUE):
Get players into the fun part in as few steps and with as little unnecessary information as possible.
Deep customization options are great, but don’t require them and let players discover them at their own pace.
If you can’t remove enough confusing complexity for beginners, add tools so other players can help.
Re-use interaction paradigms as often as possible to limit how much you have to teach.
Adventure Mode
At the halfway point of development, I had figured out the gameplay and art pipeline for everything, but was seriously worried about differentiating Sausage Sports Club from other local multiplayer games and especially that the game didn’t offer enough for solo players. To quell that fear I decided to add a campaign mode built for single-player and co-op with up to 4 players. I spent weeks deciding how it should be structured to add the most value, while keeping in mind the big limitation that I’d be the one writing dialogue, building environments, and coding everything. Once I’d weighed all the pros and cons, had a plan for Adventure Mode, and accepted it would add at least 6 months to my development, I decided scope up.
I’d already spent 1.5 years on the game and didn’t have any project-related debt, so why not follow through in making it the best thing I could and give it the best chance to succeed?
The Overworld!
So what is Adventure Mode? It’s a reality TV show where you’ll meet NPCs and help them solve interpersonal drama by competing in sports matches. On each day of the season, more of the Overworld will open up and give access to new biomes filled with toys and entrances new arenas. As you play, you’ll unlock new characters and skins, while also earning coins you’ll use to unlock hats. Most importantly, each playthrough holds new quests and arrangements of the Overworld meaning your adventure is always different. Elevator pitch aside, how does this work?
I knew there was a limit to how much content I could make alone, so instead of making one linear story that would only last one playthrough, I chose to make many short stories that could be re-arranged, interspersed with random sports matches, and replayed. I referenced sitcoms which similarly have short episodes, always feature the same characters, and can be watched for the most part in any order or combination without being too confusing.
To get the procedural sitcom feel I wanted, I wrote lots of quests; over 2x as many as I’d expect or want players to go through in one sitting. They all feature different combinations of characters, have their own 5-minute contained stories, and (for the most part) can be placed anywhere around the Overworld. When starting any day of the season I randomly grab a few from this pool of quests, making sure to only use any character once per day and to not reuse quests later in the season. Then I pick random locations to place them in the Overworld, which was important to encourage players used to linear games to go out and explore. A season requires players to go through 12 quests and the full pool is 26 quests, so you’re very likely to see lots of new quests for at least the first 3 or 4 playthroughs.
I’m pumped with where Adventure Mode ended up, especially that the structure feels so different from any other game and that every player’s experience really is unique, but the process of getting here was tough. All told, I spent another 18 months on the game after deciding to add Adventure Mode which is a lot more than the 6 months I first expected. Much of that was hustling at conventions, porting the game to Nintendo Switch, and moving to Austin to start a new job, but I definitely bit off more than I expected. Much of that extra time was spent redoing work after my first (or first few) versions sucked.
Here’s a few memorable spots where my first attempts at parts of Adventure Mode didn’t work out:
When I started building Adventure Mode I thought my bottleneck was going to be writing scripted sequences that would make quests feel unique, so I spent weeks building a visual node editor to speed up that process. I also had some hope that I’d be able to hire a non-programmer friend to help author quests with this tool. Eventually, after getting this tool pretty functional I realized my bottleneck was actually writing dialogue, that the scripted sequences were simple enough to build and debug easily in code, and that maintaining/adding features to this tool was costing more time than it was likely to earn back I threw out all that work.
Quest Editor v0.1
My process for writing quests was to make a matrix of all the characters, point to an intersection and think about how their motivations could intersect to create conflict. Once I had a handful of quests written I rated how interesting each one was and tried to analyze why. Most of them sucked and felt too similar to each other, so that led me to focus on making quests feel more different by giving the bots interesting behaviors like following you, racing each other, running away, exchanging hats, or running along splines.
My first pass at implementing the quests and dialogue for Adventure Mode was rough because characters weren’t charming. Until I showed character color on dialogue bubbles, added emotes, pushed in the camera, added dialogue sounds, and added blinking and mouth movement- dialogue was a slog.
Exciting dialogue!
All these procedural systems required lots of tech and dealing with bugs to make things work. Debugging these issues was especially annoying because every playthrough shuffles which quests show up and where they’re placed. When possible I added debug settings to load specific quests under specific conditions, but sometimes issues resulted from a cascade of quest, character, and implementation issues that I struggled with for days at a time.
Progression
As Adventure Mode, arenas, and characters all started getting finished up it became clear that player direction and motivation was lacking and I needed to look at how other games keep players interested and invested over time without making things feel like a grind.
I referenced addicting multiplayer games with repetitive gameplay loops like Overwatch, PUBG, TF2 to see how they kept players engaged. Here are the common threads I noted:
Short exciting play sessions that end before players have a chance to get get bored
Explicit notice that a match is nearing its end so players aren’t surprised by the ending and know when it’s time for a final push
Immediate dopamine hit of showing unlock progress post-game to reinforce finishing a match is exciting and fun, even if you lost
Multiple avenues of unlock/progression so players are more likely to earn a reward after every match
Varied and subjective quality of rewards, so there’s a varied level of excitement between players and unlocks
Tie progress/unlocks to customization so players feel a sense of pride and investment between matches
Up until that point, I thought my plan for progression and unlocks was good, but players weren’t responding to the implementation. At that point you earned coins (which are used to roll for a random hat) after each Adventure Mode quest and filled a meter towards unlocked a random character, skin or arena. I thought just having these elements in the game would be enough for a tight, compelling loop but it turned out that the little details of my implementation made a huge difference.
At that point in development there wasn’t enough time to add more unlockables, or add other progression systems I had in mind and I was hopeful adding juice would be enough to sell these moments. So I decided to keep iterating on each of the unlock sequences until playtesters started connecting with the systems.
Earning hat coins!
Here are all the changes I had to make before players would continuously play through seasons of Adventure Mode and revisit the hat shop to roll for hats:
My curve deciding how many matches it took to unlock a new character/skin/arena needed to be tweaked so early on unlocks would come fast and loose.
The XP meter filling to show your progress towards the next unlock needed a rising tone as the bar filled and a special cue when filled to trigger player’s excitement.
The music in the cinematic sequence where players mash buttons to open a gift box needed to react to player input and rise in intensity, so the moment was exciting.
The shake/punch of the lootbox in that same sequence needed to feel like fast jabs or players didn’t understand you were trying to smash it open.
The background music of whatever level an unlock happened in needed to be muted during this sequence to focus your attention.
When any player has enough coins to unlock a hat, there needed to be a UI element above the hat shop showing you could get a new hat.
When unlocking a hat, there had to be a quick, dramatic jingle to make the moment memorable and to give it impact.
When unlocking a hat, the camera needs to zoom in and lock player’s input to showcase the big moment.
I don’t share this example to suggest that any feature can work if you spend enough time polishing it, but to highlight that little details like pacing, timing, audio levels, camera angles, zoom, and music volume matter a lot especially in features closely related to making players feel a specific emotion.
Level Design
After building all the spaces in this game I’m convinced level design has to be fun before you can build anything worthwhile. That means making things fast, playing them fast, and jumping between fast. That workflow is going to be different for everybody, but you should think seriously about it and use any tools you have to make it better, whether that’s building your own tools, asking your team to prioritize tools for you, or buying good tools.
I used ProBuilder for some early levels and I still do to make collision geometry, but the interface is too slow and clunky for sketching. Specifically needing to look from a straight-on angle to select things and the tedious process of creating a new primitive and putting it in place slow me down so much compared to Maya’s refined toolset. When building levels I use Maya to sketch ideas with primitives and more complex shapes as needed. I select everything and export as FBX then run around in Unity on the sketch. I have a component in Unity that automatically adds mesh colliders to all mesh renderers in children, so I don’t need to take any extra steps in Unity after each export before I can test.
Some early shots of the Overworld in Maya.
At the start the start of this process I take a lot of notes and tear up the sketch a lot more, then as things get more refined I go back and forth making little tweaks. I’ll also throw on temp materials to various objects in Unity to help get a sense of how the space will look as it gets farther along. Once I’m happy with the layout of a level, I’ll start polishing in that same FBX by replacing primitives with higher poly shapes. I’m pretty frivolous about using many materials since I use a lot of tiling textures and find optimizing UVs boring. I generally only split props out into separate FBXs. Unless something has an especially simple shape I almost always use a mesh colliders for static geometry. For anything dynamic I’ll place a few colliders to approximate the shape.
Building the Overworld was especially challenging because of all the extra spaces and expectations it affords. It’s notably different from all the arenas because it’s one continuous space that sprawls in many directions. Also, everyone’s attention isn’t focused on objectives in the same way it is during matches, which means players are free to run in any direction.
With these constraints in mind, what were my design principles in building this space?
I stuck to having just a few path splits in each biome and adding high walls, fences, and other blocking props around these paths and to separate biomes to keep players from running off and getting lost. It was also useful to define camera settings along these to try to keep players’ view on areas they can traverse.
I created sight lines that partially obscure interesting things around corners or behind objects to build anticipation and reward players for exploring. As you play through Adventure Mode you unlock new biomes each day, but from the beginning their all partially visible behind blocking fences around the hub. In addition to hiding interesting spaces, Sausage Sports Club also affords hiding toys and arena entrances.
I made sure to change up height as often as possible to help define interesting sight lines and to create fun spots to jump on and between, which is especially important for a platformer. Besides the hub, most of the Overworld is paths going up or down and fun bits of geometry to jump on and knock around by flopping your head.
One last thought about designing spaces is that they can feel pretty dead until far into the process, which makes it hard to have confidence in what you’re building. For this game, I couldn’t tell how successful a spaces were at communicating their theme until close to finished and I had to experiment a lot. That feeling is always part of the process, but I’d recommend building a pretty corner or vertical slice early in your project (and maybe for each new zone) so you’ll know what you’re capable of, what you’re aiming for, and how you’ll get there.
Camera
The design of the game created a few constraints for the camera. Since it’s local multiplayer only and supports up to 8 players, the camera needs to be dynamic and controlled by the game’s state rather than any individual player.
Given these constraints and 3 years of time iterating, rewriting, over complicating, and simplifying here are the important aspects:
Zoom: This is the most obvious. If all the targets are spread out, the camera should move back to see more.
Height Offset: This is huge for depth perception. A top view makes it easier to tell where players are on the Z-axis.
Weighted Targets: When specifying transform targets for the camera to track, you can optionally specify a multiplier of how much weight that target should have when finding the average position of all targets.
Max Target Distance: The maximum distance between your targets should be used to drive values like zoom distance and height offset. If all targets are very close together, you can be zoomed in and have a straight on view; but if some targets are very far apart, the camera should zoom out and get a higher view.
Override Focus & Weight: Allow an override focus position and weight to be specified in code. This allows cutscenes or scripted sequences to take partial or full control of the camera while maintaining awareness of tracked targets.
The camera doesn’t move as much in arenas!
With the above lessons in tow, I decided to add a sprawling Overworld for Adventure Mode and it came with a host of new camera problems. Because different areas of the Overworld face different directions and afford different views, I needed a way to define settings quickly for different areas.
To this end I setup dozens of camera zones that each define the aforementioned settings and a few new ones:
Look Angle: Since zones face arbitrary directions, the camera should rotate to change the perceived forward.
Spline Control: Since paths can be dramatically winding and our zones are defined as primitive shapes (boxes, spheres) it’s useful to be able to define a spline with different settings per control point and interpolate along the spline. This gives the added benefit of smoother transitions along paths. The lightweight spline tools I built for this system, especially being able to interpolate between arbitrary data defined at each control point, ended up being very robust and is now an invaluable part of my toolkit for anything path related.
Collision: A common issue with 3rd person cameras is clipping through geometry showing the underside of the world. Rather than add lots of complexity to my camera code to shoot whisker raycasts and properly avoid and push away from walls I just added a rigidbody and sphere collider and used ProBuilder to block in camera-only collision geometry in problematic areas. There are still very rare occasions where the camera gets into a wall or snags on camera blocking colliders, but it saved me dozens (if not hundreds) of hours of work to end up with what probably would have been a similarly robust solution.
Camera Blockers: For some props and pieces of geometry in the Overworld adding colliders would make the camera bounce around a lot and feel rough. In those cases, I instead choose to fade them out so they don’t block our view players. We check for these CameraBlockers with a spherecast from the camera’s focus position back towards the camera.
Editor Preview: Now that there’s a lot of camera settings to tweak (instead of just one per game mode) it was important to speed up the workflow by adding a preview window in the inspector to see what the camera zone would show without having to enter Play Mode and fly over to that zone.
Inspector preview!
One major takeaway from writing this camera system over such a long time is that more variables aren’t necessarily better. Especially as a game grows and more parts need to be tweaked, limiting variables to the fewest necessary to achieve the important range of outcomes can save time and make systems more intuitive and fun to use.
Shameless Plug
Thanks for reading, I hope you found this valuable. If you’d like to see more content like this please support my work by checking out Sausage Sports Club and sharing it with a friend. It’s out now on Steam and Nintendo Switch!