The official “status update” on Chapter 3 is the team is currently hard at work on it and the chapter is now “playable from beginning to end”. Unfortunately, it’s not quite finished just yet, but they are slowly getting there:
Toby Fox: “Can’t say it’s finished yet, but the unfinished parts are certainly seeming less and less numerous. That’s good because try as I might to sleep, until the game is finished, I’ll see nothing but nightmares…”
Toby also went into some detail about a “stealth-focused section in the game” that apparently didn’t make the cut. The song that was going to be used for this part has also been shared online if you want to have a listen.
“Earlier, we were considering having a stealth-focused section in the game where you would slowly, slowly sneak around certain areas. After developing some concepts, we realized a mechanic which basically just makes you move slower isn’t necessarily fun.”
Last but not least, Undertale is now officially eight years old! Toby says he doesn’t have “much energy for a wild and crazy event this year”, so apart from this newsletter update, there’s nothing special happening. You can check out some “sleepy-themed goods” on Fangamer like the new Toriel slippers. Undertale has also been available on the Switch eShop since 2018.
So, there you go then – Deltarune Chapter 3 is getting there and it is now playable from start to finish, with a release hopefully on the horizon.
Will you be playing this next chapter when it shows up on Switch? Have you played the previous chapters and Undertale? Tell us in the comments.
Nintendo’s latest entry in its Nintendo Switch Online-exclusive Battle-Royale-style series — which includes Tetris 99, the dearly departed Super Mario Bros. 35, and the soon-to-be dearly departedPAC-MAN 99 — returns a fan-favourite racer to a Nintendo console for the first entry since 2004’s Japan-only F-Zero Climax.
F-Zero 99 takes all the high-octane Formula-Zero action of the original SNES game and adds online multiplayer with up to 99 players battling it out across a variety of racing modes. It’s an addictive and complex game, and you’ll need all your wits about you if you want to climb the ranks and make it to the podium.
It’s a tough game, though, especially if you’re not familiar with the original. In this F-Zero 99 guide, we’ll cover some basic advice to help you get to grips with the vehicles, including tips and tricks, how to corner successfully, how to use your Super Boost and the all-new Skyway effectively, and more.
Ready…
F-ZERO 99 Guide – Tips & Tricks
In this guide, we’ve split the tips into Beginner and Advanced sections. All the information may be useful, but if you’re an F-Zero veteran you may want to skip to the Advanced section.
First things first, though.
Which ship should I pick?
Personally, we think Wild Goose is a good early-game vehicle, but you’ll want to use the Practice mode and try out each one to find your own personal favourite.
All the ships come with familiar plus points and caveats — here’s a rundown of the basics:
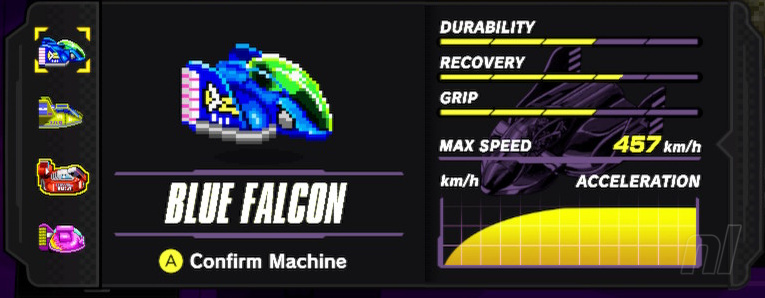
Blue Falcon
A good starter, a classic all-rounder:
Image: Nintendo Life
Golden Fox
Has good acceleration and more Boost potential at the expense of grip:
Image: Nintendo Life
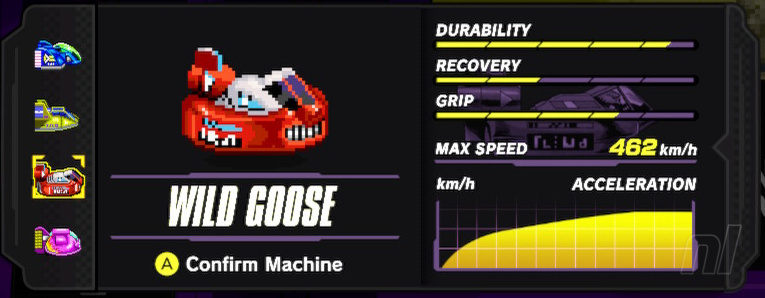
Wild Goose
A damage sponge that can take more of a beating than the others. Slower acceleration but increased grip:
Image: Nintendo Life
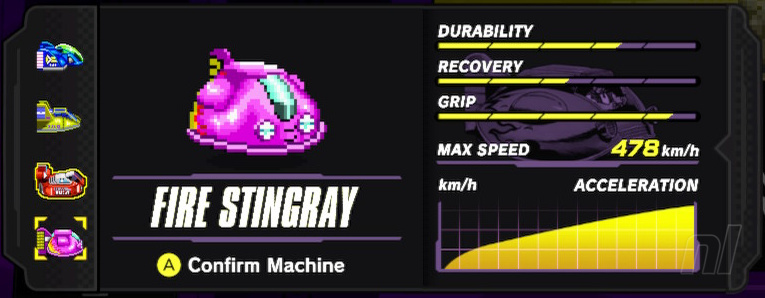
Fire Stingray
Has the fastest top speed and best cornering of all the machines, if you’re skillful enough to stay at max speed. One for the pros:
Image: Nintendo Life
Beginner’s Tips
Here we’ll lay out some general F-Zero 99 tips useful to pilots both new and rusty.
Use the Practice mode to learn the courses!
Seems obvious, but if you’re not familiar with the circuits, use the Practice mode and get familiar with them!
Get a starting Boost
Not like this — Image: Nintendo Life
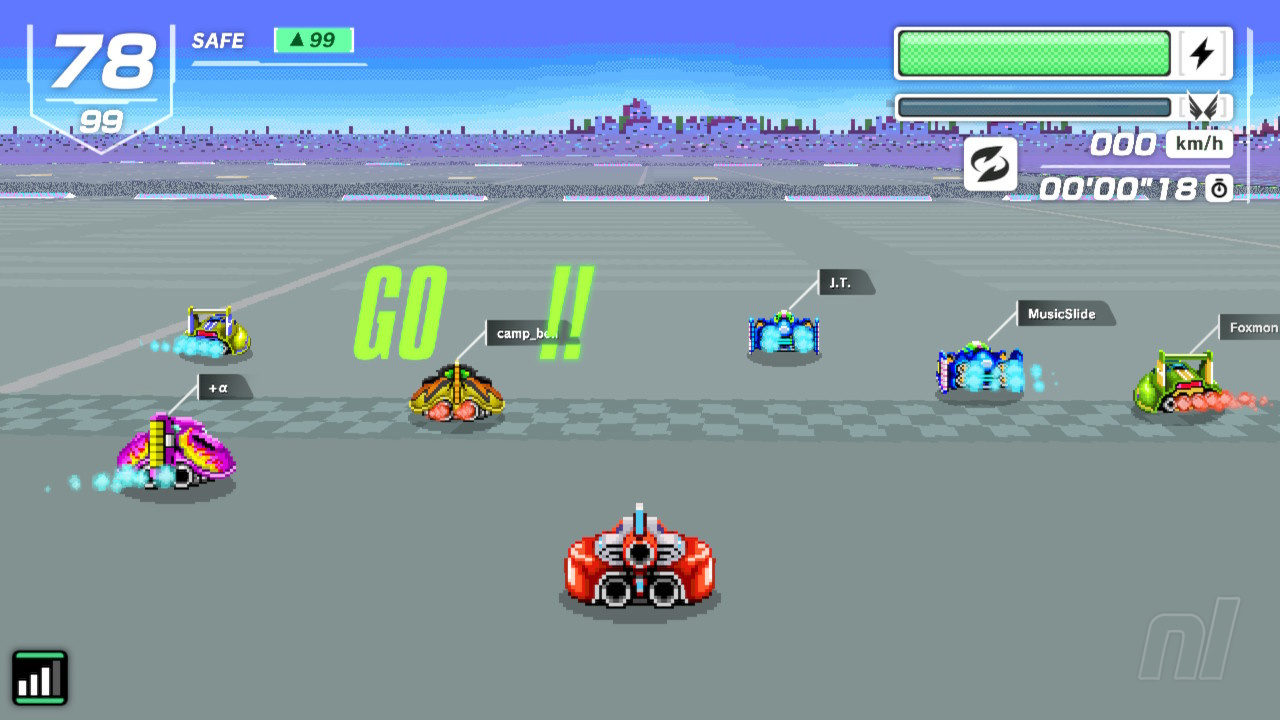
Press ‘B’ to accelerate just before GO appears at the start of the race and, yep, you got boost power.
Sorry, that’ll make zero sense to series newbies, but, ahem, F-Zero sense to veterans.
Oof, on with the tips!
Slow down on the recharge strip
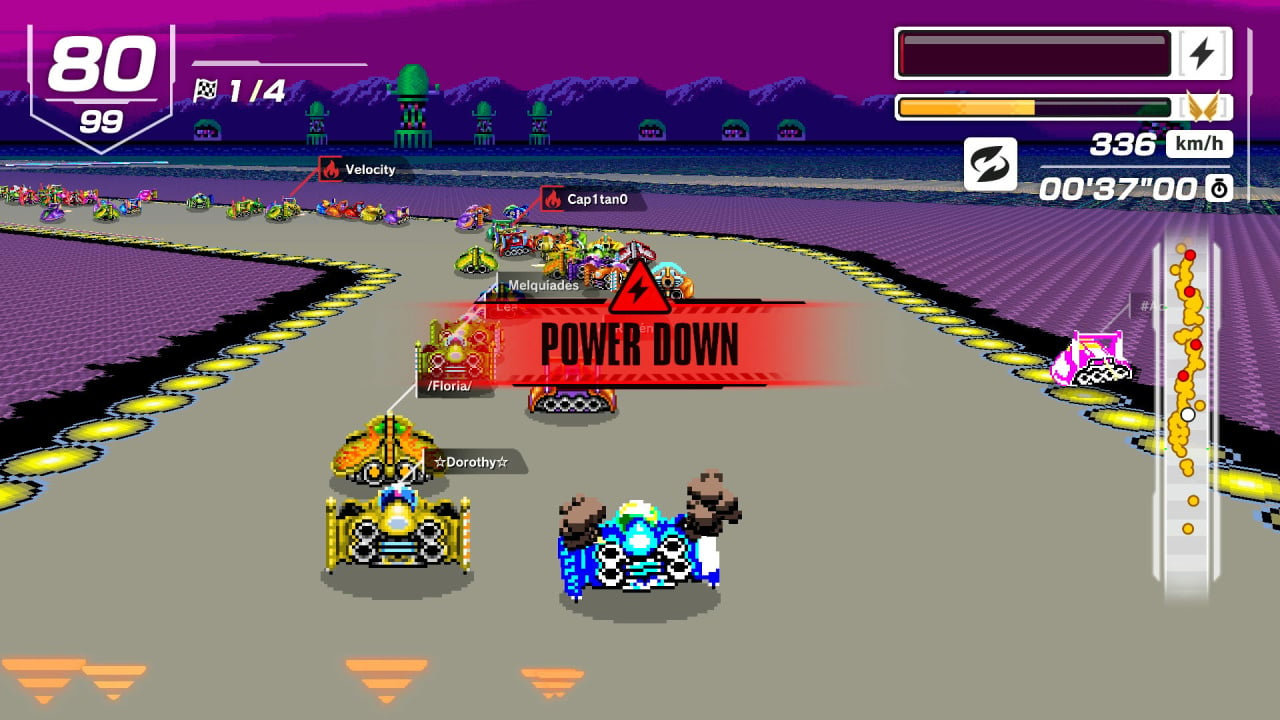
If your Power Meter is low, there’s nothing to stop you slowing down in the Pit Area if you need some more juice for the next lap. Better to be safe than sorry.
Image: Nintendo
Slow down in general!
Of course you want to get around the track as fast as possible, but with 98 other pilots crowding the track, don’t be afraid to slow down a little and let the pack thin itself out.
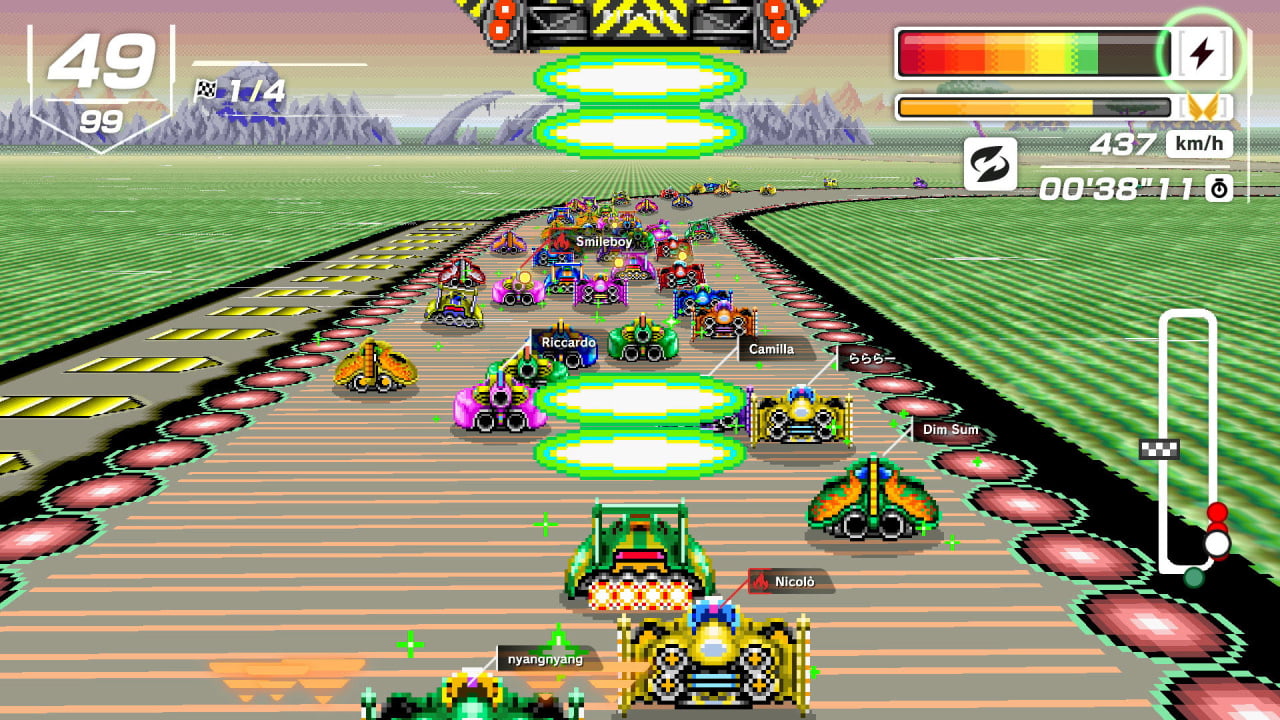
Hanging behind the leaders also means you can collect more Super Sparks (the yellow orbs) that drop when machines collide, which you can use to ascend to the Skyway — more on that later.
Slowing down will also, naturally, make cornering much easier.
Try tapping the accelerator around the bends
If you don’t want to use the brake (pah!), try tapping the accelerator as you take a corner — it’ll give you better traction on the bends.
The game itself recommends releasing the ‘B’ button entirely when you corner.
Use the Speed Boost on the straights…
Image: Nintendo
Knowing when best to use a regular Speed Boost (‘A’) can be tough, and experienced drivers will be able to deploy it successfully at almost any time.
However, if you’re starting out it’s best to stick to the straights so you don’t go ricocheting off the barriers, completely wasting your boost and, likely, heading to early retirement.
…or to ‘shortcut’ over rough patches
On some tracks (Mute City 1, for example), you’ll quickly notice people boosting over the slow-down ‘gravel’ patches. You should probably do that, too.
Collect the Super Sparks
Those yellow orbs (Super Sparks) are the key to filling your Super Boost meter and ascending (temporarily) to the Skyway track above the main circuit. Make sure you collect any along your path.
Bump the big golden car for more Super Sparks!
That big shiny gold bumper car that appears periodically? Bump into it for a bunch of Super Sparks and fill your Super Boost Meter quicker.
Don’t forget your Spin Attack
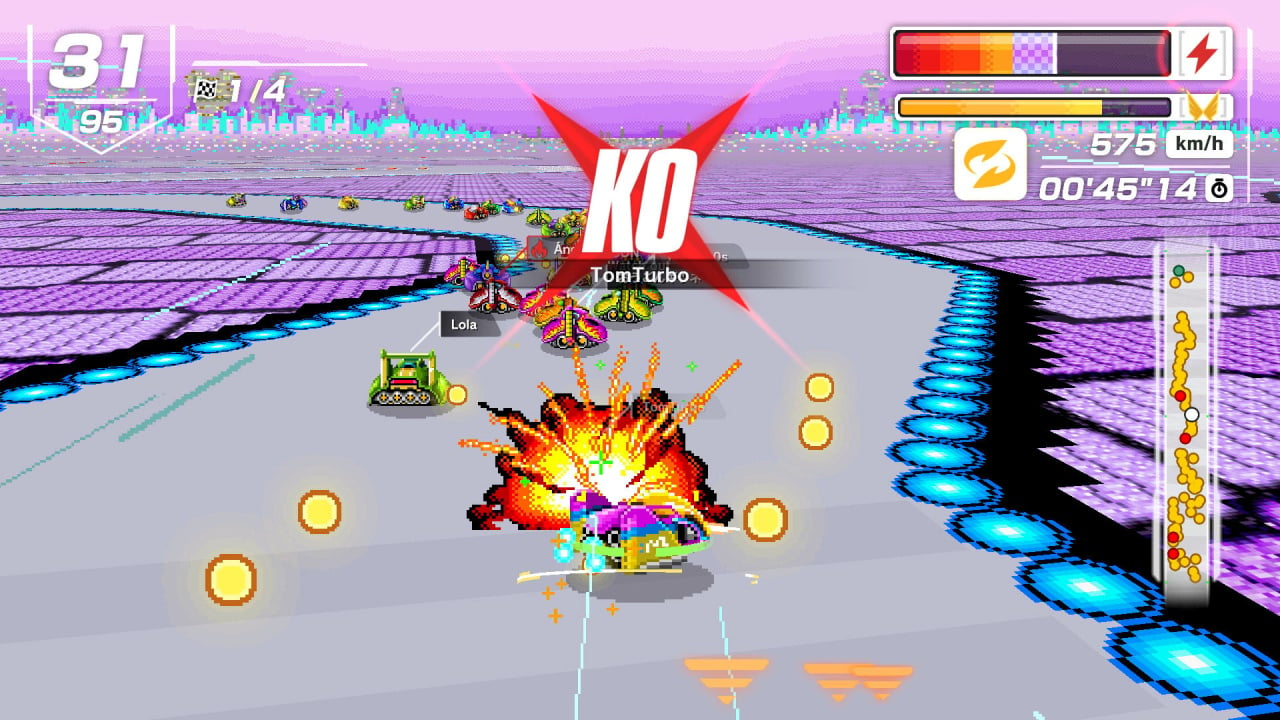
Tapping ‘ZL’ or ‘ZR’ sends your vehicle into a brief spin. Hitting other racers using this Spin Attack will take a chunk off their Power Meter and potentially lead to a KO if their energy is low enough. Spin Attacks operate only after a short cooldown, so watch for the meter to fill up (or listen for the audio cue that signals it’s ready).
Spin Attacks can also be used as a defensive measure to ward off marauding racers and give them a taste of their own medicine.
Image: Nintendo
Spin Attacks recharge instantly after hitting a jump ramp
If you’re approaching a Jump Plate and your Spin Attack is charged, you may as well hit ‘ZR’ or ‘ZL’ before the ramp as it’ll instantly top up your Spin Attack meter when you hit it. You just might get a sneaky hit in.
Advanced Tips
Here we outline a few slightly more advanced tips and strategies you’ll need to employ if you want a chance at a podium finish.
Use the Skyway strategically
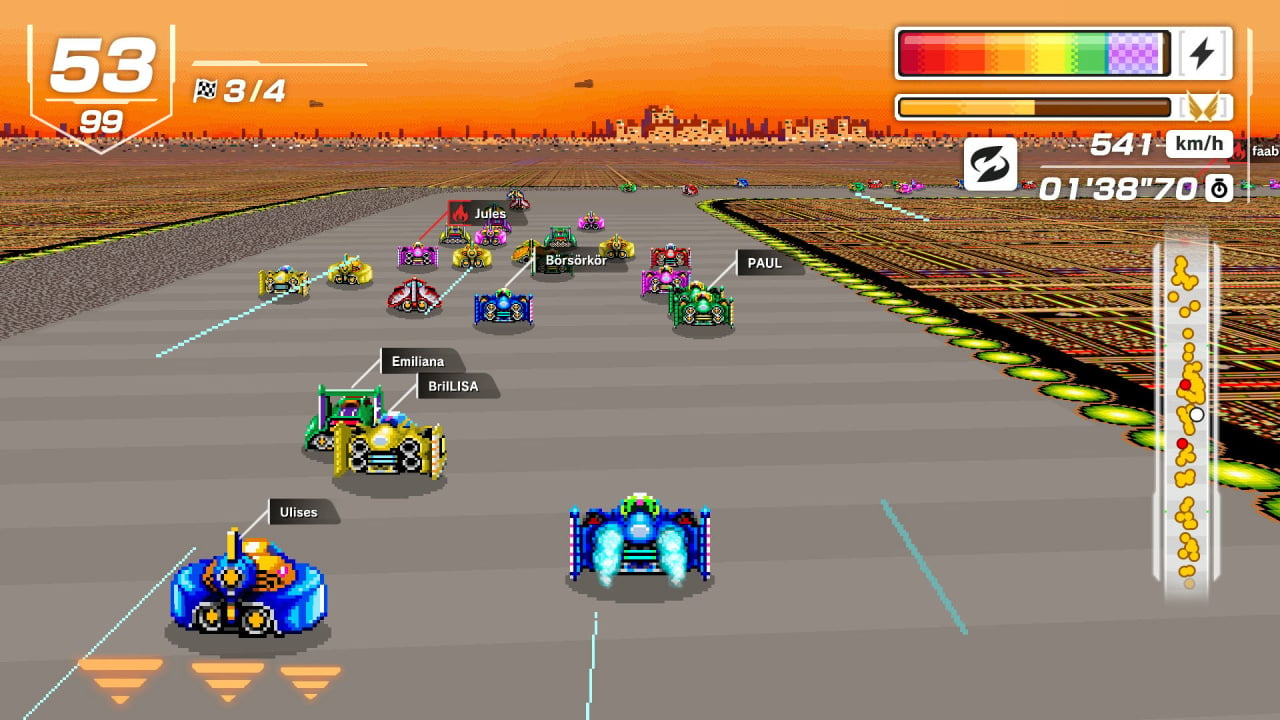
Look for opportunities to avoid tricky sections of the track by boosting to the Skyway at a strategic time.
For example, there’s a particular 180-degree turn in Sand Ocean that’s always a total pile-up. Even if you’re the world’s finest pilot and negotiate the corner perfectly, you’re guaranteed to take multiple hits that slow you down regardless. Saving the Super Boost for this section has seen us jump dozens of positions in a matter of seconds.
Tight turning, drifts, and slides
Hold down ‘L’ or ‘R’ to drift on those 180-degree bends. This activates a slide that you can also use on the straights to make minor adjustments to your racing line.
KOs come with multiple benefits, so DRIVE DIRTY
Image: Nintendo
Knocking out another pilot does several things, all of them good (for you).
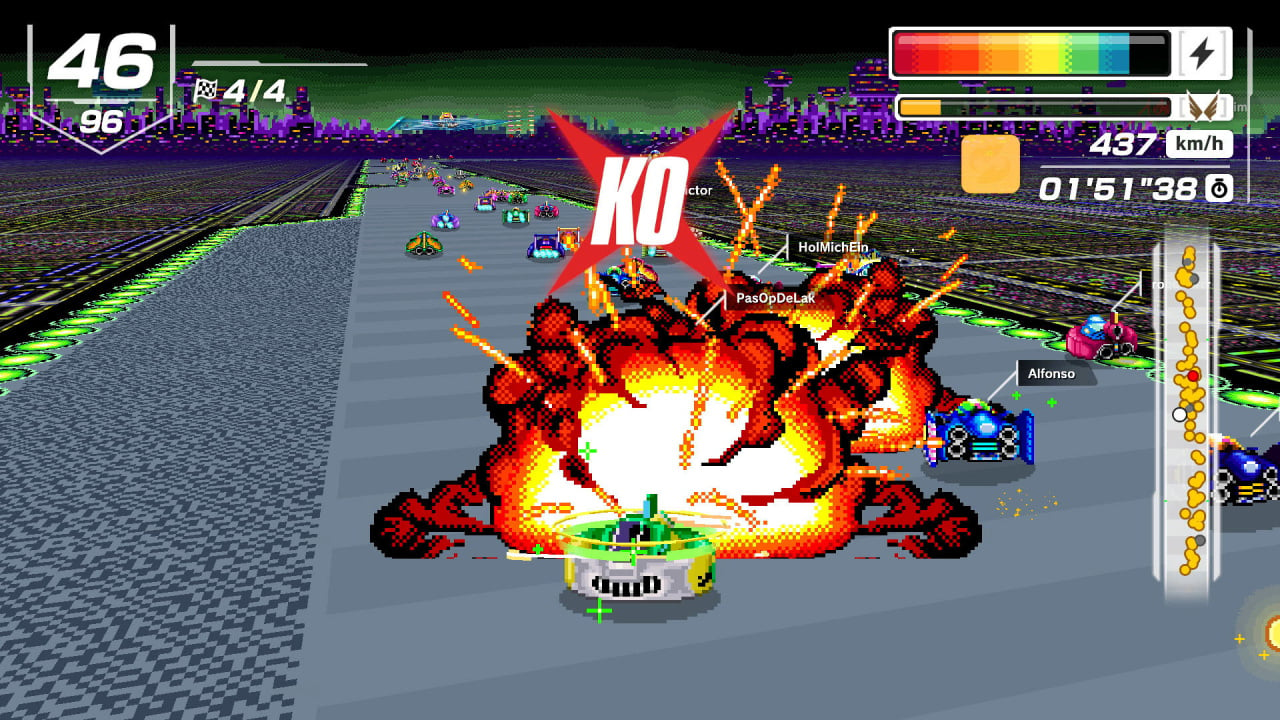
KOs instantly refill your Power Meter, extend your Power Meter, AND give you bonus points at the end of the race. If you’re racing in a Grand Prix, the Max Power remains for the following race, meaning more boost energy and/or more resilience to collisions.
A strong offence really is the best defence, so watch out for flashing racers and show no mercy.
Watch for the orange arrow
Image: Nintendo
Keep an eye on the little arrow at the bottom of the screen indicating if someone’s coming up behind you. Granted, this can be a challenge when the track is crowded, but it can be a lifesaver if you’re low on Power and some chancer gives you a rear-end shunt. Use the Spin to repel the blaggards.
Slow and steady doesn’t win the race…but it might win the championship!
Remember that when it comes to the Grand Prix, crashing out on the third lap because you over-boosted or got overly competitive with a Rival will kill your championship run. Obviously, you want to be the fastest thing alive, but sometimes you’ve got to play the long game.
Try to remember the bigger picture when you’re chasing that podium place in individual races: Is it worth risking it all now? Perhaps it is, and if you’re a good enough racer, this advice will become less relevant over time. But the bright spark that burned out in Race 2, Lap 3 isn’t getting any of the glory — or the points.
FAQ
How do Rivals work?
You’re given four Rivals to beat per race. Simply, these are random players that happen to be near your skill rating. Beat them in the race and you’ll increase your rating, lose against them and you’ll slide back.
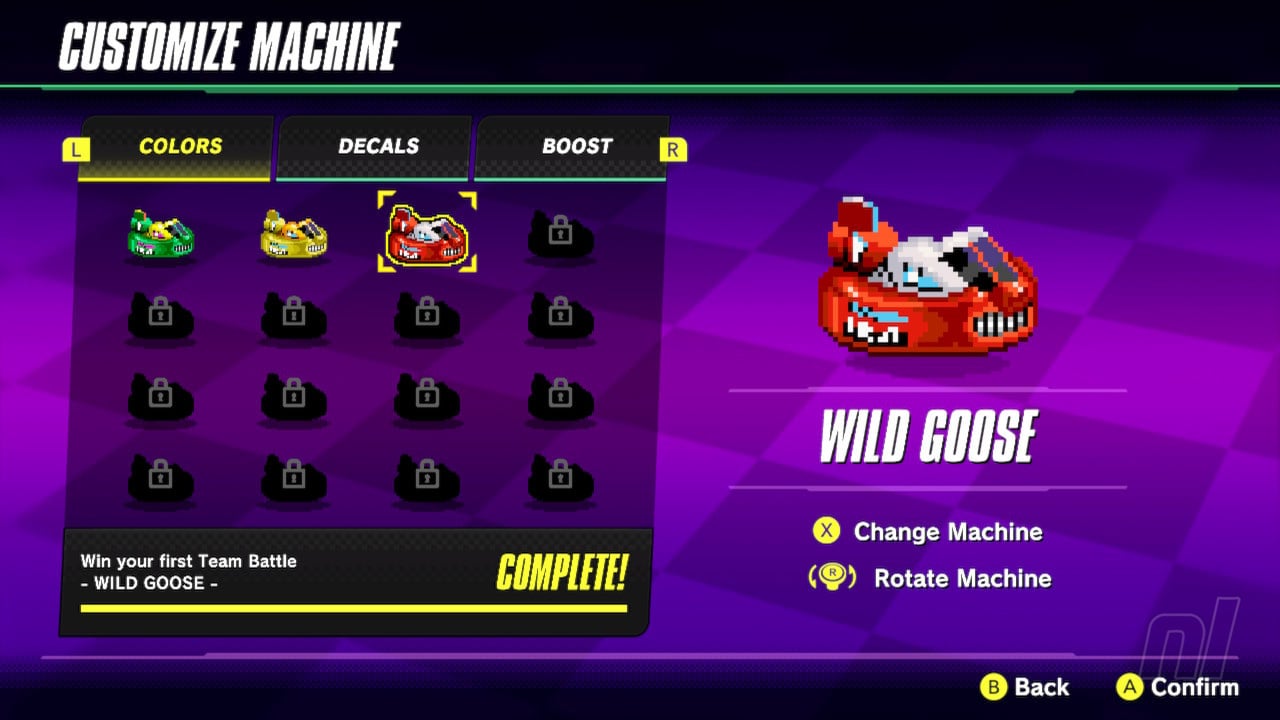
Do these ship customisations and badges affect anything?
Image: Nintendo Life
Only how cool you look. All the unlockable customisation options (Colors, Decals, Boosts, Badges, etc) are purely cosmetic, so head to the Workshop and go wild.
Will F-ZERO 99 be removed from Nintendo Switch Online?
We hope not! But as we’ve seen, Nintendo isn’t averse to removing even its big-name Super Mario Battle Royale from the service, so we certainly wouldn’t get too attached to this one.
If there’s a sliver of hope that this won’t be retired after a year or two, it’s that F-Zero 99 was an internally developed, cross-company project with Nintendo Software Technology heading up development (as evidenced in the credits, which you can watch at any time from the Options menu). Conversely, development on all the previous entries in this loose series was primarily handled by external company Arika.
Whether the fact it was developed internally makes any difference, only Nintendo can say. You might argue that Tetris 99’s continued survival is down to its function as a marketing tool which periodically hosts tie-in events to new releases. F-Zero doesn’t have that brand of cross-promotional potential, perhaps, but let’s all cross our fingers that Nintendo sees fit to keep this one alive for a long time to come.
Hopefully you’ve found this F-Zero 99 starter guide useful. If only we could have come up with 99 tips and tricks, eh!? We’ll no doubt be updating this guide as we play more of the game. Let us know below if you’ve got any to bolster the pack.
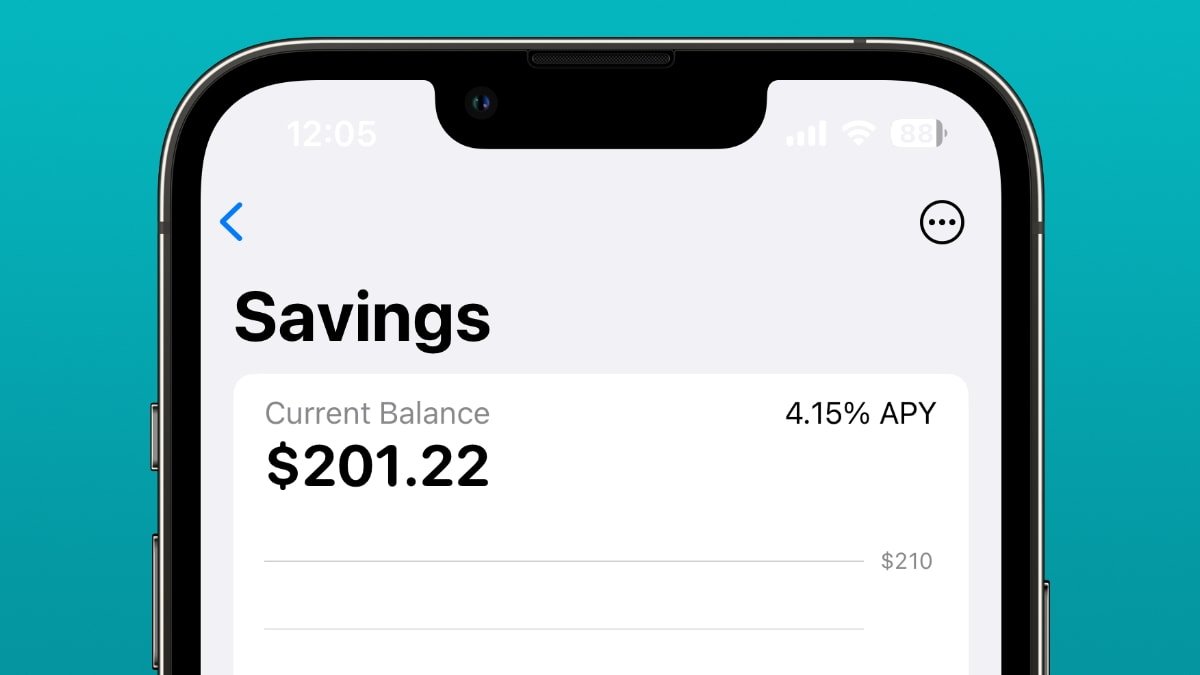
After a tumultuous period between Apple and Apple Card partner Goldman Sachs involving Apple Savings customer withdrawals, the issues appear to be mostly solved with loosened anti-fraud protections.
Shortly after Apple Savings launched, there were a flurry of customers complaining that it was difficult or impossible to extract money from the high-interest savings account. It’s been relatively quiet on that front for months — but apparently Goldman Sachs has resolved at least some of the systemic issues leading to problems.
The report on late Friday by The Information claims that the automated fraud detection systems are now less likely to flag transactions with small volumes to an outside account. Furthermore, Goldman Sachs has also reduced the number of days it says a transaction should take, and is said to be communicating with consumers better if there are issues, instead of not telling customers at all, and allowing time to tick by instead.
An Apple Savings customer representative cited in the report says that transfers shouldn’t take weeks or months, but if they are, the system, has flagged a large transfer because the bank is being cautious about unauthorized users. This is said to be alleviated some by a three-way call between the call center, the customer, and the bank selected to take the withdrawal.
After the April launch, the saga started with a report in June. Nathan Thacker said that he’d been trying to withdraw $1,700 from his Apple Savings account to his JPMorgan Chase account since May 15. However, upon calling Goldman Sachs’ customer service department, he was told that the money would be in his account in a few more days.
The money was finally posted to his account on June 1, more than two weeks after he initiated the transfer.
Thacker wasn’t the only one who has noticed issues, either. Some customers said that upon initiating the transfer, the money seemingly vanishes. The disappeared money didn’t show up in either their Apple account or the bank account they were trying to move it to.
In another example, a man from Minnesota had attempted to transfer $10,000 from his Apple account to a U.S. bank on May 16. The money was flagged for security review, leaving it in limbo until the review was finished.
Goldman Sachs went on record at the time saying that most customers do not see any delays. The ones that do, however, see them because of behind-the-scenes processes that have been put in place to protect customers’ accounts.
New accounts, such as those opened by Apple Card owners, may trigger anti-money-laundering alerts. The transfers must then be manually approved. On average, these delays take about five days.
Delays were longer for those who transferred money to an account that differed from the account the money originally came from.
Still, despite this, Apple Savings has done quite well for itself. The first week of Apple Savings proved Apple’s ecosystem strength with more than 240,000 new accounts being created and nearly $1 billion in deposits being made.
It’s not clear how strong the relationship between Apple and Goldman Sachs is, beyond contractually. Reportedly, Goldman Sachs is looking for an exit on the Apple Card and Apple Savings deal.
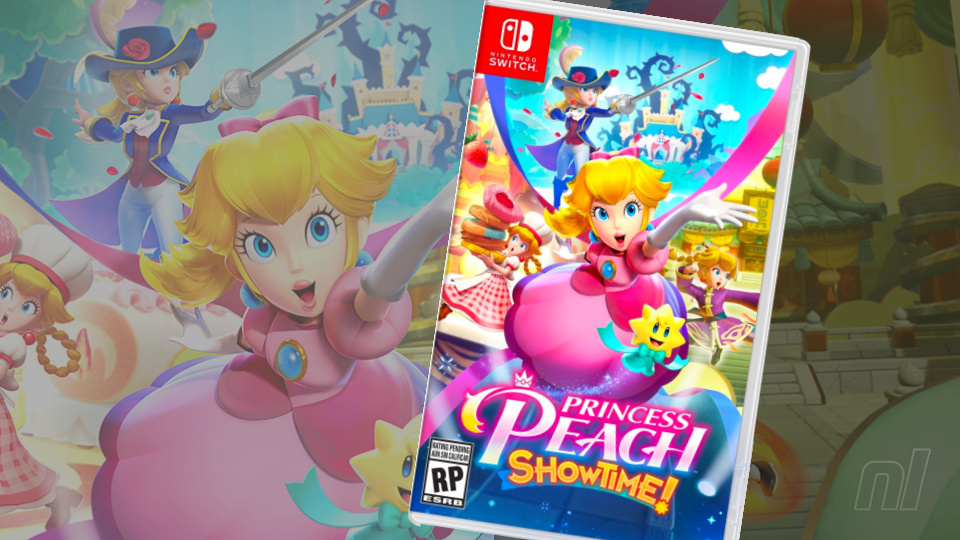
If you’re hoping to find where you can pre-order the game for the best price, we’ve got you covered. We’ll be keeping track of all retail options for you on this page, highlighting the best deals and cheapest prices available as and when they appear. Enjoy!
Please note that some external links on this page are affiliate links, which means if you click them and make a purchase we may receive a small percentage of the sale. Please read our FTC Disclosure for more information.
Pre-Order Princess Peach: Showtime! In The US & Canada
Here are your current options in the US and Canada (we’ll add more links as and when they appear):
Pre-Order Princess Peach: Showtime! In The UK
There aren’t many options in the UK yet, but you can secure an order with Nintendo’s official store or GAME now:
Buy Princess Peach: Showtime! With eShop Credit
If you’d rather own the game digitally, you can also pre-order it from the Nintendo Switch eShop. We stock Nintendo Switch eShop credit vouchers at our very own store – if you’d like to top up your account and support our work here at Nintendo Life at the same time, you can buy some below:
Are you looking forward to playing a new game starring our favourite gaming princess? Let us know if you grab a copy with a comment below.
In Python, the async for construct allows you to iterate over asynchronous iterators, which yield values from asynchronous operations. You’ll use it when working with asynchronous libraries or frameworks where data fetching or processing happens asynchronously, such as reading from databases or making HTTP requests. The async for loop ensures that while waiting for data, other tasks can run concurrently, improving efficiency in I/O-bound tasks.
Here’s a minimal example:
import asyncio async def async_gen(): for i in range(3): await asyncio.sleep(1) # Simulate asynchronous I/O operation yield i async def main(): async for val in async_gen(): print(val) # To run the code: asyncio.run(main())
In this example, async_gen is an asynchronous generator that yields numbers from 0 to 2. Each number is yielded after waiting for 1 second (simulating an asynchronous operation). The main function demonstrates how to use the async for loop to iterate over the asynchronous generator.
Understanding Python Async Keyword
As a Python developer, you might have heard of asynchronous programming and how it can help improve the efficiency of your code.
One powerful tool for working with asynchronous code is the async for loop, which allows you to iterate through asynchronous iterators while maintaining a non-blocking execution flow. By harnessing the power of async for, you will be able to write high-performing applications that can handle multiple tasks concurrently without being slowed down by blocking operations.
The async for loop is based on the concept of asynchronous iterators, providing a mechanism to traverse through a series of awaitables while retrieving their results without blocking the rest of your program. This distinct feature sets it apart from traditional synchronous loops, and it plays an essential role in making your code concurrent and responsive, handling tasks such as network requests and other I/O-bound operations more efficiently.
To get started with async for in Python, you’ll need to use the async def keyword when creating asynchronous functions, and make use of asynchronous context managers and generators.
When you deal with asynchronous programming in Python, the async keyword plays a crucial role. Asynchronous programming allows your code to handle multiple tasks simultaneously without blocking other tasks. This is particularly useful in scenarios where tasks need to be executed concurrently without waiting for each other to finish.
The async keyword in Python signifies that a function is a coroutine. Coroutines are a way of writing asynchronous code that looks similar to synchronous code, making it easier to understand. With coroutines, you can suspend and resume the execution of a function at specific points, allowing other tasks to run concurrently.
In Python, the async keyword is used in conjunction with the await keyword. While async defines a coroutine function, await is used to call a coroutine and wait for it to complete. When you use the await keyword, the execution of the current coroutine is suspended, and other tasks are allowed to run. Once the await expression completes, the coroutine resumes its execution from where it left off.
Here’s an example of how you might use the async and await keywords in your Python code:
import aiohttp
import asyncio async def fetch_url(url): async with aiohttp.ClientSession() as session: async with session.get(url) as response: return await response.text() async def main(): url = "https://www.example.com/" content = await fetch_url(url) print(content) asyncio.run(main())
In this example, fetch_url is a coroutine defined using the async keyword. It makes a request to a specified URL and retrieves the content. The request and response handling is done asynchronously, allowing other tasks to run while waiting for the response. The main coroutine uses await to call fetch_url and waits for it to complete before printing the content.
Async Function and Coroutine Objects
In Python, asynchronous programming relies on coroutine objects to execute code concurrently without blocking the execution flow of your program. You can create coroutine objects by defining asynchronous functions using the async def keyword. Within these async functions, you can use the await keyword to call other asynchronous functions, referred to as async/await syntax.
To begin, define your asynchronous function using the async keyword, followed by def:
async def my_async_function(): # your code here
While working with asynchronous functions, you’ll often encounter situations where you need to call other async functions. To do this, use the await keyword before the function call. This allows your program to wait for the result of the awaited function before moving on to the next line of code:
async def another_async_function(): # your code here async def my_async_function(): result = await another_async_function()
Coroutine objects are created when you call an async function, but the function doesn’t execute immediately. Instead, these coroutines can be scheduled to run concurrently using an event loop provided by the asyncio library. Here’s an example of running a coroutine using asyncio.run():
Remember that async functions are not meant to be called directly like regular functions. Instead, they should be awaited within another async function or scheduled using an event loop.
By using coroutine objects and the async/await syntax, you can write more efficient, readable, and performant code that manages concurrency and handles I/O bound tasks effectively. Keep in mind that async functions should primarily be used for I/O-bound tasks and not for CPU-bound tasks. For CPU-bound tasks, consider using multi-threading or multi-processing instead.
The Fundamentals of AsyncIO
AsyncIO is a Python library that provides support for writing asynchronous code utilizing the async and await syntax. It allows you to write concurrent code in a single-threaded environment, which can be more efficient and easier to work with than using multiple threads.
To start using AsyncIO, you need to import asyncio in your Python script. Once imported, the core component of AsyncIO is the event loop. The event loop manages and schedules the execution of coroutines, which are special functions designed to work with asynchronous code. They are defined using the async def syntax.
Creating a coroutine is simple. For instance, here’s a basic example:
In this example, my_coroutine is a coroutine that just prints a message. The asyncio.run() function is used to start and run the event loop, which in turn executes the coroutine.
Coroutines play a crucial role in writing asynchronous code with AsyncIO. Instead of using callbacks or threads, coroutines use the await keyword to temporarily suspend their execution, allowing other tasks to run concurrently. This cooperative multitasking approach lets you write efficient, non-blocking code.
In this example, the say_after coroutine takes two parameters: delay and message. The await asyncio.sleep(delay) line is used to pause the execution of the coroutine for the specified number of seconds. After the pause, the message is printed. The main coroutine is responsible for running two instances of say_after, and the whole script is run via asyncio.run(main()).
Asynchronous For Loop
In Python, you can use the async for statement to iterate asynchronously over items in a collection. It allows you to perform non-blocking iteration, making your code more efficient when handling tasks such as fetching data from APIs or handling user inputs in a graphical user interface.
In order to create an asynchronous iterator, you need to define an object with an __aiter__() method that returns itself, and an __anext__() method which is responsible for providing the next item in the collection.
For example:
class AsyncRange: def __init__(self, start, end): self.start = start self.end = end def __aiter__(self): return self async def __anext__(self): if self.start >= self.end: raise StopAsyncIteration current = self.start self.start += 1 return current
Once you have your asynchronous iterator, you can use the async for loop to iterate over the items in a non-blocking manner. Here is an example showcasing the usage of the AsyncRange iterator:
import asyncio async def main(): async for number in AsyncRange(0, 5): print(number) await asyncio.sleep(1) asyncio.run(main())
In this example, the AsyncRange iterator is used in an async for loop, where each iteration in the loop pauses for one second using the await asyncio.sleep(1) line. Despite the delay, the loop doesn’t block the execution of other tasks because it is asynchronous.
It’s important to remember that the async for, __aiter__(), and __anext__() constructs should be used only in asynchronous contexts, such as in coroutines or with async context managers.
By utilizing the asynchronous for loop, you can write more efficient Python code that takes full advantage of the asynchronous programming paradigm. This comes in handy when dealing with multiple tasks that need to be executed concurrently and in non-blocking ways.
Using Async with Statement
When working with asynchronous programming in Python, you might come across the async with statement. This statement is specifically designed for creating and utilizing asynchronous context managers. Asynchronous context managers are able to suspend execution in their __enter__ and __exit__ methods, providing an effective way to manage resources in a concurrent environment.
To use the async with statement, first, you need to define an asynchronous context manager. This can be done by implementing an __aenter__ and an __aexit__ method in your class, which are the asynchronous counterparts of the synchronous __enter__ and __exit__ methods used in regular context managers.
The __aenter__ method is responsible for entering the asynchronous context, while the __aexit__ method takes care of exiting the context and performing cleanup operations.
Here’s a simple example to illustrate the usage of the async with statement:
import aiohttp
import asyncio async def fetch_data(url): async with aiohttp.ClientSession() as session: async with session.get(url) as response: return await response.text() async def main(): url = "https://example.com" data = await fetch_data(url) print(data) asyncio.run(main())
In this example, we’re using the aiohttp library to fetch the contents of a webpage. By using async with when creating the ClientSession and the session.get contexts, we ensure that resources are effectively managed throughout their lifetime in an asynchronous environment.
Time and Delays in Async
The time and asyncio.sleep functions are essential components of managing time delays.
In asynchronous programming, using time.sleep is not recommended since it can block the entire execution of your script, causing it to become unresponsive. Instead, you should use asyncio.sleep, which is a non-blocking alternative specifically designed for asynchronous tasks.
To implement a time delay in your async function, simply use the await asyncio.sleep(seconds) syntax, replacing seconds with the desired number of seconds for the delay. For example:
This will cause a 2-second wait between printing “Task started” and “Task completed after 2 seconds” without blocking the overall execution of your script.
Timeouts can also play a significant role in async programming, preventing tasks from taking up too much time or becoming stuck in an infinite loop.
To set a timeout for an async task, you can use the asyncio.wait_for function:
import asyncio async def long_running_task(): await asyncio.sleep(10) return "Task completed after 10 seconds" async def main(): try: result = await asyncio.wait_for(long_running_task(), timeout=5) print(result) except asyncio.TimeoutError: print("Task took too long to complete") asyncio.run(main())
In this example, the long_running_task takes 10 seconds to complete, but we set a timeout of 5 seconds using asyncio.wait_for. When the task exceeds the 5-second limit, an asyncio.TimeoutError is raised, and the message “Task took too long to complete” is printed.
By understanding and utilizing asyncio.sleep and timeouts in your asynchronous programming, you can create efficient and responsive applications in Python.
Concurrency with AsyncIO
AsyncIO is a powerful library in Python that enables you to write concurrent code. By using the async/await syntax, you can create and manage coroutines, which are lightweight functions that can run concurrently in a single thread or event loop. This approach maximizes efficiency and responsiveness in your applications, especially when dealing with I/O-bound operations.
To start, you’ll need to define your coroutines using the async def keyword. This allows you to use the await keyword within the coroutine to yield control back to the event loop, thus enabling other coroutines to run. You can think of coroutines as tasks that run concurrently within the same event loop.
To manage the execution of coroutines, you’ll use the asyncio.create_task() function. This creates a task object linked to the coroutine which is scheduled and run concurrently with other tasks within the event loop. For example:
To run multiple tasks concurrently, you can use the asyncio.gather() function. This function takes several tasks as arguments and starts them all concurrently. When all tasks are completed, it returns a list of their results:
Another useful function is asyncio.as_completed(). This function returns an asynchronous iterator that yields coroutines in the order they complete. It can be helpful when you want to process the results of coroutines as soon as they are finished, without waiting for all of them to complete:
import asyncio async def my_task(duration): await asyncio.sleep(duration) return f"Task completed in {duration} seconds" async def main(): tasks = [my_task(1), my_task(3), my_task(2)] for coroutine in asyncio.as_completed(tasks): result = await coroutine print(result) asyncio.run(main())
When working with AsyncIO, remember that your coroutines should always be defined using the async keyword, and any function that calls an asynchronous function should also be asynchronous.
Generators, Futures and Transports
In your journey with Python’s async programming, you will come across key concepts like generators, futures, and transports. Understanding these concepts will help you grasp the core principles of asynchronous programming in Python.
Generators are functions that use the yield keyword to produce a sequence of values without computing them all at once. Instead of returning a single value or a list, a generator can be paused at any point in its execution, only to be resumed later. This is especially useful in async programming as it helps manage resources efficiently.
yield from is a construct that allows you to delegate part of a generator’s operations to another generator, ultimately simplifying the code. When using yield from, you include a subgenerator expression, which enables the parent generator to yield values from the subgenerator.
Futures represent the result of a computation that may not have completed yet. In the context of async programming, a future object essentially acts as a placeholder for the eventual outcome of an asynchronous operation. Their main purpose is to enable the interoperation of low-level callback-based code with high-level async/await code. As a best practice, avoid exposing future objects in user-facing APIs.
Transports are low-level constructs responsible for handling the actual I/O operations. They implement the communication protocol details, allowing you to focus on the high-level async/await code. Asyncio transports provide a streamlined way to manage sockets, buffers, and other low-level I/O related tasks.
Frequently Asked Questions
What are the main differences between ‘async for’ and regular ‘for’ loops?
The main difference between async for and regular for loops in Python is that async for allows you to work with asynchronous iterators. This means that you can perform non-blocking I/O operations while iterating, helping to improve your program’s performance and efficiency. Regular for loops are used with synchronous code, where each iteration must complete before the next one begins.
How can async for loop be implemented with list comprehensions?
Unfortunately, async for cannot be directly used with list comprehensions since the syntax does not support asynchronous execution. Instead, when working with asynchronous code, you can use asyncio.gather() alongside a list comprehension to achieve a similar result. This approach allows you to run multiple asynchronous tasks concurrently and collect their results.
For example:
import asyncio async def square(x): await asyncio.sleep(1) return x * x async def main(): numbers = [1, 2, 3, 4, 5] results = await asyncio.gather(*(square(num) for num in numbers)) print(results) asyncio.run(main())
What are common patterns to efficiently use async in Python?
To efficiently use async in Python, you can employ the following patterns:
Use asyncio library features, such as asyncio.gather(), asyncio.sleep(), and event loops.
Write asynchronous functions with the async def syntax and use await to call other asynchronous functions.
Use context managers, such as async with, to handle resources that support asynchronous operations.
Use async for loops when working with asynchronous iterators to keep your code non-blocking.
How can you create an async range in Python?
To create an async range in Python, you can implement an asynchronous iterator with a custom class that adheres to the async iterator protocol. The custom class should define an __aiter__() method to return itself and implement an __anext__() method that raises StopAsyncIteration when the range is exhausted. Here is an example:
import asyncio class AsyncRange: def __init__(self, start, end): self.start = start self.end = end def __aiter__(self): return self async def __anext__(self): if self.start >= self.end: raise StopAsyncIteration current = self.start self.start += 1 await asyncio.sleep(1) return current
Are there any examples of creating an async iterator?
Here’s an example of creating an async iterator using a custom class:
import asyncio class AsyncCountdown: def __init__(self, count): self.count = count def __aiter__(self): return self async def __anext__(self): if self.count <= 0: raise StopAsyncIteration value = self.count self.count -= 1 await asyncio.sleep(1) return value async def main(): async for value in AsyncCountdown(5): print(value) asyncio.run(main())
What is the correct way to use ‘async while’ in Python?
To use async while in Python, simply place the await keyword before an asynchronous function or expression within the body of the while loop. By doing so, the loop will execute the asynchronous code non-blocking, allowing other tasks to run concurrently. Here’s an example:
Note: NBA 2K24 does not allow you to take in-game screenshots on Switch. The images throughout this review were taken from the game’s page on Nintendo’s website.
Whenever September rolls around, you can expect a new entry in 2K’s NBA series to bounce onto the court. These games aren’t usually all that revolutionary, with a handful of new features and surprisingly good performance on Switch giving them enough to get by. We expected the same from NBA 2K24, but having got to grips with the latest title, the rinse-and-repeat formula is beginning to show its age, and purchasing the series annually has never been a less attractive prospect.
It is usually the case that each new title can be summed up by, “It’s the same as last year’s, only X has been added and Y has been tweaked”, but the Switch version of NBA 2K24 notably has fewer options than its predecessor.
So, what features make up the roster this time around? Those who have played an NBA 2K title before will find no major surprises here. MyCareer, MyTeam, and MyLeague are still your main ways to play, with the new ‘Mamba Moments’ subbing into the slot occupied by last year’s brilliant ‘Jordan Challenge’. 2K24’s next-gen release brought a whole batch of new features to the table (Crossplay, ProPlay, The W, MyNBA), but with none of them making the cut on Switch, this version feels more watered-down than usual.
Let’s look at what the Switch does offer. Beginning with the newbie, Mamba Moments sees you playing through seven iconic games from Kobe Bryant’s 20-year career, replicating historic plays in an attempt to collect stars and ‘beat’ the game mode. If this sounds like last year’s Jordan Challenge, that’s because it is, but while last year’s new mode was presented as a history lesson for MJ’s career — complete with changing TV graphics and CRT filters — Mamba Moments instead becomes quickly repetitive. This isn’t a celebration of Kobe’s legendary performances but rather a whistle-stop tour of some of his accolades (the omission of his 81-point game in 2006 is baffling to us). A short piece of footage from the games themselves prior to each tip-off provides a nice bit of context, but this feels like a step back from what we have seen before.
Similarly disappointing is the MyCareer mode — which is usually one of our favourites. Much like NBA 2K23, the Switch misses out on the next-gen consoles’ new expansive hub world, ‘The City’ — where players can buy new gear, play streetball or simply strut their stuff — and instead has to settle for the much smaller ‘The Neighborhood’. The mode is still very much built on a pay-to-win structure, with player upgrades and gear dependent on 2K’s in-game currency (VC), which otherwise relies on a silly amount of grinding to catch up with others that walk the courts.
All of this is expected, of course, but what we had not foreseen was that the Switch would miss out on the MyCareer story mode this year — something that has been continued on Sony and Microsoft’s consoles. Instead of watching your player make their way into the league and gradually accumulate minutes and respect (as was the case in 2K23 on Switch), the Nintendo version of ’24 sees you dropped straight into a starting role with a 60 overall rating. With no cutscenes, action, or character growth, our designed player felt about as realistic as the handful of NPCs that coldly throw challenges at you as you walk around The Neighborhood.
Fortunately, MyTeam once again proves itself to be the standout mode. There have been a couple of new additions for 2K24 including an all-new player market and salary cap. The latter of these is a fun way to make things feel that bit more realistic (worry not, 2K23’s decision to remove player contracts has continued into this year) but the new way to buy cards is the real MVP, making it a good amount easier to add some star power to your team in the early days — we are particular fans of the new collections and ‘Deal of the Day’ features.
The control scheme has stayed pretty much the same as it was in NBA 2K23, with a clear shot meter making it easier to land a perfect release. Elsewhere, the mildly frustrating alley-oop commands make a return, though the dunk and lay-up animations look crisp and realistic amongst the otherwise less-detailed player visuals.
Sticking with the on-court action, 2K24 is once again surprisingly smooth on Switch. Of course, the visuals are nothing compared to what you can find on more powerful consoles (good luck identifying any key players as they get back on defence), but the bread and butter of the gameplay is nicely responsive, with the quality sticking pretty firmly at 30 FPS by our estimation in games.
What we see outside of the games themselves isn’t quite as polished, sadly. From the stuttering opening cutscene (a montage of Bryant’s best bits) to the minuscule text of the in-game menus, getting yourself into a game is more draining than the act of playing itself. This isn’t helped by long load times and server issues that make the simple act of switching between game modes comparable to trying to win a Championship Ring. There were several occasions during our playtime where the game required a manual restart from the Switch’s home menu, and one fix that saw us needing to delete and reinstall the game just to get past the initial loading screen — hardly ideal scenarios to play in.
Conclusion
NBA 2K24 is less a continuation of what made the series good on Switch and more a downgrade of what has come before it. Even with how smoothly this one plays on the console, with some clean animations and a sprinkling of improvements to MyTeam being the real MVPs, all of this is overshadowed by just how watered-down this year’s entry feels. With none of the new game modes making the jump to Switch apart from the disappointing Mamba Moments, a severely lessened MyCareer and a model that continues to be plagued by microtransactions and long load times, the 2K franchise on Switch has never needed more of a boost. If you are after a basketball game on the go, last year’s offering is a much better option.
Microsoft and Oracle have partnered to bring the best of both worlds together. OCI database services are now available in Azure. This partnership helps organizations meet their evolving needs and empowers customers to create new value in the cloud. With this integration, users can seamlessly build Azure applications with the high performance, high availability, and automated management of Oracle database services, such as Exadata and RAC, running on OCI.
Nintendo surprised fans this week with the reveal of F-Zero 99, a new twist on the orignal SNES classic that throws 99 players into a single race to determine who will be the last machine standing.
It’s a neat throwback to the original that follows in the footsteps of Tetris 99 and PAC-MAN 99, and fans so far seem to be quite enamoured with the fresh spin on the F-Zero franchise. Even Tatakya Imamura, one of the key developers on the series until his departure from Nintendo, has expressed his love in a recent post on X.
Translated via Google, the text reads:
” A bold arrangement that respects the original elements! I felt the love for F-ZERO. I would like to express my deepest gratitude to the creator. We are looking forward to the revival of this IP.”
We certainly echo Imamura’s sentiments here in regards to a revival of the F-Zero IP! Hopefully, Nintendo might well be testing the waters with the launch of F-Zero 99; in which case, make sure you get it downloaded if you’re interested in seeing future games in the series.
F-Zero 99 is available to download for free now for all members of Nintendo Switch Online. Our review is currently in the works, so be sure to keep an eye out for that in the near future.
What do you make of Imamura’s comments here? Would you like to see a brand new F-Zero title on Switch or future Nintendo hardware? Let us know.
Time for some good news from gaming – Genshin Impact has teamed up with El Centro de Transferencia Canina del Metro (CTC) to feed thousands of stray dogs in Mexico City, and provide a bit of light into their lives.
Between August 12 to 27, 2023, Genshin Impact’s Spanish Twitter account encouraged players to get involved and create 10k retweets, which then translated to 10,000 KG of dog food that Hoyoverse donated. Fans, of course, flooded the Twitter replies with pictures of their own dogs which is incredibly wholesome in itself.
The non-profit organization and Hoyo’s collab had Genshin Impact’s Thoma as its mascot, along with Taroumaru, the dog running Komore Teahouse in Inazuma. We saw this in the recent 4.1 version livestream along with delightful artwork from Twitter user Nonemii_ and others.
Adverts with QR codes appeared along Mexico City’s train stations and platforms, where the public could scan the code and retweet the appropriate Tweet, to make sure it gained traction and fulfilled its goals.
And, we’re pleased to say, that it did just that. The literal ton of food fed over 5,000 dogs in the city. The CTC has continued to feed canines ever since its creation in 2017, looking after dogs found across all 12 train lines in Mexico City.
To see what all the fuss is about in Genshin, including some dapper dogs in Fontaine, check out the latest Genshin Impact update right here, and grab these Genshin Impact codes, too.
Two years after the announcement of the current Fedora logo, we decided to clear our stock of shirts with the old logo. Soon our shirts will only be made and stocked with the new Fedora logo.
The Fedora jackets and hoodies are back again:
The old Fedora polo shirts are almost out of stock, so we have a new type with black buttons:
We have improved delivery too. No more taxes and customs paperwork within the European Union, the United States and the United Kingdom. If you have your own embroidery machine, the PES file for the Fedora embroidery is available here; for the Fedora Classic, here.
Check out theembroidered Fedora collection here and don’t forget to use the FEDORA5 coupon code, for the $5 discount on every Fedora shirt and sweatshirt.
When ordering, note that the old logo style items are labelled “Fedora Classic”.






 Recommended: