Hardware Review: 16Bit Pocket MD – An Unexpectedly Decent Portable Mega Drive
This year, Sega will release the Mega Drive Mini, its own take on the retro console craze which Nintendo has done rather well out of in recent years with the NES and SNES Classic Editions. However, it’s not the first time that the SNES rival has been resurrected using modern technology; in fact, we’ve been seeing clones of the Mega Drive / Genesis for the past decade, the vast majority of which have been pretty terrible. Plagued by poor emulation, terrible controls and hopelessly inaccurate sound replication, these devices have been huge disappointments – and the ones which carry Sega’s official blessing haven’t been any better either, often exhibiting the same issues because they’re based on largely the same ‘system on a chip’ tech.
When news hit our ears that Japanese company Columbus Circle – which has been doing a good job of resurrecting classic games in recent years – was about to release its own portable Mega Drive clone, we had little reason to suspect it would change this sorrowful tradition. Nonetheless, we duly ordered one – mostly out of morbid curiosity – and we’ve been pleasantly surprised. Not only does the unit come with a good screen that really makes the pixels stand out (although viewing angles aren’t brilliant and some games appear slightly stretched), it also has a fantastic rolling D-pad and a six button setup which means you can play games like Super Street Fighter II perfectly (in case you were wondering, it works fine with games like Forgotten Worlds and Golden Axe II, both of which have issues with the official six-button controller on original hardware). It’s also comfortable to use for prolonged periods and is highly portable. Oh, and Mega Everdrive carts work on it, if you’re into that kind of jazz.
It’s not perfect, by any means; the sound, while better than we’ve heard on other clones, still isn’t quite right and bass notes cause the speaker to distort, even when it’s at quite a low volume. The unit doesn’t have an internal rechargeable battery either, and relies on four AAA batteries for power, which give around five to six hours of play. Despite the quality of the screen and the controls, the 16Bit Pocket MD looks and feels a little cheap, and almost looks like a prototype in some places; for example, on the top edge there’s a ‘DC 5V’ mark next to a blank piece of plastic, which suggests that Columbus Circle had intended to include the ability to power the unit from a wall charger, but removed it at the last minute. Elsewhere, the casing doesn’t quite fit together snugly enough, and we found that our copy of Virtua Racing – which includes Sega’s Super FX-beating SVP chip – refused to boot. PAL and North American games with region locking refused to work too, which means the 16Bit Pocket MD is imitating a Japanese Mega Drive console on a hardware level.
The 16Bit Pocket MD also has AV-out support, but it’s via composite and the quality is predictably poor; it’s a nice bonus but not something you’ll want to make much use of. The inability to plug in a second controller also means that you’re limited to single-player games, both in TV-out mode and when used as a portable (Sega’s own attempt at a portable Mega Drive, the Nomad, had a controller port on the bottom to overcome this).
In so many ways, the 16Bit Pocket MD repeats many of the mistakes other Sega clone systems have done; it’s a cheaply-made device rather than a premium proposition. But it gets the most important things (mostly) right – the controls are great, the screen is good and, by and large, performance is of an acceptable standard (although those of you who refuse to accept anything but FPGA quality will no doubt find plenty of issues).
The really puzzling thing about the 16Bit Pocket MD is how hard it is to get hold of; our unit was pre-ordered via Play-Asia before Christmas and was subject to several release date delays before finally arriving this week. Play-Asia is now completely sold out, and a quick glance online appears to suggest that Amazon Japan and Columbus Circle’s own online store are the only places that have stock right now. If you’re brave enough to order from either then you can pick one up for around £43 / $55, not including international shipping. It’s worth noting that Columbus Circle has also released a portable Super Famicom with HDMI-out support, although that appears to be just as hard to get as its Sega sibling.
If you do somehow manage to get your hands on a 16Bit Pocket MD, we can’t imagine you’ll be disappointed, especially for this price. While the Sega Nomad remains the portable console of choice for diehard Mega Drive / Genesis fans, its muddy screen and terrible battery life count against it in 2019; the 16Bit Pocket MD may not be perfect, but it does at least solve these two issues.
The current Fedora Logo has been used by Fedora and the Fedora Community since 2005. However, over the past few months, Máirín Duffy and the Fedora Design team, along with the wider Fedora community have been working on redesigning the Fedora logo.
Far from being just an arbitrary logo change, this process is being undertaken to solve a number of issues encountered with the current logo. Some of the issues with the current logo include the lack of a single colour variant, and, consequently the logo not working well on dark backgrounds. Other challenges with the current logo is confusion with other well-known brands, and the use of a proprietary font.
The new Fedora Logo design process
Last month, Máirín posted an amazing article about the history of the Fedora logo, a detailed analysis of the challenges with the current logo, and a proposal of two candidates. A wide ranging discussion with the Fedora community followed, including input from Matt Muñoz, the designer of the current Fedora logo. After the discussions, the following candidate was chosen for further iteration:
In a follow-up post this week, Máirín summarizes the discussions and critiques that took place around the initial proposal, and details the iterations that took place as a result.
After all the discussions and iterations, the following 3 candidates are where the team is currently at:
Conquer with character in Apex Legends, a free-to-play Battle Royale shooter where legendary characters with powerful abilities team up to battle for fame and fortune on the fringes of the Frontier. Master an ever-growing roster of diverse legends, deep tactical squad play, and bold new innovations that level-up the Battle Royale experience?all within a rugged world where anything goes. Welcome to the next evolution of Battle Royale.
As I work, throughout the day, music is always playing in the background. Most often, that music is in the form of vinyl spinning on a turntable. But when I’m not in purist mode, I’ll opt to listen to audio by way of a streaming app. Naturally, I’m on the Linux platform, so the only tools I have at my disposal are those that play well on my operating system of choice. Fortunately, plenty of options exist for those who want to stream audio to their Linux desktops.
In fact, Linux offers a number of solid offerings for music streaming, and I’ll highlight five of my favorite tools for this task. A word of warning, not all of these players are open source. But if you’re okay running a proprietary app on your open source desktop, you have some really powerful options. Let’s take a look at what’s available.
Spotify for Linux isn’t some dumb-downed, half-baked app that crashes every other time you open it, and doesn’t offer the full-range of features found on the macOS and Windows equivalent. In fact, the Linux version of Spotify is exactly the same as you’ll find on other platforms. With the Spotify streaming client you can listen to music and podcasts, create playlists, discover new artists, and so much more. And the Spotify interface (Figure 1) is quite easy to navigate and use.
You can install Spotify either using snap (with the command sudo snap install spotify), or from the official repository, with the following commands:
Once installed, you’ll want to log into your Spotify account, so you can start streaming all of the great music to help motivate you to get your work done. If you have Spotify installed on other devices (and logged into the same account), you can dictate to which device the music should stream (by clicking the Devices Available icon near the bottom right corner of the Spotify window).
Clementine one of the best music players available to the Linux platform. Clementine not only allows user to play locally stored music, but to connect to numerous streaming audio services, such as:
There are two caveats to using Clementine. The first is you must be using the most recent version (as the build available in some repositories is out of date and won’t install the necessary streaming plugins). Second, even with the most recent build, some streaming services won’t function as expected. For example, with Spotify, you’ll only have available to you the Top Tracks (and not your playlist … or the ability to search for songs).
With Clementine Internet radio streaming, you’ll find musicians and bands you’ve never heard of (Figure 2), and plenty of them to tune into.
Odio is a cross-platform, proprietary app (available for Linux, MacOS, and Windows) that allows you to stream internet music stations of all genres. Radio stations are curated from www.radio-browser.info and the app itself does an incredible job of presenting the streams for you (Figure 3).
Odio makes it very easy to find unique Internet radio stations and even add those you find and enjoy to your library. Currently, the only way to install Odio on Linux is via Snap. If you’re distribution supports snap packages, install this streaming app with the command:
sudo snap install odio
Once installed, you can open the app and start using it. There is no need to log into (or create) an account. Odio is very limited in its settings. In fact, it only offers the choice between a dark or light theme in the settings window. However, as limited as it might be, Odio is one of your best bets for playing Internet radio on Linux.
Streamtuner2 is an outstanding Internet radio station GUI tool. With it you can stream music from the likes of:
Internet radio stations
Jameno
MyOggRadio
Shoutcast.com
SurfMusic
TuneIn
Xiph.org
YouTube
Streamtuner2 offers a nice (if not slightly outdated) interface, that makes it quite easy to find and stream your favorite music. The one caveat with StreamTuner2 is that it’s really just a GUI for finding the streams you want to hear. When you find a station, double-click on it to open the app associated with the stream. That means you must have the necessary apps installed, in order for the streams to play. If you don’t have the proper apps, you can’t play the streams. Because of this, you’ll spend a good amount of time figuring out what apps to install for certain streams (Figure 4).
VLC has been, for a very long time, dubbed the best media playback tool for Linux. That’s with good reason, as it can play just about anything you throw at it. Included in that list is streaming radio stations. Although you won’t find VLC connecting to the likes of Spotify, you can head over to Internet-Radio, click on a playlist and have VLC open it without a problem. And considering how many internet radio stations are available at the moment, you won’t have any problem finding music to suit your tastes. VLC also includes tools like visualizers, equalizers (Figure 5), and more.
The only caveat to VLC is that you do have to have a URL for the Internet Radio you wish you hear, as the tool itself doesn’t curate. But with those links in hand, you won’t find a better media player than VLC.
Always More Where That Came From
If one of these five tools doesn’t fit your needs, I suggest you open your distribution’s app store and search for one that will. There are plenty of tools to make streaming music, podcasts, and more not only possible on Linux, but easy.
Assassin's Creed 3: Remastered Release Date Confirmed, But Not For Switch
Assassin's Creed III: Remastered's release date has finally been announced, but so far it doesn't look like it's coming to Switch--despite those recent rumors. The game launches for PS4, Xbox One, and PC on March 29.
Alongside Assassin's Creed III is a remastered edition ofAssassin's Creed III: Liberation--once a PS Vita exclusive--and the Tyranny of King Washington DLC series. Together, the collection features 4K HDR upgrades on PS4 Pro, Xbox One X, and PC, as well as "higher resolution textures, a new graphics engine and several other graphical enhancements." The collection can be bought standalone, but it's also included for no extra cost in the Assassin's Creed Odyssey season pass.
Multiple retailer listings had suggested an Assassin's Creed collection was to launch for Nintendo Switch this month. Ubisoft's press release confirming Assassin's Creed III: Remastered's launch date for PS4, Xbox One, and PC, however, fails to mention a Switch version. GameSpot contacted Ubisoft for clarification on whether the remaster will come to Switch and was again told the publisher would not comment on rumors or speculation.
Assassin's Creed III was first released for PS3, Xbox 360, PC, and Wii U in 2012. We awarded the game an 8.5/10 in our Assassin's Creed III review; critic Kevin VanOrd said it "expands the series' gameplay in enjoyable and sensible ways."
R-Type Dimensions EX Is Getting A Very Limited Collector’s Edition On Switch
Stuttgart-based publisher Strictly Limited Games has revealed that it will be releasing two physical editions of R-Type Dimensions EX on Switch later this month.
R-Type Dimensions EX contains both R-Type I and R-Type II in one lovely shoot ’em up package, both of which are regarded as being up there with the most influential games of the genre. Players must save the universe from the evil Bydo in their spaceship and, across a total of 14 levels, shoot their way through the Bydo-contaminated worlds alone. In a nice touch, you can switch between the original, retro 2D graphics and the completely reworked 3D mode at the touch of a button. We described last year’s digital release as a “top-notch” package in our review, so feel free to give that a read for more info.
As well as a standard physical release, the game will be treated to a fancy Collector’s Edition, with pre-orders going live from Strictly Limited Games’ store from 24th February. The Collector’s Edition is limited to just 2,000 copies and will cost €49.99; the standard physical release will receive 3,000 copies and will be priced at €24.99.
Specific details about the Collector’s Edition haven’t been shared just yet, although Strictly Limited’s last Switch collector’s release, for Velocity 2X, came with a soundtrack CD, an artbook, and a poster.
Have you already played this one on Switch? Would you like to add a physical copy to your collection? Tell us below.
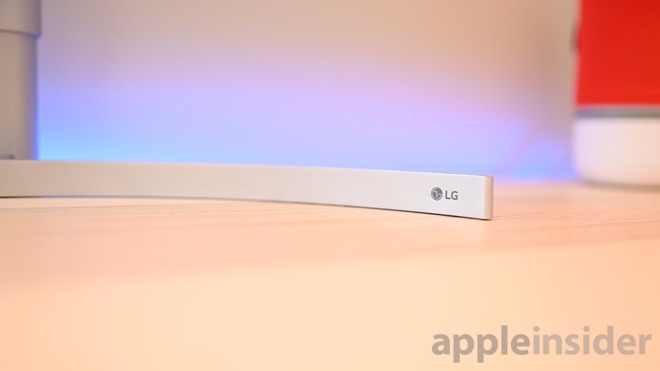
LG UltraWide 5K2K is a beast of a monitor with Thunderbolt 3
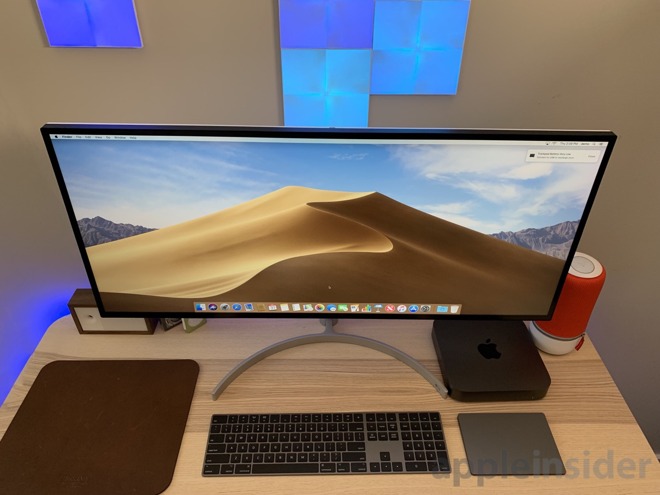
LG has been catering to Mac owners for years, and the company’s UltraWide 5K2K display is a great solution for creative professionals who want a bit more horizontal real estate.
LG UltraWide 5K2K and 15-inch MacBook Pro
If you’ve got a MacBook Pro on your desk, a big monitor absolutely helps workflow. If you’ve got a more compact Mac mini, it’s a requirement. With certain tasks such as video or audio editing, programming, or other content creation, more real estate is good, and a 34-inch wide display certainly provides that.
Resolution
As a display —especially at this level —it needs to kill it in the visuals department. The LG UltraWide 5K2K sports a resolution of 5120 x 2160, which at first blush makes this look like a 5K monitor.
Eagle-eyed readers will note, however, the vertical resolution. In short, it has the horizontal resolution of a 5K monitor and the vertical resolution of a 4K display.
LG UltraWide 5K
A massively wide 21:9 display is going to have a bit of a niche audience but anyone who is coming from a resolution of 4K or below should be happy.
Color representation is accurate and like many high-end monitors, an individually unique color calibration report is included in the box to verify its integrity. It supports DisplayHDR 600 (HDR10) so between the brightness and accuracy, colors pop —even with the matte finish.
As far as other specs go: The refresh rate is 60Hz, it has a max brightness of 450 nits, covers 90 percent of the DCI-P3 wide color gamut, has a contrast ratio of 1200:1, and an exceptionally wide 178-degree viewing angle.
A gamer may find flaws with the slower 60Hz refresh rate, but let’s be real —most hardcore gamers aren’t going to be using a Mac. If you are a steadfast gamer who needs a gaming-focused monitor, we’d suggest looking elsewhere for 120Hz or 240Hz.
Connectivity
Connectivity isn’t an issue, with a bevy of ports available.
LG UltraWide 5K
Ports include:
1 x Thunderbolt 3
1 x DisplayPort
2 x HDMI
1 x 3.5mm Headphone
2 x USB Type-A
1 x USB Type-B
1 x Power input
When you connect a 15-inch MacBook Pro over Thunderbolt 3, you get to take advantage of the audio output on the back of the monitor for headphones and the two USB ports while also drawing 85 watts of power. The 15-inch MacBook Pro can handle 87W so this is just shy of full speed charging.
In our testing so far, the 85W is more than sufficient to keep the MacBook Pro fully charged, even when under load.
LG UltraWide 5K
The Thunderbolt 3 signal also routes the audio through the monitor’s dual 5W speakers. The speakers themselves aren’t anything to write home about. They beat the MacBook Pros internal speakers but still far cry from dedicated studio speakers.
To control the monitor there is a multi-purpose joystick on the underside of the front panel. It can be moved in four directions, as well as be depressed to make a selection.
LG UltraWide 5K controls
Quickly moving it left and right will decrease and increase the volume while moving it forward will toggle mute on and off. If you depress the joystick, LG’s menu is presented where you can access picture mode, settings, power, and input.
It is a simple control scheme that does its best not to bury settings too deep within the menu. The main menu is displayed at the bottom center, but once you go into a settings option it will appear on the right side of the display.
Setup
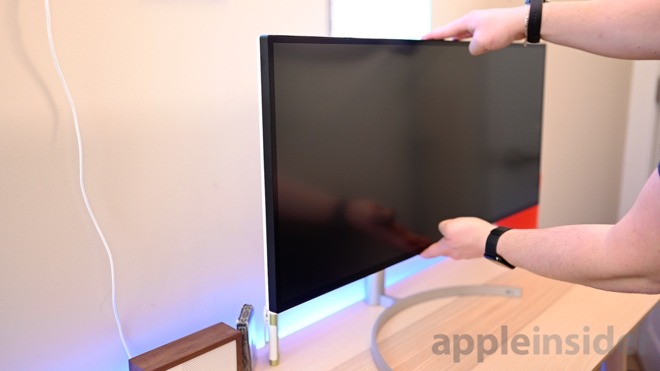
The display ships in three pieces —the screen, the curved stand, and the pole that holds it all together. Unfortunately, the support post is largely made of plastic and painted to look like the silver metal of the bottom stand. This gives it a bit of a cheap feeling —a sentiment we also had regarding the bezels around the monitor itself.
LG UltraWide 5K metal stand
We really like the minimalist design of the curved stand, it still keeps our desk free for other clutter and the whole setup can stay fairly close to the back of the desk.
Once you take everything out of the box, the stand connects to the support pole with a simple thumb screw. Then the monitor snaps into place at the top.
LG has built in a very small amount of horizontal rotation which seems largely just to make sure the monitor is straight. The display is so big rotating it wouldn’t be feasible on most desks anyway.
LG UltraWide 5K adjustments
It easily adjusts up and down with very little assistance from the user. LG has the resistance balance perfectly which makes adjusting it a breeze. Vertically it can tilt ~5-15 degrees.
Build quality
LG did a bang-up job designing the LG34WK95U. The display itself looks fantastic, the silver and black body look sleek, but there are still areas that could improve.
It is odd that the front and sides are all black, but the hidden back is white. It would have looked a bit better if they went all one way or another in our opinion.
Most of the display is also plastic between the bezels, back, and the support column. We don’t expect to see others taking Apple’s approach of creating an all-metal display, but it could be improved.
The bezels around the display look particularly cheap. LG likely would have tried to get away with making the base plastic too if it didn’t need the added heft.
To be fair to LG, almost all other display companies employ similar tactics so it is something that we see time and time again, we just miss Apple’s propensity for design.
Nano IPS technology
LG is touting its new Nano IPS tech in this and other of its newer monitors. Nano IPS is a new, LG-specific version of in-plane switching LCD technology that uses nanometer-sized particles to help absorb excess light wavelengths to produce more intense colors. This is partially what earned it the DisplayHDR 600 compliancy badge on the front for HDR.
Even though HDR displays are often very bright, the LG34WK95U still isn’t quite as bright as Apple’s own displays —such as that in the 5K iMac.
Living with an ultrawide display
The width takes some getting used to. There are some obvious use-cases for the display right off the bat, though.
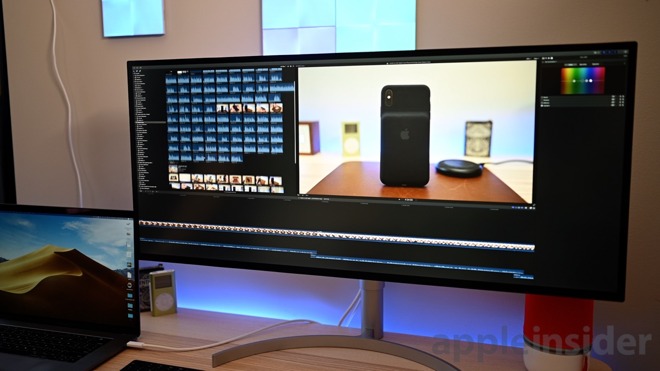
Jumping into Final Cut Pro X, a much larger view of your timeline with the added horizontal real estate makes working pleasant. Instead of just having a library, preview window, and Inspector open, you can add color wheels on the top which helps streamline that workflow and reduces the need to constantly open and close UI elements.
LG UltraWide 5K with Final Cut Pro X
I spent some time working on my web development projects as well. It was much easier to have multiple windows open at once such as the actual code and the live preview of my work. Instead of having to tab between my IDE and Safari, I can freely see them side by side.
This is a 34-inch monitor, so expectations should be set that it will occupy a large overall footprint. The horizontal span of this monitor will exclude it quickly from any smaller setups. For a long-term solution, we’d rather mount this to an arm so it can move more to the side and keep the space under it open.
LG UltraWide 5K
Our Mac does a great job powering up such a large display, though your mileage will vary based on your machine. For example, the latest Mac Mini is unable to push this display at full native resolution. When you do run a 4K or 5K display at native resolution though, on-screen objects get insanely small.
It may be easier to be run the display at a scaled 2560 x 1080 instead, which makes user interface elements a comfortable size while still leaving you room to work. But, on the other hand, why pay for 5K2K if you don’t need the resolution? This decision all comes down to workflow.
For the price, the display will be limited to the creative pros who can really benefit from the large horizontal space at a high resolution. It can make a world of a difference to those users’ workflows. The bulk of other users may be better off with one of the flagship LG UltraFine 4K or 5K displays.
Rating: 4 out of 5
Where to buy
LG’s 34-inch 5K monitor (34WK95U-W) is available at both B&H Photo and Amazon.com for $1,496.99. B&H is also throwing in free expedited shipping withing the contiguous U.S. and will not collect sales tax in a number of states.
When we launched Azure Key Vault a few years ago, it solved a major problem users had which was that storing sensitive and/or secret information in code or config files in plain text causes multiple problems including security exposure. Users stored their secrets in a safe store like Key Vault and used a URI to fetch the secret material. This service has been wildly popular and has become a standard for cloud applications. It is used by fledling startups to Fortune 500 companies world over.
Developers use Key Vault to store their adhoc secrets, certificates and keys used for encryption. And to follow best security practices they create secrets that are short lived. An example of typical flow in this case could be
Step 1: Developer creates a certificate in Key Vault
Step 2: Developer sets the lifetime of the secret to be 30 day. In other words developer asks Key Vault to re-create the certificate every 30 days. Developer also chooses to receive an email when a certificate is about to expire
Step 3: Developer writes a polling service to check if the certificate has indeed expired
In the above scenario there are few challenges for the customer. They would have to write a polling service that constantly checks if the certificate has expired and if so they wait for the new certificate and then bind it in Windows Certificate manager. Now what if developer doesn’t have to poll. And also if the developer doesn’t have to bind the new certificate in Windows Certificate manager. To solve this exact problem we built a Key Vault Virtual Machine Extension.
Azure virtual machine (VM) extensions are small applications that provide post-deployment configuration and automation tasks on Azure VMs. For example, if a virtual machine requires software installation, anti-virus protection, or to run a script inside of it, a VM extension can be used. Azure VM extensions can be run with the Azure CLI, PowerShell, Azure Resource Manager templates, and the Azure portal. Extensions can be bundled with a new VM deployment, or run against any existing system. To learn more about VM Extensions please click here
Key Vault VM Extension is supposed to do just that as explained in the steps below
Step 1: Create a Key Vault and create an Azure Windows Virtual Machine
Step 2: Install the Key Vault VM Extension on the VM
Step 3: Configure Key Vault VM Extension to monitor a specific vault by specifying how often it should fetch the certificate
By doing the above steps the latest certificate is bound correctly in Windows Certificate Manager. This feature enables auto-rotation of SSL certificates, without necessitating a re-deployment or binding.
In the lifecycle of secrets management fetching the latest version of the secret (for the purpose of this article a certificate) is just as important as storing it securely. To solve this problem, on an Azure Virtual Machine, we’ve created a VM Extension for Windows. A Linux version is coming soon. Virtual Machine Extensions are small applications that provide post-deployment configuration and automation tasks on Azure VMs. In this case the Key Vault Virtual Machine extension once installed fetches the latest version of the certificate at a specified interval and automatically binds the latest version of the certificate in the certificate store on Windows. As you can see this feature enables auto-rotation of SSL certificates, without necessitating a re-deployment or binding.
Also before we begin going through the tutorial, we need to understand a concept called Managed Identities. Your code needs credentials to authenticate to cloud services, but you want to limit the visibility of those credentials as much as possible. Ideally, they never appear on a developer’s workstation or get checked-in to source control. Azure Key Vault can store credentials securely so they aren’t in your code, but to retrieve them you need to authenticate to Azure Key Vault. To authenticate to Key Vault, you need a credential! A classic bootstrap problem. Through the magic of Azure and Azure AD, MI provides a “bootstrap identity” that makes it much simpler to get things started.
Here’s how it works: When you enable MI for an Azure resource such as a virtual machine, Azure creates a Service Principal (an identity) for that resource in Azure AD, and injects the credentials (of that identity) into the resource (in this case a virtual machine).
Your code calls a local MI endpoint to get an access token
MI uses the locally injected credentials to get an access token from Azure AD
Your code uses this access token to authenticate to an Azure service
Now within Managed Identities there are 2 types
System Assigned managed identity is enabled directly on an Azure service instance. When the identity is enabled, Azure creates an identity for the instance in the Azure AD tenant that’s trusted by the subscription. The lifecycle of the identity is managed by Azure and is tied to the Azure service instance.
User Assigned managed identity is created as a standalone Azure resource. Users first create an identity and then assign that identity to one or more Azure resources.
In this tutorial I will demonstrate how to create a Azure Virtual Machine with an ARM template which also includes creating a Key Vault VM Extension on the VM.
Prerequisites
Step 1
After the prerequisites are complete, create an System Assigned identity by following this tutorial
Step 2
Assign the newly created System Assigned identity to access to your Key Vault
Select Access Policies section and Add New by searching for the User Assigned identity
Step 3
Create or Update a VM with the following ARM template You can view full the ARM template here and the ARM Parameters file here.
The most minimal settings in the ARM template are shown below:
{
"secretsManagementSettings": {
"observedCertificates": [
"<KeyVault URI of a secret to be monitored/retrieved, in versionless format: https://myVaultName.vault.azure.net/secrets/myCertName">,
"<more entries here>",
"pollingIntervalInS": "[parameters('kvvmextPollingInterval')]",
]
}
}
As you can see we only specify the observedCertificates parameter and polling Interval in seconds
Note: Your observedCertificates urls should be of the form:
Reason being the /secrets path returns the full certificate, inluding the private key, while the /certificates path does not.
By following this tutorial you can create a VM with the above specified template
The above tutorial assumes that you are storing your certificates on Windows Certificate Manager. And so the VM Extension pulls down the latest certificates at a specified interval and automatically binds those certificates in your certificate manager.
That’s all folks!
Linux Version: We’re actively working on a VM Extension for Linux and would love to hear any feedback you might have.
We are eager to hear from you about your use cases and how we can evolve the VM Extension to help you. So please reach out to us and add your feature requests to the Azure feedback forum. If you run into issues using the VM extension please reach out to us on StackOverflow.
Prashanth Yerramilli, Senior Program Manager, Azure Key Vault
Prashanth Yerramilli is the Key Vault Program Manager on the Azure Security team. He has over 10 years of Software Engineering experience and brings to the team love for creating the ultimate development experience.
Posted by: xSicKxBot - 02-08-2019, 10:00 AM - Forum: Lounge
- No Replies
The Rock Says He Was First Choice To Host Oscars This Year
On the same day that The Academy officially confirmed there will be no single host for the Oscars this year, actor Dwayne "The Rock" Johnson has come forward to say he was initially the Academy's first choice to host the awards show. Writing on Twitter, The Rock said he wanted to make this year's Oscars broadcast the "most fun and entertaining Oscars ever."
However, The Rock's busy filming schedule prevented him from being able to be the host. Specifically, he's away filming the Jumanji: Welcome to the Jungle sequel. "Academy and I were super bummed but maybe one day down the road," The Rock said.
Ah mahalo dude, I was their first choice to host this year, and my goal was to make it the most fun and entertaining Oscars ever. We all tried hard, but couldn’t make it work since I’m shooting Jumanji. Academy and I were super bummed but maybe one day down the road ? https://t.co/eiiMuBNOzb
In December, The Academy announced comedian/actor and The Rock's Jumanji co-star Kevin Hart would host the 91st Oscars. However, there was controversy around some of his old tweets, and this eventually culminated in Hart stepping down.
Instead of a single host, the Oscars will feature numerous presenters, including Daniel Craig, Chris Evans, Jennifer Lopez, Whoopi Goldberg, and Brie Larson, among others.
The Oscars air on ABC, and the network's entertainment boss, Karey Burke, said at a Television Critics Association event this week that the show will start with a "very exciting opener." As relayed by The Hollywood Reporter, she also confirmed that the goal is to keep the show to three hours, which is good news considering last year's event was almost as long as Gone With The Wind.
The 91st Oscars take place Sunday, February 24. Black Panther and Bohemian Rhapsody are among the Best Picture nominees; you can see all the categories and nominees here.
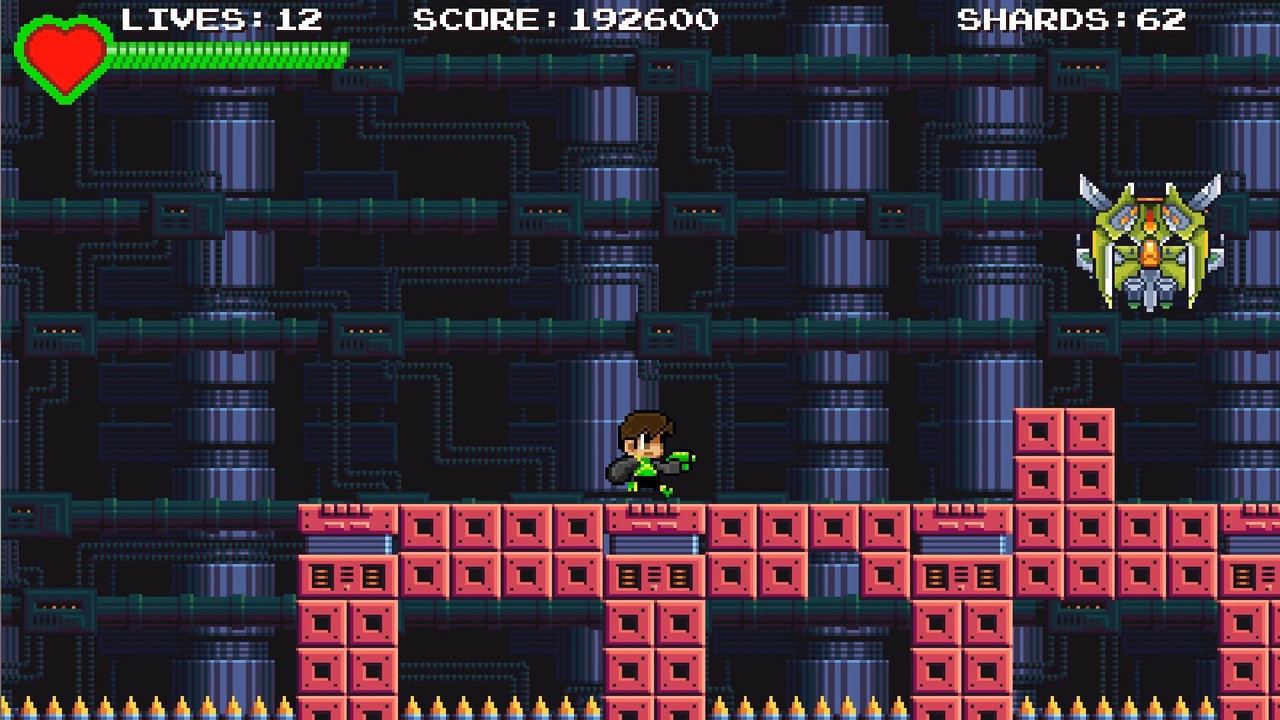
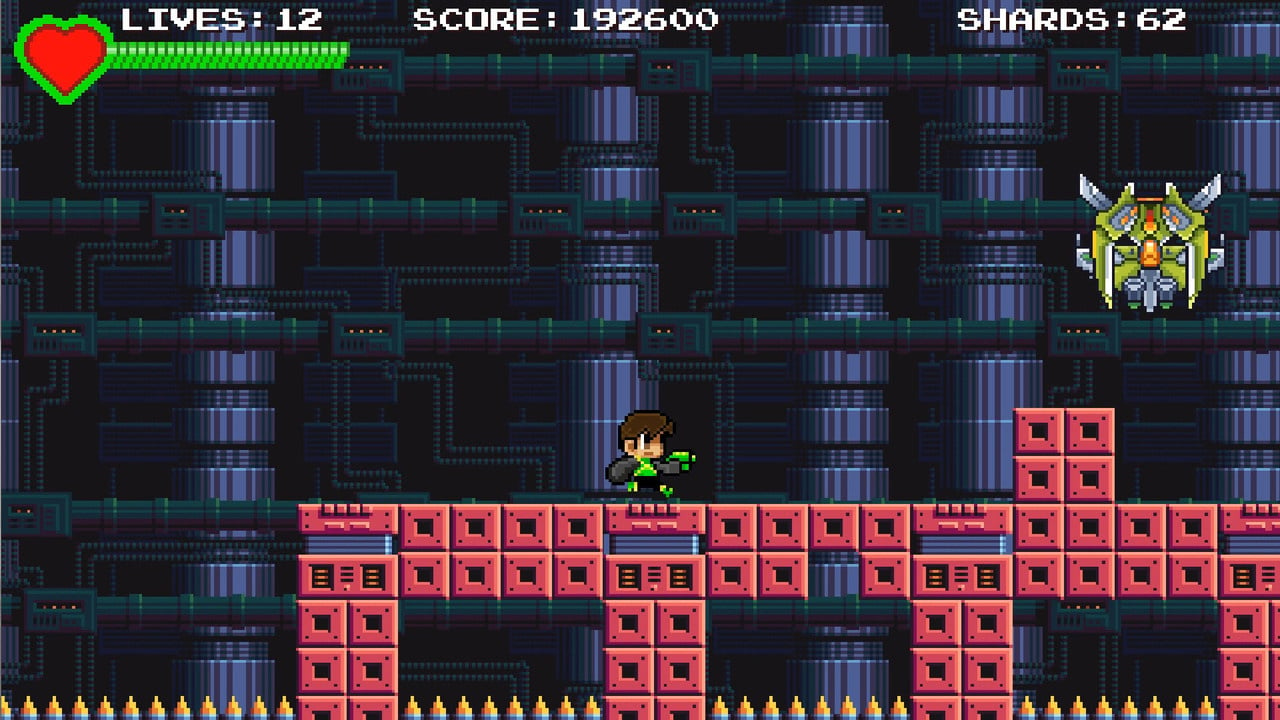
Retro-Flavoured V.O.I.D. Side-Scrolls Onto Switch At The End Of February
Nape Games and Jandusoft are prepping their action side-scroller V.O.I.D. for release later this month (the 28th, to be exact). Offering the choice between two characters, they promise different gameplay depending on your character’s abilities that recalls the classic platforming action of the 8 and 16-bit eras, but updates it with new mechanics and fresh ideas.
According to the offical press release, the Earth itself is at stake (it’s always getting itself in trouble):
PLOIDS are the evolution of the human race by merging technology with its DNA. Our planet is invaded by a race from another galaxy, which destroys everything it touches to become thus with absolute power.
After some time, a group of Ploids decides to take action and return the peace. To achieve this, Alpha and Omega must travel through time to eras of ancient land, in order to obtain sacred stones that will give him the necessary power to defeat the invaders. Some of the ancient epochs are feudal Japan, the ice age, the medieval era or among others. What he does not know is that the invaders tried to get those holy stones before him! … In addition, time threatens to collapse, and only you can connect to the PLOIDS to save the Earth!
It goes on to mention time travel, retro passwords and ‘more than 50 levels’. Sounds lovely, then, and the game certainly looks the part, as you can see from the screens below:
Have you had your fill of pixel-y platformers? Think there’s always room for a little retro-flavoured treat? Let us know if this tickles your fancy in the comments.


 Prashanth Yerramilli is the Key Vault Program Manager on the Azure Security team. He has over 10 years of Software Engineering experience and brings to the team love for creating the ultimate development experience.