Posted by: xSicKxBot - 02-09-2020, 03:50 AM - Forum: Lounge
- No Replies
ALT.CTRL.GDC Showcase: Twined
The 2020 Game Developers Conference will feature an exhibition called Alt.Ctrl.GDC dedicated to games that use alternative control schemes and interactions. Gamasutra will be talking to the developers of each of the games that have been selected for the showcase.
Twined tasks players with working together to jump higher and higher while they’re tied together, using communication and separate sliders to reach new heights.
Gamasutra had a talk with Elias Faltin, producer at Tissue Drop Games, to talk about what interested them in having players talk and plan with each other to progress and the appeal of exploring human interactions through the game’s controls.
My name is Elias Faltin, and I worked as the Producer and constructed the controller. As a producer, I was responsible for organizing and leading the team’s design and development activities. We worked according to agile philosophy and used a lot of Scrum elements. I also spent a lot of my time during the project designing, prototyping, and constructing the controller for the game.
We are students at Uppsala University Campus Gotland in the GAME department. At the end of our first year, we had a 10 week full-time course with the goal of constructing an alternative input game. At the start of Twined, we had only spent 10 weeks at half-time pace developing a shoot ‘em up game. Twined was our first full time game project.
The course was called the “Arcade” course, and it is an option to get an arcade cabinet and standard arcade inputs, but students are encouraged to come up with unique alternative inputs.
Our controller is a direct representation of the game state of the player characters in the game. In Twined, two people have to cooperate to climb together. They control the quirky “Eeny” (the orange one) and the mellow “Miney” (the purple one), two circular beings mysteriously tethered together.
Players can hold on to the ground or jump with their character. Additionally, they can manipulate “their half” of the tether by lengthening or shortening it. These three actions are controlled by player with the help of two sliders. The vertical slider is equipped with a button to hold on to the ground with. It is also used to charge the jump and is released when the slider is released. The “hold on” button can also be used to give the character a boost while in air. The horizontal slider allows players to manipulate the tether length.
We used Unity as a game engine, rhe Ferr2D plugin for quick platform creation and level iterations, Hack’nPlan as a project management tool, Photoshop and Procreate for art assets, and FL Studio for Music and Sound Effects.
As for physical materials, we used wood, screws, glue, a tabletop, 4 table legs, some custom bent metal, 4 computer mice, some buttons, magnets, springs, an iPac (allows you to connect your buttons to it and outputs their input as a keystroke. Basically a usb keyboard), and paint.
Ultimately, we wanted to make a game where players that sat down together to play but did not know each other previously would get up and continue to have a conversation together. The game and controller should act as an ice breaker and then continue to challenge the players to interact with each other. This continuous interaction would inevitably lead to a sufficient enough level of familiarity with the other person to have a conversation with that person without the game being involved.
The game itself morphed a lot in the first weeks of development. Originally, we wanted the characters to levitate and use the tether to slingshot each other through the level. Through playtesting of different prototypes, we settled on the characters jumping and holding on, which allowed for a myriad of different ways of moving the characters through a level. Having to coordinate to jump over each other or to jump at the same time to progress through the level forced players to communicate with each other in order to progress. Human-to-Human interaction becomes the first priority, followed by Human-to-Game interaction. This was the thing most multiplayer games we played failed to consistently achieve, but when they did, it created the most enjoyable moments of the games.
By making it hard, essentially. We were inspired by games like Octodad or QWOP for their annoyingly fun controls. The two players are reliant on each other (much like two climbers). If one jumps and the other one does not hold on, the two will just fly into the air and land pretty much where they started.
If the players progress through the level, they will encounter climbing problems they can’t solve by jumping over each other. They will have to jump at the same time or adjust the length of the tether between them.
Like mentioned before, it is impossible to progress for players if they do not cooperate. This might seem harsh, but it is an effective way of ensuring the players talk to each other. As soon as players start to cooperate, they will quickly find a rhythm in the movement. One holds on, the other one jumps, then the roles get reversed.
As soon as the level can’t be traversed in this fashion any more, players need to stop and cooperate in a new way (synchronous jumping) to progress. This, again, is a quite rhythmic exercise which most players solve by counting down together. This rhythm in the way players move naturally creates a lot of positive feedback in the Human-to-Human interaction.
The main challenge was to always make it clear which character the player is controlling. This was solved by giving them different colors and identities. The orange-purple color pattern is continued on the input, where the entire left half of the table is painted orange, the entire right side purple. The tether sliders are also equipped with “Eeny” and “Miney” figurines to give players more reference points.
Their identities are mostly represented through audio effects. “Eeny” is thought of as energetic and quirky, “Miney” is mellow and relaxed, and their sound designs reflect those moods, respectively. Visually, this is mostly represented by their idle animations, as we decided to keep their visual feedback identical otherwise so that players could help each other understand the controls better.
The background and environment is designed in a way that it allows players to easily identify which part of it they landed on should they fall while climbing. The visual mood of the game lightens up when players progress to distract players from the increasing difficulty of the challenges. Since players might stand in place for a second and discuss strategy, the environment offers small details that can be discovered while ascending through the cave into the platform-filled summit. This aims to allow players to “appreciate nature” on their ascent.
The level increases in difficulty as you progress. First, players will be able to progress by just jumping over each other. After exiting the first area of the level, they are shown a shortcut that requires them to jump synchronously, and it is much easier to execute if they also adjust the tether length. From that point on, they have to synchronously jump a lot more since the walls are covered in “non-stick” material that does not allow players to hold on to it.
In the last part of the level, we present players with a very open area, meaning they won’t see an apparent edge to the level on three sides (top, left, right) instead of one (top). This leads to a need for navigation, which can be a challenge in a young friendship. The last area also introduces moving platforms which require synchronous jumping and a lot of “leap of faith” jumps that will bring the players even closer together.
I think accepting and figuring out a solution to that challenge was a big motivator for the team during the project. Especially once the first playtests confirmed that our design ideas were pointing us in the right direction. We wanted to make a co-op game, and when we started with our design process, we discussed what aspects of co-op games we enjoyed and what aspects we didn’t.
It became quite clear to us that games with strong moments of Human-to-Human interaction were fun for us to play. We did not enjoy co-op games that made you wait for each other or had you staring into a phone all night long instead of into someone’s eyes. So, we challenged ourselves to make a game that focuses on making humans interact; making a game where the actual game is the social game being played by the players in front of the digital game.
Posted by: xSicKxBot - 02-09-2020, 03:50 AM - Forum: Lounge
- No Replies
Coronavirus concerns lead to delay of The Outer Worlds Switch port
Private Division has delayed the upcoming Switch port of The Outer Worlds for an unspecified period of time, a delay that comes as many China-based or adjacent companies, including partner developer Virtuos, remain closed for fear of the coronavirus epidemic.
“We’re delaying [The Outer Worlds] on Nintendo Switch due to the coronavirus impacting the Virtuos team working on the port, to provide them enough time to finish development,” tweeted Private Division, later adding: “To clarify, the team at Virtuos is ok, but their office has remained closed during this time. We’re working with the team to determine an updated development timeline, and will share more regarding a new launch date shortly.”
Private Division’s delay comes the same day as a similar announcement from Nintendo that some Switch models and Ring Fit accessories would be delayed in Japan due to coronavirus-related closures affecting the China-based portions of its supply chain.
The coronavirus outbreak began in Wuhan, China in late 2019 and, while still at its heaviest concentration in China, has been labeled a public health emergency by the World Health Organization as the virus continues to spread. Confirmed cases near the 30,000 mark while 566 individuals have died of the virus. Many affected areas have imposed mandatory quarantines and office closures to curb the spread of the virus.
Posted by: xSicKxBot - 02-09-2020, 03:50 AM - Forum: Lounge
- No Replies
Animal Crossing: New Horizons Eshop Pre-Orders Open, Eligible For Vouchers
Animal Crossing: New Horizons' release date is quickly approaching--the highly anticipated game will launch March 20, 2020 exclusively on Nintendo Switch. Physical pre-orders for New Horizons have been available for a while, but the new Animal Crossing game has finally arrived on the Switch Eshop, meaning you can now pre-order your copy digitally. And if you've been holding onto one of Nintendo's game vouchers from last year, you're in luck, because Animal Crossing: New Horizons is also eligible for that offer.
Nintendo's game voucher program was rolled out last year, offering two vouchers for $100 USD / £84 / AU$134.95. Assuming you redeem the vouchers on two full-price Nintendo Switch games, you could save yourself $20 / £16 / AU$24.95 overall. It was a great deal considering first-party Switch games just don't drop below list price when they're brand-new, and you could redeem the vouchers any two eligible games, from Pokemon Sword and Shield and Luigi's Mansion 3 to Fire Emblem: Three Houses. Unfortunately, vouchers are no longer available to be purchased in the United States or Australia, so hopefully you took advantage of the promotion last year.
If you want to redeem your voucher on Animal Crossing: New Horizons, you can do so in the Nintendo Switch Eshop, or on Nintendo.com if you're in the US or Canada. The newly released Tokyo Mirage Sessions #FE Encore was just added to the list of eligible titles as well, if you have more than one voucher saved up.
Yoo.
Sometime ago I created csgo cheat. I tested it on 10 ranked games and my account is still clear.
Nowaday i want to give you sourcecode because I don't use it anymore so do whatever u want with it.
If it was helpful for you - just give a star on github, it will be really nice.
If you want to use it - change memory class with updated addresses.
Anyway, there you go
Source:
On the PlayStation VR side, the biggest games continue to perform well. Beat Saber and Superhot VR led the pack, with Job Simulator and Arizona Sunshine also included. Though none of these games are new, they’re certainly among the most-polished titles available on the platform.
The full sales chart information is listed below.
PS4 Games
1. Grand Theft Auto V
2. Call of Duty: Modern Warfare
3. Dragon Ball Z: Kakarot
4. The Witcher 3: Wild Hunt
5. Star Wars Battlefront II
6. Madden NFL 20
7. Minecraft
8. EA Sports UFC 3
9. Star Wars Jedi: Fallen order
10. Payday 2: Crimewave Edition
11. NBA 2K20
12. God of War
13. Need for Speed Heat
14. Tom Clancy’s Rainbow Six Siege
15. Red Dead Redemption 2
16. Rocket League
17. Resident Evil 2
18. The Elder Scrolls V: Skyrim – Special Edition
19. Need for Speed Payback
20. Marvel’s Spider-Man
PSVR Games
1. Beat Saber
2. Superhot VR
3. Job Simulator
4. Arizona Sunshine
5. Surgeon Simulator: Experience Reality
6. Creed: Rise to Glory
7. Doom VFR
8. The Elder Scrolls V: Skyrim VR
9. Vacation Simulator
10. Drunkn Bar Fight
Free-to-Play Games
1. Fortnite
2. Darwin Project
3. Cuisine Royale
4. Apex Legends
5. Brawlhalla
6. Dauntless
7. Warframe
8. Paladins
9. DC Universe Online
10. H1Z1: Battle Royale
DLC and Expansions
1. Fortnite – The Wavebreaker Pack
2. Kingdom Hearts III Re:Mind
3. Fortnite – Polar Legends Pack
4. GTA Online: Criminal Enterprise Starter Pack
5. Star Wars Battlefront II: Celebration Edition Upgrade
6. Fortnite – Frozen Legends Pack
7. Fortnite: Save the World – Standard Founder’s Pack
Posted by: xSicKxBot - 02-08-2020, 10:37 AM - Forum: Python
- No Replies
Matplotlib Subplot – A Helpful Illustrated Guide
Too much stuff happening in a single plot? No problem—use multiple subplots!
This in-depth tutorial shows you everything you need to know to get started with Matplotlib’s subplot() function.
If you want, just hit “play” and watch the explainer video. I’ll then guide you through the tutorial:
To create a matplotlib subplot with any number of rows and columns, use the plt.subplot() function.
It takes 3 arguments, all of which are integers and positional only i.e. you cannot use keywords to specify them.
plt.subplot(nrows, ncols, index)
nrows – the number of rows
ncols – the number of columns
index – the Subplot you want to select (starting from 1 in the top left)
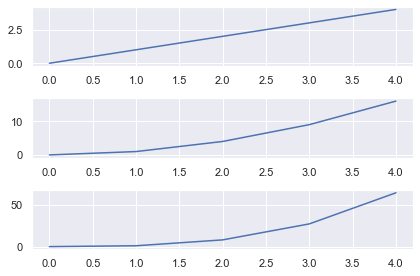
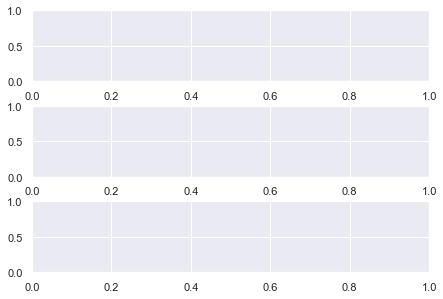
So, plt.subplot(3, 1, 1) has 3 rows, 1 column (a 3 x 1 grid) and selects Subplot with index 1.
After plt.subplot(), code your plot as normal using the plt. functions you know and love. Then, select the next subplot by increasing the index by 1 – plt.subplot(3, 1, 2) selects the second Subplot in a 3 x 1 grid. Once all Subplots have been plotted, call plt.tight_layout() to ensure no parts of the plots overlap. Finally, call plt.show() to display your plot.
# Import necessary modules and (optionally) set Seaborn style

import matplotlib.pyplot as plt

import seaborn as sns; sns.set()

import numpy as np # Generate data to plot

linear = [x for x in range(5)]

square = [x**2 for x in range(5)]

cube = [x**3 for x in range(5)] # 3x1 grid, first subplot

plt.subplot(3, 1, 1)

plt.plot(linear) # 3x1 grid, second subplot

plt.subplot(3, 1, 2)

plt.plot(square) # 3x1 grid, third subplot

plt.subplot(3, 1, 3)

plt.plot(cube) plt.tight_layout()

plt.show()
Matplotlib Subplot Example
The arguments for plt.subplot() are intuitive:
plt.subplot(nrows, ncols, index)
The first two – nrows and ncols – stand for the number of rows and number of columns respectively.
If you want a 2×2 grid, set nrows=2 and ncols=2. For a 3×1 grid, it’s nrows=3 and ncols=1.
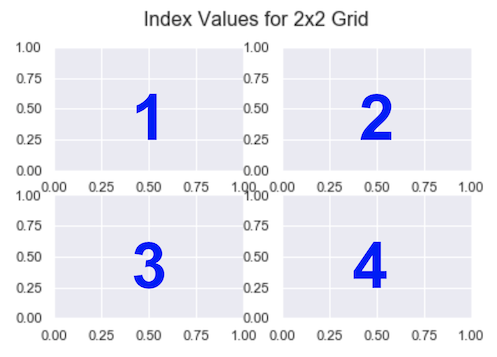
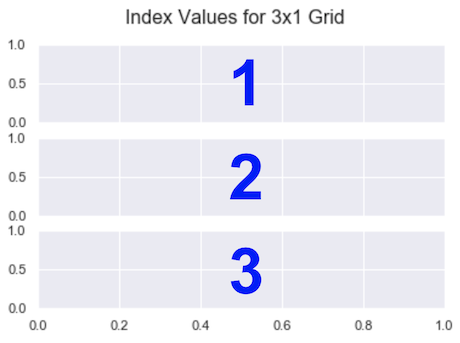
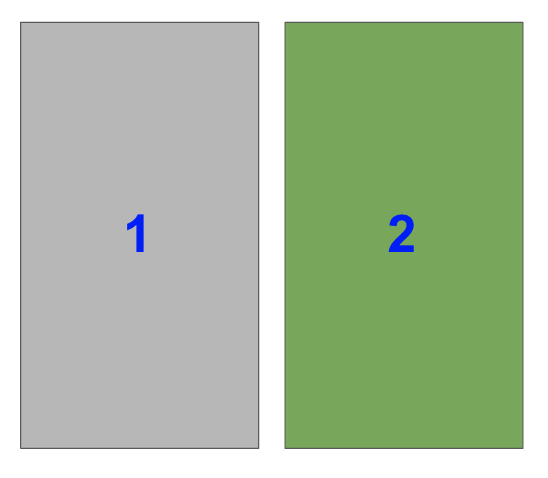
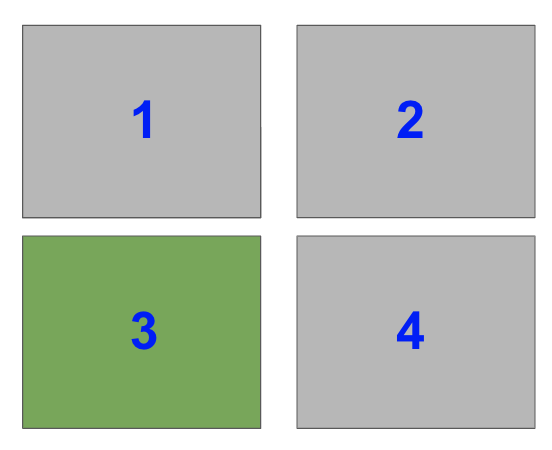
The index is the subplot you want to select. The code you write immediately after it is drawn on that subplot. Unlike everything else in the Python universe, indexing starts from 1, not 0. It continues from left-to-right in the same way you read.
So, for a 2 x 2 grid, the indexes are
For a 3 x 1 grid, they are
The arguments for plt.subplot() are positional only. You cannot pass them as keyword arguments.
>>> plt.subplot(nrows=3, ncols=1, index=1)

AttributeError: 'AxesSubplot' object has no property 'nrows'
However, the comma between the values is optional, if each value is an integer less than 10.
Thus, the following are equivalent – they both select index 1 from a 3×1 grid.
plt.subplot(3, 1, 1)

plt.subplot(311)
I will alternate between including and excluding commas to aid your learning.
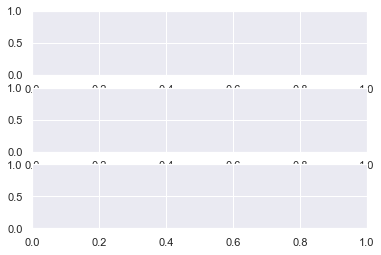
Let’s look at the default subplot layout and the general outline for your code.
plt.subplot(3, 1, 1)

<em># First subplot here</em> plt.subplot(3, 1, 2)

<em># Second subplot here</em> plt.subplot(3, 1, 3)

<em># Third subplot here</em> plt.show()
This looks ok but the x-axis labels are hard to read on the top 2 subplots.
You have a few ways to solve this problem.
First, you can manually adjust the xticks with the matplotlib xticks function – plt.xticks() – and either:
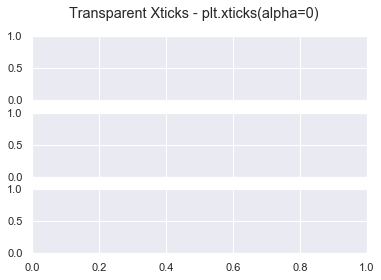
make them transparent by setting alpha=0, or
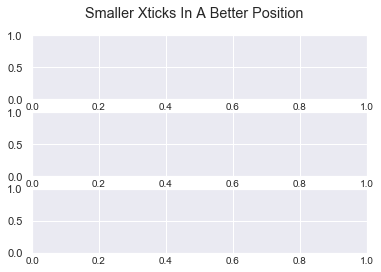
move them and decrease their font size with the position and size arguments
# Make xticks of top 2 subplots transparent

plt.subplot(3, 1, 1)

plt.xticks(alpha=0) plt.subplot(3, 1, 2)

plt.xticks(alpha=0) # Plot nothing on final subplot

plt.subplot(3, 1, 3) plt.suptitle('Transparent Xticks - plt.xticks(alpha=0)')

plt.show()
# Move and decrease size of xticks on all subplots

plt.subplot(3, 1, 1)

plt.xticks(position=(0, 0.1), size=10) plt.subplot(3, 1, 2)

plt.xticks(position=(0, 0.1), size=10) plt.subplot(3, 1, 3)

plt.xticks(position=(0, 0.1), size=10) plt.suptitle('Smaller Xticks In A Better Position')

plt.show()
Both these methods work but are fiddly. Plus, you cannot automate them which is annoying for us programmers.
You have this ticks problem whenever you create subplots. Thankfully, the matplotlib tight_layout function was created to solve this.
Matplotlib Tight_Layout
By calling plt.tight_layout(), matplotlib automatically adjusts the following parts of the plot to make sure they don’t overlap:
axis labels set with plt.xlabel() and plt.ylabel(),
tick labels set with plt.xticks() and plt.yticks(),
titles set with plt.title() and plt.suptitle()
Note that this feature is experimental. It’s not perfect but often does a really good job. Also, note that it does not work too well with legends or colorbars – you’ll see how to work with them later.
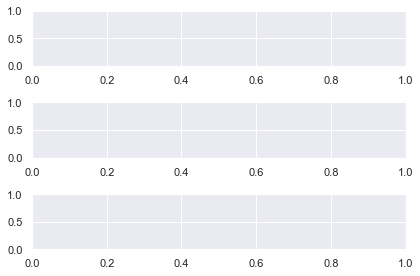
Let’s see the most basic example without any labels or titles.
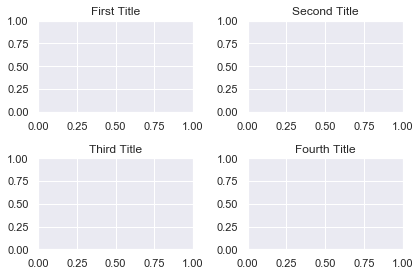
Now there is plenty of space between the plots. You can adjust this with the pad keyword. It accepts a float in the range [0.0, 1.0] and is a fraction of the font size.
Now there is less space between the plots but everything is still readable. I use plt.tight_layout() in every single plot (without colobars or legends) and I recommend you do as well. It’s an easy way to make your plots look great.
It is the overall window/page that everything is drawn on. You can have multiple independent figures and Figures can contain multiple Subplots
In other words, the Figure is the blank canvas you ‘paint’ all your plots on.
If you are happy with the size of your subplots but you want the final image to be larger/smaller, change the Figure. Do this at the top of your code with the matplotlib figure function – plt.figure().
# Make Figure 3 inches wide and 6 inches long

plt.figure(figsize=(3, 6)) # Create 2x1 grid of subplots

plt.subplot(211)

plt.subplot(212)

plt.show()
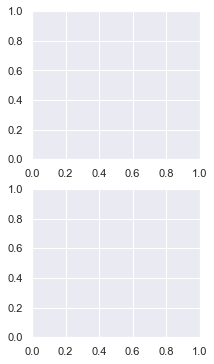
Before coding any subplots, call plt.figure() and specify the Figure size with the figsize argument. It accepts a tuple of 2 numbers – (width, height) of the image in inches.
Above, I created a plot 3 inches wide and 6 inches long – plt.figure(figsize=(3, 6)).
# Make a Figure twice as long as it is wide

plt.figure(figsize=plt.figaspect(2)) # Create 2x1 grid of subplots

plt.subplot(211)

plt.subplot(212)

plt.show()
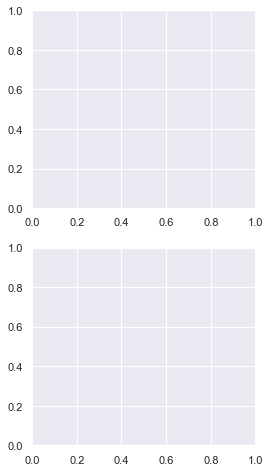
You can set a more general Figure size with the matplotlib figaspect function. It lets you set the aspect ratio (height/width) of the Figure.
Above, I created a Figure twice as long as it is wide by setting figsize=plt.figaspect(2).
Note: Remember the aspect ratio (height/width) formula by recalling that height comes first in the alphabet.
Now let’s look at putting different sized Subplots on one Figure.
Matplotlib Subplots Different Sizes
The hardest part of creating a Figure with different sized Subplots in matplotlib is figuring out what fraction each Subplot takes up.
So, you should know what you are aiming for before you start. You could sketch it on paper or draw shapes in PowerPoint. Once you’ve done this, everything else is much easier.
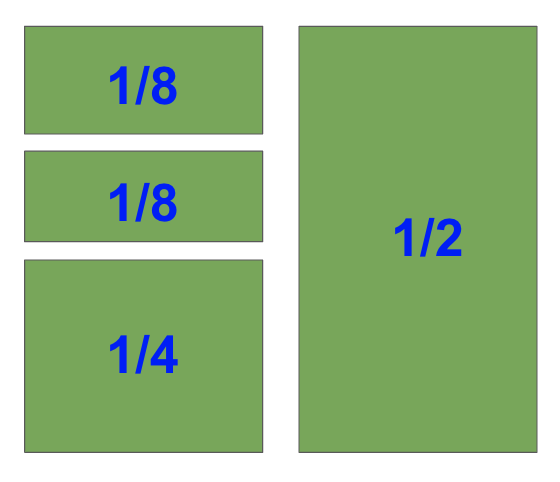
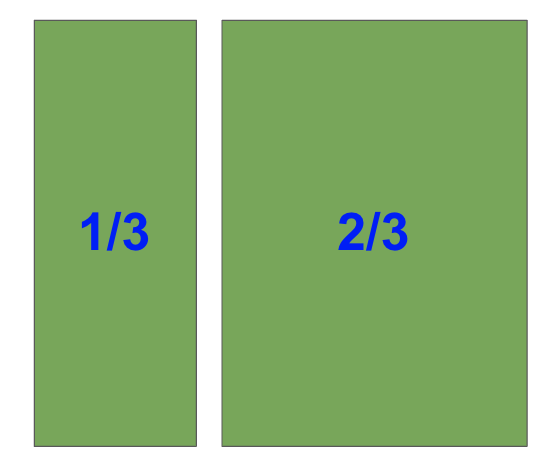
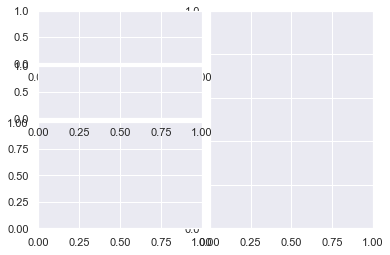
I’m going to create this shape
I’ve labeled the fraction each Subplot takes up as we need this for our plt.subplot() calls.
I’ll create the biggest subplot first and the others in descending order.
The right-hand side is half of the plot. It is one of two plots on a Figure with 1 row and 2 columns. To select it with plt.subplot(), you need to set index=2.
Note that in the image, the blue numbers are the index values each Subplot has.
In code, this is
plt.subplot(122)
Now, select the bottom left Subplot in a a 2×2 grid i.e. index=3
plt.subplot(223)
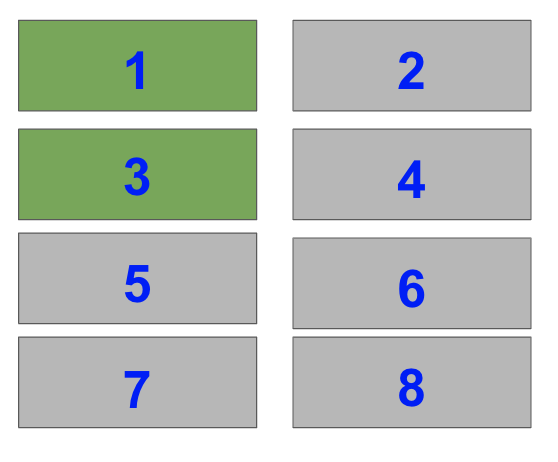
Lastly, select the top two Subplots on the left-hand side of a 4×2 grid i.e. index=1 and index=3.
plt.subplot(421)

plt.subplot(423)
When you put this altogether you get
# Subplots you have just figured out

plt.subplot(122)

plt.subplot(223)

plt.subplot(421)

plt.subplot(423) plt.tight_layout(pad=0.1)

plt.show()
Perfect! Breaking the Subplots down into their individual parts and knowing the shape you want makes everything easier.
Matplotlib Subplot Size Different
You may have noticed that each of the Subplots in the previous example took up 1/x fraction of space – 1/2, 1/4 and 1/8.
With the matplotlib subplot function, you can only create Subplots that are 1/x.
It is not possible to create the above plot in matplotlib using the plt.subplot() function. However, if you use the matplotlib subplots function or GridSpec, then it can be done.
Matplotlib Subplots_Adjust
If you aren’t happy with the spacing between plots that plt.tight_layout() provides, manually adjust it with plt.subplots_adjust().
It takes 6 optional, self-explanatory keyword arguments. Each accepts a float in the range [0.0, 1.0] and they are a fraction of the font size:
left, right, bottom and top is the spacing on each side of the Subplot
wspace – the width between Subplots
hspace – the height between Subplots
# Same grid as above

plt.subplot(122)

plt.subplot(223)

plt.subplot(421)

plt.subplot(423) # Set horizontal and vertical space to 0.05

plt.subplots_adjust(hspace=0.05, wspace=0.05)

plt.show()
In this example, I decreased both the height and width to just 0.05. Now there is hardly any space between the plots.
To avoid loads of similar examples, play around with the arguments yourself to get a feel for how this function works.
Matplotlib Suplot DPI
The Dots Per Inch (DPI) is a measure of printer resolution. It is the number of colored dots placed on each square inch of paper when it’s printed. The more dots you have, the higher the quality of the image. If you are going to print your plot on a large poster, it’s a good idea to use a large DPI.
The DPI for each Figure is controlled by the plt.rcParams dictionary. It contains all the runtime configuration settings. If you print plt.rcParams to the screen, you will see all the variables you can modify. We want figure.dpi.
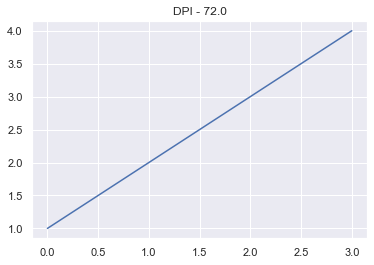
Let’s make a simple line plot first with the default DPI (72.0) and then a much smaller value.
The Figure with a smaller DPI is smaller and has a lower resolution.
If you want to permanently change the DPI of all matplotlib Figures – or any of the runtime configuration settings – find the matplotlibrc file on your system and modify it.
You can find it by entering
import matplotlib as mpl

mpl.matplotlib_fname()
Once you have found it, there are notes inside telling you what everything does.
Matplotlib Subplot Spacing
The function plt.tight_layout() solves most of your spacing issues. If that is not enough, call it with the optional pad and pass a float in the range [0.0, 1.0]. If that still is not enough, use the plt.subplots_adjust() function.
I’ve explained both of these functions in detail further up the article.
Matplotlib Subplot Colorbar
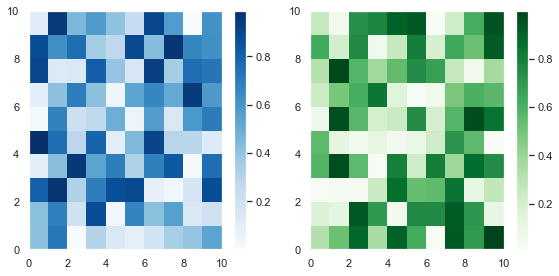
Adding a colorbar to each plot is the same as adding a title – code it underneath the plt.subplot() call you are currently working on. Let’s plot a 1×2 grid where each Subplot is a heatmap of randomly generated numbers.
For more info on the Python random module, check out my article. I use the Numpy random module below but the same ideas apply.
# Set seed so you can reproduce results

np.random.seed(1) # Create a 10x10 array of random floats in the range [0.0, 1.0]

data1 = np.random.random((10, 10))

data2 = np.random.random((10, 10)) # Make figure twice as wide as it is long plt.figure(figsize=plt.figaspect(1/2)) # First subplot

plt.subplot(121)

pcm1 = plt.pcolormesh(data1, cmap='Blues')

plt.colorbar(pcm1) # Second subplot

plt.subplot(122)

pcm2 = plt.pcolormesh(data2, cmap='Greens')

plt.colorbar(pcm2) plt.tight_layout()

plt.show()
First, I created some (10, 10) arrays containing random numbers between 0 and 1 using the np.random.random() function. Then I plotted them as heatmaps using plt.pcolormesh(). I stored the result and passed it to plt.colorbar(), then finished the plot.
As this is an article on Subplots, I won’t discuss the matplotlib pcolormesh function in detail.
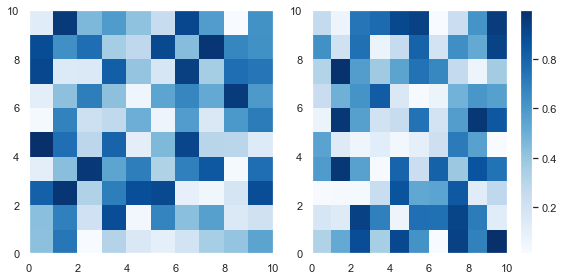
Since these plots are different samples of the same data, you can plot them with the same color and just draw one colorbar.
To draw this plot, use the same code as above and set the same colormap in both matplotlib pcolormesh calls – cmap='Blues'. Then draw the colorbar on the second subplot.
This doesn’t look as good as the above Figure since the colorbar takes up space from the second Subplot. Unfortunately, you cannot change this behavior – the colorbar takes up space from the Subplot it is drawn next to.
A Grid is the number of rows and columns you specify when calling plt.subplot(). Each section of the Grid is called a cell. You can create any sized grid you want. But plt.subplot() only creates Subplots that span one cell. To create Subplots that span multiple cells, use the GridSpec class, the plt.subplots() function or the subplot2grid method.
I discuss these in detail in my article on matplotlib subplots.
Summary
Now you know everything there is to know about the subplot function in matplotlib.
You can create grids of any size you want and draw subplots of any size – as long as it takes up 1/xth of the plot. If you want a larger or smaller Figure you can change it with the plt.figure() function. Plus you can control the DPI, spacing and set the title.
Armed with this knowlege, you can now make impressive plots of unlimited complexity.
But you have also discovered some of the limits of the subplot function. And you may feel that it is a bit clunky to type plt.subplot() whenever you want to draw a new one.
To learn how to create more detailed plots with less lines of code, read my article on the plt.subplots() (with an ‘s’) function.
Where To Go From Here?
Do you wish you could be a programmer full-time but don’t know how to start?
Check out my pure value-packed webinar where I teach you to become a Python freelancer in 60 days or your money back!
It doesn’t matter if you’re a Python novice or Python pro. If you are not making six figures/year with Python right now, you will learn something from this webinar.
These are proven, no-BS methods that get you results fast.
This webinar won’t be online forever. Click the link below before the seats fill up and learn how to become a Python freelancer, guaranteed. https://tinyurl.com/become-a-python-freelancer
WordPress conversion from plt.subplot.ipynb by nb2wp v0.3.1
I’ve been expressing my creative muscles this week through variousnewsstories, although I worry that perhaps I come off as being slightly unhinged? The bright-side is you won’t have to put up with me for much longer. The new team will be in place by the start of March, and then the ‘proper’ re-launch takes place at the end of March and they’ll be taking care of you.
Before then however, I’m probably going to have some fun.
Meanwhile, thousands of miles away…
New App Releases
There’s only one game of note that people are talking about, and that’s PictoQuest. A Nintendo Switch game that’s been ported over to mobile (we might start seeing this more often as games go to Switch first, mobile later) and it’s basically just picross with some window dressing. Reports suggest that It’s not quite as good as more involved RPG/Puzzle hybrids like Puzzle Quest, but if you’re a fan of this particular style of puzzle it does the job.
App Updates & News
Scythe is coming to iOS!
After some much needed TLC, I think it’s fair to say Asmodee Digital’s adaptation of Scythe is one of their better digital board game properties, and probably generally the best way to play Scythe. It’s been out of Early Access since September 2018, and there hasn’t been a peep from either the developer nor Asmodee themselves… until now!
Thanks to the eagle eyed patrons of Stately Play, we’ve spotted that AD are taking sign-ups for an iOS beta for Scythe Digital Edition. Yay!
They’ve also got a new patch for Terraforming Mars in beta as well, which is set to rework multiplayer.
GWENT Update 5.1
GWENT has just received another sizeable update on iOS (and PC), with a look at re-balancing a bunch of existing cards. The focus is on Skellige and Syndicate factions but there’s been a wide range of changes, including:
Less rank loss at the start of a new season.
The mobile version has new tool-tips for cards on the board
Lots and lots of card changes and tweaking.
I’ve recently started playing The Witcher 3 on PS4 and jumped into the ‘OG’ version of the game to see what the fuss was about. I actually really enjoyed it, so I hope this comes to Android soon so I can play the fully fleshed out version.
Teamfight Tactics Closed Beta Tests
A closed beta for the mobile version of Teamfight Tactics is due to start today in select countries… and we have no idea what countries those might be. Despite an extensive blog post covering the news and some other interesting details, they don’t actually say what countries they’ll be running the test in.
The full release is still scheduled for March, however, and the rest of the post goes into detail as to what the key differences are. It’s also worth highlighting that this will be a phone-only game at launch – tablet support is coming later. Minimum requirements on iOS are expected to be iPhones 6S or later, and OS5+ with 2GB RAM on Android.
App Sales
Another slow week for sales of note, but we spotted that Tsuro: The Game of the Path is down to $3.99 (from $3.99) on both iOS and Android. It’s not the lowest price it’s ever been, but last time it was lower was April 2018 so it doesn’t go in for the cheaper prices often.
Seen anything else you liked? Played any of the above? Let us know in the comments!
Best MacBook Pro blowout deals: save up to $3,300 instantly
Exclusive
By Christine McKee Friday, February 07, 2020, 12:05 pm PT (03:05 pm ET)
Apple Authorized Resellers are clearing out MacBook Pro inventory ahead of Valentine’s Day, and AppleInsider readers have first dibs on up to $3,300 in exclusive savings on premium 13-inch and 15-inch configurations.
Exclusive coupon savings
Apple Authorized Resellers are kicking off the weekend on a high note with the lowest prices on record for a number of high-end Mid 2018 13-inch and 15-inch MacBook Pro configurations. Featuring upgrades like extra RAM, additional storage, and even beefier graphics for the 15-inch models, the machines highlighted below offer a wealth of features for a fraction of the original retail cost.
At Adorama, the discounts displayed are in the form of instant rebates stacked with coupon code APINSIDER when used with the pricing links below or the links in our 2018 13-inch MacBook Pro and 2018 15-inch MacBook Pro Price Guides. The systems are also eligible for no interest financing when paid in full within 12 months using the Adorama Credit Card, and AppleCare is available as an optional add-on for the discounted rate of $349 ($30 off retail). Only need coverage for a year? Check out the VIP360 program that offers 1-year drops and spills protection for new products you buy at Adorama for $49.99 per year.
For even more Mac deals, including coupon savings on the new 16-inch MacBook Pro, be sure to visit the AppleInsiderApple Price Guide.
Make sure you’re using a browser with cookies enabled that isn’t in private mode.
Click on the price link to the desired configuration from this article or the Adorama price links in our Price Guides. You MUST click through our links in the same shopping session that you use our coupon. If you try to save a link for late, the coupon WON’T WORK. Once you click through a price link, you’ll see a price that’s higher than advertised (we’ll fix that in a moment).
Add the MacBook Pro to your cart anyway, and when you’re done shopping, begin the checkout process.
Look for a link that says “Do you have a gift card or promo code?” next to the gift icon. Click that to bring up a coupon code field.
Enter the coupon code APINSIDER in the field and click apply. The discount should appear under “Promo Savings” above the order total.
That’s it. As always, if you have any issues, you can reach out to us at [email protected] and we’ll try and help.
Additional Apple deals
AppleInsider and Apple authorized resellers are also running additional exclusive savings on Apple hardware that will not only deliver the lowest prices on many of the items, but also throw in bonus discounts on AppleCare, software and more. These offers are as follows:
Connect Fedora to your Android phone with GSConnect
Both Apple and Microsoft offer varying levels of integration of their desktop offerings with your mobile devices. Fedora offers a similar if not greater degree of integration with GSConnect. It lets you pair your Android phone with your Fedora desktop and opens up a lot of possibilities. Keep reading to discover more about what it is and how it works.
What is GSConnect?
GSConnect is an implementation of the KDE Connect project tailored for the GNOME desktop. KDE Connect makes it possible for your devices to communicate with each other. However, installing it on Fedora’s default GNOME desktop requires pulling in a large number of KDE dependencies.
GSConnect is a complete implementation of KDE Connect, but in the form of a GNOME shell extension. Once installed, GSConnect lets you do the following and a lot more:
Receive phone notifications on your desktop and reply to messages
Use your phone as a remote control for your desktop
Share files and links between devices
Check your phone’s battery level from the desktop
Ring your phone to help find it
Setting up the GSConnect extension
Setting up GSConnect requires installing two components: the GSConnect extension on your desktop and the KDE Connect app on your Android device.
First, install the GSConnect extension from the GNOME Shell extensions website: GSConnect. (Fedora Magazine has a handy article on How to install a GNOME Shell extension to help you with this step.)
The KDE Connect app is available on Google’s Play Store. It’s also available on the FOSS Android apps repository, F-Droid.
Once you have installed both these components, you can pair your two devices. Installing the extension makes it show up in your system menu as Mobile Devices. Clicking on it displays a drop down menu, from which you can access Mobile Settings.
Here’s where you can view your paired devices and manage the features offered by GSConnect. Once you are on this screen, launch the app on your Android device.
You can initiate pairing from either device, but here you’ll be connecting to your desktop from the Android device. Simply hit refresh on the app, and as long as both devices are on the same wireless network, your desktop shows up in your Android device. You can now send a pair request to the desktop. Accept the pair request on your desktop to complete the pairing.
Using GSConnect
Once paired, you’ll need to grant permissions on your Android device to make use of the many features available on GSConnect. Click on the paired device in the list of devices to see all available functions and enable or disable them according to your preferences.
Remember that you’ll also need to grant corresponding permissions in the Android app to be able to use these functions. Depending upon the features you’ve enabled and the permissions you’ve granted, you can now access your mobile contacts on your desktop, get notified of messages and reply to them, and even sync the desktop and Android device clipboards.
Integration with Files and your web browsers
GSConnect allows you to directly send files to your Android device from your desktop file explorer’s context menu.
On Fedora’s default GNOME desktop, you will need to install the nautilus-python package in order to make your paired devices show up in the context menu. Installing this is as straightforward as running the following command from your preferred terminal:
$ sudo dnf install nautilus-python
Once done, the Send to Mobile Device entry appears in the context menu of the Files app.
Similarly, install the corresponding WebExtension for your browser, be it Firefox or Chrome, to send links to your Android device. You have the option to send the link to launch directly in your browser or to deliver it as SMS.
Running Commands
GSConnect lets you define commands which you can then run on your desktop, from your remote device. This allows you to do things such as take a screenshot of your desktop, or lock and unlock your desktop from your Android device, remotely.
To make use of this feature, you can use standard shell commands and the CLI exposed by GSConnect. Documentation on this is provided in the project’s GitHub repository: CLI Scripting.
The KDE UserBase Wiki has a list of example commands. These examples cover controlling the brightness and volume on your desktop, locking the mouse and keyboard, and even changing the desktop theme. Some of the commands are specific for KDE Plasma, and modifications are necessary to make it run on the GNOME desktop.
Explore and have fun
GSConnect makes it possible to enjoy a great degree of convenience and comfort. Dive into the preferences to see all that you can do and get creative with the commands function. Feel free to share all the possibilities this utility unlocked in your workflow in the comments below.