Posted on Leave a comment

Convert CSV to Dictionary in Python

5/5 – (1 vote)

The best way to convert a CSV file to a Python dictionary is to create a CSV file object f using open("my_file.csv") and pass it in the csv.DictReader(f) method. The return value is an iterable of dictionaries, one per row in the CSV file, that maps the column header from the first row to the specific row value.

Let’s have a look at a simple example to demonstrate this solution next!

Basic Solution: CSV to Dict Example

Here’s the content of an example CSV file "my_file.csv" used in our code snippet below:
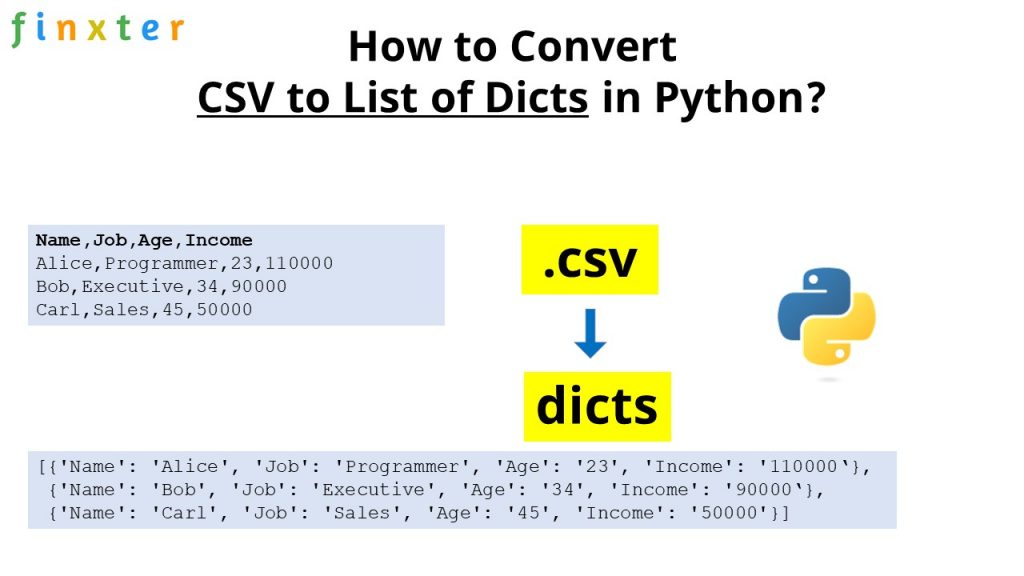
Name,Job,Age,Income
Alice,Programmer,23,110000
Bob,Executive,34,90000
Carl,Sales,45,50000

If you visualize this CSV in table form, it looks like this:

Name Job Age Income
Alice Programmer 23 110000
Bob Executive 34 90000
Carl Sales 45 50000

Here’s the code to convert that CSV file to multiple dictionaries, one dictionary per row by using the csv.DictReader(file) function:

import csv csv_filename = 'my_file.csv' with open(csv_filename) as f: reader = csv.DictReader(f) for row in reader: print(row)

A dictionary is a data structure that maps keys to values.

The output of the previous code snippet shows how the first row of the CSV is used as a header to determine the keys of the dictionary that are mapped to the values defined in the individual rows of the CSV file:

{'Name': 'Alice', 'Job': 'Programmer', 'Age': '23', 'Income': '110000'}
{'Name': 'Bob', 'Job': 'Executive', 'Age': '34', 'Income': '90000'}
{'Name': 'Carl', 'Job': 'Sales', 'Age': '45', 'Income': '50000'}

The csv.DictReader(f) method takes a file object f as an input argument. So, you first need to open the file using the built-in Python open() function.

🪲 Note: A common error is to pass the filename as a string—but this doesn’t work! The csv.DictReader(f) method expects a file object as a required argument.

One-Liner Solution: CSV to Dict

I love Python one-liners. That’s why I have written a book on those after all. 🙂

So, can we convert a CSV to a list of dictionaries in a single line of Python?

Of course, we can!

Here’s the one-liner that accomplishes the same as the code discussed before:

import csv; print(*csv.DictReader(open('my_file.csv')), sep='\n')

💡 Explanation: We import the csv module, use the semicolon ; to package two statements in one line, unpack * all rows from the csv.DictReader() output in a print statement, and use the newline character '\n' as a separator between two dictionary rows.

The output is the same as before:

{'Name': 'Alice', 'Job': 'Programmer', 'Age': '23', 'Income': '110000'}
{'Name': 'Bob', 'Job': 'Executive', 'Age': '34', 'Income': '90000'}
{'Name': 'Carl', 'Job': 'Sales', 'Age': '45', 'Income': '50000'}

If you just want to store the CSV contents in a list of dictionaries rather than printing them, you can use the following technique:

import csv; lst=[*csv.DictReader(open('my_file.csv'))]; print(lst)

The output is a list of dictionaries, one per (non-header) row of the original CSV:

[{'Name': 'Alice', 'Job': 'Programmer', 'Age': '23', 'Income': '110000'}, {'Name': 'Bob', 'Job': 'Executive', 'Age': '34', 'Income': '90000'}, {'Name': 'Carl', 'Job': 'Sales', 'Age': '45', 'Income': '50000'}]

If you’re interested in learning one-liners as well, feel free to check out my book:

Python One-Liners Book: Master the Single Line First!

Python programmers will improve their computer science skills with these useful one-liners.

Python One-Liners

Python One-Liners will teach you how to read and write “one-liners”: concise statements of useful functionality packed into a single line of code. You’ll learn how to systematically unpack and understand any line of Python code, and write eloquent, powerfully compressed Python like an expert.

The book’s five chapters cover (1) tips and tricks, (2) regular expressions, (3) machine learning, (4) core data science topics, and (5) useful algorithms.

Detailed explanations of one-liners introduce key computer science concepts and boost your coding and analytical skills. You’ll learn about advanced Python features such as list comprehension, slicing, lambda functions, regular expressions, map and reduce functions, and slice assignments.

You’ll also learn how to:

  • Leverage data structures to solve real-world problems, like using Boolean indexing to find cities with above-average pollution
  • Use NumPy basics such as array, shape, axis, type, broadcasting, advanced indexing, slicing, sorting, searching, aggregating, and statistics
  • Calculate basic statistics of multidimensional data arrays and the K-Means algorithms for unsupervised learning
  • Create more advanced regular expressions using grouping and named groups, negative lookaheads, escaped characters, whitespaces, character sets (and negative characters sets), and greedy/nongreedy operators
  • Understand a wide range of computer science topics, including anagrams, palindromes, supersets, permutations, factorials, prime numbers, Fibonacci numbers, obfuscation, searching, and algorithmic sorting

By the end of the book, you’ll know how to write Python at its most refined, and create concise, beautiful pieces of “Python art” in merely a single line.

Get your Python One-Liners on Amazon!!

Posted on Leave a comment

50 Signs You’re a Programmer Geek

5/5 – (1 vote)
  1. I consider 256 to be a nice, round number.
  2. I become annoyed when 10K means 10,000.
  3. I’ve written a useless program just for the “fun” of it.
  4. In fact, I prefer writing useless programs.
  5. I start counting from 0 and end up with one less than everyone else.
  6. I write equals as == and not equals as !=.
  7. I understand (0x2b||!0x2b) and find it funny.
  8. I know where to find the {braces} keys without looking.
  9. I call text phrases “strings.”
  10. I dream in code.
  11. I refer to eating and drinking as uploading.
  12. I refer to using the bathroom as downloading.
  13. I frequently use words like iteration, implementation, contiguous, trivial, version, array, polymorphic, parse, and WTF in casual conversations.
  14. When someone asks me what languages I speak, I reply: “Python, C++, JavaScript, and Solidity.”
  15. I hear the word “Scuzzy” and don’t think it’s a bad thing.
  16. My favorite f-word is fdisk.
  17. <rant>I include XML in regular correspondence.</rant>
  18. I use camelCase for names.
  19. I take things too literally.  For example, my wife gets upset when she asks “Do you want to take out the garbage?” (no) instead of “Will you take out the garbage?” (yes).
  20. I respond to questions too logically.  For example, when a waitress asks me, “Would you like coffee or tea?”  I respond, “Yes.”
  21. I answer negative questions in the technically-correct but awkward way.  When my mom asks me, “Wouldn’t you like a glass of milk?”  I respond, “Yes, I wouldn’t like a glass of milk.”
  22. I refer to having sex as setting up a LAN!
  23. When I make a mistake or say something I shouldn’t have, I wish I could press Ctrl+Z.
  24. When searching a paper book, I get frustrated that I cannot simply press Ctrl+F to find the text I’m looking for.
  25. When a store cashier asks me for my zip code, I demand to see the store’s privacy policy.
  26. I get sudden attacks of bittersweet nostalgia when thinking about my long-lost Commodore 64, Sinclair ZX-81, TRS-80, or Amiga 1000.
  27. It’s hard for me to make an absolute statement because I always consider there may be an edge case.
  28. I unit-test my spouse, expecting deterministic, solid outputs for a certain input with boundary conditions.
  29. I tell my spouse to “stop throwing exceptions that I’m not willing to catch.”
  30. I email myself notes rather than writing them.
  31. I hold a mouse more than my wife’s hand.
  32. I end my sentences with a semicolon…
  33. … actually not anymore since I discovered Python.
  34. I assume that most people love their jobs like I do.
  35. I’d rather text the guy in the next cubicle than talk to him.
  36. Nighttime and sleep are no longer irrevocably linked.
  37. I think these programming jokes are hilarious.
  38. I think xkcd is the funniest webcomic ever.
  39. I think the three primary colors are red, green and blue.
  40. I have more than one monitor.
  41. I have more email addresses than pairs of shoes.
  42. The number of computers in my house exceeds the number of romantic relationships I’ve had in my lifetime.
  43. I run a Web server at home.
  44. Instead of playing games on my Xbox, I set up a Bitcoin node.
  45. I carry a USB flash drive in my pocket wherever I go.
  46. I know what a router is, and I know what a bit is, but I don’t know what’s a router bit.
  47. I helped my grandma create her own blog.
  48. I talk to my computer the way most people talk to their significant other.
  49. I email myself to remind me to do something.
  50. I rig up elaborate mechanisms to perform basic tasks.
  51. When I’m reading a magazine and I see an underlined passage, I feel compelled to click on it.

Shout Out

This compilation is from multiple awesome ❤ online sources such as the following:

Posted on Leave a comment

Convert CSV to Excel xlsx in Python

5/5 – (1 vote)

Problem Formulation

💡 Challenge: Given a CSV file. How to convert it to an excel file in Python?

csv to excel in Python

We create a folder with two files, the file csv_to_excel.py and my_file.csv. We want to convert the CSV file to an excel file so that after running the script csv_to_excel.py, we obtain the third file my_file.csv in our folder like so:

All methods discussed in this tutorial show different code snippets to put into csv_to_excel.py so that it converts the CSV to XLSX in Python.

Method 1: 5 Easy Steps in Pandas

The most pythonic way to convert a .csv to an .xlsx (Excel) in Python is to use the Pandas library.

  1. Install the pandas library with pip install pandas
  2. Install the openpyxl library that is used internally by pandas with pip install openpyxl
  3. Import the pandas libray with import pandas as pd
  4. Read the CSV file into a DataFrame df by using the expression df = pd.read_csv('my_file.csv')
  5. Store the DataFrame in an Excel file by calling df.to_excel('my_file.xlsx', index=None, header=True)
import pandas as pd df = pd.read_csv('my_file.csv')
df.to_excel('my_file.xlsx', index=None, header=True)

Note that there are many ways to customize the to_excel() function in case

  • you don’t need a header line,
  • you want to fix the first line in the Excel file,
  • you want to format the cells as numbers instead of strings, or
  • you have an index column in the original CSV and want to consider it in the Excel file too.

If you want to do any of those, feel free to read our full guide on the Finxter blog here:

🌍 Tutorial: Pandas DataFrame.to_excel() – An Unofficial Guide to Saving Data to Excel

Also, we’ve recorded a video on the ins and outs of this method here:

Let’s have a look at an alternative to converting a CSV to an Excel file in Python:

Method 2: Modules csv and openpyxl

To convert a CSV to an Excel file, you can also use the following approach:

  • Import the csv module
  • Import the openpyxl module
  • Read the CSV file into a list of lists, one inner list per row, by using the csv.reader() function
  • Write the list of lists to the Excel file by using the workbook representation of the openpyxl library.
  • Get the active worksheet by calling workbook.active
  • Write to the worksheet by calling worksheet.append(row) and append one list of values, one value per cell.

The following function converts a given CSV to an Excel file:

import csv
import openpyxl def csv_to_excel(csv_filename, excel_filename): # Read CSV file csv_data = [] with open(csv_filename) as f: csv_data = [row for row in csv.reader(f)] # Write to Excel file workbook = openpyxl.workbook.Workbook() worksheet = workbook.active for row in csv_data: worksheet.append(row) workbook.save(excel_filename) if __name__ == "__main__": csv_to_excel("my_file.csv", "my_file.xlsx")

This is a bit more fine-granular approach and it allows you to modify each row in the code or even write additional details into the Excel worksheet.

Where to Go From Here?

Enough theory. Let’s get some practice!

Coders get paid six figures and more because they can solve problems more effectively using machine intelligence and automation.

To become more successful in coding, solve more real problems for real people. That’s how you polish the skills you really need in practice. After all, what’s the use of learning theory that nobody ever needs?

You build high-value coding skills by working on practical coding projects!

Do you want to stop learning with toy projects and focus on practical code projects that earn you money and solve real problems for people?

🚀 If your answer is YES!, consider becoming a Python freelance developer! It’s the best way of approaching the task of improving your Python skills—even if you are a complete beginner.

If you just want to learn about the freelancing opportunity, feel free to watch my free webinar “How to Build Your High-Income Skill Python” and learn how I grew my coding business online and how you can, too—from the comfort of your own home.

Join the free webinar now!

Posted on Leave a comment

Scrape a Bookstore in 5 Steps Python [Learn Project]

5/5 – (1 vote)

Story: This series of articles assume you work in the IT Department of Mason Books. The Owner asks you to scrape the website of a competitor. He would like this information to gain insight into his pricing structure.

💡 Note: Before continuing, we recommend you possess, at minimum, a basic knowledge of HTML and CSS and have reviewed our articles on How to Scrape HTML tables.

What You’ll Build in This Project

Let’s navigate to Books to Scrape and review the format.

At first glance, you will notice:

  • Book categories display on the left-hand side.
  • There are, in total, 1,000 books listed on the website.
  • Each web page shows 20 Books.
  • Each price is in £ (in this instance, the UK pound).
  • Each Book displays minimum details.
  • To view complete details for a book, click on the image or the Book Title hyperlink. This hyperlink forwards to a page containing additional book details for the selected item (see below).
  • The total number of website pages displays in the footer (Page 1 of 50).

Step 1: Install and Import Libraries for Project

Before any data manipulation can occur, three (3) new libraries will require installation.

  • The Pandas library enables access to/from a DataFrame.
  • The Requests library provides access to the HTTP requests in Python.
  • The Beautiful Soup library enables data extraction from HTML and XML files.

To install these libraries, navigate to an IDE terminal. At the command prompt ($), execute the code below. For the terminal used in this example, the command prompt is a dollar sign ($). Your terminal prompt may be different.

$ pip install pandas

Hit the <Enter> key on the keyboard to start the installation process.

$ pip install requests

Hit the <Enter> key on the keyboard to start the installation process.

$ pip install beautifulsoup4

Hit the <Enter> key on the keyboard to start the installation process.

If the installations were successful, a message displays in the terminal indicating the same.


Feel free to view the PyCharm installation guides for the required libraries.


Add the following code to the top of each code snippet. This snippet will allow the code in this article to run error-free.

import pandas as pd
import requests
from bs4 import BeautifulSoup
import time
import urllib.request
from csv import reader, writer
  • The time library is built-in with Python and does not require installation. This library contains time.sleep() and is used to set a delay between page scrapes.
  • The urllib library is built-in with Python and does not require installation. This library contains urllib.request and is used to save images.
  • The csv library is built-in Pandas and does not require additional installation. This library contains reader and writer methods to save data to a CSV file.

Step 2: Understand Basics and Scrape Your First Results

In this step, you’ll perform the following tasks:

  • Reviewing the website to scrape.
  • Understanding HTTP Status Codes.
  • Connecting to the Books to Scrape website using the requests library.
  • Retrieving Total Pages to Scrape
  • Closing the Open Connection.

🌍 Learn More: Learn everything you need to know to reproduce this step in the in-depth Finxter blog tutorial.

Step 3: Configure URL to Scrape and Avoid Spamming the Server

Rule: Don’t Spam the Server!

In this step, you’ll perform the following tasks:

  • Configuring a page URL for scraping
  • Setting a delay: time.sleep() to pause between page scrapes.
  • Looping through two (2) pages for testing purposes.

🌍 Learn More: Learn everything you need to know to reproduce this step in the in-depth Finxter blog tutorial.

Step 4: Save Book Details in a Python List

In this step, you’ll perform the following tasks:

  • Locating Book details.
  • Writing code to retrieve this information for all Books.
  • Saving Book details to a List.

🌍 Learn More: Learn everything you need to know to reproduce this step in the in-depth Finxter blog tutorial.

Step 5: Clean and Save the Scraped Output

In this step, you’ll perform the following tasks:

  • Cleaning up the scraped code.
  • Saving the output to a CSV file.

🌍 Learn More: Learn everything you need to know to reproduce this step in the in-depth Finxter blog tutorial.

Conclusion

This tutorial has guided you through the steps to create your first practical web scraping project: scraping the contents of a book store!

Now, go out and use your skills wisely and to the benefit of humanity, my friend! 🙂


Posted on Leave a comment

Ten Easy Steps to Your First Python Flask App

Rate this post

Project Description

Story: Assume you work in the IT Department of Right-On Realtors.

Your boss asks you to create a simple website the Realtors can query to view current Home Sales.

He would like this website created using the Flask framework in Python.

In this article, we’ll create a simple website app to query real estate stats from a CSV on the server that looks like this:

What is Flask?

Flask is a web app framework created with ease of use in mind. Without much training, you can easily create a simple web application. Flask works with Bootstrap, HTML, CSS, and Jinja (to name a few) to create a website.

Step 1: Set Up a Virtual Environment

All your projects share the same globally installed libraries. But some of them may require different versions or incompatible libraries.

This is where virtual environments come into play. 

A virtual environment serves as a “sandbox” for your Python program. You can install any external library or version there without having any global impact.

The virtual environments are isolated, independent, and separate.

Click here for instructions on setting up and activating a virtual environment.

Step 2: Install Libraries

Before our code executes successfully, two (2) new libraries will require installation.

  • The Pandas library enables access to/from a DataFrame.
  • The Flask library allows us to create and render our website.

To install these libraries, navigate to an IDE terminal. At the command prompt ($), execute the code below. For the terminal used in this example, the command prompt is a dollar sign ($). Your terminal prompt may be different.

$ pip install pandas

Hit the <Enter> key on the keyboard to start the installation process.

$ pip install flask

Hit the <Enter> key on the keyboard to start the installation process.

Step 3: Set up the Folder Structure

We want to have the following folder structure.

Then set up the app.py file that is responsible for most of the Flask action and create a basic template file from which all of the HTML files served by your app will inherit.

Follow our in-depth guide on how to set this up here:

🌍 Tutorial: Learn more about how to accomplish this step.

Step 4: Routes and Dynamic Content

First, add routes to your web project, so people can navigate to different parts of your website. You can do this by replacing the app.py file with the following code:

app = Flask(__name__) @app.route('/') # home
def index(): return render_template("index.html") @app.route('/reports') # reports
def reports(): return render_template("reports.html") @app.route('/contact') # contact
def contact(): return render_template("contact.html")

Second, you create blank HTML files that inherit from the base template and that should be returned after calling each of those URLs 'https://yourwebsite.com/', 'https://yourwebsite.com/reports', and 'https://yourwebsite.com/contact'.

Third, add Jinja to the base template file so that you can add some dynamically created content to your website—it shouldn’t return the same content for all users after all!

🌍 Tutorial: Learn more about how to accomplish this step.

Step 5: Styling, Navigation, and Running the App Locally

Bootstrap is a popular framework that contains numerous HTML, API, and JS code snippets. These snippets assist web designers/developers everywhere create a responsive website.

Add Bootstrap to your project and create a navigation bar using the provided styling options.

Next, you can run your app with a simple command in your shell and view it in your browser:

🌍 Tutorial: Learn more about how to accomplish this step.

Step 6: Forms for User Input and Output

Add a Form with elements to an HTML page. Then add Jinja to the Reports page and update the code in app.py to get the HTML Form working.

Your project will look like this at this point:

Congratulations, users can now input numbers into the front-end and your Python code will process them on the back-end!

To view any changes, Flask needs to be re-started. To perform this task, navigate to the command prompt and enter CTRL+C (stop), then flask run (re-start).

🌍 Tutorial: Learn more about how to accomplish this step.

Step 7: Data Processing at the Back-End

Next, read in the Real Estate CSV file to a DataFrame and allow users to query the results based on the entered Zip code and display the results on the Reports page.

It’ll look like so:

🌍 Tutorial: Learn more about how to accomplish this step.

Step 8: Data Cleaning

In this step, you write some Python code to validate the Zip Code to make sure the user input is correct. You’ll clean up the data and reformat the sales price of the real estate objects for clarity of presentation.

🌍 Tutorial: Learn more about how to accomplish this step.

Step 9: Stylesheets

Next, we’ll add a stylesheet, and add some specific styles to the navigation bar and the remaining HTML pages. Styling should come after the core functionality is implemented—which at this point is done! 🙂

After this step, the website will look much cleaner and prettier:

🌍 Tutorial: Learn more about how to accomplish this step.

Step 10: Contact Us and Email Automation

The last step makes sure that users can contact you via the contact page. We’ll style it too using CSS and stylesheets and email the form values to you using the Flask functionality.

🌍 Tutorial: Learn more about how to accomplish this step.

Summary

This post has summarized the steps necessary to create a simple real estate related website with Flask. If you have followed the outlined steps and read the tutorials linked after each step, you should now have a running prototype website on your local computer.

You should also know the basics of how to create a dynamic and interactive website in Python, a skill that is sought-after by many companies today as a freelance or employed full-stack web developer!

Tutorials You Should Check Out Next


Nerd Humor

Oh yeah, I didn’t even know they renamed it the Willis Tower in 2009, because I know a normal amount about skyscrapers.xkcd (source)
Posted on Leave a comment

[Fixed] ModuleNotFoundError: No module named ‘xmltodict’

Rate this post

Quick Fix: Python raises the ImportError: No module named 'xmltodict' when it cannot find the library xmltodict. The most frequent source of this error is that you haven’t installed xmltodict explicitly with pip install xmltodict. Alternatively, you may have different Python versions on your computer, and xmltodict is not installed for the particular version you’re using.

Problem Formulation

You’ve just learned about the awesome capabilities of the xmltodict library and you want to try it out, so you start your code with the following statement:

import xmltodict

This is supposed to import the Pandas library into your (virtual) environment. However, it only throws the following ImportError: No module named xmltodict:

>>> import xmltodict
Traceback (most recent call last): File "<pyshell#6>", line 1, in <module> import xmltodict
ModuleNotFoundError: No module named 'xmltodict'

Solution Idea 1: Install Library xmltodict

The most likely reason is that Python doesn’t provide xmltodict in its standard library. You need to install it first!

Before being able to import the Pandas module, you need to install it using Python’s package manager pip. Make sure pip is installed on your machine.

To fix this error, you can run the following command in your Windows shell:

$ pip install xmltodict

This simple command installs xmltodict in your virtual environment on Windows, Linux, and MacOS. It assumes that your pip version is updated. If it isn’t, use the following two commands in your terminal, command line, or shell (there’s no harm in doing it anyways):

$ python -m pip install --upgrade pip
$ pip install pandas

💡 Note: Don’t copy and paste the $ symbol. This is just to illustrate that you run it in your shell/terminal/command line.

Solution Idea 2: Fix the Path

The error might persist even after you have installed the xmltodict library. This likely happens because pip is installed but doesn’t reside in the path you can use. Although pip may be installed on your system the script is unable to locate it. Therefore, it is unable to install the library using pip in the correct path.

To fix the problem with the path in Windows follow the steps given next.

Step 1: Open the folder where you installed Python by opening the command prompt and typing where python

Step 2: Once you have opened the Python folder, browse and open the Scripts folder and copy its location. Also verify that the folder contains the pip file.

Step 3: Now open the Scripts directory in the command prompt using the cd command and the location that you copied previously.

Step 4: Now install the library using pip install xmltodict command. Here’s an analogous example:

After having followed the above steps, execute our script once again. And you should get the desired output.

Other Solution Ideas

  • The ModuleNotFoundError may appear due to relative imports. You can learn everything about relative imports and how to create your own module in this article.
  • You may have mixed up Python and pip versions on your machine. In this case, to install xmltodict for Python 3, you may want to try python3 -m pip install xmltodict or even pip3 install xmltodict instead of pip install xmltodict
  • If you face this issue server-side, you may want to try the command pip install --user xmltodict
  • If you’re using Ubuntu, you may want to try this command: sudo apt install xmltodict
  • You can check out our in-depth guide on installing xmltodict here.
  • You can also check out this article to learn more about possible problems that may lead to an error when importing a library.

Understanding the “import” Statement

import xmltodict

In Python, the import statement serves two main purposes:

  • Search the module by its name, load it, and initialize it.
  • Define a name in the local namespace within the scope of the import statement. This local name is then used to reference the accessed module throughout the code.

What’s the Difference Between ImportError and ModuleNotFoundError?

What’s the difference between ImportError and ModuleNotFoundError?

Python defines an error hierarchy, so some error classes inherit from other error classes. In our case, the ModuleNotFoundError is a subclass of the ImportError class.

You can see this in this screenshot from the docs:

You can also check this relationship using the issubclass() built-in function:

>>> issubclass(ModuleNotFoundError, ImportError)
True

Specifically, Python raises the ModuleNotFoundError if the module (e.g., xmltodict) cannot be found. If it can be found, there may be a problem loading the module or some specific files within the module. In those cases, Python would raise an ImportError.

If an import statement cannot import a module, it raises an ImportError. This may occur because of a faulty installation or an invalid path. In Python 3.6 or newer, this will usually raise a ModuleNotFoundError.

Related Videos

The following video shows you how to resolve the ImportError:

The following video shows you how to import a function from another folder—doing it the wrong way often results in the ModuleNotFoundError:

How to Fix “ModuleNotFoundError: No module named ‘xmltodict’” in PyCharm

If you create a new Python project in PyCharm and try to import the xmltodict library, it’ll raise the following error message:

Traceback (most recent call last): File "C:/Users/.../main.py", line 1, in <module> import xmltodict
ModuleNotFoundError: No module named 'xmltodict' Process finished with exit code 1

The reason is that each PyCharm project, per default, creates a virtual environment in which you can install custom Python modules. But the virtual environment is initially empty—even if you’ve already installed xmltodict on your computer!

Here’s a screenshot exemplifying this for the pandas library. It’ll look similar for xmltodict.

The fix is simple: Use the PyCharm installation tooltips to install Pandas in your virtual environment—two clicks and you’re good to go!

First, right-click on the pandas text in your editor:

Second, click “Show Context Actions” in your context menu. In the new menu that arises, click “Install Pandas” and wait for PyCharm to finish the installation.

The code will run after your installation completes successfully.

As an alternative, you can also open the Terminal tool at the bottom and type:

$ pip install xmltodict

If this doesn’t work, you may want to set the Python interpreter to another version using the following tutorial: https://www.jetbrains.com/help/pycharm/2016.1/configuring-python-interpreter-for-a-project.html

You can also manually install a new library such as xmltodict in PyCharm using the following procedure:

  • Open File > Settings > Project from the PyCharm menu.
  • Select your current project.
  • Click the Python Interpreter tab within your project tab.
  • Click the small + symbol to add a new library to the project.
  • Now type in the library to be installed, in your example Pandas, and click Install Package.
  • Wait for the installation to terminate and close all popup windows.

Here’s an analogous example:

Here’s a full guide on how to install a library on PyCharm.

Posted on Leave a comment

How to Save a Dictionary to a File in Python

Rate this post

Summary: You can use Python’s pickle library to save dictionary data to a file. Another efficient approach to save dictionary data to a file is to use Python’s built-in JSON package. You can also use simple file handling functions to store dictionary data in a text file directly.


Problem: Given a Python dictionary. How will you save the data from the dictionary to a file so that it can be loaded to be used later?

You might need the help of persistent storage systems like databases or files to store serialized data structures like arrayslists, and dictionaries. One of the major reasons behind doing so is databases and files are reusable, i.e., after analyzing the given data, we can store it in the file, and later that data can be read to use in an application.

This article will deal with dictionary data that you can store in a file.

Example: Consider the following dictionary:

d = {'country': 'Germany', 'capital': 'Berlin'}

Challenge: How will you store the key-value pairs of the above dictionary in a file?

Related Tutorials:

There are numerous ways to store dictionary data in a file using Python. Let’s have a look at some of them:

Method 1: Using Pickle

  • Pickle is a module in Python that uses binary protocols to serialize and de-serialize an object structure. “Pickling” refers to the process of converting a Python object to a byte stream. “Unpickling” is just the reverse operation wherein a byte stream is converted to a Python object. Pickling is also sometimes referred to as serialization.
  • A good idea to implement a Pickle file is when you are dealing with sensitive data or when you need to keep a program status across sessions.

Approach:

  • Create the pickle file (i.e., filename.pkl) with the help of the open(filename, mode) function. Since we will be storing the data in a pickle file which stores the data as a binary stream, hence, open the file in binary (“wb“) mode.
  • Use the pickle.dump(dictionary, filename) method to store/serialize the dictionary data to the file.
  • To read data from this file, call the pickle.load(filename) method.
  • Note: Remember to close the file.

Code: Let’s visualize the above approach with the help of the following code snippet:

import pickle
d = {'country': 'Germany', 'capital': 'Berlin'}
file = open("dictionary_data.pkl", "wb")
pickle.dump(d, file)
file.close()
file = open("dictionary_data.pkl", "rb")
output = pickle.load(file)
print(output)
file.close()

Output:

Output Console:

{'country': 'Germany', 'capital': 'Berlin'}

Method 2: Using json

Approach:

  • Open the file in write mode by calling open('filename','mode').
  • Use the json.dump(dictionary, filename) function to convert the dictionary data to the json format and write it to the file.
  • To read the data from this file, read the data from it by calling the file.read() function.
  • Note: Remember to close the file.

Code:

import json
d = {'country': 'Germany', 'capital': 'Berlin'}
file = open("dictionary_data.json", "w")
json.dump(d, file)
file.close()
file = open("dictionary_data.json", "r")
output = file.read()
print(output)
file.close()

Output:

Output Console:

{"country": "Germany", "capital": "Berlin"}

Note: The json.dump() method is used to convert a Python object to a JSON string.

Method 3: Using Numpy

Using JSON and Pickle are the best options when it comes to storing a dictionary to a file. But we also have another way of doing so using the Numpy module.

Approach: Call the np.save(filename, dictionary) function to save the file into the disk. To read the data from this file us call the np.load('file.npy', allow_pickle='TRUE').item() function.

Code:

import numpy as np
d = {'country': 'Germany', 'capital': 'Berlin'}
np.save('file.npy', d)
read_d = np.load('file.npy', allow_pickle='TRUE').item()
print(read_d)

Read Here: NumPy Tutorial – Everything You Need to Know to Get Started

Do you want to become a NumPy master? Check out our interactive puzzle book Coffee Break NumPy and boost your data science skills! (Amazon link opens in new tab.)

Coffee Break NumPy

Method 4: Basic Approach

Last but not the least, you can store the dictionary data to a simple text file by simply writing the data to the file using file handling functions.

Approach:

  • Call the open('filename.txt', 'w') function to create/open the file in the write mode.
  • Use the file.write(str(dictionary)) function to write the dictionary data to the file and then close the file.
  • To read the data from this file open up the file and use the file.read() method to read the data from this file.
d = {'country': 'Germany', 'capital': 'Berlin'}
f = open('file.txt', 'w')
f.write(str(d))
f.close()
f = open('file.txt', 'r')
data = f.read()
print(data)
f.close()

Output:

Recommended Reads on File Handling:

Conclusion

We learned four ways of storing the dictionary data to a file in Python in this article. The most suitable ways of storing the dictionary data in a file are using the JSON or the pickle modules. However, feel free to try out the other ways discussed in this tutorial.

I hope this article helped you. Please subscribe and stay tuned for more interesting tutorials and discussions.


But before we move on, I’m excited to present you my new Python book Python One-Liners (Amazon Link).

If you like one-liners, you’ll LOVE the book. It’ll teach you everything there is to know about a single line of Python code. But it’s also an introduction to computer science, data science, machine learning, and algorithms. The universe in a single line of Python!

The book was released in 2020 with the world-class programming book publisher NoStarch Press (San Francisco).

Link: https://nostarch.com/pythononeliners

Posted on Leave a comment

How to Erase Contents of a File

5/5 – (1 vote)

Problem Formulation and Solution Overview

In this article, you’ll learn how to erase the contents of a file in Python.

To make it more fun, we have the following running scenario:

Let’s say you have a Python script that retrieves the daily stock exchange prices for five (5) Tech Companies and saves it to prices.txt. To ensure no mistakes, you would like to erase the contents of this file before saving the latest data.

💬 Question: How would we write code to erase the contents of a file?

We can accomplish this task by one of the following options:


Preparation

To follow along, copy, paste and save the text below to prices.txt. Move this file to the current working directory.

AAPL,138.22
MMSF,255.67
HPE,14.51
DELL,14.51
MNDT,21.89

Method 1: Use open() and truncate()

This method erases the contents of a file without removing the file itself using open() and truncate(0).

fp = open('prices.txt', 'w')
fp.truncate(0)
fp.close()

This code opens prices.txt in write mode (w) and saves the output to fp which creates a file object similar to the output below.

<_io.TextIOWrapper name='prices.txt' mode='w' encoding='cp1252'>

📢Tip: A file object is returned whenever a file is opened in Python. This object allows access to process/manipulate the open file.

Next, fp.truncate(0) is called. This method resizes the said file to a specified number of bytes. If no argument is passed, the current file position is used.

Finally, fp.close() is called to close the open file.

If this code is successful, an empty prices.txt file now resides in the current working directory.


Method 2: Use open(), seek(0) and truncate(0)

This method opens/re-opens a file and erases the contents without removing the file itself using open(), seek() and truncate(0).

fp = open('prices.txt', 'r+')
fp.seek(0) fp.truncate() 

This code opens/re-opens the prices.txt file in read/write mode (r+) and saves the output to fp which creates a file object similar to the output above.

Next, fp.seek(0) is called to re-position the file pointer (fp) to a given position in the file. In this case, the position is 0 (the top of the file).

Then, fp.truncate(0) is called. This method resizes the said file to a specified number of bytes. If no argument is passed, the current file position is used.

If this code is successful, an empty prices.txt file now resides in the current working directory.


Method 3: Use with open()

This method erases the contents of a file without deleting the file itself using with open() on one-line!

with open('prices.txt', 'w'): pass

This code calls with open() to open prices.txt for writing (w). Then, the pass statement executes, which does nothing, and the file automatically closes.

📢Tip: The pass statement is used as a placeholder. When pass executes, nothing happens. This is necessary when code is expected, but no code is required.

If this code is successful, an empty prices.txt file now resides in the current working directory.


Method 4: Use open() and close() on one line

Also a good option, this method opens a file for writing (open()) and closes said file (close()) using one line of code!

open('prices.txt', 'w').close()

This code uses open() to open prices.txt for writing (w). Since no other code is called, the file contents are erased, and the file closes (close()).

If this code is successful, an empty prices.txt file now resides in the current working directory.


Bonus: Erase File Contents after Specified Location

What happens if you want to erase everything after the first x number of characters in a file and return the same?

import os fp = os.open('prices.txt', os.O_RDWR|os.O_CREAT)
os.ftruncate(fp, 4)
os.lseek(fp, 0, 0)
str = os.read(fp, 100).decode('utf-8')
print(f"Read String is : {str}")
os.close(fp)

This example could be used for erasing the entire contents of a file. However, let’s retrieve the first four (4) characters from prices.txt (AAPL) and erase the remainder.

First, this code calls in the os library to access the many functions available for interacting with the operating system.

Then, prices.txt is opened in read/write mode, and if the file does not exist, or fails, a new file is created (os.O_RDWR|os.O_CREAT)).

Then, the file is truncated to 4 bytes/characters (os.ftruncate(fp, 4)) and the file pointer (fp) moves to the top of the file (os.lseek(fp, 0, 0)).

Next, the code reads in the first four (4) bytes/characters indicated above and decodes the output (os.read(fp, 100).decode('utf-8')) and saves to str.

The output is sent to the terminal, and the file closes.

Output

Read String is: AAPL

Summary

These four (4) methods of how to erase the contents of a file should give you enough information to select the best one for your coding requirements.

Good Luck & Happy Coding!


Programmer Humor

There are only 10 kinds of people in this world: those who know binary and those who don’t.
👩🧔‍♂️
~~~

There are 10 types of people in the world. Those who understand trinary, those who don’t, and those who mistake it for binary.
👩🧔‍♂️👱‍♀️

Posted on Leave a comment

How to Extend a NumPy Array in Python

Rate this post

Summary: Call the append function of the Numpy library as: numpy.append(given_array, elements_to_be_appended, axis) to extend the given array along a specific axis.

Other ways of extending the array include using: (i) the vstack and column_stack helper functions. (ii) the numpy.insert function.


Problem Formulation

Given a Numpy array; How will you extend the given array with values along rows and columns?

Example: Consider the following array –

import numpy as np arr = np.array([[1, 2], [3, 4]])
print(arr)

Question: How will you add an extra row and column to the array such that the expected output is:

[[1 2 7] [3 4 8] [5 6 9]]

Do you want to become a NumPy master? Check out our interactive puzzle book Coffee Break NumPy and boost your data science skills! (Amazon link opens in new tab.)

Coffee Break NumPy

Method 1: Using numpy.append()

  • Use numpy.append(given_array, elements_to_be_appended, axis) to return an extended array with elements across a specified axis.
  • NumPy’s append() method appends values to the end of the array. The optional axis argument allows you to append arrays along the specified axis. When the value of axis is 0, elements will be appended across rows and when the value of axis is 1, elements will be appended across columns.

Explanation:

  • To extend the given array across a row call the numpy.append() method and pass the given array as an input followed by the row elements to be added to the existing array. Finally, to specify that you want to append the values to a row feed in the value of axis as 0.
  • To extend the given array across a column call the numpy.append() method and pass the given array as an input followed by the column elements to be added to the existing array. Finally, to specify that you want to append the values to a column feed in the value of axis as 1.

Code:

import numpy as np arr = np.array([[1, 2], [3, 4]])
# add elements row-wise
arr = np.append(arr, [[5, 6]], 0)
# add elements column-wise
arr = np.append(arr, [[7], [8], [9]], 1)
print(arr)

Output:

[[1 2 7] [3 4 8] [5 6 9]]

Method 2: Stacking Elements Along Rows and Columns

  • Call np.vstack([given_array, [elements_to_be_stacked]]) to extend the given array along the row.
  • Call np.column_stack([given_array, [elements_to_be_stacked]]) to extend the given array along the column.

Note:

  • NumPy’s vstack() method takes a tuple argument and stacks the arrays in sequence vertically (row wise). This is like concatenating along the first axis after reshaping 1-D arrays of shape (N,) to (1,N).
  •  numpy.column_stack() method stacks 1-D arrays as columns into a 2D array. It takes a tuple argument and stacks the arrays in sequence (column wise).

Code:

import numpy as np arr = np.array([[1, 2], [3, 4]])
# add elements row-wise
arr = np.vstack([arr, [5, 6]])
# add elements column-wise
arr = np.column_stack([arr, [7, 8, 9]])
print(arr)

Output:

[[1 2 7] [3 4 8] [5 6 9]]

Method 3: Using numpy.insert

The numpy.insert() function is used to insert values in a numpy array along a given axis.

Call the np.insert() method and feed in the following parameters: (i) the given array, (ii) the column or the row number before which you want to insert the values, (iii) the values that you want to insert in the array, (iv) the axis along which you want to insert the values. When axis=0, values will be inserted along the rows and when axis=1 values will be inserted along the columns.

import numpy as np arr = np.array([[1, 2], [3, 4]])
# add elements row-wise (insert before row 2)
arr = np.insert(arr, 2, values=[5, 6], axis=0)
# add elements column-wise (insert before column 2)
arr = np.insert(arr, 2, values=[7, 8, 9], axis=1)
print(arr)

Explanation:

  • To insert the values=[5,6] at the third row call the insert method as: np.insert(arr, 2, values=[5, 6], axis=0). The second attribute (i.e. the vaule 2) ensures that the values will be inserted at column index 2 and the axis=0 indicates that the values will be inserted along the row.
  • To insert the values=[7, 8, 9] at the third column call the insert method as: np.insert(arr, 2, values=[7, 8, 9], axis=1). The second attribute (i.e. the vaule 2) ensures that the values will be inserted at row index 2 and the axis=0 indicates that the values will be inserted along the column.

Method 4: Concatenate Two 2D Arrays

Note: NumPy’s concatenate() method joins a sequence of arrays along an existing axis. The first couple of comma-separated array arguments are joined. If you use the axis argument, you can specify along which axis the arrays should be joined. For example, np.concatenate(a, b, axis=0) joins arrays along the first axis and np.concatenate(a, b, axis=None) joins the flattened arrays.

  • Call np.concatenate((arr_a, arr_b), axis=1) to concatenate the two given arrays along the columns.
  • Call np.concatenate((arr_a, arr_b), axis=0) to concatenate the two given arrays along the rows.
import numpy as np arr_a = np.array([[1, 2], [3, 4]])
arr_b = np.array([[5, 6], [7, 8]])
print('merge across columns: ')
arr = np.concatenate((arr_a, arr_b), axis=1)
print(arr)
print('merge across rows: ')
arr = np.concatenate((arr_a, arr_b), axis=0)
print(arr)

Output:

merge across columns: [[1 2 5 6] [3 4 7 8]]
merge across rows: [[1 2] [3 4] [5 6] [7 8]]

There are other ways of merging two given arrays which include approaches that we already learned above. To explore more on this feel free to read the following tutorial: How to Concatenate Two NumPy Arrays?

Conclusion

We have learned as many as four ways of extending a given array in this article. Feel free to use the option that suits your requirements. I hope this article helped you. Please subscribe and stay tuned for more interesting tutorials and discussions.

Recommended Tutorials:


Web Scraping with BeautifulSoup

One of the most sought-after skills on Fiverr and Upwork is web scraping . Make no mistake: extracting data programmatically from websites is a critical life-skill in today’s world that’s shaped by the web and remote work. This course teaches you the ins and outs of Python’s BeautifulSoup library for web scraping.

Posted on Leave a comment

Top 5 Finance Jobs for Coders in 2023

4/5 – (1 vote)

Coders are often skilled in analytical and creative areas. It doesn’t surprise that with those skills, they often fare well in business and investing too.

Examples of skilled coders who are also skilled in finance are Bill Gates, Mark Zuckerberg, Marc Andreessen, and myriads more.

Those coders with a strong interest in finance became billionaires!

But legions of coders who work at Facebook, Amazon, Google, Coinbase, and Netflix became multi-millionaires just by combining their skills in coding with skills in finance and investing.

⭐ Are you interested in the intersection of finance and coding?

In this article, I’ll show you five of the most profitable ways to work as a financial coder:

  1. Crypto Trading Bot Developer
  2. Quant Developer
  3. Forex Algo-Trading Python Developer
  4. DeFi Developer
  5. Blockchain Developer

Let’s get started!

Crypto Trading Bot Developer

Trading bots are software programs that talk directly to financial exchanges. Crypto trading bots are programs that talk to crypto exchanges.

A crypto bot developer develops those programs. Crypto trading bot developers tend to be very proficient in trading, financial algorithms, APIs, and web services. (Source)

The average annual income of a Crypto Trading Bot Developer is similar to algorithmic traders of $104,422 (source). However, due to the novelty of the industry, there’s little official data. If you assume an hourly rate of $50 and an annual 2000 hours worked, the annual income of a crypto trading bot developer would be $100,000.

But is there enough demand? Let’s have a look at Google trends to find out how interest evolves over time (source):

Yes, this definitely is an interesting industry for programmers to make $50 per hour and more!

🌍 Further Reading: Crypto Trading Bot Developer — Income and Opportunity

Quant Developer

A quantitative developer (i.e., Quant) is a financial programmer focused on financial modeling and quantitative finance and trading.

Quants use their profound knowledge of

  • statistics and math,
  • finance,
  • data structures,
  • algorithms,
  • machine learning,
  • scientific computing,
  • data science,
  • chart technique, and
  • data visualization

to create models for financial prediction, backtesting, analysis, and implementation of trading and financial applications (e.g., for risk management).

Question: How much does a Quant Developer in the US make per year?

Figure: Average Income of a Quant Developer in the US by Source.
Figure: Average Income of a Quant Developer in the US by Source. [1]

The expected annual income of a Quantitative Developer (Quant) in the United States is between $86,528 and $170,000 per year, with an average annual income of $127,375 per year and a median income of $136,321 per year.

🌍 Further Reading: Quant Developer — Income and Opportunity

Forex Algo-Trading Python Developer

Forex is short for foreign exchange, and is the largest and most liquid market in the world

In forex markets, currency pairs are traded in varying volumes according to quoted prices. A base currency is given a price in terms of a quote currency. Forex is considered to be the world’s largest and most liquid financial market, trading 24 hours a day, five days a week.

The daily global average volume of forex trading was approximately $6.6 trillion as of 2019. (source)

The average salary of a forex trader is $98,652 per year plus $25,000 in commissions. But the annual salary of a forex trader can vary widely. Top traders make north of $150,000 but the lowest salaries can be around $11,500. (source)

🌍 Further Reading: A Beginners Guide to Forex Trading Bots and Python

DeFi Developer

DeFi (or “decentralized finance”) is a term used to refer to financial services transacted on public blockchains.

DeFi is permissionless and open to all. Transactions are routed through a decentralized network or blockchain.

DeFi applications provide many of the same services provided by traditional banks such as lending, borrowing, trading, to mention just a few.

🌍 Further Reading: Top 11 DeFi Articles to Get Started in Crypto

Blockchain Developer

Blockchain developers are very often skilled in financial matters — because a Blockchain essentially is a distributed system based on code and some tokenomics.

💡 Blockchain is at the intersection of computer science and finance!

The average annual income of a Blockchain engineer is between $105,180 and $108,560 according to Glassdoor (source).

If you decide to go the route as a freelance Blockchain engineer, you can expect to make between $25 and $80 per hour on Upwork (source).

Do you want to create your own thriving coding business online? Feel free to check out our freelance developer course — the world’s #1 best-selling freelance developer course that specifically shows you how to succeed on Upwork and Fiverr!

A blockchain engineer operates, designs, develops, analyzes, implements, and supports a distributed blockchain network. Blockchain engineers manage specific business models dealing with blockchain technology. (Source)

🌍 Further Reading: Blockchain Developer — Income and Opportunity

Conclusion

In this article, I’ve shown you five of the most profitable ways to work as a financial coder:

  • Crypto Trading Bot Developer
  • Quant Developer
  • Forex Algo-Trading Python Developer
  • DeFi Developer
  • Blockchain Developer

If you’re interested in making money with code, feel free to check out our freelancer educational material on Finxter:

Where to Go From Here?

Enough theory. Let’s get some practice!

Coders get paid six figures and more because they can solve problems more effectively using machine intelligence and automation.

To become more successful in coding, solve more real problems for real people. That’s how you polish the skills you really need in practice. After all, what’s the use of learning theory that nobody ever needs?

You build high-value coding skills by working on practical coding projects!

Do you want to stop learning with toy projects and focus on practical code projects that earn you money and solve real problems for people?

🚀 If your answer is YES!, consider becoming a Python freelance developer! It’s the best way of approaching the task of improving your Python skills—even if you are a complete beginner.

If you just want to learn about the freelancing opportunity, feel free to watch my free webinar “How to Build Your High-Income Skill Python” and learn how I grew my coding business online and how you can, too—from the comfort of your own home.

Join the free webinar now!