Posted on Leave a comment

Review: Disco Dodgeball – REMIX (Switch eShop)

Breaking away from its custom of pumping out pinball titles at an impressive rate, Zen Studios has decided to bring Robot Roller-Derby Disco Dodgeball back to life but with a much snappier name. The first iteration saw release on PC three years ago and now Switch owners can join in with minimal differences from the PC counterpart.

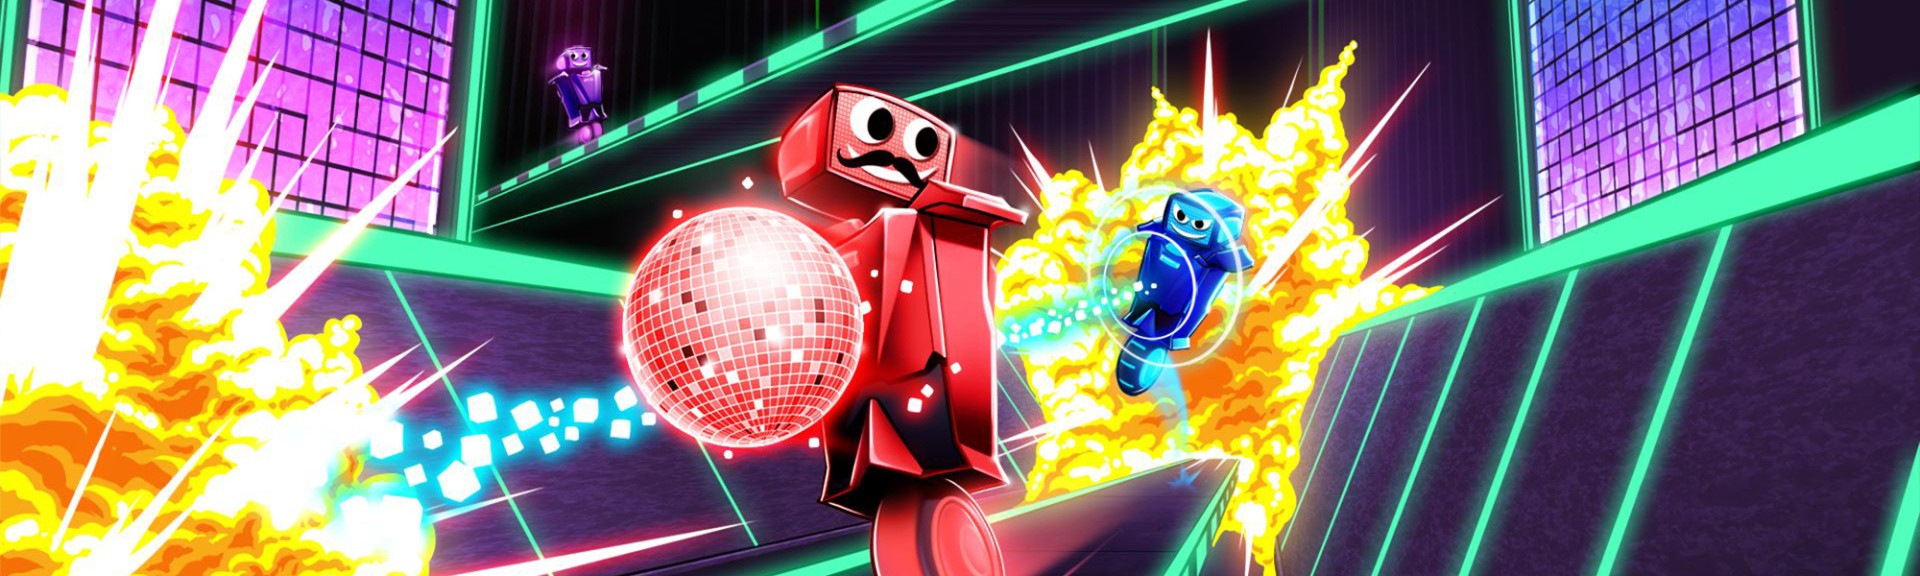
Disco Dodgeball – REMIX is a first-person competitive sports game that relies primarily on online play. Up to eight players battle it out in TRON-style arenas with 21 gameplay modes to choose from including classic Dodgeball, Grand Prix (yes, you read that correctly) and our personal favourite, Elimination. We rally up some of our gaming buddies to take the majority of the modes for a spin, and although there’s plenty to choose from, only a handful manage to hold our interest.

Rushing to grab one of the randomly generated balls that crop up in each of the ten or so arenas and lobbing them at the opposing players is a different and entertaining way to play, but once the penny drops and the art is mastered, trying to figure out what you’re meant to be doing (and when) starts to become increasingly frustrating. One mode has us all scrambling to the elusive golden ball to then throw it at one of four panels marked with a big X that dangle from the middle of the ceiling. Simple on paper, but when we find that none of us is scoring any points because we need to hit the blank side of the panel, it becomes a frustrating face-to-palm situation.

Sadly, many of the design decisions have us scratching our heads in confusion, most notably when it comes to the matchmaking facilities. Granted, the developer has created a seamless lobby that allows for drop-in/drop-out gameplay, but hosting a private room isn’t straightforward and the only option is to piggy-back and invite fellow Switch players until everyone is present. Hosting a dedicated Discord voice comms room makes things more accessible, functional and fun albeit still confusing in many of the modes.

If you’re a fan of customisation then you’re in luck as the game offers it in droves. Completing single-player and online challenges – such as levelling up or performing a set amount of special moves – and the game dishes out nuts, bolts and other mechanical bits-and-bobs. Grabbing a certain amount of parts sees us crafting all sorts of items to pimp our bot out with. From changing the wheels to having the option to plonk a set of antlers on the dodgeball-wielding robot, having a funny-looking bot whizzing around the arenas doesn’t provide too much incentive to grind.

There’s single-player content and while there’s an Arcade, Training and a Challenges mode to play, all of these don’t bring much in the way of incentive to come back and revisit once a few minutes have been spent exploring them. Still, a leaderboard for every mode (including the solo content) is readily accessible and is sure to attract those wanting to stay on top and screenshot them holding first place for their friends to see. There’s also a split-screen option for couch multiplayer for those wanting to break away from the online side of things. Again, it works fine but there isn’t enough there to draw the player back in.

Disco Dodgeball Remix successfully ticks some boxes. Smooth performing multiplayer? Tick. Customisation? Tick. Effective power-ups? Kind of tick. But apart from having a mediocre online offering that provides a light amount of entertainment when there’s a group of mates playing in a chat room for company, there isn’t much else to experience.

Conclusion

The bright, flashing lights – and admittedly catchy thumping club music – coupled with an eye-watering amount of modes and game/bot customisation isn’t quite enough to dress up what essentially feels like a promising idea that’s vastly undercooked. A little more time in the oven – and with a more appetising and interesting main course – and Disco Dodgeball could have been a much stronger option on the small, but rapidly growing menu of online-focused games for Switch.

Posted on Leave a comment

It’s Master Mummy Vs Max Brass In The Latest ARMS Party Crash

It’s been a little while since ARMS held another badge-happy Party Crash – with Spring Man and Ninjara having gone head to head earlier in the month – but the drought has come to an end with Nintendo confirming the new event will see Master Mummy and Max Brass bringing the pain from Friday 25th May.

With the big, Teenage Mutant Ninja Turtles-themed Splatoon 2 Splatfest now officially over with Team Donnie rising victorious, we’re looking forward to jumping back into ARMS in search of more badges for our collection. The event officially starts at 10:00am BST on May 25th and ends at 10:00am BST on May 28th.

Will you be jumping back into ARMS now that the latest Party Crash has been announced? Which team will you be fighting for come the weekend? Share your thoughts below…

Posted on Leave a comment

No Plans For Call Of Duty: Black Ops 4 On Nintendo Switch, Treyarch Says

Activision’s latest shooty-shooty-boom-boom game Call of Duty: Black Ops 4 was officially revealed to the world late last week, but one thing missing from the presentation was any mention of a Switch version – something that many had optimistically expected, given recent rumours.

Twinfinite asked senior producer Yale Miller if there were any plans for the game on Switch in the future, and got a slightly disappointing reply. Miller apparently shot down the discussion with a quick “No there is not”, which we guess puts to bed any talk of Black Ops 4 coming to Nintendo’s console. That of course doesn’t rule out a Call of Duty entry on Nintendo’s hybrid system in some shape or form of course, but we guess we’ll see in the fullness of time.

If you’re still interested in learning more about the game despite the lack of a Switch version, then head over to our friends at Push Square where you’ll find out about the lack of a solo campaign, the game’s on-trend “Battle Royale” mode and its unique zombie scenarios – one of which is set aboard the Titanic

Posted on Leave a comment

Looks Like Sega’s New Sonic Racing Game Will Be Rolling Out Of The Garage Soon

The fact that Sega is working on a new Sonic racing title isn’t a secret anymore; the company teased the logo at SXSW, after all. 

However, we know precious little about the game itself – but that’s about to change, according to Sega’s PR and social media guru Aaron Webber, who said this during a recent live stream:

A lot of you have been waiting for news and information, and you’re very curious about what that title was that we teased back at South by Southwest, and at least in the near future, you might be hearing some more news and information about that. So hey, that’s coming up. Get ready. It’s on the horizon.

Could this hint at a reveal at E3, or perhaps beforehand? Webber also mentioned that Sega will have more news about its plans soon, and that it has “cool” stuff to reveal.

Posted on Leave a comment

Review: Little Nightmares: Complete Edition (Switch eShop)

Bestowed with a disquieting atmosphere and visual imagination, Little Nightmares makes a terrific first impression. A side-on platform-puzzler in the vein of Playdead’s exceptional Limbo and Inside – with a similarly dark palette – the game casts the player as Six, a nine-year-old girl who must navigate her way from the depths of a titanic ship called The Maw to escape onto the ocean waves. But the more time you spend with Six, guiding her through the clanking and groaning vessel, the more Little Nightmares reveals its shortcomings.

Swedish studio Tarsier first revealed Little Nightmares in 2014 as a game called Hunger, and Six is indeed cursed with a raging appetite which sees her take some unexpected character turns. Suffice to say that she is no sweet summer child, at times exhibiting qualities more in keeping with the game’s array of grotesque antagonists. An empathetic, protective connection with Little Nightmare’s protagonist is no guarantee, then, which strips the game’s scenes of life-or-death hide and seek – and desperate sprints to evade the clutches of lanky armed assailants – of the tension they should be positively dripping with.

This leads to the player caring less about Six’s safety than they might’ve done, had she not been partial to the occasional wicked act. And that, combined with the regular deaths you’ll encounter (another element borrowed from Playdead’s copybook), turns the trial-and-error gameplay into something where the stakes don’t feel especially raised.

If Six gets fried, or crushed, or caught, that’s fine – you simply reload the checkpoint, having learned from your mistakes. But here’s where the greatest obstacle you’ll face in finishing the game raises its head. Forget the traps and the terrors of the Maw – it’s the painfully long loading times between deaths that’ll have you hitting the Switch home button for something less frustrating.

If the game snapped you right back to the last checkpoint a few seconds after coming a cropper, Little Nightmares would be much easier to recommend. But with death occurring so regularly – not just because of the things that are actively out to get you, but also some spongey controls, unclear environments and ropey collision detection that sees Six stick herself to walls or stumble on the floorboards when you least need her to – these lengthy waits to get back to the Maw become bothersome in the extreme.

Checkpointing itself is fairly generous, with usually only a handful of potential pitfalls between one respawn area and the next, but repeating the same short sequences several times robs them of their potency, and the Maw’s occupants quickly lose their fear factor.

Which is a true shame, as the story of Little Nightmares – fleshed out as it is, wonderfully, by the DLC included in the Switch’s Complete Edition port – is a treat of gruesome titillation and macabre mystery. It’s not just Six who isn’t all she seems; other characters that she encounters – both playable (in the DLC) and not – have murky backgrounds that can be exposed through both their actions and by studying the environments they inhabit.

All of those Nomes that run from Six as she sneaks around the ship? Oh, they have their reasons for being afraid of her, and that shocking reveal is Little Nightmare’s narrative highlight, bar none. Be sure to pay attention to their shadows, too.

And you’ll want to look for those when the Switch is docked, as Little Nightmares is crisp and clear on the TV, its shadows working more as mood setters than making the screen hard to read. Played handheld, though, a game this dimly lit can’t not suffer from reflection interference, and seeing your own face peering back at you from behind Six’s misadventures doesn’t half compromise the experience.

If you are intending to play Little Nightmares undocked, then, ensure you’re someplace dark enough to avoid that. The visuals are a little fuzzier when in handheld mode, but with the stylised look Tarsier has realised here – not to mention the slow gameplay – Little Nightmares doesn’t suffer significantly for the minor dip in clarity.

The DLC, in which you play as another runaway kid entirely, is mechanically identical to the main game, and its three instalments add up to about three hours of bonus material – which is welcomed in a value-for-money capacity, as Six’s story is beatable in just over four hours, unless those loading screens grind you down first. Oh, and if you’ve got a Pac-Man amiibo lying about the house, you might want to dig out and dust it off for this one.

The DLC features one of the game’s very best monsters, too, an aquatic nasty that’s evocative of the truly disturbing, long-haired underwater horrors of Inside. But every time Little Nightmares throws up such a parallel to Playdead’s output, it only ever comes up short by comparison, leading one to wonder just how much better this could have been with controls that felt more responsive, and quicker turnaround times between failures.

Conclusion

Little Nightmares boasts some superb character and environment design, and exceptional sound too, with parts of the Maw screaming as if the ship was a gigantic bionic seafarer. Its story is compellingly told, and the way the main game connects with the DLC is immensely rewarding. But you never really feel like you have full control of Six, and the long breaks between restarts can dump you into a painful loop of spending less time in the game than you do in loading screens. These problems were present in the game’s initial release back in April 2017, and Switch owners can be forgiven for feeling disappointed that Tarsier wasn’t able to fix them for this port. If you can overlook them, though, Little Nightmares is an occasionally moreish puzzler with an exceptionally creepy cast capable of turning any stomach.

Posted on Leave a comment

Guide: Hyrule Warriors: Definitive Edition – Link Heart Piece And Containers Guide

What? Just because Hyrule Warriors: Definitive Edition isn’t a traditional Zelda game, doesn’t mean it can’t have heart pieces. There’s a ton to gather here, and if you gather four of them you’ll get an extra heart. There’s even heart containers to collect that give you a full heart each time you collect one. That’s good because it will help you last longer in battle.

In this guide, we’re going to help you gather every single heart container in the game, for each character, so you can bring down Ganondorf and save Hyrule a little easier.

Link Heart Containers

Prologue – The Armies of Ruin Skyward Sword – Land in the Sky
Epilogue – Shining Beacon Grand Finale – Enduring Resolve
Adventure Map G-1 Adventure Map P-2
Great Sea Map A-3 Master Quest Map A-1
Master Quest Map K-1 Master Quest Map L-6
Twilight Map B-3 Twilight Map E-4
Twilight Map F-1 Termina Map B-2
Termina Map K-5 Master Wind Waker Map A-3
Master Wind Waker Map J-2 Master Wind Waker Map N-5
Koholint Island Map F-1 Koholint Island Map N-1

Link Pieces Of Heart

Prologue – The Armies of Ruin Prologue – The Sheikah Tribesman
Skyward Sword – Land in the Sky Skyward Sword – Sealed Ambition
Wind Waker – A New Disturbance Wind Waker – Watchers of the Triforce
Adventure Map F-1 Adventure Map N-7
Great Sea Map C-2 Twilight Map E-7
Termina Map H-8 Termina Map M-1

Impa Heart Containers

Prologue – The Sheikah Tribesman Epilogue – A War of Spirit
Linkle’s Tale – The Other Hero Adventure Map A-3
Adventure Map H-8 Adventure Map I-7
Adventure Map K-7 Adventure Map O-4
Great Sea Map N-7 Master Quest Map A-3
Master Quest Map B-1 Master Quest Map G-5
Twilight Map B-6 Twilight Map G-5
Twilight Map H-7 Termina Map G-3
Termina Map H-4 Master Wind Waker Map C-2
Master Wind Waker Map G-3 Master Wind Waker Map J-4
Koholint Island Map B-6 Koholint Island Map L-1

Impa Pieces Of Heart

Prologue – The Sorceress of the Woods Ocarina of Time – Land of Myth
Grand Finale – Liberation of the Triforce Adventure Map O-4

Sheik Heart Containers

Prologue – The Sorceress of the Woods Ocarina of Time – Land of Myth
Adventure Map I-8 Adventure Map L-7
Adventure Map M-4 Adventure Map M-6
Adventure Map P-8 Great Sea Map B-4
Great Sea Map J-2 Master Quest Map D-5
Master Quest Map G-1 Master Quest Map N-2
Twilight Map E-5 Twilight Map G-8
Twilight Map L-6 Termina Map A-3
Termina Map K-4 Master Wind Waker Map H-3
Master Wind Waker Map M-7 Master Wind Waker Map N-6
Koholint Island Map A-4 Koholint Island Map N-5

Sheik Pieces Of Heart

Prologue – The Sorceress of the Valley Ocarina of Time – The Water Temple
Adventure Map C-5 Adventure Map M-4

Lana Heart Containers

Prologue – The Sorceress of the Valley Twilight Princess – Land of Twilight
Adventure Map H-5 Adventure Map H-6
Adventure Map I-1 Adventure Map K-1
Adventure Map P-3 Great Sea Map D-1
Master Quest Map F-2 Master Quest Map G-7
Master Quest Map H-6 Twilight Map C-5
Twilight Map L-5 Twilight Map N-5
Termina Map I-2 Termina Map M-4
Master Wind Waker Map B-5 Master Wind Waker Map D-2
Master Wind Waker Map K-7 Koholint Island Map D-4
Koholint Island Map N-2

Lana Pieces Of Heart

Twilight Princess – Land of Twilight Twilight Princess – The Shadow King
Epilogue – The Sacred Sword Grand Finale – Enduring Resolve
Wind Waker – The Search for Cia Adventure Map I-1
Adventure Map J-7 Great Sea Map N-1

Zelda Heart Containers

Epilogue – The Sacred Sword Grand Finale – Liberation of the Triforce
Adventure Map B-1 Adventure Map B-8
Adventure Map J-8 Adventure Map L-5
Adventure Map P-1 Great Sea Map C-7
Great Sea Map M-2 Master Quest Map D-6
Master Quest Map J-8 Master Quest Map L-7
Twilight Map C-3 Twilight Map H-4
Twilight Map J-4 Termina Map L-5
Termina Map O-4 Master Wind Waker Map B-2
Master Wind Waker Map L-5 Master Wind Waker Map N-2
Koholint Island Map E-2 Koholint Island Map K-6

Zelda Pieces Of Heart

Adventure Map B-1 Adventure Map B-8
Adventure Map J-8 Adventure Map L-5

Ganondorf Heart Containers

Ganondorf – Ganondorf’s Return Ganondorf – March of the Demon King
Ganondorf – Battle of the Triforce Adventure Map E-2
Adventure Map H-2 Adventure Map M-1
Adventure Map N-2 Great Sea Map A-1
Great Sea Map B-6 Master Quest Map C-6
Master Quest Map H-1 Master Quest Map K-5
Master Quest Map P-6 Twilight Map D-8
Twilight Map F-7 Termina Map A-2
Termina Map K-7 Master Wind Waker Map A-2
Master Wind Waker Map G-1 Master Wind Waker Map L-1
Koholint Island Map C-1 Koholint Island Map G-2

Ganondorf Pieces Of Heart

Ganondorf – Ganondorf’s Return Ganondorf – March of the Demon King
Ganondorf – Battle of the Triforce Adventure Map F-2

Darunia Heart Containers

Ocarina of Time – The Water Temple Adventure Map I-6
Adventure Map J-3 Adventure Map J-5
Adventure Map M-2 Adventure Map M-3
Adventure Map N-1 Great Sea Map E-6
Great Sea Map J-5 Master Quest Map C-1
Master Quest Map N-3 Master Quest Map N-5
Twilight Map F-8 Twilight Map I-8
Twilight Map L-5 Termina Map G-8
Termina Map O-6 Master Wind Waker Map B-1
Master Wind Waker Map D-3 Master Wind Waker Map L-7
Koholint Island Map D-1 Koholint Island Map J-2

Darunia Pieces Of Heart

Adventure Map J-5 Adventure Map M-3
Adventure Map N-1 Adventure Map N-6

Ruto Heart Containers

Linkle’s Tale – Powers Collide Adventure Map C-1
Adventure Map D-4 Adventure Map D-7
Adventure Map N-4 Adventure Map N-5
Adventure Map P-6 Great Sea Map D-4
Great Sea Map I-1 Master Quest Map F-6
Master Quest Map I-2 Master Quest Map P-8
Twilight Map E-2 Twilight Map H-5
Twilight Map H-6 Termina Map I-6
Termina Map N-7 Master Wind Waker Map F-2
Master Wind Waker Map G-6 Master Wind Waker Map N-4
Koholint Island Map J-6 Koholint Island Map L-3

Ruto Pieces Of Heart

Adventure Map K-3 Adventure Map K-4
Adventure Map L-6 Adventure Map P-6

Agitha Heart Containers

Adventure Map A-1 Adventure Map A-5
Adventure Map A-7 Adventure Map C-3
Adventure Map D-1 Adventure Map E-7
Adventure Map J-2 Great Sea Map E-4
Great Sea Map K-1 Master Quest Map J-7
Master Quest Map O-4 Master Quest Map O-5
Twilight Map G-4 Twilight Map J-3
Twilight Map K-1 Termina Map J-3
Termina Map J-8 Master Wind Waker Map D-6
Master Wind Waker Map H-1 Master Wind Waker Map L-6
Koholint Island Map E-1 Koholint Island Map H-3

Agitha Pieces Of Heart

Adventure Map A-5 Adventure Map C-3
Adventure Map D-1 Adventure Map F-4

Midna Heart Containers

Twilight Princess – The Shadow King Adventure Map F-3
Adventure Map F-5 Adventure Map I-3
Adventure Map K-5 Adventure Map O-2
Adventure Map O-8 Great Sea Map H-2
Great Sea Map J-4 Master Quest Map C-2
Master Quest Map D-8 Master Quest Map N-6
Twilight Map B-2 Twilight Map D-5
Twilight Map N-6 Termina Map I-3
Termina Map N-5 Master Wind Waker Map F-3
Master Wind Waker Map F-6 Master Wind Waker Map I-1
Koholint Island Map D-5 Koholint Island Map I-1

Midna Pieces Of Heart

Epilogue – Shining Beacon Adventure Map A-6
Adventure Map F-6 Adventure Map I-3

Zant Heart Containers

Adventure Map A-4 Adventure Map C-2
Adventure Map C-7 Adventure Map G-4
Adventure Map G-7 Adventure Map O-1
Adventure Map P-7 Great Sea Map G-7
Great Sea Map L-4 Master Quest Map J-6
Master Quest Map K-2 Master Quest Map K-4
Twilight Map C-1 Twilight Map C-4
Twilight Map H-3 Termina Map E-5
Termina Map L-8 Master Wind Waker Map C-6
Master Wind Waker Map F-5 Master Wind Waker Map N-3
Koholint Island Map F-3 Koholint Island Map I-4

Zant Pieces Of Heart

Adventure Map A-4 Adventure Map C-2
Adventure Map G-4 Adventure Map O-2

Fi Heart Containers

Skyward Sword – Sealed Ambition Linkle’s Tale – The Demon Lord’s Plan
Adventure Map C-6 Adventure Map E-6
Adventure Map F-8 Adventure Map J-1
Adventure Map N-8 Great Sea Map D-2
Great Sea Map G-6 Master Quest Map F-4
Master Quest Map F-5 Master Quest Map O-7
Twilight Map F-2 Twilight Map F-3
Twilight Map M-5 Termina Map D-7
Termina Map F-5 Master Wind Waker Map C-5
Master Wind Waker Map M-3 Master Wind Waker Map M-6
Koholint Island Map C-2 Koholint Island Map J-5

Fi Pieces Of Heart

Epilogue – A War of Spirit Adventure Map E-6
Adventure Map F-7 Adventure Map N-8

Ghirahim Heart Containers

Adventure Map D-6 Adventure Map D-8
Adventure Map E-4 Adventure Map I-2
Adventure Map K-2 Adventure Map M-5
Adventure Map M-8 Great Sea Map H-6
Great Sea Map M-3 Master Quest Map A-4
Master Quest Map I-6 Master Quest Map M-8
Twilight Map E-1 Twilight Map G-2
Twilight Map I-6 Termina Map F-6
Termina Map H-5 Master Wind Waker Map B-6
Master Wind Waker Map G-5 Master Wind Waker Map M-4
Koholint Island Map I-3 Koholint Island Map I-5

Ghirahim Pieces of Heart

Adventure Map E-4 Adventure Map G-8
Adventure Map I-2 Adventure Map P-7

Cia Heart Containers

Cia’s Tale – The Dragon of the Caves Great Sea Map H-7
Great Sea Map N-4 Master Quest Map B-2
Master Quest Map C-3 Master Quest Map E-5
Master Quest Map E-6 Master Quest Map G-6
Master Quest Map H-7 Master Quest Map I-8
Master Quest Map K-8 Twilight Map C-7
Twilight Map D-7 Twilight Map L-4
Termina Map G-6 Termina Map J-1
Master Wind Waker Map E-2 Master Wind Waker Map I-4
Master Wind Waker Map L-4 Koholint Island Map K-4
Koholint Island Map M-3

Cia Pieces Of Heart

Cia’s Tale – The Dragon of the Caves Cia’s Tale – The Usurper King
Cia’s Tale – The Demon Lord Cia’s Tale – Darkness Falls
Master Quest Map C-3 Master Quest Map G-8
Master Quest Map H-5 Master Quest Map K-8

Volga Heart Containers

Cia’s Tale – The Demon Lord Cia’s Tale – Darkness Falls
Great Sea Map G-1 Great Sea Map L-7
Master Quest Map A-6 Master Quest Map B-4
Master Quest Map H-8 Master Quest Map J-4
Master Quest Map L-2 Master Quest Map L-5
Master Quest Map M-7 Master Quest Map O-1
Twilight Map D-2 Twilight Map K-4
Twilight Map M-4 Termina Map I-1
Termina Map N-4 Master Wind Waker Map A-1
Master Wind Waker Map C-1 Master Wind Waker Map I-3
Koholint Island Map C-6 Koholint Island Map G-3

Volga Pieces Of Heart

Cia’s Tale – The Invasion Begins Master Quest Map B-4
Master Quest Map N-8 Master Quest Map O-1

Wizzro Heart Containers

Cia’s Tale – The Invasion Begins Cia’s Tale – The Usurper King
Great Sea Map F-7 Great Sea Map J-7
Master Quest Map A-5 Master Quest Map A-7
Master Quest Map D-4 Master Quest Map G-4
Master Quest Map I-4 Master Quest Map J-5
Master Quest Map L-3 Master Quest Map M-5
Twilight Map B-7 Twilight Map G-7
Twilight Map J-6 Termina Map G-1
Termina Map L-2 Master Wind Waker Map C-4
Master Wind Waker Map E-7 Master Wind Waker Map M-5
Koholint Island Map E-6 Koholint Island Map K-1

Wizzro Pieces Of Heart

Master Quest Map D-7 Master Quest Map I-5
Master Quest Map M-2 Master Quest Map M-6

Twili Midna Heart Containers

Linkle’s Tale – Her True Self Adventure Map D-2
Adventure Map D-3 Adventure Map J-4
Adventure Map L-3 Adventure Map L-6
Adventure Map O-7 Great Sea Map A-4
Great Sea Map F-3 Master Quest Map F-3
Master Quest Map G-2 Master Quest Map K-3
Master Quest Map P-1 Twilight Map C-8
Twilight Map I-5 Termina Map N-1
Termina Map N-6 Master Wind Waker Map C-3
Master Wind Waker Map I-2 Master Wind Waker Map L-3
Koholint Island Map F-5 Koholint Island Map K-3

Twili Midna Pieces Of Heart

Adventure Map D-2 Adventure Map F-3
Adventure Map F-5 Adventure Map I-7

Young Link Heart Containers

Adventure Map B-2 Adventure Map D-5
Adventure Map E-3 Adventure Map H-4
Adventure Map L-4 Adventure Map L-8
Adventure Map M-7 Great Sea Map C-4
Great Sea Map I-4 Master Quest Map B-8
Master Quest Map H-3 Master Quest Map M-2
Twilight Map D-1 Twilight Map I-3
Twilight Map I-7 Termina Map J-5
Termina Map M-1 Master Wind Waker Map H-4
Master Wind Waker Map I-7 Master Wind Waker Map M-1
Koholint Island Map A-1 Koholint Island Map B-3

Young Link Pieces Of Heart

Adventure Map C-7 Adventure Map H-4
Adventure Map L-8 Adventure Map O-8

Tingle Heart Containers

Adventure Map C-4 Adventure Map E-8
Adventure Map G-2 Adventure Map G-5
Adventure Map I-4 Adventure Map N-3
Adventure Map P-5 Great Sea Map C-5
Great Sea Map E-2 Master Quest Map F-1
Master Quest Map K-7 Master Quest Map M-3
Twilight Map E-3 Twilight Map G-1
Twilight Map J-2 Termina Map J-4
Termina Map L-3 Master Wind Waker Map F-7
Master Wind Waker Map G-4 Master Wind Waker Map H-7
Koholint Island Map C-4 Koholint Island Map N-6

Tingle Pieces of Heart

Adventure Map E-8 Adventure Map G-2
Adventure Map I-5 Adventure Map N-3

Linkle Heart Containers

Linkle’s Tale – The Girl in the Green Tunic Adventure Map B-4
Adventure Map E-1 Adventure Map G-3
Adventure Map G-6 Adventure Map H-1
Adventure Map J-6 Great Sea Map H-4
Master Quest Map E-2 Master Quest Map J-3
Master Quest Map O-2 Twilight Map F-4
Twilight Map I-2 Twilight Map J-7
Termina Map I-4 Termina Map I-5
Master Wind Waker Map B-7 Master Wind Waker Map I-5
Master Wind Waker Map K-5 Koholint Island Map G-6
Koholint Island Map L-5

Linkle Pieces Of Heart

Linkle’s Tale – The Girl in the Green Tunic Linkle’s Tale – Powers Collide
Linkle’s Tale – The Demon Lord’s Plan Linkle’s Tale – Her True Self
Linkle’s Tale – The Other Hero Adventure Map H-1
Great Sea Map H-4 Great Sea Map M-4

Skull Kid Heart Containers

Adventure Map C-5 Adventure Map C-8
Adventure Map H-7 Adventure Map K-6
Adventure Map L-1 Adventure Map O-6
Adventure Map P-4 Great Sea Map F-4
Great Sea Map F-6 Master Quest Map E-4
Master Quest Map E-8 Master Quest Map N-1
Master Quest Map P-5 Twilight Map D-6
Twilight Map J-8 Termina Map K-6
Termina Map L-4 Master Wind Waker Map E-4
Master Wind Waker Map E-6 Master Wind Waker Map K-1
Koholint Island Map A-5 Koholint Island Map L-4

Skull Kid Pieces Of Heart

Adventure Map C-1 Adventure Map H-7
Adventure Map L-1 Adventure Map O-6

Toon Link Heart Containers

Adventure Map B-5 Adventure Map B-7
Adventure Map G-8 Adventure Map H-3
Adventure Map I-5 Adventure Map K-8
Adventure Map L-2 Great Sea Map G-4
Great Sea Map N-3 Master Quest Map B-3
Master Quest Map B-7 Master Quest Map G-3
Master Quest Map I-7 Twilight Map F-6
Twilight Map O-6 Termina Map E-4
Termina Map L-7 Master Wind Waker Map J-1
Master Wind Waker Map J-3 Master Wind Waker Map K-4
Koholint Island Map M-2 Koholint Island Map M-4

Toon Link Pieces Of Heart

Adventure Map A-3 Adventure Map G-5
Adventure Map I-8 Adventure Map P-1

Tetra Heart Containers

Wind Waker – A New Disturbance Wind Waker – The Search for Cia
Wind Waker – Reclaiming the Darkness Great Sea Map B-3
Great Sea Map F-1 Great Sea Map I-2
Great Sea Map I-6 Great Sea Map L-3
Great Sea Map L-6 Great Sea Map M-5
Master Quest Map B-6 Master Quest Map E-1
Master Quest Map N-4 Twilight Map D-4
Twilight Map G-3 Twilight Map K-7
Termina Map E-6 Termina Map H-3
Master Wind Waker Map A-6 Master Wind Waker Map E-1
Master Wind Waker Map J-7 Koholint Island Map E-5
Koholint Island Map I-6

King Daphnes Heart Containers

Wind Waker – Watchers of the Triforce Great Sea Map B-1
Great Sea Map E-5 Great Sea Map E-7
Great Sea Map H-5 Great Sea Map I-3
Great Sea Map K-6 Great Sea Map L-5
Master Quest Map A-2 Master Quest Map C-8
Master Quest Map D-3 Master Quest Map H-4
Twilight Map E-6 Twilight Map H-8
Termina Map I-7 Termina Map L-1
Master Wind Waker Map B-4 Master Wind Waker Map D-1
Master Wind Waker Map I-6 Koholint Island Map B-2
Koholint Island Map H-5

King Daphnes Pieces of Heart

Wind Waker – Reclaiming the Darkness Great Sea Map B-1
Great Sea Map E-5 Great Sea Map E-7
Great Sea Map H-5 Great Sea Map I-3
Great Sea Map K-6 Great Sea Map L-5

Medli Heart Containers

Master Wind Waker Map A-4 Master Wind Waker Map A-7
Master Wind Waker Map C-7 Master Wind Waker Map D-4
Master Wind Waker Map D-5 Master Wind Waker Map D-7
Master Wind Waker Map E-3 Master Wind Waker Map F-4
Master Wind Waker Map G-2 Master Wind Waker Map K-3
Master Wind Waker Map K-6 Master Wind Waker Map L-2
Master Wind Waker Map M-2

Medli Pieces Of Heart

Master Wind Waker Map B-6 Master Wind Waker Map C-6
Master Wind Waker Map F-2 Master Wind Waker Map G-2
Master Wind Waker Map H-4 Master Wind Waker Map I-3
Master Wind Waker Map I-7 Master Wind Waker Map M-7

Marin Heart Containers

Koholint Island Map B-5 Koholint Island Map D-2
Koholint Island Map D-3 Koholint Island Map E-4
Koholint Island Map F-4 Koholint Island Map G-5
Koholint Island Map H-1 Koholint Island Map H-4
Koholint Island Map J-3 Koholint Island Map J-4
Koholint Island Map L-2 Koholint Island Map L-6
Koholint Island Map M-1 Koholint Island Map M-5
Koholint Island Map N-3
Posted on Leave a comment

Guide: Hyrule Warriors: Definitive Edition – How To Unlock All Costumes

There’s a bunch of different characters to unlock in Hyrule Warriors: Definitive Edition and each of them has various different costumes they can wear. These are often based on outfits from previous The Legend of Zelda games.

In this guide, we’re going to help you unlock all costumes for each character in the game. We’ll list all of them and then their unlock conditions below. Enjoy!

Link Costumes

Costume How To Unlock
Trainee Tunic Default
Era of the Wilds Tunic Default
Hero’s Clothes Beat Prologue – The Armies of Ruin
Zora Tunic Beat Adventure Map E-5
Goron Tunic Beat Adventure Map G-1
Kokiri Tunic Beat Termina Map F-7
Era of Twilight Tunic Beat Twilight Map F-5
Knight of Skyloft Tunic Beat Adventure Map B-6
Hero’s Clothes (Master Quest) Beat Master Quest Map I-7
Dark Link Beat Rewards Map – True Partners
Postman Uniform Beat Twilight Map G-6
Hero’s Clothes (Twilight) Beat Twilight Map C-6
Fierce Deity Link Beat Termina Map B-3
Hero’s Clothes (Boss) Beat Rewards Map – The Giants Gather
Hero’s Clothes (Great Sea) Beat Great Sea Map L-1
Hero’s Clothes (Wind Waker) Beat Master Wind Waker Map A-2

Impa Costumes

Costume How To Unlock
Standard Outfit Default
Standard Outfit (Master Quest) Beat Master Quest Map G-5
Standard Outfit (Twilight) Beat Twilight Map K-2
Era of the Hero of Time Outfit Beat Termina Map J-6
Mask of Truth Beat Termina Map K-1
Standard Outfit (Great Sea) Beat Great Sea Map J-1
Standard Outfit (Wind Waker) Beat Master Wind Waker Map I-4

Sheik Costumes

Costume How To Unlock
Standard Outfit Default
Standard Outfit (Master Quest) Beat Master Quest Map I-3
Standard Outfit (Twilight) Beat Twilight Map L-6
Era of the Hero of Time Outfit Beat Termina Map I-8
Kafel’s Mask Beat Termina Map M-7
Standard Outfit (Great Sea) Beat Great Sea Map K-5
Standard Outfit (Wind Waker) Beat Master Wind Waker Map J-4

Lana Costumes

Costume How To Unlock
Standard Robes Default
Era of the Hero of Time Robes Beat Termina Map M-5
Era of Twilight Robes Beat Twilight Map B-5
Skyloft Robes Beat Adventure Map B-8
Standard Robes (Master Quest) Beat Master Quest Map P-3
Ilia’s Clothes Beat Twilight Map N-4
Standard Outfit (Twilight) Beat Twilight Map K-3
Bunny Hood Beat Termina Map A-3
Standard Robes (Boss) Rewards Map – Boss Rush
Standard Robes (Great Sea) Beat Great Sea Map M-1
Standard Outfit (Wind Waker) Beat Master Wind Waker L-1

Ganondorf Costumes

Costume How To Unlock
Standard Outfit Default
Era of the Hero of Time Armor Beat Termina Map F-4
Era of Twilight Armor Beat Twilight Map I-4
Standard Outfit (Master Quest) Beat Master Quest Map A-8
Standard Outfit (Twilight) Beat Twilight Map D-7
Odolwa’s Remains Beat Termina C-3
Standard Outfit (Boss) Beat Rewards Map – Rulers of Twilight
Standard Outfit (Great Sea) Beat Great Sea Map I-5

Darunia Costumes

Costume How To Unlock
Standard Outfit Default
Standard Outfit (Master Quest) Beat Master Quest Map N-2
Standard Outfit (Twilight) Beat Twilight Map I-8
Goron’s Mask Beat Termina Map J-2
Standard Outfit (Great Sea) Beat Great Sea Map F-5
Standard Outfit (Wind Waker) Beat Master Wind Waker Map C-1

Ruto Costumes

Costume How To Unlock
Standard Outfit Default
Standard Outfit (Master Quest) Beat Master Quest Map N-3
Standard Outfit (Twilight) Beat Twilight Map F-8
Goron’s Mask Beat Termina Map J-7
Standard Outfit (Great Sea) Beat Great Sea Map K-4
Standard Outfit (Wind Waker) Beat Master Wind Waker Map E-7

Agitha Costumes

Costume How To Unlock
Standard Outfit Default
Standard Outfit (Master Quest) Beat Master Quest Map J-6
Standard Outfit (Twilight) Beat Twilight Map J-1
Don Gero’s Mask Beat Termina Map K-3
Standard Outfit (Great Sea) Beat Great Sea Map B-7

Midna Costumes

Costume How To Unlock
Standard Outfit Default
Standard Outfit (Master Quest) Master Quest Map L-4
Standard Outfit (Twilight) Twilight Map B-2
Ordon Shield Termina Map M-2
Standard Outfit (Great Sea) Great Sea Map F-2
Standard Outfit (Wind Waker) Master Wind Waker Map N-3

Zant Costumes

Costume How To Unlock
Standard Outfit Default
Standard Outfit (Master Quest) Beat Master Quest Map L-8
Standard Outfit (Twilight) Beat Twilight Map H-3
Troupe Leader’s Mask Beat Termina Map H-2
Standard Outfit (Great Sea) Beat Great Sea Map C-3

Fi Costumes

Costume How To Unlock
Standard Outfit Default
Standard Outfit (Boss) Beat Master Quest Map E-3
Standard Outfit (Twilight) Beat Twilight Map F-2
Stone Mask Beat Termina Map G-5
Standard Outfit (Great Sea) Beat Great Sea Map G-2
Standard Outfit (Wind Waker) Beat Master Wind Waker Map M-4

Ghirahim Costumes

Costume How To Unlock
Standard Outfit Default
Standard Outfit (Master Quest) Beat Master Quest Map F-4
Standard Outfit (Twilight) Beat Twilight Map E-1
Kamaro’s Mask Beat Termina Map N-5
Standard Outfit (Great Sea) Beat Great Sea Map N-2
Standard Outfit (Wind Waker) Beat Master Wind Waker Map N-5

Cia Costumes

Costume How To Unlock
Masked Default
Unmasked Beat Grand Finale – Liberation of the Triforce
Hatless Beat Grand Finale – Liberation of the Triforce
Masked (Master Quest) Beat Master Quest Map C-7
Unmasked (Master Quest) Beat Master Quest Map C-7
Hatless (Master Quest) Beat Master Quest Map C-7
Guardian of Time Beat Master Quest Map O-8
Masked (Twilight) Beat Twilight Map B-6
Unmasked (Twilight) Beat Twilight Map B-6
Hatless (Twilight) Beat Twilight Map B-6
Majora’s Mask Beat Termina Map H-6
Masked (Boss) Beat Rewards Map – Evil Power
Unmasked (Boss) Beat Rewards Map – Evil Power
Hatless (Boss) Beat Reward Map – Evil Power
Masked (Great Sea) Beat Great Sea Map H-1
Unmasked (Great Sea) Beat Great Sea Map H-1
Hatless (Great Sea) Beat Great Sea Map H-1
Masked (Wind Waker) Beat Master Wind Waker Map A-1
Unmasked (Wind Waker) Beat Master Wind Waker Map A-1
Hatless (Wind Waker) Beat Master Wind Waker Map A-1

Volga Costumes

Costume How To Unlock
Standard Outfit Default
Standard Outfit (Master Quest) Beat Master Quest Map O-1
Standard Outfit (Twilight) Beat Twilight Map D-2
Giant’s Mask Beat Termina Map N-3
Standard Outfit (Great Sea) Beat Great Sea Map L-2
Standard Outfit (Wind Waker) Beat Master Wind Waker Map B-1

Wizzro Costumes

Costume How To Unlock
Standard Outfit Default
Standard Outfit (Master Quest) Beat Master Quest Map E-6
Standard Outfit (Twilight) Beat Twilight Map J-6
Captain’s Hat Beat Termina Map L-2
Standard Outfit (Great Sea) Beat Great Sea Map D-5

Twili Midna Costumes

Costume How To Unlock
Standard Outfit Default
Standard Outfit (Great Sea) Beat Great Sea Map N-5
Standard Outfit (Wind Waker) Beat Master Wind Waker Map I-4

Young Link Costumes

Costume How To Unlock
Standard Outfit Default
Standard Outfit (Great Sea) Beat Great Sea Map I-7

Tingle Costumes

Costume How To Unlock
Standard Outfit Default
Standard Outfit (Great Sea) Beat Great Sea Map J-3
Standard Outfit (Wind Waker) Beat Master Wind Waker Map E-4

Linkle Costumes

Costume How To Unlock
Standard Outfit Default
Standard Outfit (Great Sea) Beat Great Sea Map C-6

Skull Kid Costumes

Costume How To Unlock
Standard Outfit Default
Standard Outfit (Great Sea) Beat Great Sea Map M-7

Toon Link Costumes

Costume How To Unlock
Standard Outfit Default
Standard Outfit (Great Sea) Beat Great Sea Map D-7
Standard Outfit (Wind Waker) Beat Master Wind Waker Map G-1

Tetra Costumes

Costume How To Unlock
Standard Outfit Default
Standard Outfit (Great Sea) Beat Great Sea Map K-2
Standard Outfit (Wind Waker) Beat Master Wind Waker Map F-7

King Daphnes Costumes

Costume Name Unlock
Standard Outfit Default
Standard Outfit (Great Sea) Beat Great Sea Map H-3
Standard Outfit (Wind Waker) Beat Master Wind Waker Map C-4
Posted on Leave a comment

Video: Some Mario Games Just Can’t Properly Be Played Anymore

Video games are a funny medium; one’s released, and about a year afterwards you’re not likely to be able to buy a brand new copy of it unless you’re very lucky or it gets a second run. As such they age, and in a time of online patches and internet servers being so integral it’s likely only going to get harder to play games properly once they’re retro.

But of course, that’s already happened for some games, and Mario’s not safe from the proverbial reaper’s scythe. We’ve dug up five Mario games that you simply can’t play properly any more, or perhaps were never able to be played in their intended form. If you’re wondering, yes, the Satellaview does come into it; how could it not?

Posted on Leave a comment

Review: Invisiballs (Switch eShop)

Created by Swiss indie developer Digital Kingdom, Invisiballs describes itself as a, “competitive next-gen hide-and-seek,” aiming to utilise the unique features of the Nintendo Switch to make something a little different. It also gives off that immediate multiplayer party vibe that we see so often in the Switch’s digital offerings, with an easy to pick up, one Joy-Con per player approach hoping to allow friends and family to quickly jump in and have a go. So does it achieve these goals, or should it be allowed to slip under your radar?

Before we dive into answering that question, it’s worth noting that this is absolutely not a single-player experience; Invisiballs is designed as a competitive two-to-four player game and you’ll definitely need to have a buddy alongside you to play. Each of the game’s modes are pretty frantic affairs, especially if you fill out all four available player spaces, and you’ll quickly be zooming around each stage, hoping to better your opponents with quick reactions and clever thinking.

You each play as a ball that can be guided around the game’s various stages with a flick of the control stick. Rather than having complete control, though, your ball will whizz across the entire length of the stage until it rests on a wall or barrier, forcing you to plan routes as you go. Aside from this your only other input is an attack on the ‘A’ button, used to destroy any opponents that cross your path, and this can be charged slightly by holding the button down for a couple of seconds.

There is a catch, however; your ball is (for the most part) invisible, and rather than relying on your vision to move around each stage, you’ll actually be using the HD Rumble feature of your Joy-Con to feel when you hit a wall, and also when you pass by an opponent. If you wish, you can actually turn the balls on to full visibility so that you can see them at all times, but considering the vibrations and invisibility make up the game’s main quirk we’d suggest trying to play with it off as standard.

At launch there are two modes to choose from. The first of these is called ‘Free For All’, which simply tasks you with killing off your opponents before they can get to you. Each kill, and subsequently each death, will affect your scores, with points going up and down until someone reaches ten points or the timer runs out. Of course, you won’t know where your opponents are until you pass them by or if they chance an attack (as using your attack gives off light), so you’ll need to remain fully concentrated on the vibrations running through your controller.

The second mode is called ‘Gold Rush’, this time adding a collectable treasure into the mix. Rather than simply knocking out your opponents, you’ll now need to keep hold of a treasure that appears in the centre of the stage, with opponents trying to knock it out of your possession before your timer runs out. If you manage to keep hold of it for long enough, you’ll secure one more point towards victory.

Each of these modes can be played in one of nine stages, each varying in size, and these offer the only real difference from one game to the next. While the main concept is solid, and presented smartly and efficiently, games start to feel extremely repetitive rather quickly. With the same nine stages appearing in both modes, and with the only differences between them being different wall patterns, you’ll likely have had enough after just a handful of games.

There are a couple of clever features woven into the game’s core that make Invisiballs a nicely polished piece of software, but this isn’t enough on its own. One such feature restricts the ability to simply spam the attack as you travel around each stage, with the power of your attack diminishing with each press in quick succession. If the game were to capitalise more on these relatively strong foundations, we could well have another decent party game lurking on the eShop, but without any further development the content is sadly lacking.

Luckily, as early buyers will notice, a third option on the game’s main menu states that more content is coming soon. A quick word with the developer has told us that this third mode will have a bit less confrontation between players, with several treasures spawning on screen and a lesser punishment being dished out when you’re captured by an opponent. On top of this, another option will be added to include tricks and traps, hopefully enhancing the game by adding chaotic objects into the mix.

Digital Kingdom has informed us that this update is expected to go live this summer, with more updates planned for additional maps and modes expected after that, too. This news is pleasing to hear, of course, and could well be just what the game needs to see it soaring upwards in our judgment, but it’s a shame that we’re currently faced with a package that feels slightly undercooked. As it stands, Invisiballs doesn’t provide enough content to justify the asking price, and we can’t imagine many players wanting to stick around for any longer than a dozen or so games. If you’re interested enough in the game’s concept, you might want to hold off and see exactly what content comes from these future updates.

Conclusion

Invisiballs provides us with a competitive party experience that uses HD Rumble to good effect, allowing players to battle it out using only vibrations and quick thinking. The concept is a solid one, and the presentation does the job nicely, but a saddening lack of content across the game’s modes leaves us feeling rather underwhelmed. With multiple updates planned for the near future this issue could soon start to be addressed so, unless you’re entirely sold on the concept alone, we’d recommend holding off until these new features have landed.

Posted on Leave a comment

Guide: Hyrule Warriors: Definitive Edition – How To Unlock Zelda, Link, And All Other Characters

Hyrule Warriors: Definitive Edition combines the universe and characters of The Legend of Zelda with the addictive Dynasty Warriors franchise to create a pretty intriguing mashup. It still feels like a Zelda game – you play as Link, grab the Master Sword, and rescue Zelda – but the gameplay is all Dynasty Warriors. That means flashy combat against hundreds of monsters, capturing bases, and beating gigantic bosses.

If you played Fire Emblem Warriors, you’ll know a huge part of the fun involves playing as your favourite characters in a completely new way. In typical Zelda games, we’re limited to playing as Link, but Hyrule Warriors gives you an opportunity to experience combat as the likes of fan favourites Zelda and Ganondorf alongside the more obscure Zant, Fi, and Midna.

In this guide, we’re going to not only list every single character you can unlock in Hyrule Warriors, but we’re going to tell you exactly what you have to do to unlock them. So read on below and you’ll be smashing through hordes of hapless Hyrulians as Ganondorf himself in no time.

Hyrule Warriors: Definitive Edition Characters Unlocked by Default

Link

Link is the primary protagonist in The Legend of Zelda franchise, and has foiled Ganon countless times over many different generations. Link possesses the Triforce of Courage.

First Appearance Weapons
The Legend of Zelda (NES) Sword / Magic Rod / Gauntlets / Great Fairy

Impa

Impa is a member of the Sheikah clan, which serves and protects the royal family of Hyrule. Typically, Impa serves as a bodyguard for Princess Zelda, and provides guidance to each incarnation of Link.

First Appearance Weapons
The Legend of Zelda (NES) Giant Blade / Naginata

Sheik

Sheik is a persona that Zelda undertakes in Ocarina of Time, in order to anonymously assist Link during his adventure. Posing as a member of the Sheikah tribe, Sheik teaches Link a variety of songs on a harp.

First Appearance Weapons
Ocarina of Time (N64) Harp

Lana

Lana is a sorceress that appears exclusively in Hyrule Warriors, and is tasked with maintaining the balance of the Triforce.

First Appearance Weapons
Hyrule Warriors (Wii U) Book of Sorcery / Spear / Summoning Gate

Zelda

Zelda is the eponymous princess in The Legend of Zelda franchise, and possesses the Triforce of Wisdom.

First Appearance Weapons
The Legend of Zelda (NES) Rapier / Baton

Ganondorf

Ganondorf is the alter-ego of Ganon, the primary antagonist of The Legend of Zelda franchise, and King of the Gerudo people. He possesses the Triforce of Power.

First Appearance Weapons
Ocarina of Time (N64) Great Swords

Darunia

Darunia is the leader of the Hyrulian Gorons in Ocarina of Time, and the Sage of Fire.

First Appearance Weapons
Ocarina of Time (N64) Hammer

Ruto

Princess Ruto is the only child of King Zora, the ruler of the Zoras in Ocarina of Time. Ruto is the Sage of Water.

First Appearance Weapons
Ocarina of Time (N64) Zora Scale

Agitha

Agitha is the self-proclaimed princess of the insect people in Twilight Princess.

First Appearance Weapons
Twilight Princess (GameCube) Parasol

Midna

Midna is a main character in Twilight Princess, and a descendant of the ancient Twili people.

First Appearance Weapons
Twilight Princess (GameCube) Shackle

Zant

Zant is a minion of Ganondorf, and one of the primary antagonists in Twilight Princess.

First Appearance Weapons
Twilight Princess (GameCube) Scimitars

Fi

Fi is a spirit that inhabits the Goddess Sword in Skyward Sword, and assists Link during his adventure.

First Appearance Weapons
Skyward Sword (Wii) Goddess Sword

Ghirahim

Ghirahim is an antagonist in Skyward Sword, and hunts Zelda so he can use her spirit to resurrect his master, Demise.

First Appearance Weapons
Skyward Sword (Wii) Demon Sword

Cia

Cia is a primary antagonist in Hyrule Warriors, and aims to conquer the entire lands of Hyrule.

First Appearance Weapons
Hyrule Warriors (Wii U) Sceptor

Volga

Volga is a primary antagonist in Hyrule Warriors, and the general of Cia’s army.

First Appearance Weapons
Hyrule Warriors (Wii U) Dragon Spear

Wizzro

Wizzro is a companion of Cia, and is another primary antagonist in Hyrule Warriors.

First Appearance Weapons
Hyrule Warriors (Wii U) Ring

Linkle

Linkle is a shepherd who believes she is the reincarnation of the legendary hero, Link.

First Appearance Weapons
Hyrule Warriors Legends (3DS) Dual

Hyrule Warriors: Definitive Edition Unlockable Characters

Cucco

Cuccos are chicken-like creatures that are often found inhabiting the various worlds in The Legend of Zelda. When repeatedly attacked by Link, they will often retaliate en masse.

First Appearance How to Unlock Weapons
A Link to the Past (SNES) Complete Ganon’s Fury Survival Stage 3 with an A Rank N/A

Twili Midna

Twili Midna is the true form of Midna, one of the primary protagonists in Twilight Princess.

First Appearance How to Unlock Weapons
Twilight Princess (GameCube) Complete Adventure Mode 1-16 Mirror

Young Link

Young Link is the child stage of Link, the Hero of Time from Ocarina of Time. He also appears in Majora’s Mask. 

First Appearance How to Unlock Weapons
The Legend of Zelda (NES) / Ocarina of Time (N64) Complete Adventure Mode 2-1 Mask

Tingle

Tingle is a bizarre recurring character in The Legend of Zelda. He’s obsessed with fairies and believes himself to be one.

First Appearance How to Unlock Weapons
Majora’s Mask (N64) Complete Adventure Mode 1-12 Balloon

Skull Kid

Skull Kid appears in Ocarina of Time, Majora’s Mask, and Twilight Princess, and is believed to be one of the children that went missing in the Lost Woods.

First Appearance How to Unlock Weapons
Ocarina of Time (N64) Complete Adventure Mode 3-13 Ocarina

Toon Link

Toon Link is the protagonist of Wind Waker and the Phantom Hourglass.

First Appearance How to Unlock Weapons
Wind Waker (GameCube) Complete Adventure Mode 7-9 Sword / Sand Wand

Tetra

Tetra is a pirate captain and another persona of the Princess Zelda. She’s a primary protagonist in Wind Waker and the Phantom Hourglass.

First Appearance How to Unlock Weapons
Wind Waker (GameCube) Complete The Wind Waker: A New Disturbance in Legend Mode Cutlass / Flintlock Pistol

King Daphnes

Daphnes is the king of Hyrule and a primary protagonist in Wind Waker, in which he takes on a boat form: the King of Red Lions.

First Appearance How to Unlock Weapons
Wind Waker (GameCube) Complete The Wind Waker: Reclaiming the Darkness in Legend Mode Sail

Medli

Medli is a character from the Wind Waker and takes on the roles of attendant of Valoo and the Sage of Earth. She is a member of the Rito people.

First Appearance How to Unlock Weapons
Wind Waker (GameCube) Complete Great Sea Map B8 in Adventure Mode Rito Harp

Ganon

Ganon is the primary antagonist of The Legend of Zelda franchise, and has appeared in most of the games in the franchise. He possesses the Triforce of Power.

First Appearance How to Unlock Weapons
The Legend of Zelda (NES) Complete Ganon’s Fury in Challenge Mode N/A

Marin

Marin saves Link right at the beginning of Link’s Awakening, and goes on to be a major character during that game.

First Appearance How to Unlock Weapons
Link’s Awakening (Game Boy) Unlocked in the Koholint Island Map in Adventure Mode Bell

Ravio

Ravio serves as a shopkeeper in A Link Between Worlds, providing Link with the equipment necessary to complete his adventures… for a small fee.

First Appearance How to Unlock Weapons
A Link Between Worlds (3DS) Unlocked in the Lorule Map in Adventure Mode Rental Hammer

Yuga

Yuga is a minion of Ganon, and one of the primary antagonists in A Link Between Worlds.

First Appearance How to Unlock Weapons
A Link Between Worlds (3DS) Unlocked in the Lorule Map in Adventure Mode Picture Frame