Posted on Leave a comment

Dota 2 Update – February 15, 2018

* Lane creeps now have a minor knockback based on the amount of hero damage in the killing blow
* Nature’s Guise now shows a buff icon to show when Treant remains within range of trees
* Fixed Flesh Golem heal not taking into account temporary increases to max HP
* Fixed location of familiars when player had bought Aghs or chose the +1 Familiar talent
* Courier no longer try to deliver gems if your inventory is full.
* Minor Windranger updates to model, textures and attachment point for bow strings
* Fixed Windranger taunt not showing when you don’t have vision of the center of the map
* Added last updated time to the guide details view in the In-Game guide picker
* Added number of camps stacked to the support column of the post game scoreboard
* Added a toggle near the language filter to prioritize recent guides
* Custom Games: The local lobby list is now sorted by oldest lobby first
* Custom Games: Fixed a bug where loading into a custom game would occasionally fail to find the necessary files (resulting in a crash or missing interface elements)

7.09:
=====
* Courier cost reduced from 200 to 50
* Starting gold is reduced from 625 to 600

* Tangoes now come with 3 charges and cost 90 gold

* Initial bounty rune now gives +40 gold to all heroes instead of 100 to the hero that picks it up (those bounty runes look slightly different)

* Killing a neutral camp stack now gives a bonus 15% gold bounty to the hero that stacked it. No bonus is given if the stack is cleared by an enemy or the hero that stacked it. (New audio is now played once a stack is successful. Stacked neutrals have a buff with the stacker’s hero icon on it)

* Tier 1 mid lane towers are now a bit closer to the river
* Removed a tree in the radiant jungle (to the top right of the blue crystals near the ancients)

* Range creep attack acquisition range reduced from 800 to 600

Posted on Leave a comment

Steam Lunar New Year Sale

The Steam Lunar New Year Sale starts now, celebrating the Year of the Dog with great deals across the Steam catalog throughout the weekend*. Come back every day to see new featured titles, check out the games that are recommended for you, and use the updated Wishlist tools to sort and filter the games on your Wishlist!

*Discounts end Monday at 10am Pacific

Posted on Leave a comment

TrionWorlds Publisher Weekend

* Lane creeps now have a minor knockback based on the amount of hero damage in the killing blow
* Nature’s Guise now shows a buff icon to show when Treant remains within range of trees
* Fixed Flesh Golem heal not taking into account temporary increases to max HP
* Fixed location of familiars when player had bought Aghs or chose the +1 Familiar talent
* Courier no longer try to deliver gems if your inventory is full.
* Minor Windranger updates to model, textures and attachment point for bow strings
* Fixed Windranger taunt not showing when you don’t have vision of the center of the map
* Added last updated time to the guide details view in the In-Game guide picker
* Added number of camps stacked to the support column of the post game scoreboard
* Added a toggle near the language filter to prioritize recent guides
* Custom Games: The local lobby list is now sorted by oldest lobby first
* Custom Games: Fixed a bug where loading into a custom game would occasionally fail to find the necessary files (resulting in a crash or missing interface elements)

7.09:
=====
* Courier cost reduced from 200 to 50
* Starting gold is reduced from 625 to 600

* Tangoes now come with 3 charges and cost 90 gold

* Initial bounty rune now gives +40 gold to all heroes instead of 100 to the hero that picks it up (those bounty runes look slightly different)

* Killing a neutral camp stack now gives a bonus 15% gold bounty to the hero that stacked it. No bonus is given if the stack is cleared by an enemy or the hero that stacked it. (New audio is now played once a stack is successful. Stacked neutrals have a buff with the stacker’s hero icon on it)

* Tier 1 mid lane towers are now a bit closer to the river
* Removed a tree in the radiant jungle (to the top right of the blue crystals near the ancients)

* Range creep attack acquisition range reduced from 800 to 600

Posted on Leave a comment

Blog: Making a Game Boy game in 2017 – A Sheep It Up! postmortem

The following blog post, unless otherwise noted, was written by a member of Gamasutra’s community.
The thoughts and opinions expressed are those of the writer and not Gamasutra or its parent company.


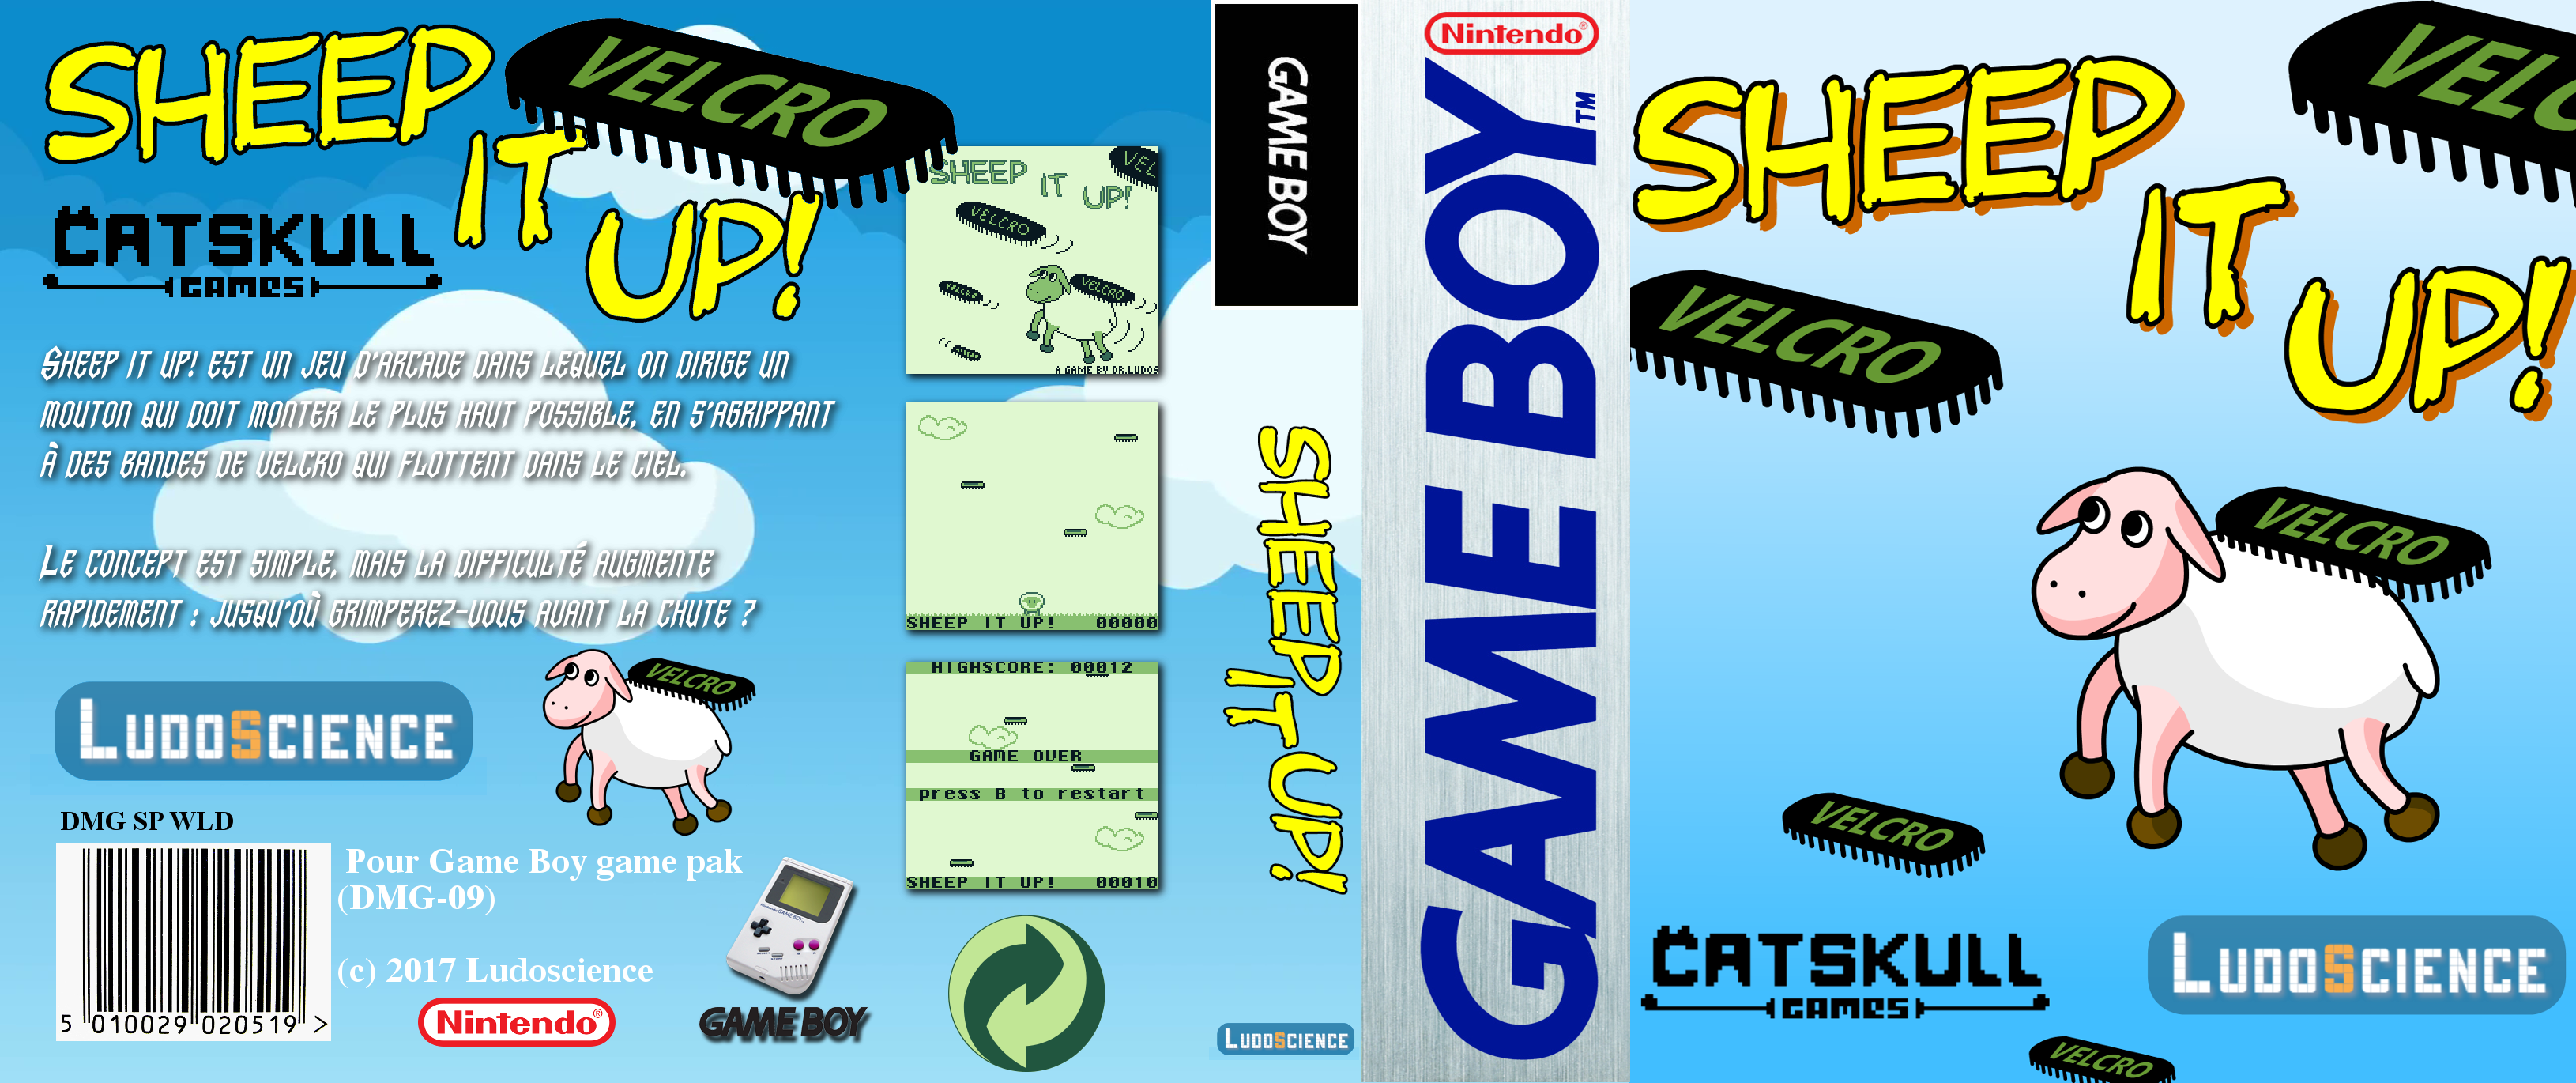
Everyone has childhood dreams. Mine was to make a game for my first console: the Nintendo Game Boy. A few months ago, I fulfilled this dream, by releasing my first Game Boy game on a actual cartridge: Sheep It Up!

In this article, I’ll present the tools I used, and some pitfalls a newcomer like me had to overcome to make this project a reality! Due to it’s length, this article is split in two parts:

“Sheep It Up!” is an arcade game where a sheep has to climb up by hanging himself to flying velcro straps. The concept is simple, but the game rapidly gets quite challenging: how high can you climb without falling down?

Sheep It Up! gameplay

As a game collector myself, I wanted this game to be produced without sacrificing any vintage Game Boy titles. So everything is manufactured specifically for this game: the pcb, the rom, the shell, the protective case and even the sticker! We also tried to keep the price reasonable, so everyone can enjoy the game: $15 (+shipping). It will run on any Game Boy model, from the first one to the GBA SP, including the Super Game Boy and the Game Boy Player.

If you still own a Game Boy, you can buy a cartridge on the publisher website:

https://catskullgames.com/sheep-it-up

As we’ve seen in part 1, the Game Boy comes with some obvious limitations on the CPU power and graphics sides. But same can be said for audio. Indeed, unlike modern machines, the Game Boy can’t play MP3 music or read WAV sound files. To make sounds and music with a Game Boy, you have to dynamically generate it using the 4 “sound channels” built inside the console. Each channel has a different function:

  • Channel 1 – Tone & Sweep: can play a sound (a tone) with a pitch moving up or down.
  • Channel 2 – Tone: plays a tone with no special effect.
  • Channel 3 – Waveform: can play very simple waveforms (encoded in 4bits).
  • Channel 4 – Noise: can generate explosion or engine sounds.

Let me say this again: to make a sound with a Game Boy, you have to generate it manually by directly controlling these 4 sound channels. Hopefully, this is actually quite easy to do: you simply need to modify the values of some hardware registers. Each sound channel is controlled by 4 or 5 hardware registers (8bits variables) that defines volume, pitch, special effects, etc. By setting different values on the registers that control a channel, you can make the Game Boy produce a large variety of sounds. For example, here are three sounds coming from Sheep It Up! that I created by using sound channel 1, alongside with the hardware registers values used to generate them:

Jump

NR10_REG = 0x15;
NR11_REG = 0x96;
NR12_REG = 0x73;
NR13_REG = 0xBB;
NR14_REG = 0x85;

Land on ground

NR10_REG = 0x79;
NR11_REG = 0x8D;
NR12_REG = 0x63;
NR13_REG = 0xC8;
NR14_REG = 0x80;

Falling down (game over)

NR10_REG = 0x4F;
NR11_REG = 0x96;
NR12_REG = 0xB7;
NR13_REG = 0xBB;
NR14_REG = 0x85;

As you can see, setting different values to 5 variables enables you to produce very different sounds effects. One could image that, to create sounds, you could go the trial and error route: putting random values to the registers until you find a pleasing sound to hear. But that would be really tedious and not meaningful at all. So, hopefully, modern tools are now available to make our life easier. Namely, let me introduce you to GB Sound Sample Generator.


First, you tweak user-friendly parameters to find a sound you like (press START to test current sound)

It’s a Game Boy program, fully working on real hardware, that allow you modify the values of the sound hardware registers in a user-friendly way. Instead of setting the raw value of ”NR10_REG”, you’ll now be defining a sound frequency, a volume level, a sweep time, etc. You can think of this tool as SFXR for Game Boy. But to export your sound, instead of saving a WAV file, GB Sound Sample generator will display the corresponding hardware register values. So, to play a sound in your game, now you simply have to write down these values into your source code.


then, you hold A+SELECT to display the corresponding raw hardware register values

For Sheep It Up!, I used GB Sound Sample generator on a Game Boy Advance SP (backlight screen is easier to read), with the ROM running on a Everdrive GB. I spent quite some time tweaking parameters directly on the console, and when I found a nice combination, I could easily copy the values from the GB screen to the source code on my computer.

 
To play this sound in your game, you simply need to copy the hardware register values in your source code

Despite limited audio capabilities, nowadays the Game Boy is used as a musical instrument. In the chiptune scene, many talented artists are making energizing tracks on Game Boy, by using programs like LSDJ or Nanoloop. For example, you may have heard of Irish chiptune legend Chipzel, who composed music for Super Hexagon, and French wizard Sidabitball who remixed many pop music hits from the 90’s.


Chipzel                                                               Sidabitball     

Sadly for us game developers, LSDJ, the tool used to compose these outstanding songs, use almost 100% of the Game Boy hardware resources. So you can make outstanding music with it, but you can’t run a game while playing this music on the console. Hopefully, there are less resource-hungry alternatives to create and play Game Boy music.


1) Custom music player

The most bare bone solution is to make your own “music player”. Remember, the only way to make sounds on a Game Boy is to set values to the hardware registers that controls the 4 sound generation channels. So you can quite easily make your own “music player” by storing “notes” in an array. Each “note” is a particular combination of values for each hardware register. Then, if you define a tempo at which you run through this array to play these notes, you can have a very simple way to make music. And it’s actually how I did it in Sheep It Up! Here is a short gameplay video with sound and music so you can hear the result:

[embedded content]

To be more specific, my “notes” are only played on the sound channel 2. Indeed, the 4 sound channels are shared for both sound effects and music. So, if you are playing a note on a channel, you can’t use it to play a sound effect at the same time. And, as each channel is somewhat “specific”, sometimes it may be preferable to use some channels for music only, while others channels may be reserved for sound effects. For example, the “scratching” sound that you hear whenever the sheep get attached to a flying strap is played on channel 4 (noise). As it’s a very common sound in my game, I decided to avoid using this channel for music. Same goes for channel 1 that I used for all the other sound effects. As my music skills are very limited, I choose not to use the waveforms of channel 3, and to focus on the tones of channel 2 instead.

2) GBT Player & Carillon Player

Many homebrew games use the “custom music player” solution. Hopefully, this is not the only one available. There is a library called GBT Player that can convert music modules (in Impulse Tracker “.it” format) to play them back on a Game Boy. Of course, there are a lot of limitation regarding the sample sizes, the number of channels and the notes effects that you can use. But still, it allows you to compose real music in an actual music tracker, such as OpenMPT, and play it back on a Game Boy. The cherry on the cake is that this library only consumes about 7-8% of the Game Boy CPU resources, leaving a lot of processing power to run the rest of the game. Moreover, it’s very easy to integrate it into your code, whether you choose to program your game in C with GBDK or in assembly with RGBDS. Carillon Player is a good alternative to GBT Player, although you’ll have to use Carillon Editor to compose music instead of your favorite tracker program.

[embedded content]
Geometrix is an homebrew game by AntonioND, creator of GBT Player. The music uses this library.

After a lot of work on code, graphics and audio, the game was finally complete. But, at this stage, all I had was a ROM file. Sure, I could (and did) test it a lot on the various Gameboy models in my collection (all of them except for the AGS-101). But it didn’t feel like the project was complete: to me, the game needed to have is own dedicated cartridge to be considered as “finished“.

As I mentioned in part 1, the whole Sheep It Up! game ROM weights only 32KB, like the early Game Boy titles such as Tetris and Alleyway. But most of the Game Boy games are actually way larger, ranging from 128KB to 512KB, with Pokemon Blue and Red being the largest games at a whopping 1024KB (1MB). In the 90’s, the larger the game, the more costly were the cartridges to produce: you had to use more expensive chips to store large games. But today, they all cost almost the same. So why did I limit myself to a 32KB game?

The answer is that I wanted to be able to release the game on newly produced cartridges. As you can imagine, Nintendo have discontinued manufacturing Game Boy cartridges (err.. I mean Game Paks) since a long time ago. So, two alternative solutions exists to make your own game cartridge today:

1) Cartmodding

The first one, named “cartmodding”, consists in recycling vintage Game Boy games. The games released during the Game Boy commercial era are stored on non-rewritable cartridges. So, to replace the game stored on it, you have to open it, desolder the memory chip, and replace it by another memory chip where you uploaded you own game ROM file. This solution allows you to create games of any size. But, as a game collector myself, I didn’t want to destroy any Game Boy games to produce mine.


An example of cartmodding. A new memory chip containing a homebrew game was soldered inside a vintage cartridge

2) Custom built cartridge

So, the second solution is to build a new cartridge from scratch. As I know nothing about electronics, I started to search online for people able to build Game Boy cartridges. After several failed attempts, I was lucky enough to get in touch with Catskull. He’s a brilliant electronic wizard who build and sells a lot of Game Boy related hardware on his shop Catskull Electronics. Among others things, he designed a device to connect the Gameboy to a MIDI interface, enabling musicians to use Game Boy with actual instruments and synthesizers. He also designed his own Game Boy cartridge. For his cartridge, everything is manufactured anew: the PCB, the chips, the shells, and even the stickers are new parts – nothing is recycled from previous games. That was the perfect solution for me.


The original cartridge PCB designed by Catskull, used for Sheep It Up!

It gets even better: after a few email exchanges, Catskull told me he wanted to start a homebrew games publishing label since a long time ago, and that my game was the perfect opportunity for him to launch it! So, we teamed up: I make the software, and he makes the hardware. The only limitation with this solution is that Catskull’s Game Boy cartridge can only store a 32KB game. Why?

Originally, the Game Boy console was designed to be able to access to 32KB of ROM data only. In order to have games with more than 32KB of data, you need to “browse” through all the data in your cartridge, by accessing only a subsection of the whole ROM data at a time. This method is called “Bank Switching”: the whole ROM data is segmented in banks of 16KB each, and you can swap them out anytime you want (with some limitations). However, to be able to do bank switching, the cartridge need to have an additional chip on it: the “Memory Bank Controller” (MBC). Several chips exists (MBC1, MBC5, etc.), allowing for larger ROM sizes, battery-powered RAM for savegames, etc. Unfortunately, for now, there is no real solution to produce new cartridges from scratch with such a chip on it.

So people who are creating homebrew games larger than 32KB are usually doing cartmodding, in order to reuse the MBC chip of the vintage Game Boy cartridge they are “recycling.” Another solution is to buy counterfeit copies of actual Game Boy games, and to reflash them. Indeed, since several years, Chinese manufacturers have been able to “clone” the MBC chip, in order to produce pirate copies of large games like Pokemon. And, as these pirate carts use EEPROM chips instead of the ROM chips found on vintage games, it’s usually possible to “reflash” them to modify the game stored on it. For that, you’ll need to use a cartridge flasher, such as the BennVenn’s Joey. Several homebrew games larger than 32KB have been released using this solution.


A pirate cartridge made in China. This one can be reflashed to put your game on it, but others are not reflashable (more info)

Regarding Sheep It Up!, I wanted to produce 100% newly manufactured cartridges to avoid destroying original Game Boy games. So I was very lucky to be able to partner with Catskull, who produces his own cartridges, even if it meant that I was limited to 32KB of total storage.

So, how are “custom-built” cartridges made? I’ve asked Catskull to take pictures of the different steps of his own cartridge assembly process. As you’ll see, each cartridge is assembled by hand:

1) The PCB is inserted into a fixture.

2) A stainless steel stencil is put over the PCB, in order to apply solder paste.
This paste will allow to solder the memory chip onto the card.

3) I usually do batches of 18-20 cards at a time. Solder paste is applied to this batch.

4) I know have to manually pick the capacitors and resistors, and place them on the cards.
I then place the Flash Memory chips onto each card.

5) The cards are inserted into a oven rack to do the reflow.
We literally “bake” each card to solder each chip on the cards.
I can now pick each PCB, and flash the game ROM onto the memory chip.

6) The PCB is then placed into an aftermaket game cartridge shell,
with a beautiful label made by a professional printer.


7) After a thorough testing to check that the cartridge works perfectly on actual hardware,
the game is now ready to get shipped to the player who ordered it!

After all these technical information, I’d like to give you a more personal feedback about what this project means to me. For context, the most inspirational talk I’ve ever seen is “Really achieving your childhood dreams” by Randy Pausch. I highly recommend you to watch it. It’s a brilliant lesson on how to take life with a sense of wonder, even in the darkest days. To have a meaningful life, Randy Pausch invites us to try to achieve our childhood dreams and to enable the dreams of others.

[embedded content]

On the top section of my personal list of childhood dreams sits “To create a video game for the Nintendo Game Boy.” The Game Boy was my first video game console, and it will forever hold a dear place in my heart. For years, I told myself that someday I would create a game for it. But I always had “more important things to do”, such as working on a project that can actually bring in money to pay the rent. Then, one day I’ve stumbled upon the BitBitJam, a game jam to create games running on retro hardware. That’s when I remembered the words of the wise Randy Pausch: what if, for one time, I’ll try to do a project with no other expectations than fulfilling one of my childhood dreams?

So, about a month before the Jam started, I began to look into the various tools to create Game Boy games. Then, during the Jam, I spent an entire week (I was on vacation) to make a prototype version of Sheep It Up! After the Jam, I kept working on the game, polishing it, refining it, optimizing it, redrawing it… until I was satisfied with the result. Meanwhile, I was also looking for a way to create actual cartridges for the game. There, I was lucky enough to meet with Catskull who were able to build them, and also had the secret desire to start a homebrew games publishing label. In the end, I now have created and released an actual Game Boy game, available on physical cartridges. But why did the cartridges matter so much? Couldn’t I have stopped at distributing an electronic version of the game online, like many other homebrewers do?

Remember, my real goal wasn’t to release a game, but to achieve a childhood dream. And in my dream, I can play the game cartridge I made on my Game Boy, like I did with all the other games I bought when I was a kid. So, here’s a video of me testing the game on the actual Game Boy my parents got me for Christmas when I was 9 years old:

[embedded content]

As you can see, my childhood console is quite beaten up: many pixels columns are no longer displaying, the buttons are clearly worn, and there is a big vertical scratch on the screen. But it still works. I can’t put words on the feeling of playing a game YOU created on the actual console you had so many good times with as a kid. All I can I say is that, at this very moment, the 9-years-old version of myself was really proud of the grown-up he became. And that feeling alone is the best outcome I could have excepted from such a project.


Still working after 25 years, and running a game manufactured in 2017!

So, to create a game primarily for your own enjoyment is the best. But actually, it can still become even better if other people are enjoying it too. At the end of the project, I knew that Sheep It Up! was a simple game, so my expectations weren’t really high in this area. But the player feedback I received did manage to surprise me anyway!

Indeed, despite (or thanks to) this simplicity, players who tried the game really enjoyed it. The gameplay is simple enough to understand how to play in a second, but then you’ll quickly get hooked to do “one last run” and try to beat the highscore. By-the-way, my current highscore is 147! But what I love most about the retro gaming community, is that the key drive for most players is passion. And that can lead to some really nice surprises.

For starter, several people complained that the game wasn’t available in a “boxed version.” As I collect retro games in loose cartridges (both for money and shelf space constraints), a boxed version didn’t crossed my mind at first. But now, I realize that it would have been a good idea to offer it to people who asked for it. But one fan of the game, Cyph, went the extra mile, and built his own custom-made game box by recycling a Nintendo DS jewel case. I don’t know for you, but I find the result totally awesome. For those who are interested, you can make your own box at home too. You simply need to pick a Nintendo DS jewel case, remove two tiny plastic pieces inside it, and insert this beautiful cover designed by Cyph


A beautiful custom box for Sheep It Up! created by Cyph, a player of the game, using a Nintendo DS case!

Another funny fact about the game is that it was showcased during one of the largest video game convention in the world: the Paris Game Week (300.000 visitors, more than E3 and Tokyo Game Show). So, how did an amateur game released on Game Boy get showcased in the same event as the latest AAA games in the industry? Well, for this opportunity all my gratitude goes to OrdiRetro. It’s a French association dedicated to video game history, and more specifically to the brand new games released for old consoles and computers. They had a booth at this event to showcase a selection of games. Thanks to a friend of mine, Julian Alvarez, they heard about the game and proposed me to display it during the event.


Sheep It Up! being played on a Super Game Boy during the Paris Game Week 2017 – thanks OrdiRetro!

But such an opportunity can also happen without you knowing anyone in particular. Right after release, the game was bought by two Game Boy enthusiasts from Germany, who are running the DMGpage website. But instead of simply buying the game, they actually showed it during a retrogaming convention, the Retro-Börse in Hessen. So players were actually able to play my game on a Super Game Boy in a German convention, thanks to two Game Boy fans – again, I’m very grateful for that!


Sheep It Up! demonstrated on a Super Game Boy during the Retro-Börse in Hessen – thanks DMGpage!

Making homebrew games for retro consoles isn’t about money nor popularity. Very few copies of your game will be produced. You can usually hope for an audience of several dozens of people, or at best a couple of hundreds if your game is really good. But you can be certain that these players will have a genuine interest for your game. They will be driven by the same passion for retro hardware that you have. Sometimes they will even be more passionate about it than you. So, if you enjoyed this two-parts article about making a Game Boy game today, why not give it a try yourself?

As you’ll see in part 1, there are many easy to use tools to create a game for the most iconic handheld console in history. Sure, it won’t pay your rent, but you’ll have a lot of fun doing it. And maybe, you’ll also offer an equally fun experience to the people who will play your game!

Well, I really hope that you enjoyed this post-mortem, and that it will motivate you to try your hand at retro game development. Meanwhile, if you still have a Game Boy laying around, don’t forget that you can buy a beautiful Sheep It Up cartridge for a mere $15 from Catskull games. Each cartridge will be assembled by hand before being sent to you!

And if you want to be informed when I release my next game, or my next article, you can sign up to my newsletter! To give you a taste of things to come, my favorite console ever is the Super Nintendo. So, who knows, maybe next time we will discuss how to “play with Super Power!”

Posted on Leave a comment

Video: Storytelling strategies that will get players to care

After a successful launch on iOS devices, the writing team behind High School Story knew that in order to keep and retain a dedicated player base, they had to come up with a strategy. 

When tasked with creating an ongoing interactive narrative, how should writers go about ensuring players will stick around? 

In this 2014 GDC session, Pixelberry Studios’ Kara Loo and Royal McGraw explain High School Story’s combination of using drama, romance, comedy and cliffhangers to drive user engagement and retention.

Fellow writers may appreciate that they can now watch the talk completely free via the official GDC YouTube channel!

In addition to this presentation, the GDC Vault and its accompanying YouTube channel offers numerous other free videos, audio recordings, and slides from many of the recent Game Developers Conference events, and the service offers even more members-only content for GDC Vault subscribers.

Those who purchased All Access passes to recent events like GDC or VRDC already have full access to GDC Vault, and interested parties can apply for the individual subscription via a GDC Vault subscription page. Group subscriptions are also available: game-related schools and development studios who sign up for GDC Vault Studio Subscriptions can receive access for their entire office or company by contacting staff via the GDC Vault group subscription page. Finally, current subscribers with access issues can contact GDC Vault technical support.

Gamasutra and GDC are sibling organizations under parent UBM Americas.

Posted on Leave a comment

New details and videos released for Nintendo Labo

New details and videos released for Nintendo Labo

You may have heard about the upcoming launch of Nintendo Labo, a series of kits that combine the magic of Nintendo Switch* with the fun of DIY creations.

Now we’ve got lots more details to share, along with three new videos that give you a deeper look at how you can Make, Play, and Discover with the Nintendo Labo Variety Kit and Robot Kit, both launching on April 20. You can check out the videos right away at https://labo.nintendo.com/

One particularly cool feature that’s part of the software included with each Nintendo Labo kit is Toy-Con Garage, which can be accessed in Discover mode. Toy-Con Garage introduces basic principles of technology in a fun and accessible way, allowing you to combine various simple inputs and outputs to invent new ways to play with your Toy-Con projects.

In addition to Toy-Con Garage, the Toy-Con projects in each kit offer many ways to have fun.

Nintendo Labo Robot Kit

  • Build your own wearable Toy-Con Robot suit and assume control of a giant in-game robot, completing challenges and destroying in-game objects to unlock powerful new abilities.
  • If you’re feeling competitive, you can even challenge a friend in two-player local battles or compare your high scores/rankings with other players! (An additional Robot Kit and Joy-Con controllers are required for two-player mode; sold separately.)
  • Nintendo Labo encourages you to use your imagination and creativity to customize your cardboard Toy-Con creations in a variety of ways. The Robot Kit even allows you to customize and level-up your in-game robot.
  • Learn more about the Nintendo Labo Robot Kit in this new video .

Nintendo Labo Variety Kit

  • Toy-Con Piano: After assembling your 13-key Piano, you can host an impromptu recital or record your songs and play them back for your biggest fans-in-the-making. Experiment with different sounds and pitches to create something truly unique – even a song composed entirely of cat noises!
  • Toy-Con Motorbike: Grab your newly-constructed handlebars and race through different tracks, challenging CPU opponents or collecting targets across mountainous terrain. You can even create your own custom tracks, so start planning your designs now!
  • Toy-Con Fishing Rod: There are many exotic fish to discover, and some of the deep-ocean fish are particularly tricky to catch. Show off your collection in Aquarium mode and have fun creating your own fish with different shapes and colors – simply insert and scan different cards in the Toy-Con Piano to get started. (Assembled Toy-Con Piano is required to access Aquarium mode.)
  • Toy-Con House: Befriend the cute creature living in your Toy-Con House (shown on the Nintendo Switch screen) and discover different ways to interact and play with it. There are a variety of experiences to discover, including mine cart races, bowling, and jump rope.
  • Toy-Con RC Car: The RC Car is full of unique and surprising features. Since the Variety Kit includes materials to build two Toy-Con RC Cars, you can race against a friend, set up obstacle courses or even compete in a sumo-inspired challenge to try to knock your opponent’s RC Car over (additional Joy-Con controllers are required; sold separately). Create a path using the reflective stickers included in the kit, and set the car to auto-drive along a specific route using the IR Motion Camera on the Right Joy-Con controller.
  • Learn more about the Nintendo Labo Variety Kit in this new video .

For more information about Nintendo Labo, visit https://labo.nintendo.com/.

*Nintendo Switch is sold separately.

Games Rated:

Posted on Leave a comment

Clash of Clans developer Supercell reports a decline in profits

Finnish mobile game studio Supercell said today it earned $810 million in profit and $2 billion in revenue for fiscal 2017. That’s down from 2016, when the company reported $1 billion in profit and $2.3 billion in revenues.

Supercell’s 2017 is still notable given that the company hasn’t released a game globally since 2017, and as sales from Clash of Clans seem to be winding down. 

“Our headline numbers for the year are not as high as last year, as we did not release a new game globally,” said CEO Ilkka Paananen in a statement. “Our vision is to create games for as many people as possible that are played for years and remembered forever. This is how we continue to build Supercell for the long term.”

In addition the company also paid a dividend of $615 million (~€523 million) to Tencent, after the Chinese online and video game giant purchased an 84.3 percent stake in Supercell back in 2016. 

Supercell announced last month that it had invested $4.2 million in funding to London-based studio TrailMix Games, continuing the company’s trend of investing in other game makers as they also spent over $55 million last year to take a majority stake in Space Ape Games.

Posted on Leave a comment

Dota 2 Update – February 14th, 2018

* Lane creeps now have a minor knockback based on the amount of hero damage in the killing blow
* Nature’s Guise now shows a buff icon to show when Treant remains within range of trees
* Fixed Flesh Golem heal not taking into account temporary increases to max HP
* Fixed location of familiars when player had bought Aghs or chose the +1 Familiar talent
* Courier no longer try to deliver gems if your inventory is full.
* Minor Windranger updates to model, textures and attachment point for bow strings
* Fixed Windranger taunt not showing when you don’t have vision of the center of the map
* Added last updated time to the guide details view in the In-Game guide picker
* Added number of camps stacked to the support column of the post game scoreboard
* Added a toggle near the language filter to prioritize recent guides
* Custom Games: The local lobby list is now sorted by oldest lobby first
* Custom Games: Fixed a bug where loading into a custom game would occasionally fail to find the necessary files (resulting in a crash or missing interface elements)

7.09:
=====
* Courier cost reduced from 200 to 50
* Starting gold is reduced from 625 to 600

* Tangoes now come with 3 charges and cost 90 gold

* Initial bounty rune now gives +40 gold to all heroes instead of 100 to the hero that picks it up (those bounty runes look slightly different)

* Killing a neutral camp stack now gives a bonus 15% gold bounty to the hero that stacked it. No bonus is given if the stack is cleared by an enemy or the hero that stacked it. (New audio is now played once a stack is successful. Stacked neutrals have a buff with the stacker’s hero icon on it)

* Tier 1 mid lane towers are now a bit closer to the river
* Removed a tree in the radiant jungle (to the top right of the blue crystals near the ancients)

* Range creep attack acquisition range reduced from 800 to 600

Posted on Leave a comment

How Fourattic captured the ’80s with Crossing Souls’ art design

Creating a coherent art style for your game can be difficult. There are lots things to consider: the color palette, the core assets, and the design of the characters and environments.

Fourattic, the Spanish studio behind the action-adventure game Crossing Souls, knows this all too well. The team set themselves the challenge of creating a distinctly 1980s aesthetic for the game, achieving this through the use of reference materials, detailed environments, and color.

Crossing Souls is out this week, and asks players to manage a group of five teenagers who discover a pink stone that allows them to travel between the realms of the living and the dead.

Using each character’s unique abilities, players need to explore a bunch of settings inspired by ’80s media, communicate with ghosts, and unravel a sinister government conspiracy in order to save your hometown from ruin.

Using reference material

Juanga Jaén, lead animator and artist on Crossing Souls, explains the inspiration behind the game, “We were born in the ’80s, so it was the movies we grew up with [that inspired us]. We wanted to make an adventure like that. So, we set the plot in the ’80s and this small American neighbourhood.”

What’s notable about this is how thoroughly the team at Fourattic went about recreating the look and feel of that halcyon decade. The developers relied heavily on reference material from the ’80s, and many of the character designs in the game are based off popular figures in films from the period. For instance, Quincy Queen takes inspiration from Prince’s character ‘The Kid’ in Purple Rain, Vigo Sarducci borrows from Vigo the Carpathian from Ghostbusters 2, and Matt’s dad is based on Wayne Szalinski from Honey, I Shrunk the Kids.

Importantly, locking in this reference material helped them to nail the fashion of the period, as well as inject some clever Easter eggs for those knowledgeable enough to notice them.

This isn’t just limited to the character designs either. It also extends to many of the environments. The main city in the game is based on Tujunga, California, where ET the Extra-Terrestrial was filmed back in 1982.

Jaén and his team used Google Maps to explore the area and tried to incorporate elements of the place into Tajunga, the fictional location in the game. You can see this in the suburban houses, and the theme of the neighboring environments: forests, industrial areas, and deserts.

Aiming for a more detailed pixel art style

The game also captures the period through smaller details you can find in the environment too. The settings are extremely detailed, even though most the objects have the same pixel per unit (16×16 pixels). This because some of the bigger objects in the game are assembled from multiple tiles. Doors for example are composed of 3 tiles vertical and 1 horizontal, allowing the artists to add much more detail into them.

A perfect demonstration of this is Kevin and Chris’s house. Posters, props, and photos are spread all across the different rooms on walls, referencing 80s media like The Ghostbusters, Michael Jackson, and Pac-Man. This helps to cement the setting further.

Jaén states, “It’s not really a retro style, it’s just pixel art. Like, if you see, for example, Super Time Force or Hyper Light Drifter, all of those games are like a new form of pixel art.” He points to those games richly-detailed characters as proof of this. “We have old cutscenes, and the plot of the story, is [retro], but the art style is something new. I don’t remember seeing any game with [this] quality in the [environments].”

He continues, “Danny [Benítez, the pixel artist on Crossing Souls] put a lot of little references and details into each map. The player can explore […] and find something in [every] corner. We really want the player to get immersed in this world.”

Deciding on a color palette

Color is extremely important at conveying the time period in Crossing Souls. The game uses a different color palette for each stage, but consistently opts for brighter hues, aiming to evoke the colorful look of the 1980s, popularized by design collectives like the Memphis Group.

There are several examples of this throughout. The forest scene, for instance uses blues and purples to convey the night time, as opposed to shades of grey, whereas bright pinks, blues, and purples represent the duat stone and everything associated with the 80s.

“We play with the pink and blue, because it fits well in the world,” says Jaén. “What we were thinking when we [chose] all the colors was we wanted the player to live an adventure and [for] every level they play [to be] different.”

He recalls buying games for the MegaDrive in the late 80s and early 90s based on the number of colors used in panels on the back of boxes; it always hinted at the size and scope of the world and the potential for adventure. This is something he wanted to capture with the art style in Crossing Souls: making the player feel they were going on a journey.

Emulating ’80s cartoons

In addition to the pixel art, the game also has multiple cutscenes, used to heighten the drama and give the game’s characters more personality. They were created in TVPaint and are animated in a style reminiscent of cheap 1980s cartoons, like He-Man, Thundercats, and Dogtanian. Not only did this approach fit the theme, but it also helped to save time and money when animating.

“I’m the only animator here, so I’m the only one who made the animations. I’ll just say the budget is not the best. So, He-Man is a good reference […] because it has less frames. In Crossing Souls, the less frames we can use [the better]. There [are] 14 cutscenes and each one is between 20 seconds to one minute of length, so we need to optimize as much as possible.”

These cutscenes emulate this period of children’s television through the number of frames used, which is far below the amount in contemporary animation. Jaén also applied post-effects over the finished cutscenes, adding VHS scanlines over the individual frames to reference 80s home media.

Keeping things readable

“I’m the only animator here, so I’m the only one who made the animations. I’ll just say the budget is not the best. So, He-Man is a good reference […] because it has less frames…the less frames we can use [the better]. There [are] 14 cutscenes and each one is between 20 seconds to one minute of length, so we need to optimize as much as possible.”

Even the game’s perspective is another nod to the 80s. It’s orthographic, calling to mind classic games from the era, like Bomberman, Pacman, and The Legend of Zelda. This approach came with some downsides, however; the most challenging was that distances were much harder to convey in this style. The team employed some simple tricks to fix this though.

Jaén explains, “It’s difficult to […] see distances, so we [added] some lines in the border and play with shadows to show that one place is higher than another. It’s [probably] the most difficult part of the game: to tell the player this place is higher or that you can reach it. When we play with shadows – sometimes we cheat and make the shadows go [the wrong way], because the player will see it better and they don’t notice [it].”

These are only subtle changes, but it makes a huge difference. Platforming is a massive part of the game, and these small alterations make it far more natural for the player to move around the map and locate where they need to go.

Crossing Souls is clearly deeply tied to the look and feel of ’80s culture. Not only is the decade integral to the plot, it is woven into all aspects the art direction, coming across in the colors used, the minute details, and the design of the characters and environments.

To finish the interview, I ask Jaén if he has any advice from his time working on the art direction for Crossing Souls

“This game is very huge, with a lot of characters. It isn’t the same to work on one character with a lot of moments, then a lot of characters with the same movements and a lot bosses,” he says. “If you are starting out with pixel art, start with something like Mario, with less movements, less [environments], something that makes you learn from the beginning to the finish with cool running. Crossing Souls, for example, was difficult from the very beginning.”

Posted on Leave a comment

Video: Six techniques for giving the player a unique narrative

Dynamic experiences that change with every session and provide players with a large amount of choice in how they play the game is important in crafting an experience unique to them. 

In this 2016 GDC talk, Paranoid Productions’ Richard Rouse III explores the strengths of games with dynamic stories, taking a look at six specific techniques that have been used in a variety of games. 

Rouse discusses how these techniques can be combined in new and interesting ways, helping designers and writers to identify and strengthen the dynamic elements in their stories, keeping players engaged with the narrative for as long as they play the game.

Narrative designers may appreciate that they can now watch the talk completely free via the official GDC YouTube channel!

In addition to this presentation, the GDC Vault and its accompanying YouTube channel offers numerous other free videos, audio recordings, and slides from many of the recent Game Developers Conference events, and the service offers even more members-only content for GDC Vault subscribers.

Those who purchased All Access passes to recent events like GDC or VRDC already have full access to GDC Vault, and interested parties can apply for the individual subscription via a GDC Vault subscription page. Group subscriptions are also available: game-related schools and development studios who sign up for GDC Vault Studio Subscriptions can receive access for their entire office or company by contacting staff via the GDC Vault group subscription page. Finally, current subscribers with access issues can contact GDC Vault technical support.

Gamasutra and GDC are sibling organizations under parent UBM Americas.