Some computer networks need to maintain identical software installations and configurations on several physical machines. One such environment would be a school computer lab. A netboot server can be set up to serve an entire operating system over a network so that the client computers can be configured from one central location. This tutorial will show one method of building a netboot server.
Part 1 of this tutorial will cover creating a netboot server and image. Part 2 will show how to add Kerberos-authenticated home directories to the netboot configuration.
Initial Configuration
Start by downloading one of Fedora Server’s netinst images, burning it to a CD, and booting the server that will be reformatted from it. We just need a typical “Minimal Install” of Fedora Server for our starting point and we will use the command line to add any additional packages that are needed after the installation is finished.

NOTE: For this tutorial we will be using Fedora 28. Other versions may include a slightly different set of packages in their “Minimal Install”. If you start with a different version of Fedora, then you may need to do some troubleshooting if an expected file or command is not available.
Once you have your minimal installation of Fedora Server up and running, log in as root and set the hostname:
$ MY_HOSTNAME=server-01.example.edu $ hostnamectl set-hostname $MY_HOSTNAME
NOTE: Red Hat recommends that both static and transient names match the fully-qualified domain name (FQDN) used for the machine in DNS, such as host.example.com (Understanding Host Names).
NOTE: This guide is meant to be copy-and-paste friendly. Any value that you might need to customize will be stated as a MY_* variable that you can tweak before running the remaining commands. Beware that if you log out, the variable assignments will be cleared.
NOTE: Fedora 28 Server tends to dump a lot of logging output to the console by default. You may want to disable the console logging temporarily by running: sysctl -w kernel.printk=0
Next, we need a static network address on our server. The following sequence of commands should find and reconfigure your default network connection appropriately:
$ MY_DNS1=192.0.2.91 $ MY_DNS2=192.0.2.92 $ MY_IP=192.0.2.158 $ MY_PREFIX=24 $ MY_GATEWAY=192.0.2.254 $ DEFAULT_DEV=$(ip route show default | awk '{print $5}') $ DEFAULT_CON=$(nmcli d show $DEFAULT_DEV | sed -n '/^GENERAL.CONNECTION:/s!.*:\s*!! p') $ nohup bash << END nmcli con mod "$DEFAULT_CON" connection.id "$DEFAULT_DEV" nmcli con mod "$DEFAULT_DEV" connection.interface-name "$DEFAULT_DEV" nmcli con mod "$DEFAULT_DEV" ipv4.method disabled nmcli con up "$DEFAULT_DEV" nmcli con add con-name br0 ifname br0 type bridge nmcli con mod br0 bridge.stp no nmcli con mod br0 ipv4.dns $MY_DNS1,$MY_DNS2 nmcli con mod br0 ipv4.addresses $MY_IP/$MY_PREFIX nmcli con mod br0 ipv4.gateway $MY_GATEWAY nmcli con mod br0 ipv4.method manual nmcli con up br0 nmcli con add con-name br0-slave0 ifname "$DEFAULT_DEV" type bridge-slave master br0 nmcli con up br0-slave0 END
NOTE: The last set of commands above is wrapped in a “nohup” script because it will disable networking temporarily. The nohup command should allow the nmcli commands to finish running even while your ssh connection is down. Beware that it may take 10 or so seconds for the connection to come back up and that you will have to start a new ssh connection if you changed the server’s IP address.
NOTE: The above network configuration creates a network bridge on top of the default connection so that we can run a virtual machine instance directly on the server for testing later. If you do not want to test the netboot image directly on the server, you can skip creating the bridge and set the static IP address directly on your default network connection.
Install and Configure NFS4
Start by installing the nfs-utils package:
$ dnf install -y nfs-utils
Create a top-level pseudo filesystem for the NFS exports and share it out to your network:
$ MY_SUBNET=192.0.2.0 $ mkdir /export $ echo "/export -fsid=0,ro,sec=sys,root_squash $MY_SUBNET/$MY_PREFIX" > /etc/exports
SELinux will interfere with the netboot server’s operation. Configuring exceptions for it is beyond the scope of this tutorial, so we will disable it:
$ sed -i '/GRUB_CMDLINE_LINUX/s/"$/ audit=0 selinux=0"/' /etc/default/grub $ grub2-mkconfig -o /boot/grub2/grub.cfg $ sed -i 's/SELINUX=enforcing/SELINUX=disabled/' /etc/sysconfig/selinux $ setenforce 0
NOTE: Editing the grub command line should not be necessary, but simply editing /etc/sysconfig/selinux proved ineffective across reboots of Fedora Server 28 during testing, so the “selinux=0” flag has been set here to be doubly sure.
Now, add an exception for the NFS service to the local firewall and start the NFS service:
$ firewall-cmd --add-service nfs $ firewall-cmd --runtime-to-permanent $ systemctl enable nfs-server.service $ systemctl start nfs-server.service
Create the Netboot Image
Now that our NFS server is up and running, we need to supply it with an operating system image to serve to the client computers. We will start with a very minimal image and add to it after everything is working.
First, create a new directory where our image will be stored:
$ mkdir /fc28
Use the “dnf” command to build the image under the new directory with only a few base packages:
$ dnf -y --releasever=28 --installroot=/fc28 install fedora-release systemd passwd rootfiles sudo dracut dracut-network nfs-utils vim-minimal dnf
It is important that the “kernel” packages were omitted from the above command. Before they are installed, we need to tweak the set of drivers that will be included in the “initramfs” image that is built automatically when the kernel is first installed. In particular, we need to disable “hostonly” mode so that the initramfs image will work on a wider set of hardware platforms and we need to add support for networking and NFS:
$ echo 'hostonly=no' > /fc28/etc/dracut.conf.d/hostonly.conf $ echo 'add_dracutmodules+=" network nfs "' > /fc28/etc/dracut.conf.d/netboot.conf
Now, install the kernel:
$ dnf -y --installroot=/fc28 install kernel
Set a rule to prevent the kernel from being updated:
$ echo 'exclude=kernel-*' >> /fc28/etc/dnf/dnf.conf
Set the locale:
$ echo 'LANG="en_US.UTF-8"' > /fc28/etc/locale.conf
NOTE: Some programs (e.g. GNOME Terminal) will not function if the locale is not properly configured.
Blank root’s passwd:
$ sed -i 's/^root:\*/root:/' /fc28/etc/shadow
Set the client’s hostname:
$ MY_CLIENT_HOSTNAME=client-01.example.edu $ echo $MY_CLIENT_HOSTNAME > /fc28/etc/hostname
Disable logging to the console:
$ echo 'kernel.printk = 0 4 1 7' > /fc28/etc/sysctl.d/00-printk.conf
Define a local “liveuser” in the netboot image:
$ echo 'liveuser:x:1000:1000::/home/liveuser:/bin/bash' >> /fc28/etc/passwd $ echo 'liveuser::::::::' >> /fc28/etc/shadow $ echo 'liveuser:x:1000:' >> /fc28/etc/group $ echo 'liveuser:!::' >> /fc28/etc/gshadow
Allow “liveuser” to sudo:
$ echo 'liveuser ALL=(ALL) NOPASSWD: ALL' > /fc28/etc/sudoers.d/liveuser
Enable automatic home directory creation:
$ dnf install -y --installroot=/fc28 authselect oddjob-mkhomedir $ echo 'dirs /home' > /fc28/etc/rwtab.d/home $ chroot /fc28 authselect select sssd with-mkhomedir --force $ chroot /fc28 systemctl enable oddjobd.service
Since multiple clients will be mounting our image concurrently, we need to configure the image so that it will operate in read-only mode:
$ sed -i 's/^READONLY=no$/READONLY=yes/' /fc28/etc/sysconfig/readonly-root
Configure logging to go to RAM rather than permanent storage:
$ sed -i 's/^#Storage=auto$/Storage=volatile/' /fc28/etc/systemd/journald.conf
Configure DNS:
$ MY_DNS1=192.0.2.91 $ MY_DNS2=192.0.2.92 $ cat << END > /fc28/etc/resolv.conf nameserver $MY_DNS1 nameserver $MY_DNS2 END
Work-around a few bugs that exist for read-only root mounts at the time this tutorial is being written (BZ1542567):
$ echo 'dirs /var/lib/gssproxy' > /fc28/etc/rwtab.d/gssproxy $ cat << END > /fc28/etc/rwtab.d/systemd dirs /var/lib/systemd/catalog dirs /var/lib/systemd/coredump END
Finally, we can create the NFS filesystem for our image and share it out to our subnet:
$ mkdir /export/fc28 $ echo '/fc28 /export/fc28 none bind 0 0' >> /etc/fstab $ mount /export/fc28 $ echo "/export/fc28 -ro,sec=sys,no_root_squash $MY_SUBNET/$MY_PREFIX" > /etc/exports.d/fc28.exports $ exportfs -vr
Create the Boot Loader
Now that we have an operating system available to netboot, we need a boot loader to kickstart it on the client systems. For this setup, we will be using iPXE.
NOTE: This section and the following section — Testing with QEMU — can be done on a separate computer; they do not have to be run on the netboot server.
Install git and use it to download iPXE:
$ dnf install -y git $ git clone http://git.ipxe.org/ipxe.git $HOME/ipxe
Now we need to create a special startup script for our bootloader:
$ cat << 'END' > $HOME/ipxe/init.ipxe #!ipxe prompt --key 0x02 --timeout 2000 Press Ctrl-B for the iPXE command line... && shell || dhcp || exit set prefix file:///linux chain ${prefix}/boot.cfg || exit END
Enable the “file” download protocol:
$ echo '#define DOWNLOAD_PROTO_FILE' > $HOME/ipxe/src/config/local/general.h
Install the C compiler and related tools and libraries:
$ dnf groupinstall -y "C Development Tools and Libraries"
Build the boot loader:
$ cd $HOME/ipxe/src $ make clean $ make bin-x86_64-efi/ipxe.efi EMBED=../init.ipxe
Make note of where the where the newly-compiled boot loader is. We will need it for the next section:
$ IPXE_FILE="$HOME/ipxe/src/bin-x86_64-efi/ipxe.efi"
Testing with QEMU
This section is optional, but you will need to duplicate the file layout of the EFI system partition that is shown below on your physical machines to configure them for netbooting.
NOTE: You could also copy the files to a TFTP server and reference that server from DHCP if you wanted a fully diskless system.
In order to test our boot loader with QEMU, we are going to create a small disk image containing only an EFI system partition and our startup files.
Start by creating the required directory layout for the EFI system partition and copying the boot loader that we created in the previous section to it:
$ mkdir -p $HOME/esp/efi/boot $ mkdir $HOME/esp/linux $ cp $IPXE_FILE $HOME/esp/efi/boot/bootx64.efi
The below command should identify the kernel version that our netboot image is using and store it in a variable for use in the remaining configuration directives:
$ DEFAULT_VER=$(ls -c /fc28/lib/modules | head -n 1)
Define the boot configuration that our client computers will be using:
$ MY_DNS1=192.0.2.91 $ MY_DNS2=192.0.2.92 $ MY_NFS4=server-01.example.edu $ cat << END > $HOME/esp/linux/boot.cfg #!ipxe kernel --name kernel.efi \${prefix}/vmlinuz-$DEFAULT_VER initrd=initrd.img ro ip=dhcp rd.peerdns=0 nameserver=$MY_DNS1 nameserver=$MY_DNS2 root=nfs4:$MY_NFS4:/fc28 console=tty0 console=ttyS0,115200n8 audit=0 selinux=0 quiet initrd --name initrd.img \${prefix}/initramfs-$DEFAULT_VER.img boot || exit END
NOTE: The above boot script shows a minimal example of how to get iPXE to netboot Linux. Much more complex configurations are possible. Most notably, iPXE has support for interactive boot menus which can be configured with a default selection and a timeout. A more advanced iPXE script could, for example, default to booting an operation system from the local disk and only go to the netboot operation if a user pressed a key before a countdown timer reached zero.
Copy the Linux kernel and its associated initramfs to the EFI system partition:
$ cp $(find /fc28/lib/modules -maxdepth 2 -name 'vmlinuz' | grep -m 1 $DEFAULT_VER) $HOME/esp/linux/vmlinuz-$DEFAULT_VER $ cp $(find /fc28/boot -name 'init*' | grep -m 1 $DEFAULT_VER) $HOME/esp/linux/initramfs-$DEFAULT_VER.img
Our resulting directory layout should look like this:
esp ├── efi │ └── boot │ └── bootx64.efi └── linux ├── boot.cfg ├── initramfs-4.18.18-200.fc28.x86_64.img └── vmlinuz-4.18.18-200.fc28.x86_64
To use our EFI system partition with QEMU, we need to create a small “uefi.img” disk image containing it and then connect that to QEMU as the primary boot drive.
Begin by installing the necessary tools:
$ dnf install -y parted dosfstools
Now create the “uefi.img” file and copy the files from the “esp” directory into it:
$ ESP_SIZE=$(du -ks $HOME/esp | cut -f 1) $ dd if=/dev/zero of=$HOME/uefi.img count=$((${ESP_SIZE}+5000)) bs=1KiB $ UEFI_DEV=$(losetup --show -f $HOME/uefi.img) $ parted ${UEFI_DEV} -s mklabel gpt mkpart EFI FAT16 1MiB 100% toggle 1 boot $ mkfs -t msdos ${UEFI_DEV}p1 $ mkdir -p $HOME/mnt $ mount ${UEFI_DEV}p1 $HOME/mnt $ cp -r $HOME/esp/* $HOME/mnt $ umount $HOME/mnt $ losetup -d ${UEFI_DEV}
NOTE: On a physical computer, you need only copy the files from the “esp” directory to the computer’s existing EFI system partition. You do not need the “uefi.img” file to boot a physical computer.
NOTE: On a physical computer you can rename the “bootx64.efi” file if a file by that name already exists, but if you do so, you will probably have to edit the computer’s BIOS settings and add the renamed efi file to the boot list.
Next we need to install the qemu package:
$ dnf install -y qemu-system-x86
Allow QEMU to access the bridge that we created in the “Initial Configuration” section of this tutorial:
$ echo 'allow br0' > /etc/qemu/bridge.conf
Create a copy of the “OVMF_VARS.fd” image to store our virtual machine’s persistent BIOS settings:
$ cp /usr/share/edk2/ovmf/OVMF_VARS.fd $HOME
Now, start the virtual machine:
$ qemu-system-x86_64 -machine accel=kvm -nographic -m 1024 -drive if=pflash,format=raw,unit=0,file=/usr/share/edk2/ovmf/OVMF_CODE.fd,readonly=on -drive if=pflash,format=raw,unit=1,file=$HOME/OVMF_VARS.fd -drive if=ide,format=raw,file=$HOME/uefi.img -net bridge,br=br0 -net nic,model=virtio
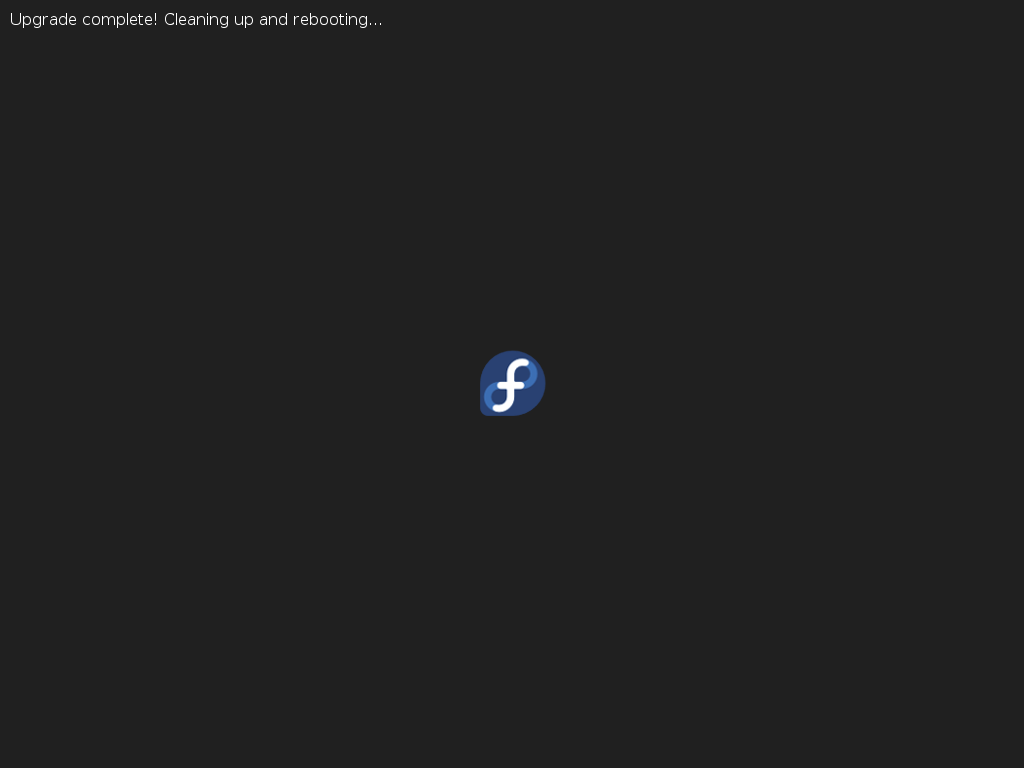
If all goes well, you should see results similar to what is shown in the below image:

You can use the “shutdown” command to get out of the virtual machine and back to the server:
$ sudo shutdown -h now
NOTE: If something goes wrong and the virtual machine hangs, you may need to start a new ssh session to the server and use the “kill” command to terminate the “qemu-system-x86_64” process.
Adding to the Image
Adding to the image should be a simple matter of chroot’ing into the image on the server and running “dnf install <package_name>”.
There is no limit to what can be installed on the netboot image. A full graphical installation should function perfectly.
Here is an example of how to bring our minimal netboot image up to a complete graphical installation:
$ for i in dev dev/pts dev/shm proc sys run; do mount -o bind /$i /fc28/$i; done $ chroot /fc28 /usr/bin/bash --login $ dnf -y groupinstall "Fedora Workstation" $ dnf -y remove gnome-initial-setup $ systemctl disable sshd.service $ systemctl enable gdm.service $ systemctl set-default graphical.target $ sed -i 's/SELINUX=enforcing/SELINUX=disabled/' /etc/sysconfig/selinux $ logout $ for i in run sys proc dev/shm dev/pts dev; do umount /fc28/$i; done
Optionally, you may want to enable automatic login for the “liveuser” account:
$ sed -i '/daemon/a AutomaticLoginEnable=true' /fc28/etc/gdm/custom.conf $ sed -i '/daemon/a AutomaticLogin=liveuser' /fc28/etc/gdm/custom.conf