One significant limitation of the netboot server built in this series is the operating system image being served is read-only. Some use cases may require the end user to modify the image. For example, an instructor may want to have the students install and configure software packages like MariaDB and Node.js as part of their course walk-through.
An added benefit of writable netboot images is the end user’s “personalized” operating system can follow them to different workstations they may use at later times.
Change the Bootmenu Application to use HTTPS
Create a self-signed certificate for the bootmenu application:
$ sudo -i
# MY_NAME=$(</etc/hostname)
# MY_TLSD=/opt/bootmenu/tls
# mkdir $MY_TLSD
# openssl req -newkey rsa:2048 -nodes -keyout $MY_TLSD/$MY_NAME.key -x509 -days 3650 -out $MY_TLSD/$MY_NAME.pem
Verify your certificate’s values. Make sure the “CN” value in the “Subject” line matches the DNS name that your iPXE clients use to connect to your bootmenu server:
# openssl x509 -text -noout -in $MY_TLSD/$MY_NAME.pem
Next, update the bootmenu application’s listen directive to use the HTTPS port and the newly created certificate and key:
# sed -i "s#listen => .*#listen => ['https://$MY_NAME:443?cert=$MY_TLSD/$MY_NAME.pem\&key=$MY_TLSD/$MY_NAME.key\&ciphers=AES256-SHA256:AES128-SHA256:AES256-SHA:AES128-SHA'],#" /opt/bootmenu/bootmenu.conf
Note the ciphers have been restricted to those currently supported by iPXE.
GnuTLS requires the “CAP_DAC_READ_SEARCH” capability, so add it to the bootmenu application’s systemd service:
# sed -i '/^AmbientCapabilities=/ s/$/ CAP_DAC_READ_SEARCH/' /etc/systemd/system/bootmenu.service
# sed -i 's/Serves iPXE Menus over HTTP/Serves iPXE Menus over HTTPS/' /etc/systemd/system/bootmenu.service
# systemctl daemon-reload
Now, add an exception for the bootmenu service to the firewall and restart the service:
# MY_SUBNET=192.0.2.0
# MY_PREFIX=24
# firewall-cmd --add-rich-rule="rule family='ipv4' source address='$MY_SUBNET/$MY_PREFIX' service name='https' accept"
# firewall-cmd --runtime-to-permanent
# systemctl restart bootmenu.service
Use wget to verify it’s working:
$ MY_NAME=server-01.example.edu
$ MY_TLSD=/opt/bootmenu/tls
$ wget -q --ca-certificate=$MY_TLSD/$MY_NAME.pem -O - https://$MY_NAME/menu
Add HTTPS to iPXE
Update init.ipxe to use HTTPS. Then recompile the ipxe bootloader with options to embed and trust the self-signed certificate you created for the bootmenu application:
$ echo '#define DOWNLOAD_PROTO_HTTPS' >> $HOME/ipxe/src/config/local/general.h
$ sed -i 's/^chain http:/chain https:/' $HOME/ipxe/init.ipxe
$ cp $MY_TLSD/$MY_NAME.pem $HOME/ipxe
$ cd $HOME/ipxe/src
$ make clean
$ make bin-x86_64-efi/ipxe.efi EMBED=../init.ipxe CERT="../$MY_NAME.pem" TRUST="../$MY_NAME.pem"
You can now copy the HTTPS-enabled iPXE bootloader out to your clients and test that everything is working correctly:
$ cp $HOME/ipxe/src/bin-x86_64-efi/ipxe.efi $HOME/esp/efi/boot/bootx64.efi
Add User Authentication to Mojolicious
Create a PAM service definition for the bootmenu application:
# dnf install -y pam_krb5
# echo 'auth required pam_krb5.so' > /etc/pam.d/bootmenu
Add a library to the bootmenu application that uses the Authen-PAM perl module to perform user authentication:
# dnf install -y perl-Authen-PAM;
# MY_MOJO=/opt/bootmenu
# mkdir $MY_MOJO/lib
# cat << 'END' > $MY_MOJO/lib/PAM.pm
package PAM; use Authen::PAM; sub auth { my $success = 0; my $username = shift; my $password = shift; my $callback = sub { my @res; while (@_) { my $code = shift; my $msg = shift; my $ans = ""; $ans = $username if ($code == PAM_PROMPT_ECHO_ON()); $ans = $password if ($code == PAM_PROMPT_ECHO_OFF()); push @res, (PAM_SUCCESS(), $ans); } push @res, PAM_SUCCESS(); return @res; }; my $pamh = new Authen::PAM('bootmenu', $username, $callback); { last unless ref $pamh; last unless $pamh->pam_authenticate() == PAM_SUCCESS; $success = 1; } return $success;
} return 1;
END
The above code is taken almost verbatim from the Authen::PAM::FAQ man page.
Redefine the bootmenu application so it returns a netboot template only if a valid username and password are supplied:
# cat << 'END' > $MY_MOJO/bootmenu.pl
#!/usr/bin/env perl use lib 'lib'; use PAM;
use Mojolicious::Lite;
use Mojolicious::Plugins;
use Mojo::Util ('url_unescape'); plugin 'Config'; get '/menu';
get '/boot' => sub { my $c = shift; my $instance = $c->param('instance'); my $username = $c->param('username'); my $password = $c->param('password'); my $template = 'menu'; { last unless $instance =~ /^fc[[:digit:]]{2}$/; last unless $username =~ /^[[:alnum:]]+$/; last unless PAM::auth($username, url_unescape($password)); $template = $instance; } return $c->render(template => $template);
}; app->start;
END
The bootmenu application now looks for the lib directory relative to its WorkingDirectory. However, by default the working directory is set to the root directory of the server for systemd units. Therefore, you must update the systemd unit to set WorkingDirectory to the root of the bootmenu application instead:
# sed -i "/^RuntimeDirectory=/ a WorkingDirectory=$MY_MOJO" /etc/systemd/system/bootmenu.service
# systemctl daemon-reload
Update the templates to work with the redefined bootmenu application:
# cd $MY_MOJO/templates
# MY_BOOTMENU_SERVER=$(</etc/hostname)
# MY_FEDORA_RELEASES="28 29"
# for i in $MY_FEDORA_RELEASES; do echo '#!ipxe' > fc$i.html.ep; grep "^kernel\|initrd" menu.html.ep | grep "fc$i" >> fc$i.html.ep; echo "boot || chain https://$MY_BOOTMENU_SERVER/menu" >> fc$i.html.ep; sed -i "/^:f$i$/,/^boot /c :f$i\nlogin\nchain https://$MY_BOOTMENU_SERVER/boot?instance=fc$i\&username=\${username}\&password=\${password:uristring} || goto failed" menu.html.ep; done
The result of the last command above should be three files similar to the following:
menu.html.ep:
#!ipxe set timeout 5000 :menu
menu iPXE Boot Menu
item --key 1 lcl 1. Microsoft Windows 10
item --key 2 f29 2. RedHat Fedora 29
item --key 3 f28 3. RedHat Fedora 28
choose --timeout ${timeout} --default lcl selected || goto shell
set timeout 0
goto ${selected} :failed
echo boot failed, dropping to shell...
goto shell :shell
echo type 'exit' to get the back to the menu
set timeout 0
shell
goto menu :lcl
exit :f29
login
chain https://server-01.example.edu/boot?instance=fc29&username=${username}&password=${password:uristring} || goto failed :f28
login
chain https://server-01.example.edu/boot?instance=fc28&username=${username}&password=${password:uristring} || goto failed
fc29.html.ep:
#!ipxe
kernel --name kernel.efi ${prefix}/vmlinuz-4.19.5-300.fc29.x86_64 initrd=initrd.img ro ip=dhcp rd.peerdns=0 nameserver=192.0.2.91 nameserver=192.0.2.92 root=/dev/disk/by-path/ip-192.0.2.158:3260-iscsi-iqn.edu.example.server-01:fc29-lun-1 netroot=iscsi:192.0.2.158::::iqn.edu.example.server-01:fc29 console=tty0 console=ttyS0,115200n8 audit=0 selinux=0 quiet
initrd --name initrd.img ${prefix}/initramfs-4.19.5-300.fc29.x86_64.img
boot || chain https://server-01.example.edu/menu
fc28.html.ep:
#!ipxe
kernel --name kernel.efi ${prefix}/vmlinuz-4.19.3-200.fc28.x86_64 initrd=initrd.img ro ip=dhcp rd.peerdns=0 nameserver=192.0.2.91 nameserver=192.0.2.92 root=/dev/disk/by-path/ip-192.0.2.158:3260-iscsi-iqn.edu.example.server-01:fc28-lun-1 netroot=iscsi:192.0.2.158::::iqn.edu.example.server-01:fc28 console=tty0 console=ttyS0,115200n8 audit=0 selinux=0 quiet
initrd --name initrd.img ${prefix}/initramfs-4.19.3-200.fc28.x86_64.img
boot || chain https://server-01.example.edu/menu
Now, restart the bootmenu application and verify authentication is working:
# systemctl restart bootmenu.service
Make the iSCSI Target Writeable
Now that user authentication works through iPXE, you can create per-user, writeable overlays on top of the read-only image on demand when users connect. Using a copy-on-write overlay has three advantages over simply copying the original image file for each user:
- The copy can be created very quickly. This allows creation on-demand.
- The copy does not increase the disk usage on the server. Only what the user writes to their personal copy of the image is stored in addition to the original image.
- Since most sectors for each copy are the same sectors on the server’s storage, they’ll likely already be loaded in RAM when subsequent users access their copies of the operating system. This improves the server’s performance because RAM is faster than disk I/O.
One potential pitfall of using copy-on-write is that once overlays are created, the images on which they are overlayed must not be changed. If they are changed, all the overlays will be corrupted. Then the overlays must be deleted and replaced with new, blank overlays. Even simply mounting the image file in read-write mode can cause sufficient filesystem updates to corrupt the overlays.
Due to the potential for the overlays to be corrupted if the original image is modified, mark the original image as immutable by running:
# chattr +i </path/to/file>
You can use lsattr </path/to/file> to view the status of the immutable flag and use to chattr -i </path/to/file> unset the immutable flag. While the immutable flag is set, even the root user or a system process running as root cannot modify or delete the file.
Begin by stopping the tgtd.service so you can change the image files:
# systemctl stop tgtd.service
It’s normal for this command to take a minute or so to stop when there are connections still open.
Now, remove the read-only iSCSI export. Then update the readonly-root configuration file in the template so the image is no longer read-only:
# MY_FC=fc29
# rm -f /etc/tgt/conf.d/$MY_FC.conf
# TEMP_MNT=$(mktemp -d)
# mount /$MY_FC.img $TEMP_MNT
# sed -i 's/^READONLY=yes$/READONLY=no/' $TEMP_MNT/etc/sysconfig/readonly-root
# sed -i 's/^Storage=volatile$/#Storage=auto/' $TEMP_MNT/etc/systemd/journald.conf
# umount $TEMP_MNT
Journald was changed from logging to volatile memory back to its default (log to disk if /var/log/journal exists) because a user reported his clients would freeze with an out-of-memory error due to an application generating excessive system logs. The downside to setting logging to disk is that extra write traffic is generated by the clients, and might burden your netboot server with unnecessary I/O. You should decide which option — log to memory or log to disk — is preferable depending on your environment.
Since you won’t make any further changes to the template image, set the immutable flag on it and restart the tgtd.service:
# chattr +i /$MY_FC.img
# systemctl start tgtd.service
Now, update the bootmenu application:
# cat << 'END' > $MY_MOJO/bootmenu.pl
#!/usr/bin/env perl use lib 'lib'; use PAM;
use Mojolicious::Lite;
use Mojolicious::Plugins;
use Mojo::Util ('url_unescape'); plugin 'Config'; get '/menu';
get '/boot' => sub { my $c = shift; my $instance = $c->param('instance'); my $username = $c->param('username'); my $password = $c->param('password'); my $chapscrt; my $template = 'menu'; { last unless $instance =~ /^fc[[:digit:]]{2}$/; last unless $username =~ /^[[:alnum:]]+$/; last unless PAM::auth($username, url_unescape($password)); last unless $chapscrt = `sudo scripts/mktgt $instance $username`; $template = $instance; } return $c->render(template => $template, username => $username, chapscrt => $chapscrt);
}; app->start;
END
This new version of the bootmenu application calls a custom mktgt script which, on success, returns a random CHAP password for each new iSCSI target that it creates. The CHAP password prevents one user from mounting another user’s iSCSI target by indirect means. The app only returns the correct iSCSI target password to a user who has successfully authenticated.
The mktgt script is prefixed with sudo because it needs root privileges to create the target.
The $username and $chapscrt variables also pass to the render command so they can be incorporated into the templates returned to the user when necessary.
Next, update our boot templates so they can read the username and chapscrt variables and pass them along to the end user. Also update the templates to mount the root filesystem in rw (read-write) mode:
# cd $MY_MOJO/templates
# sed -i "s/:$MY_FC/:$MY_FC-<%= \$username %>/g" $MY_FC.html.ep
# sed -i "s/ netroot=iscsi:/ netroot=iscsi:<%= \$username %>:<%= \$chapscrt %>@/" $MY_FC.html.ep
# sed -i "s/ ro / rw /" $MY_FC.html.ep
After running the above commands, you should have boot templates like the following:
#!ipxe
kernel --name kernel.efi ${prefix}/vmlinuz-4.19.5-300.fc29.x86_64 initrd=initrd.img rw ip=dhcp rd.peerdns=0 nameserver=192.0.2.91 nameserver=192.0.2.92 root=/dev/disk/by-path/ip-192.0.2.158:3260-iscsi-iqn.edu.example.server-01:fc29-<%= $username %>-lun-1 netroot=iscsi:<%= $username %>:<%= $chapscrt %>@192.0.2.158::::iqn.edu.example.server-01:fc29-<%= $username %> console=tty0 console=ttyS0,115200n8 audit=0 selinux=0 quiet
initrd --name initrd.img ${prefix}/initramfs-4.19.5-300.fc29.x86_64.img
boot || chain https://server-01.example.edu/menu
NOTE: If you need to view the boot template after the variables have been interpolated, you can insert the “shell” command on its own line just before the “boot” command. Then, when you netboot your client, iPXE gives you an interactive shell where you can enter “imgstat” to view the parameters being passed to the kernel. If everything looks correct, you can type “exit” to leave the shell and continue the boot process.
Now allow the bootmenu user to run the mktgt script (and only that script) as root via sudo:
# echo "bootmenu ALL = NOPASSWD: $MY_MOJO/scripts/mktgt *" > /etc/sudoers.d/bootmenu
The bootmenu user should not have write access to the mktgt script or any other files under its home directory. All the files under /opt/bootmenu should be owned by root, and should not be writable by any user other than root.
Sudo does not work well with systemd’s DynamicUser option, so create a normal user account and set the systemd service to run as that user:
# useradd -r -c 'iPXE Boot Menu Service' -d /opt/bootmenu -s /sbin/nologin bootmenu
# sed -i 's/^DynamicUser=true$/User=bootmenu/' /etc/systemd/system/bootmenu.service
# systemctl daemon-reload
Finally, create a directory for the copy-on-write overlays and create the mktgt script that manages the iSCSI targets and their overlayed backing stores:
# mkdir /$MY_FC.cow
# mkdir $MY_MOJO/scripts
# cat << 'END' > $MY_MOJO/scripts/mktgt
#!/usr/bin/env perl # if another instance of this script is running, wait for it to finish "$ENV{FLOCKER}" eq 'MKTGT' or exec "env FLOCKER=MKTGT flock /tmp $0 @ARGV"; # use "RETURN" to print to STDOUT; everything else goes to STDERR by default
open(RETURN, '>&', STDOUT);
open(STDOUT, '>&', STDERR); my $instance = shift or die "instance not provided";
my $username = shift or die "username not provided"; my $img = "/$instance.img";
my $dir = "/$instance.cow";
my $top = "$dir/$username"; -f "$img" or die "'$img' is not a file"; -d "$dir" or die "'$dir' is not a directory"; my $base;
die unless $base = `losetup --show --read-only --nooverlap --find $img`;
chomp $base; my $size;
die unless $size = `blockdev --getsz $base`;
chomp $size; # create the per-user sparse file if it does not exist
if (! -e "$top") { die unless system("dd if=/dev/zero of=$top status=none bs=512 count=0 seek=$size") == 0;
} # create the copy-on-write overlay if it does not exist
my $cow="$instance-$username";
my $dev="/dev/mapper/$cow";
if (! -e "$dev") { my $over; die unless $over = `losetup --show --nooverlap --find $top`; chomp $over; die unless system("echo 0 $size snapshot $base $over p 8 | dmsetup create $cow") == 0;
} my $tgtadm = '/usr/sbin/tgtadm --lld iscsi'; # get textual representations of the iscsi targets
my $text = `$tgtadm --op show --mode target`;
my @targets = $text =~ /(?:^T.*\n)(?:^ .*\n)*/mg; # convert the textual representations into a hash table
my $targets = {};
foreach (@targets) { my $tgt; my $sid; foreach (split /\n/) { /^Target (\d+)(?{ $tgt = $targets->{$^N} = [] })/; /I_T nexus: (\d+)(?{ $sid = $^N })/; /Connection: (\d+)(?{ push @{$tgt}, [ $sid, $^N ] })/; }
} my $hostname;
die unless $hostname = `hostname`;
chomp $hostname; my $target = 'iqn.' . join('.', reverse split('\.', $hostname)) . ":$cow"; # find the target id corresponding to the provided target name and
# close any existing connections to it
my $tid = 0;
foreach (@targets) { next unless /^Target (\d+)(?{ $tid = $^N }): $target$/m; foreach (@{$targets->{$tid}}) { die unless system("$tgtadm --op delete --mode conn --tid $tid --sid $_->[0] --cid $_->[1]") == 0; }
} # create a new target if an existing one was not found
if ($tid == 0) { # find an available target id my @ids = (0, sort keys %{$targets}); $tid = 1; while ($ids[$tid]==$tid) { $tid++ } # create the target die unless -e "$dev"; die unless system("$tgtadm --op new --mode target --tid $tid --targetname $target") == 0; die unless system("$tgtadm --op new --mode logicalunit --tid $tid --lun 1 --backing-store $dev") == 0; die unless system("$tgtadm --op bind --mode target --tid $tid --initiator-address ALL") == 0;
} # (re)set the provided target's chap password
my $password = join('', map(chr(int(rand(26))+65), 1..8));
my $accounts = `$tgtadm --op show --mode account`;
if ($accounts =~ / $username$/m) { die unless system("$tgtadm --op delete --mode account --user $username") == 0;
}
die unless system("$tgtadm --op new --mode account --user $username --password $password") == 0;
die unless system("$tgtadm --op bind --mode account --tid $tid --user $username") == 0; # return the new password to the iscsi target on stdout
print RETURN $password;
END
# chmod +x $MY_MOJO/scripts/mktgt
The above script does five things:
- It creates the /<instance>.cow/<username> sparse file if it does not already exist.
- It creates the /dev/mapper/<instance>-<username> device node that serves as the copy-on-write backing store for the iSCSI target if it does not already exist.
- It creates the iqn.<reverse-hostname>:<instance>-<username> iSCSI target if it does not exist. Or, if the target does exist, it closes any existing connections to it because the image can only be opened in read-write mode from one place at a time.
- It (re)sets the chap password on the iqn.<reverse-hostname>:<instance>-<username> iSCSI target to a new random value.
- It prints the new chap password on standard output if all of the previous tasks compeleted successfully.
You should be able to test the mktgt script from the command line by running it with valid test parameters. For example:
# echo `$MY_MOJO/scripts/mktgt fc29 jsmith`
When run from the command line, the mktgt script should print out either the eight-character random password for the iSCSI target if it succeeded or the line number on which something went wrong if it failed.
On occasion, you may want to delete an iSCSI target without having to stop the entire service. For example, a user might inadvertently corrupt their personal image, in which case you would need to systematically undo everything that the above mktgt script does so that the next time they log in they will get a copy of the original image.
Below is an rmtgt script that undoes, in reverse order, what the above mktgt script did:
# mkdir $HOME/bin
# cat << 'END' > $HOME/bin/rmtgt
#!/usr/bin/env perl @ARGV >= 2 or die "usage: $0 <instance> <username> [+d|+f]\n"; my $instance = shift;
my $username = shift; my $rmd = ($ARGV[0] eq '+d'); #remove device node if +d flag is set
my $rmf = ($ARGV[0] eq '+f'); #remove sparse file if +f flag is set
my $cow = "$instance-$username"; my $hostname;
die unless $hostname = `hostname`;
chomp $hostname; my $tgtadm = '/usr/sbin/tgtadm';
my $target = 'iqn.' . join('.', reverse split('\.', $hostname)) . ":$cow"; my $text = `$tgtadm --op show --mode target`;
my @targets = $text =~ /(?:^T.*\n)(?:^ .*\n)*/mg; my $targets = {};
foreach (@targets) { my $tgt; my $sid; foreach (split /\n/) { /^Target (\d+)(?{ $tgt = $targets->{$^N} = [] })/; /I_T nexus: (\d+)(?{ $sid = $^N })/; /Connection: (\d+)(?{ push @{$tgt}, [ $sid, $^N ] })/; }
} my $tid = 0;
foreach (@targets) { next unless /^Target (\d+)(?{ $tid = $^N }): $target$/m; foreach (@{$targets->{$tid}}) { die unless system("$tgtadm --op delete --mode conn --tid $tid --sid $_->[0] --cid $_->[1]") == 0; } die unless system("$tgtadm --op delete --mode target --tid $tid") == 0; print "target $tid deleted\n"; sleep 1;
} my $dev = "/dev/mapper/$cow";
if ($rmd or ($rmf and -e $dev)) { die unless system("dmsetup remove $cow") == 0; print "device node $dev deleted\n";
} if ($rmf) { my $sf = "/$instance.cow/$username"; die "sparse file $sf not found" unless -e "$sf"; die unless system("rm -f $sf") == 0; die unless not -e "$sf"; print "sparse file $sf deleted\n";
}
END
# chmod +x $HOME/bin/rmtgt
For example, to use the above script to completely remove the fc29-jsmith target including its backing store device node and its sparse file, run the following:
# rmtgt fc29 jsmith +f
Once you’ve verified that the mktgt script is working properly, you can restart the bootmenu service. The next time someone netboots, they should receive a personal copy of the the netboot image they can write to:
# systemctl restart bootmenu.service
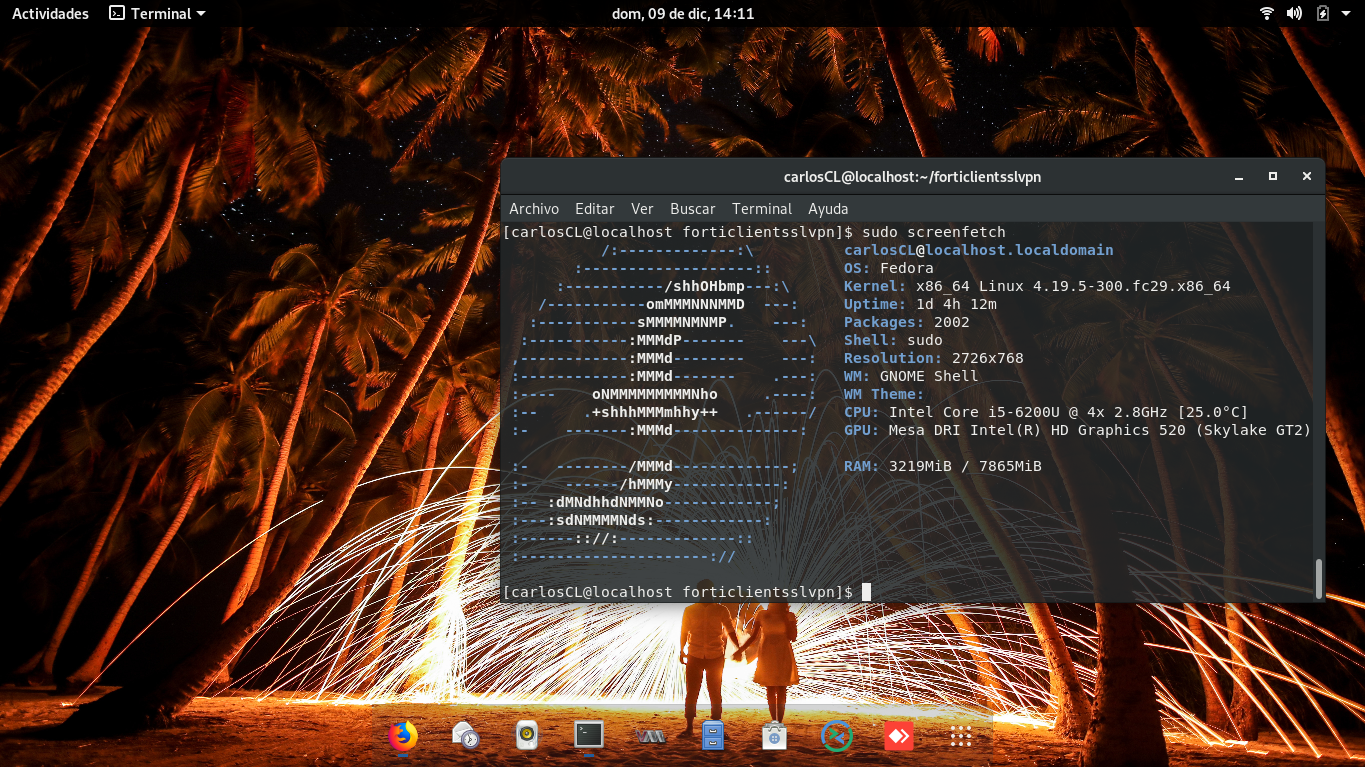
Users should now be able to modify the root filesystem as demonstrated in the below screenshot: