Meross Outdoor Dimmer Plug
The Meross Outdoor Dimmer Plug gives you more control over your lights than a regular smart plug can. However, while you can use it indoors or outdoors, it’s tailored more for outside use.
Smart plugs are great accessories to own because they can control nearly anything in your house from your device. From lamps to bug zappers, you can turn any “dumb” appliance into a smart one.
The problem is all they can do is turn your appliances on and off. While this may be enough for most objects, others may have additional features you want to control — like dimmable lights.
The Meross Outdoor Dimmer Plug offers deep control of your appliances at a budget-friendly price. It’s a great way to manage your outdoor scenery with an automation from your phone.
Meross Outdoor Dimmer Plug — An ordinary design
The Meross Outdoor Dimmer Plug is designed like other outdoor plugs. It’s made from polycarbonate fire retardant material and is FCC (Federal Communications Commission) certified.
Measuring 2.36 x 3.15 x 1.58 inches, it’s small enough to be tucked into corners or hidden under a table. There’s also a tiny hook on the back to mount the plug if you don’t want it on the ground.
Hook to mount the plug on the wall
The plug is rated IP44 dust-resistant and splash-resistant. However, you should keep the Outdoor Dimmer Plug out of water and in a dry location.
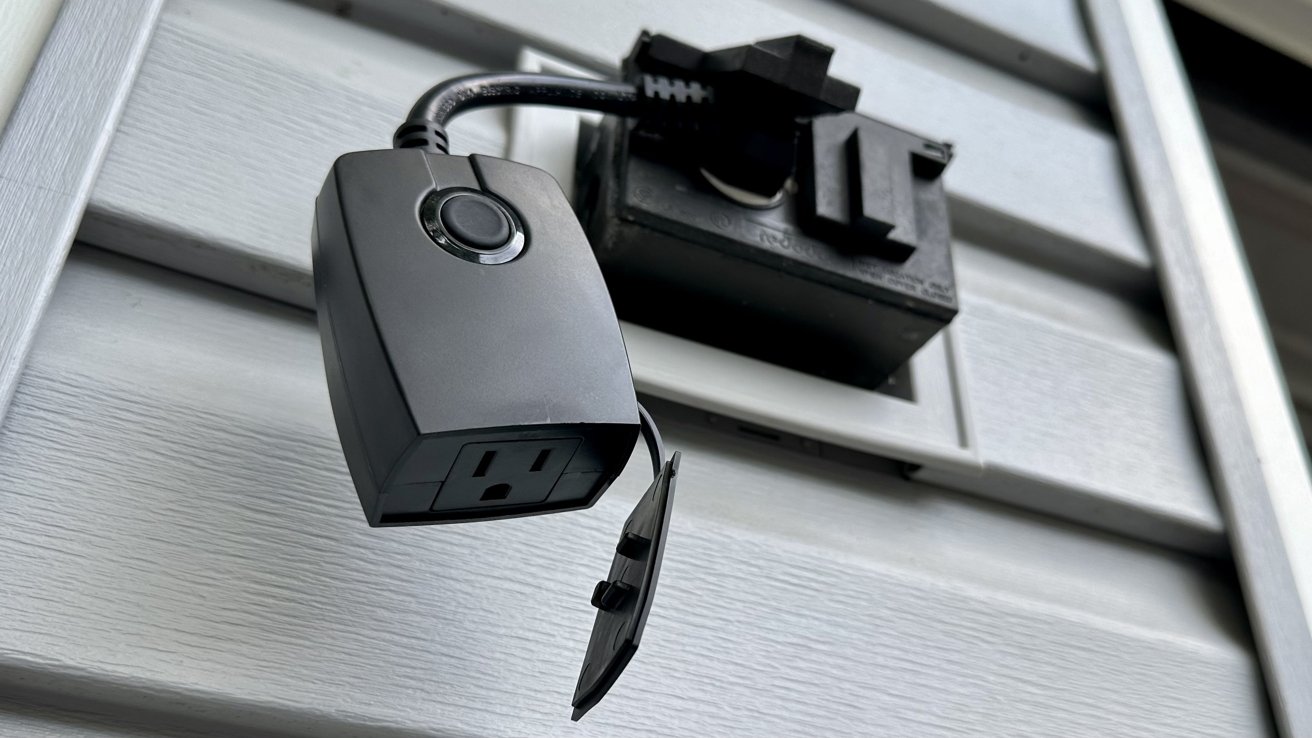
The Outdoor Dimmer Plug has a singular outlet, so you can only plug in one appliance at a time. Connected to it is a severely short cable, which requires you to already have your appliance stationed near an existing outlet.
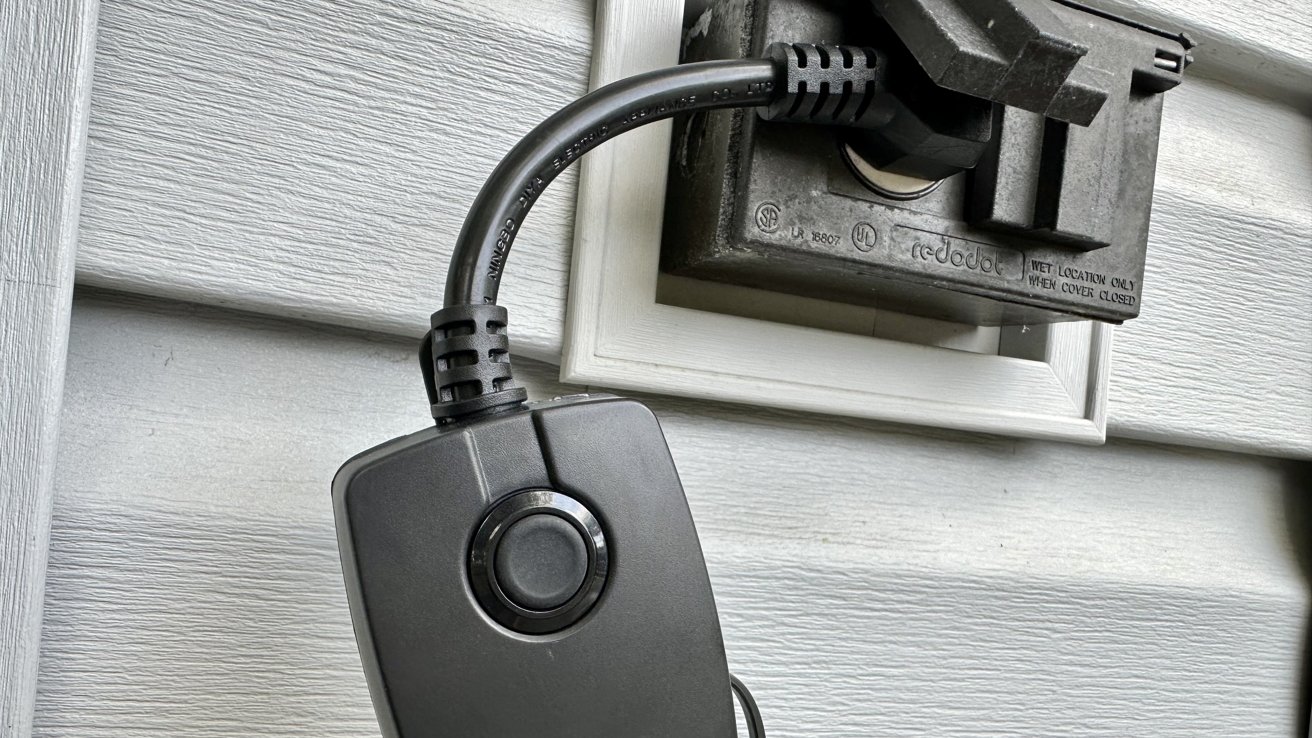
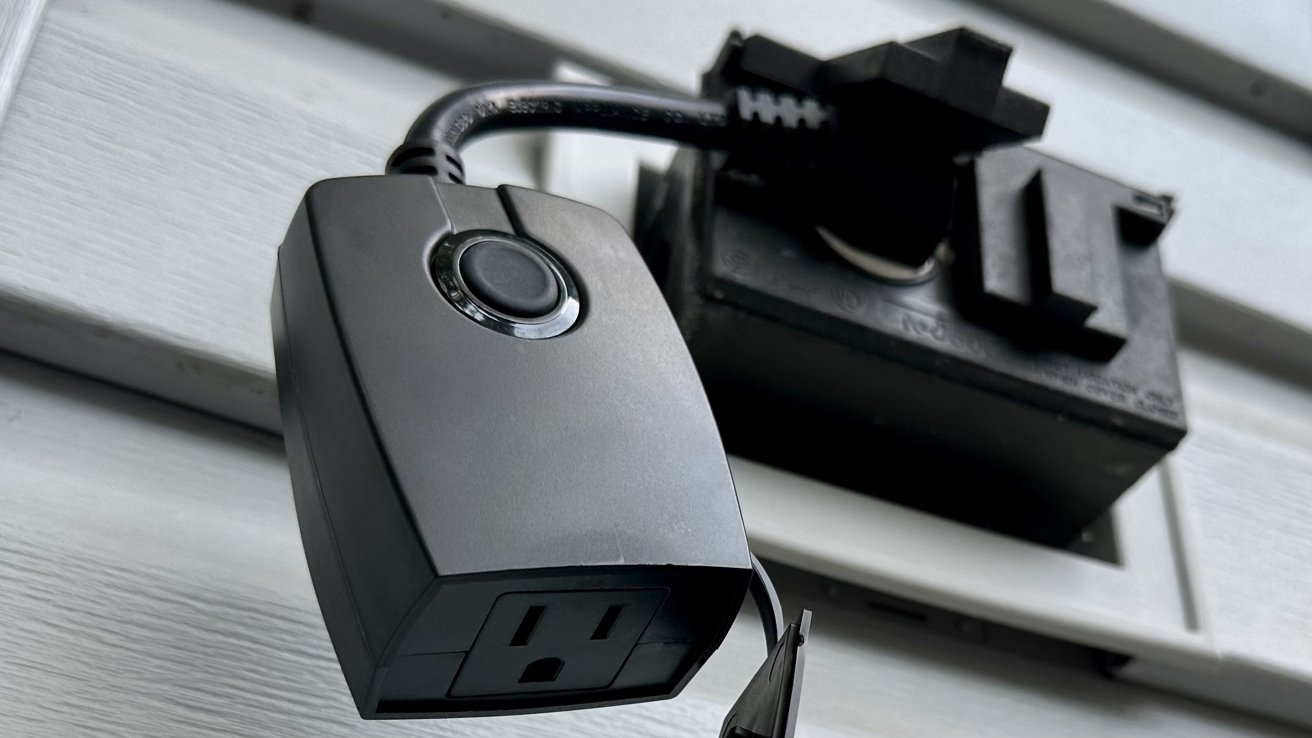
Meross Outdoor Dimmer Plug control/power button and cable
On top of the Outdoor Dimmer Plug is a button that can control the power and brightness of your lights when it’s disconnected from your iPhone. A light surrounding the button will indicate if the plug has power and is in setup mode.
When the plug is not in use, a cover can be placed over the outlet for maximum protection. On the flip side, when the plug is in use, the cover hangs off the side of the plug until it’s needed again.
Meross Outdoor Dimmer Plug — Connection and compatibility
The Meross Outdoor Dimmer Plug lets you control your lights and appliances from any device. But you must properly set up the plug before you can do that.
To start the setup process, the ring around the button must be blinking to indicate it’s ready to pair.
To connect the plug to WiFi, you need to have a 2.4GHz network available. A 5GHz network is incompatible.
While the Outdoor Dimming Plug can control the power of any connected device, it can also change the brightness levels of plugged-in dimmable lightbulbs. Even if the bulb’s screwed into an ordinary lamp, the dimness can still be altered.
LED and CFL bulbs are compatible with the plug by outputting a maximum of 150W. INC bulbs are also compatible and can have a maximum output of 400W.
If you aren’t using the plug for lighting, then note it’s not compatible with pumps, pool filters, and motors.
When controlling the dimness of your lights, you can set them to a level between 1% to 100%. If you are using the button, it can be set to 10%, 20%, 30%, 50%, or 100% brightnesses.
While you can control the Outdoor Dimming Plug from anywhere you have an internet connection, you will receive faster response times if you are in the same location.
Meross Outdoor Dimmer Plug — Controlling from your phone
The Meross Outdoor Dimmer Plug can be controlled from the Home or Meross app. However, the Meross app offers more functionality than the Home app does.
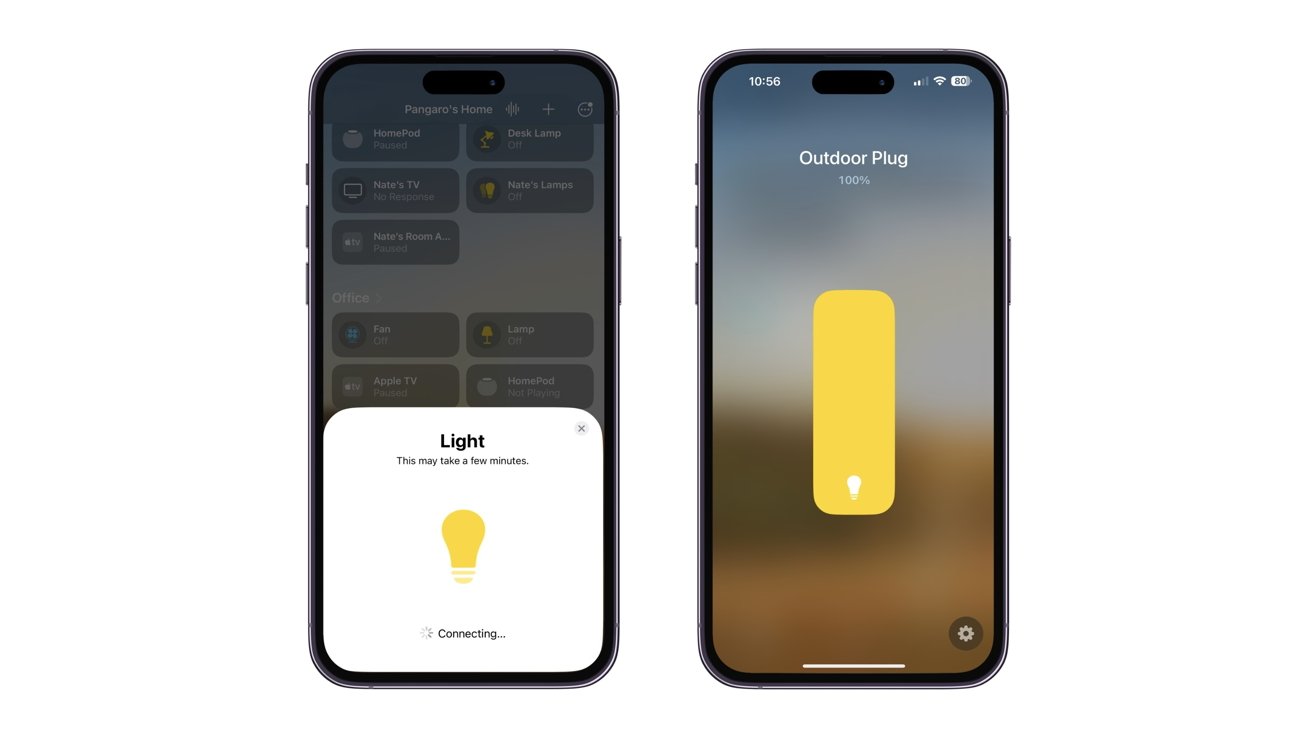
When first connecting the Outdoor Dimmer Plug to the Home app, it will recognize it as a light, not a plug. Yet, you can change the device’s icon after you complete the setup process.
Changing the brightness levels is easy — all you do is tap on the plug in the Home app and raise or lower the toggle. However, if the plugged-in lights change colors, you cannot change them from the plug itself.
HomeKit controls for Meross Outdoor Dimmer Plug
Just like with other HomeKit accessories, you can group the Outdoor Dimming Plug with other plugs and lights within the app. Since you can only plug in one appliance, this becomes a useful feature if you purchase multiple plugs and want to control them simultaneously.
By grouping the plug with dimmable lights, you can adjust their dimness level simultaneously. But, if you link it to a non-dimmable device, you’ll need to access the group settings and modify the plug’s level separately.
If you have existing automations, you can include the Outdoor Dimmer Plug or create a new one based on it. You can choose when the plug will turn on or off and set the brightness level.
While the Home app can control the main functions of the Outdoor Dimmer Plug, the Meross app provides additional features the Home app does not.
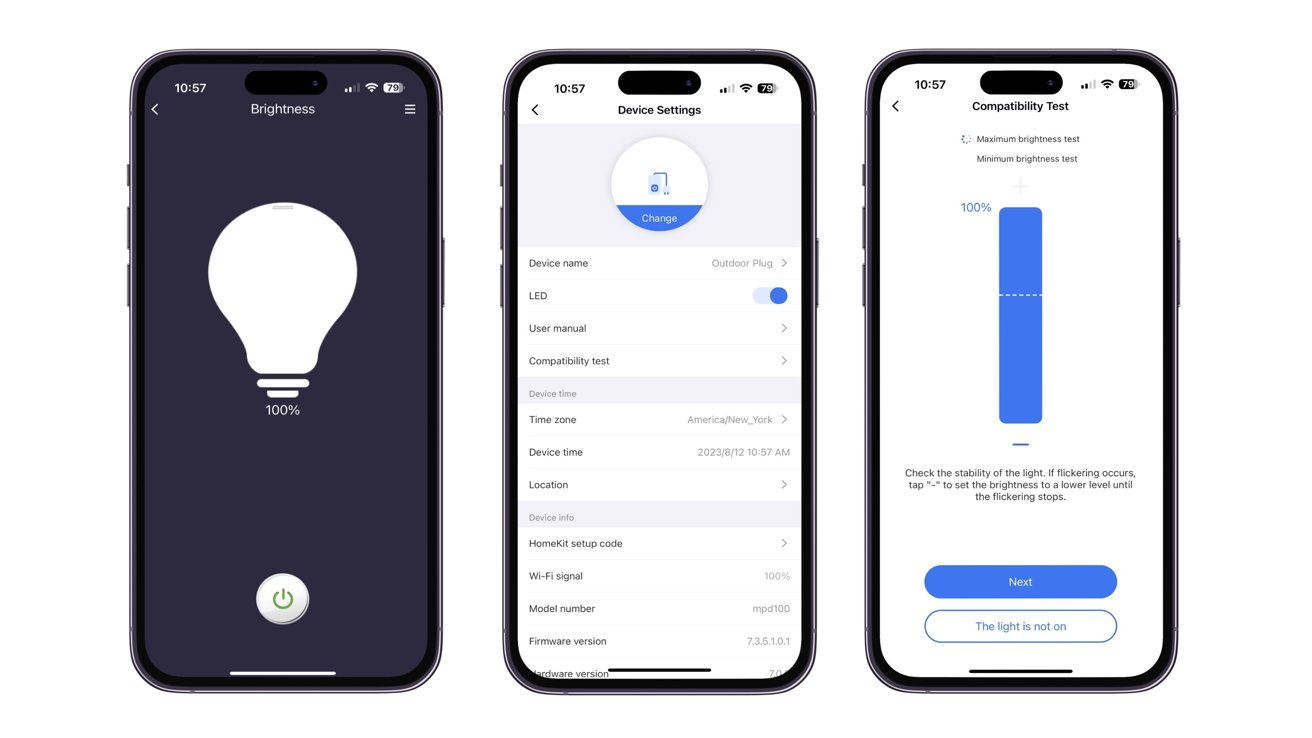
Meross native app controls
One useful feature of the app is checking the compatibility between the plug and the light you plugged in. It allows you to check the stability of the light and what level to set the brightness at if it starts flickering.
The Meross app will also supply updates to the plug when available.
Ultimately, no matter which app you use, you can easily control the Outdoor Dimming Plug’s core functionality at your fingertips.
Meross Outdoor Dimmer Plug — Outdoor control at your fingertips
The Meross Outdoor Dimmer Plug is a wonderful addition to your outdoor lights, allowing you to control their power and dimness from your phone.
Meross Outdoor Dimmer Plug
Setting up the Outdoor Dimmer Plug was straightforward, and the response time to commands was quick. Although the bulb’s brightness level didn’t change instantly when invoked, it still only took two seconds to complete.
The Outdoor Dimming Plug is great for people who hang up seasonal holiday lights and want to put them on multiple schedules. It also benefits people who want to set the mood on their patio by changing their light’s brightness level.
The price is another highlight for the Outdoor Dimming Plug because it retails under $30. Most HomeKit accessories can be expensive, but Meross has a reputation for selling budget-friendly HomeKit devices, and this plug is no different.
Although we had a positive experience with the plug, we believe it would be beneficial if it had a longer cable and more outlets in the future. While it is possible to use an extension cable to solve this issue, it would be more convenient if the plug had these features built-in.
If you want easier control over your outside lights, then the Meross Outdoor Dimmer Plug is a great option to choose. However, if you live in an apartment or don’t use outdoor lights, we recommend looking at a pack of smart plugs instead.
Meross Outdoor Dimmer Plug — Pros
- IP44 rating
- Dimmable accessibility with compatible lightbulbs
- Budget-friendly price
Meross Outdoor Dimmer Plug — Cons
- Only one outlet
- Only available in black
- Short wire length
Rating: 4 out of 5
Where to purchase the Meross Outdoor Dimmer Plug
You can purchase the Meross Outdoor Dimmer Plug from their website for $28.99. It’s available in black.
You can also purchase it from Amazon for $30.99. It’s also available in black.