The Epic vs. Apple App Store lawsuit is probably going to end up before the Supreme Court, after just about everything landed squarely in Apple’s favor. Here’s all you need to know about all the courtroom drama, updated on October 1, 2023.
Within the space of a few weeks, a disagreement between the ambitions of Epic Games and the intention to maintain the App Store status quo by Apple courted considerable controversy. The affair commenced with little warning to consumers but quickly led to international interest, as the battle sought to change one of the fundamental elements of the App Store: how much Apple earns.
Apple’s dominance has previously led to an antitrust probe by the U.S. Justice Department into the App Store’s fees and policies. Still, the disagreement between Apple and Epic is being made in a more public way and directly affects younger customers.
[youtube https://www.youtube.com/watch?v=i6En24IIT6w]
While the fight is mostly between Epic vs Apple, it has already seen other parties wading in with their observations and opinions on the matter, including developers of other apps included in the App Store. Simultaneously, as Apple received scrutiny over its policies, Epic itself has also come under fire for how it handled the situation, including forcing it to happen and orchestrating a premeditated response.
With the appeals court ruling published and the two sides considering their position and further potential appeals, here’s how Apple and Epic got into a years-long litigious battle, what followed after the ruling, the first appeals over the original trial’s ruling, that result, and the impending fallout.
Epic updates Fortnite, Apple pulls it down
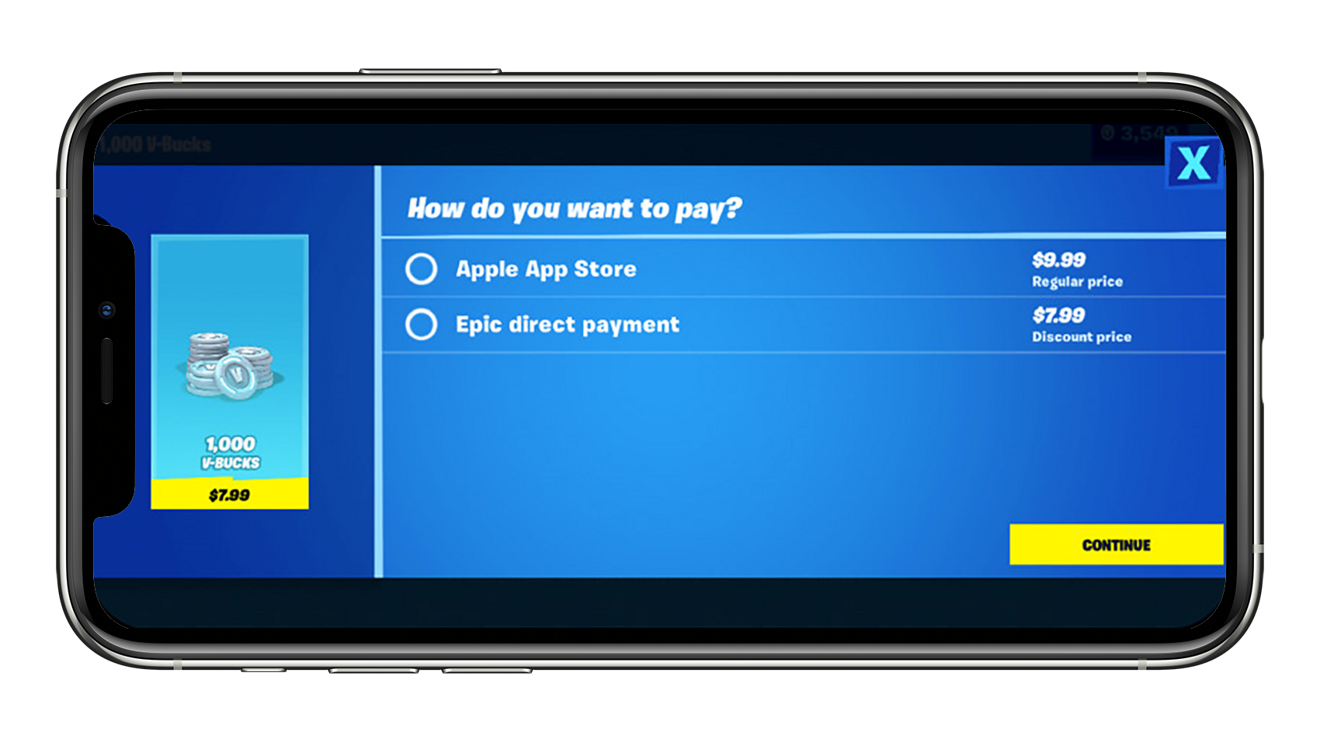
The main triggering event occurred on August 13, when Epic updated the Fortnite app with a new feature, one that allowed consumers to pay Epic directly for in-app currency at a discount, rather than paying traditionally via Apple’s App Store payment mechanism. Offering the option enabled Epic to skirt App Store rules that demanded payments go through the App Store payment system, paying a 30% fee in the process.
The fee is a non-negotiable element for the vast majority of apps, but there are some exceptions. For a start, the rule pertains to digital goods, with exceptions made for physical goods, such as online retailers and restaurants. At the same time, subscriptions can pay a smaller cut of the transaction fee in many situations.
The change was not limited to just the iOS version of the game, as it was similarly applied to the Android version, again going against the Google Play Store’s similar policy and fees.
As was to be expected, Apple pulled the game from the App Store for violating the App Store guidelines within hours of the update’s appearance. Similarly, Google also pulled the game from the Google Play Store, though on Android, the game is still available via third-party stores and from Epic directly.
Lawsuit and Marketing
The same day as the removal, Epic filed a lawsuit against Apple in the U.S. District Court for the Northern District of California, in retaliation for pulling the game. It laid another lawsuit against Google for its “Fortnite” removal.
The complaint from Epic took an accusatory stance, declaring Apple had become a “behemoth seeking to control markets, block competition, and stifle innovation. The suit also went as far as to alleged Apple’s size and reach “far exceeds that of any technology monopolist in history.”
An important part of the suit is that it isn’t attempting to argue whether Epic was abiding by App Store guidelines but instead fought against the guidelines themselves. Its objections to the policies primarily include Apple’s “exorbitant” 30% commission for in-app purchases.
It also argues that the same policies are anti-competitive by forcing developers to use the App Store. If the rules weren’t there, Epic states it would have released its competing app store.
Epic’s argument disregards the fact that Apple’s App Store and ecosystem is relatively similar to those of Sony’s Playstation and Microsoft’s Xbox platforms, with each forcing the use of a single digital storefront, the usage of specific payment systems, and the taking of a 30% cut of transactions.
At this time, Epic has yet to file lawsuits against either Sony or Microsoft, demanding transaction fee cuts or the ability to operate its digital marketplace.
The filing seeks an injunction to prohibit “Apple’s anti-competitive conduct” and any “equitable relief necessary.”
[youtube https://www.youtube.com/watch?v=euiSHuaw6Q4]
At the same time as it filed the lawsuit, Epic Games attempted to raise support in the court of public opinion by releasing a video parody of Apple’s famous “1984” Super Bowl commercial. In this version, a Fortnite character smashes a screen displaying a cartoon talking apple, complete with a worm.
While the original framed Apple as the breaker of the aging oppressive IBM’s grasp on computing, the parody seemingly puts Apple in IBM’s place, with Epic instead being the breaker of Apple’s App Store control.
As of August 22, people had viewed the video 5.6 million times. Epic is also attempting to get the social media hashtag #FreeFortnite trending.
The timing of the lengthy lawsuit and the sudden marketing blitz within a few hours of Apple’s takedown of the game strongly suggested at the time Epic had prepared them beforehand, anticipating the app’s removal.
Developer account threat
On August 17, Apple made an offensive move against Epic, which was revealed to the public by Epic over Twitter. Epic alleged that Apple had informed Epic it would be terminating all developer accounts and cutting Epic off from iOS and Mac development tools on August 28.
Naturally, Epic filed a request for a temporary restraining order to prevent Apple from taking “any adverse action against it.” The filing also included a request for the court to prevent Apple from “removing, de-listing, refusing to list or otherwise making unavailable the app Fortnite, including any update thereof, from the App Store on the basis that Fortnite offers in-app payment processing through means other than Apple’s IAP or on any pretextual basis.”
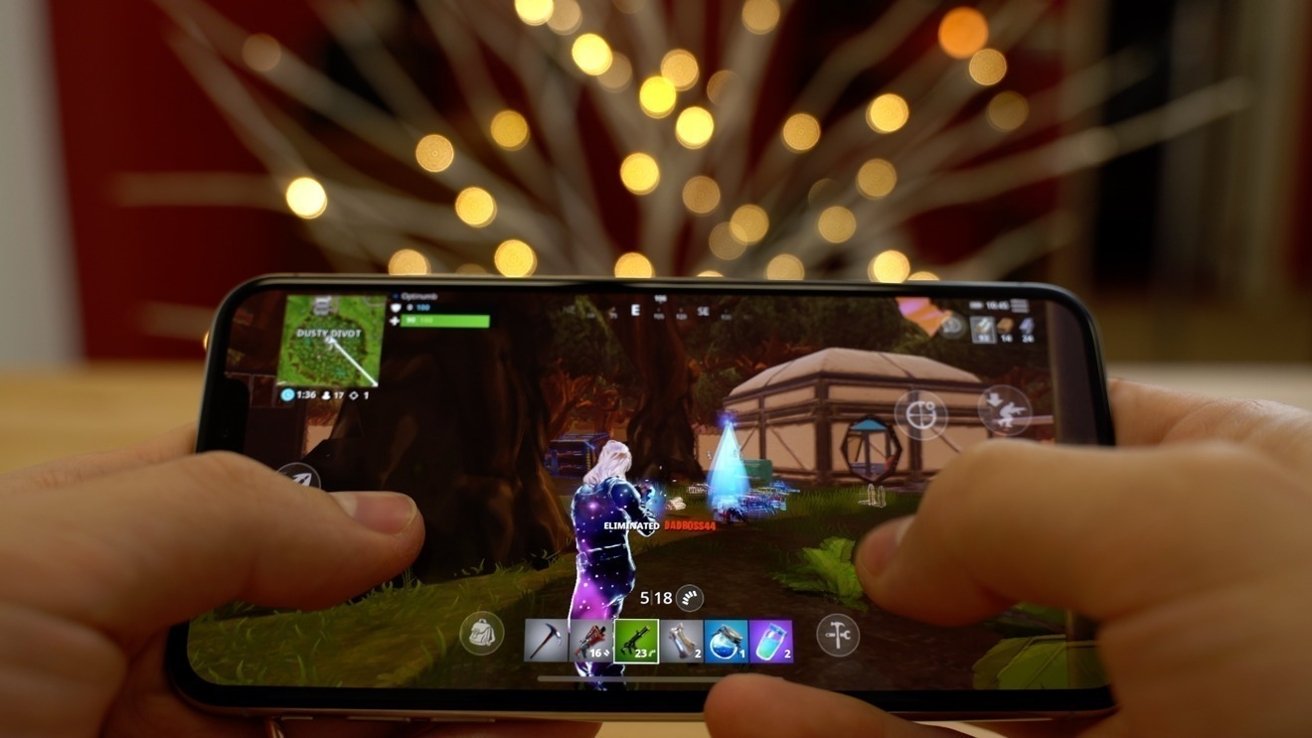
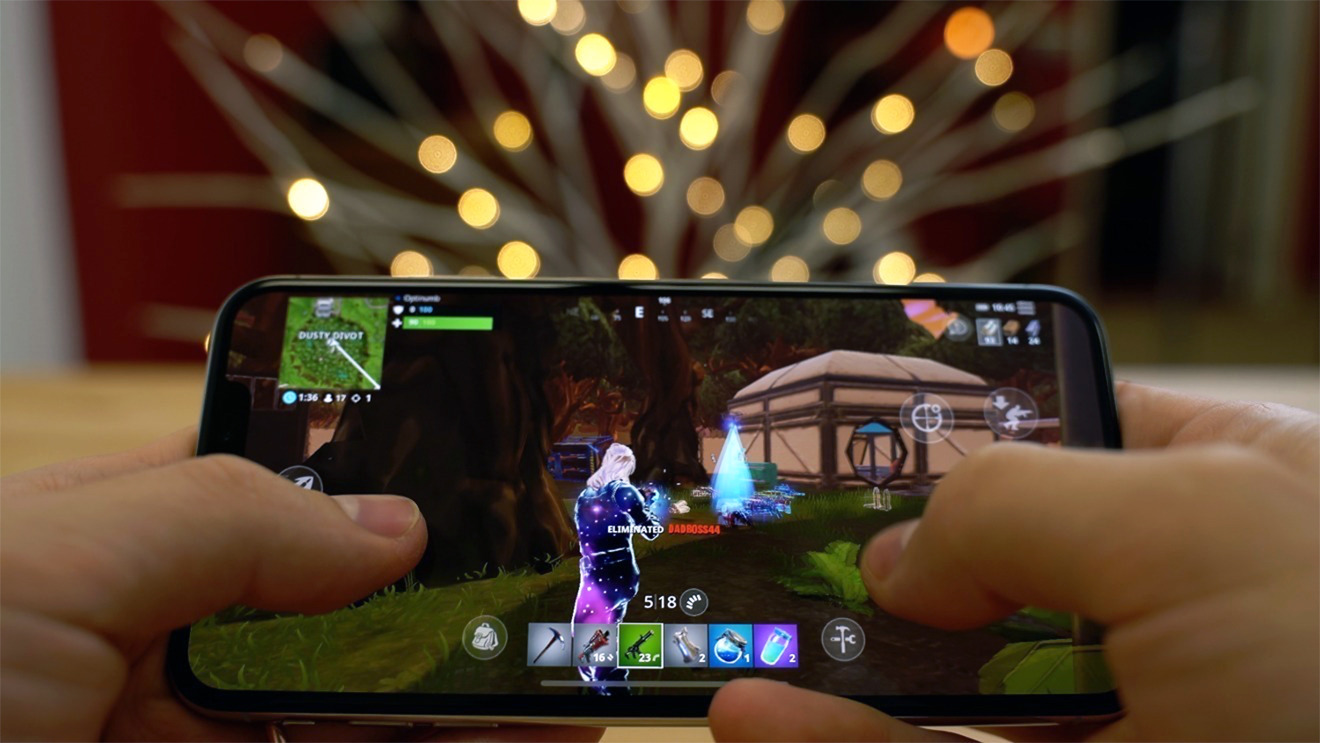
Playing Fortnite on an iPhone
The court filing published by Epic includes the letter sent by Apple to the company, which noted “several violations of the Apple Developer Program License Agreement” by Epic, and that access would be terminated unless the violations were dealt with within 14 days.
To Epic, the removal of developer tools extends far beyond Fortnite, as the company provides the Unreal Engine to thousands of developers for use in their games. By not using developer tools to maintain the macOS and iOS elements of the game engine, it effectively cannot provide support to third-party developers who licensed the technology.
The lawsuit declared, “Apple is attacking Epic’s entire business in unrelated areas.”
Sweeney before and after the takedown
Epic Games CEO Tim Sweeney has been a public critic of the App Store and its fee structure. In an interview in July, Sweeney outlined his insistence that Apple and Google stunt innovation with their respective app store policies.
In the case of Apple, Sweeney called the App Store an “absolute monopoly,” and that Apple “has locked down and crippled the ecosystem by inventing an absolute monopoly on the distribution of software, on the monetization of software.” At the time, Sweeney added that if developers were able to take their payments instead of paying the “30% tax,” the savings could be passed on “to all our consumers and players would get a better deal on items, and you’d have economic competition.”
Sweeney has railed against the transaction fee for quite some time, with comments from 2017 declaring the models “pretty unfair” and that companies like Apple are “pocketing a huge amount of profit from your order – and they aren’t really doing much to help [developers] anymore.”
Epic Games CEO Tim Sweeney
Epic also operates its app store on PC, as a competitor to Steam and others. While it is beneficial to developers in taking a smaller 12% cut from transactions, the company has also performed activities some may deem as anti-competitive, including paying developers for exclusive game launches that are available only through its storefront and not rivals. Epic has also partnered with Facebook for a timed exclusive on one of its VR games, “Robo Recall,” on the original Oculus Rift.
In a June interview, Sweeney also suggested an Epic Games Store could arrive on mobile platforms in the near future, including an iOS version.
“We think it’s a good way to help the industry forward and it’s another way where Epic as a game developer had built up this audience around Fortnite and learned how to operate a distribution platform on P.C. and Android,” said Sweeney.
On August 15, after the takedown and initial legal action, Sweeney then made the case for the lawsuit in a series of tweets. Characterizing it as being more for consumer and developer choice than more lucrative financial deals, Sweeney suggested it was a fight for the “freedom of people who bought smartphones to install apps from sources of their choosing, the freedom for creators of apps to distribute them as they choose, and the freedom of both groups to do business directly.”
Sweeney also acknowledges the argument that some may see the fight as “just a billion-dollar company fighting a trillion-dollar company about money” before admitting “there’s nothing wrong with fighting about money.”
He qualifies it by declaring, “You work hard to earn this stuff. When you spent [sic] it, the way it’s divided determines whether your money funds the creation of games or is taken by middlemen who use their power to separate gamers from game creators.”
“The fight isn’t over Epic wanting a special deal, it’s about the basic freedoms of all consumers and developers,” Sweeney proposed.
It is worth remembering that Sweeney’s position may not necessarily be entirely altruistic. “Fortnite” is an extremely high earner for Epic, including through in-app purchases on iOS, and has been ever since it first appeared on the App Store in 2018.
As for Epic itself, Chinese tech giant Tencent has a 40% stake in the company. Tencent has been in disagreements with Apple in the past regarding payment processing, with a 2018 spat involving WeChat money transfers between individuals outside of Apple’s payment systems resolved with a “mutual understanding.”
Courting allies
To try and strengthen its position in the Epic vs Apple fight, Epic reportedly sought to find other companies with a similar opinion of the App Store. Epic allegedly contacted other companies in a matter of weeks to try and create a so-called “coalition” of Apple critics.
The list of companies supposedly included Spotify, who did come out in support of Epic’s legal action shortly after it was filed. Spotify is already engaging Apple via an antitrust complaint since 2019.
While it is neither clear if a coalition exists nor what its specific purpose would serve, Epic has seemingly received what it wants in the form of multiple hot-takes criticizing Apple from various corners of the tech industry.
Newspaper pushback
On August 20, a group of major newspaper publishers contacted Tim Cook to urge a change to subscription fees, spurred on by the Epic fight. Current policy has the App Store commission fee set at 30% for the first year’s subscription to a publication via an app, but for subsequent years it reduces down to 15%.
The group of publications, including the Wall Street Journal, the New York Times, and the Washington Post, instead want the 30% charge removed in favor of a reduction down to 15%.
As part of the letter written by trade body Digital Content Next, the group refers to a deal Apple made with Amazon in 2016 that would take a 15% cut of transactions for customers signing up for a Prime Video subscription as an in-app purchase. The letter asked that Apple “clearly define the conditions that Amazon satisfied for its arrangements so that DCN’s member companies meeting those conditions can be offered the same agreement.”
Korean investigation demands
Meanwhile, in Korea, a group of companies has petitioned the Korean Communications Commission, claiming Apple and Google’s in-app purchase rules are illegal. The group, the Korea Startup Forum, objected to how much Apple and Google charge and the lack of alternative payment options.
“While the 30 percent commission rate is too high in itself, it is more problematic that they force a specific payment system for the app markets,” said the consortium. Furthermore, this is said to be more unfair to smaller companies who cannot try and negotiate different commission rates with the app storefronts.
It also suggested that both Apple and Google could raise their fees without consultation, potentially reducing developers’ profits or making apps more expensive to consumers.
Apple’s first statement
Apple’s initial public salvo in the battle on August 18 was a relatively straightforward affair, consisting of a plainly-written statement that accuses Epic of being in the wrong, by not rectifying “the problem Epic has created for itself.”
The statement starts with Apple assuring the reader that the App Store is “designed to be a safe and trusted place for users and a great business opportunity for all developers.”
Apple then mentions how Epic is “one of the most successful developers on the App Store, growing into a multibillion-dollar business that reaches millions of iOS customers,” and that Apple wants to keep Epic in the Apple Developer Program and offering apps in the App Store.
“The problem Epic has created for itself is one that can easily be remedied if they submit an update of their app that reverts it to comply with the guidelines they agreed to and which apply to all developers,” reminds Apple.
The statement concludes, “We won’t make an exception for Epic because we don’t think it’s right to put their business interests ahead of the guidelines that protect our customers.”
More public marketing
In a further bid to capitalize on the anti-Apple sentiment of part of its player base, Epic launched the “FreeFortnite Cup” tournament“FreeFortnite Cup” tournament that starts from August 23. The tournament offers a selection of prizes, including digital items such as the “Tart Tycoon” skin resembling the Apple character from the parody ad.
Physical prizes are also offered by Epic, though again with a decidedly anti-Apple leaning. Approximately 20,000 “Free Fortnite” hats, in a design reminiscent of Apple’s “Think Different” merchandise, are being given away. At the same time, 1,200 other prizes include consoles and computers that are also platforms players can play Fortnite on without going down the Apple route.
Epic’s giveaways included clothing parodying Apple’s marketing.
Epic has also made its “Free Fortnite” graphic available to players to print onto their clothing and other items in the event they didn’t win. The asset pack does, however, require users to confirm they will leave the text “Free Fortnite” in place on the graphic when used and not to edit it out to leave the rainbow-colored llama head.
Email chains and Apple’s filing
Apple’s first legal response to the Epic vs Apple lawsuit on Friday was lengthy and interesting for many reasons. It chiefly urged the U.S. federal court in San Francisco to deny Epic’s claims for an “emergency” restraining order that would put Fortnite back in the App Store.
At its core, Apple called out Epic’s behavior of adding its own proprietary payment system that allowed it to bypass the 30% fee as being similar to that of a shoplifter. “If developers can avoid the digital checkout, it is the same as if a customer leaves an Apple retail store without paying for shoplifted product: Apple does not get paid,” the filing states.
The complaint goes on to state Sweeney contacted Apple’s executives asking for a “side letter” from Apple that it would create a “special deal for only Epic that would fundamentally change the way in which Epic offers apps on Apple’s iOS platform,” said Apple App Store chief Phil Schiller.
Specifically, Epic said it wanted to bypass App Store fees by gaining permission to implement direct payment systems. When denied, Sweeney responded informing Apple that Fortnite “will no longer adhere to Apple’s payment processing restrictions.”
The filing, which included a selection of emails between Apple and Epic, refutes Sweeney’s earlier claim of not wanting a “special deal,” as he is seemingly shown to be asking for one.
The email chain starts with a June 30 message from Sweeney to Tim Cook Phil Schiller, Craig Federighi, and Matt Fischer outlining Epic’s intention to use a competing payment processing option. The email also states a wish to create “a competing Epic Games Store app available through the iOS App Store and through direct installation that has equal access to underlying operating system features for software installation and update as the iOS App Store itself has, including the ability to install and update software as seamlessly as the iOS App Store experience.”
Epic gave Apple two weeks to confirm “in principle” to permit the competing app store and payment processing. “If we do not receive your confirmation, we will understand that Apple is not willing to make the changes necessary to allow us to provide Android [sic] customers with the option of choosing their app store and payment processing system,” Sweeney’s message concludes.
On July 10, Apple Vice President & Associate General Counsel Douglas G. Vetter contacts Epic’s general counsel Canon Pence about the “disappointing” email, with a lengthy message outlining why Epic is wrong on this occasion. Pointing out how Epic has earned great success with the App Store, including earning “hundreds of millions of dollars from sales of in-app content,” Vetter outlines “Epic could not have achieved this success without great apps, but it nonetheless underscores the value Apple brings to developers like Epic.”
Vetter points to the security and trust of consumers with the App Store, in his argument against the creation of an Epic Store app, including Apple’s investment in significant resources to ensure app “privacy, security, content, and quality” standards. Apple doesn’t allow other app stores to be offered as Apple would have “no reliable way” to maintain its commitments to consumers over the four areas, and consumers would “hold Apple to account for any shortfall in performance.”
Despite assurances the Epic Store would offer protections on device security and consumer privacy, Apple “cannot be confident that Epic or any developer would uphold the same rigorous standards of privacy, security, and content as Apple.”
Referring to a tweet from Sweeney on June 16 about how it is “up to the creator of a thing to decide whether and how to sell their creation,” Apple agrees with the sentiment. “It seems, however, that Epic wishes to make an exception for Apple and dictate the way that Apple designs its products, uses its property, and serves its customers.”
One week later, Sweeney acknowledges the clear answer to Epic’s requests, while also taking a swipe at the decision for the response to be handed over to Apple’s legal team to create “such a self-righteous and self-serving screed.”
Almost a month later on August 13, Sweeney again emails Apple’s executive team and Vetter, advising Epic will “no longer adhere to Apple’s payment processing restrictions,” by introducing direct payments in the Fortnite app.
“We choose to follow this path in the firm belief that history and law are on our side,” writes Sweeney. “smartphones are essential computing devices that people use to live their lives and conduct their business. Apple’s position that its manufacture of a device gives it free rein to control, restrict, and tax commerce by consumers and creative expression by developers is repugnant to the principles of a free society.”
Sweeney signs off by claiming Epic will “regrettably, be in conflict with Apple on a multitude of fronts – creative, technical, business, and legal” if Apple takes “punitive action” by blocking the app or future updates.
Apple’s last two emails in the chain are from Apple, with one explaining how the Fortnite app is in violation of the App Store Review Guidelines in multiple ways, while the other is the email advising of a termination of Epic’s access to the Apple Developer Program, again for several violations.
Epic counter-argues and Microsoft agrees
On August 23, Epic filed a rebuttal to Apple’s court filing, attempting to poke holes in Apple’s arguments against Epic’s injunction motion the day before it takes place.
Epic’s reasoning included calling Apple’s argument Epic’s requested relief to prevent the revocation of tools as “mandatory rather than prohibitory” as incorrect. Epic stated it wanted to “preserve the status quo.”
On how Apple believes revocation is authorized by contracts, Epic says this is wrong, as Apple “fails to acknowledge the multiple contracts between Apple and Epic affiliates and programmers,” namely licensees.
Arguments about how the “balance of equities tips” in Apple’s favor and the motion’s harm to “the public interest” are both dismissed by Epic as they don’t include actual claims that apply to revoking access to developer tools to work on Unreal Engine.
Fortnite played on a MacBook Pro
For Apple’s claim Epic hasn’t provided evidence its Unreal Engine business would be “significantly harmed,” Epic refers to multiple declarations included with the original motion, as well as other elements that surfaced since the filing.
This includes a declaration from Microsoft, where it confirms it has an “enterprise-wide, multi-year Unreal Engine license agreement,” and that it has put significant resources into customizing the engine for its own products, including for iOS devices.
“Denying Epic access to Apple’s SDK and other development tools will prevent Epic from supporting Unreal Engine on iOS and macOS, and will place Unreal Engine and those game creators that have built, are building, and may build games on it at a substantial disadvantage,” writes Microsoft.
Epic also goes as far as to declare “The breadth of Apple’s retaliation is itself an unlawful effort to maintain its monopoly and chill any action by others who might dare oppose Apple” in the filing.
Even-score hearing
On August 24, the companies met with U.S. District Court Judge Yvonne Gonzalez Rogers for the first legal hearing of the Epic vs Apple affair.
In the ruling, Epic was found to be unable to demonstrate irreparable harm from Apple’s ban of Fortnite, and that it was a situation of Epic’s own making. Epic’s arguments failed to outweigh “the general public interest in requiring private parties to adhere to their contractual agreements or in resolving business disputes through normal, albeit expedited, proceedings.”
Apple argued that Epic’s integration of direct payments was intentionally made to kick off the legal scrum, which Epic’s lawyers later admitted was true, as it was necessary to force Apple’s hand.
While Fortnite is off the App Store and will remain so for the immediate future, Apple was ordered to not take action against Epic Games International’s developer account. The SARL entity is responsible for licensing Epic’s Unreal Engine, and a ban on that account’s access would restrict updates to the engine, and would hurt developers licensing the software by extension.
“Apple has chosen to act severely, and by doing so, has impacted non-parties, and a third-party developer ecosystem,” wrote Rogers. “In this regard, the equities do weigh against Apple.”
“Epic Games and Apple are at liberty to litigate against each other, but their dispute should not create havoc to bystanders. Certainly, during the period of a temporary restraining order, the status quo in this regard should be maintained,” the motion states.
Apple applauds court
Following the California court ruling, Apple issued a statement to AppleInsider and other venues applauding the decision.
“We thank the court for recognizing that Epic’s problem is entirely self-inflicted and is in their power to resolve. Our very first priority is making sure App Store users have a great experience in a safe and trusted environment, including iPhone users who play ‘Fortnite’ and who are looking forward to the game’s next season,” Apple said.
“We agree with Judge Gonzalez-Rogers that ‘the sensible way to proceed’ is for Epic to comply with the App Store guidelines and continue to operate while the case proceeds. If Epic takes the steps the judge has recommended, we will gladly welcome ‘Fortnite’ back onto iOS. We look forward to making our case to the court in September.”
A hearing on a motion for preliminary injunction against Apple is scheduled for late September.
Epic says it won’t make changes
On August 26, Epic Games told players of “Fortnite” not to expect updates to the app, as Apple was “blocking” updates and new installations via the App Store. While true, the statement avoided mentioning how the situation arose after Epic baited Apple.
The season update on August 27 would be available on all other platforms the game can be played on, but not iPhone, iPad, nor Mac.
The addition to the game’s support pages suggests Epic will continue to refuse to comply with Apple’s guidelines for the foreseeable future, leaving the future of the game in doubt until after legal activities between the two companies cease.
New volleys between the two companies
On the same day that Apple was set to terminate Epic Games’ developer account, the Cupertino tech giant highlighted a prominent “Fortnite” competitor in a piece of editorial content for the App Store.
The editorial content touts a “new era” of “PUBG Mobile,” and is especially ironic amid the ongoing legal battle because “PUBG Mobile” is created using Epic Games’ Unreal Engine. Apple was also set to shut down Epic Games’ Unreal Engine developer account, which is separate from the one that maintains “Fortnite,” but a judge blocked that supposed retaliation.
Epic Games on the previous night had also sent out emails to macOS and iOS “Fortnite” players that accused Apple of being the sole reason that the popular battle royale title was not on the App Store. In fact, a court declined Epic’s request for a TRO because the situation appeared to be one of its own making.
German antitrust interest
On September 2, it was reported Germany’s Federal Cartel Office were keeping a close eye on the Epic vs Apple legal wrangling, with a view to potentially launch an antitrust probe.
“This has most certainly attracted our interest,” said office chief Andreas Mundt. “We are at the beginning, but we are looking at this very closely.” Mundt went on to point out that the existence of the App Store and the Google Play Store represent “an interesting habitat, because they are the only two worldwide.”
Though it is possible for the Federal Cartel Office to impose fines, it is more likely that officials would try to force changes in the ways the app stores functioned instead.
“Incalculable harm to users”
Epic made a second attempt to convince the court to force Apple into keeping Fortnite available to download on September 5. While the initial attempt was an emergency measure by the company, the new version was a more formal petition to the court.
After being accused of antitrust violations for misusing its power, Apple then “used that same power to try and coerce Epic to abide by its unlawful restrictions,” Epic submitted. It followed up by suggesting Apple’s actions will “cause irreparable harm to Epic, as well as harm to countless third parties and the public interest.”
This apparently included the Fortnite community, in that removing the game from the App Store “cleaved millions of users from their friends and family” and prompting “deafening” user outcry. As of the filing, Epic claimed it had seen a 60% decline of daily active users on iOS.
Epic also reasoned that the “balance of harms tips strongly in Epic’s favor, in that it stood to lose considerably more than Apple, which would “at most lose some commissions from Epic.”
The filings included numerous declarations from key Epic staff, communications between the two companies, a document from a co-executive director of the Jevons Institute for Competition Law and Economics at University College London about Apple’s antitrust issues, and a selection of consumer emails.
Apple fires back at Epic, seeks damages for breach of contract
In a counterclaim on September 8, Apple called the Epic Games lawsuit “nothing more than a basic disagreement over money.” The Cupertino tech giant added that “although Epic portrays itself as a modern corporate Robin Hood, in reality it is a multi-billion dollar enterprise that simply wants to pay nothing for the tremendous value it derives from the App Store.”
Apple reiterated that Epic fired the first volley in the legal saga with its direct payment system in “Fortnite.” The counterclaim, filed in the U.S. District Court for the Northern District of California, calls Epic Games’ behavior “willful, brazen, and unlawful,” adding that Epic has made more than $600 million from the App Store.
Additionally, Apple alleged that Epic’s implementation of a direct payment system bypassing its App Store comissions was a “sneak assault” on the app marketplace.
The filing asks the court to hold Epic liable for breach of contract, and seeks restitution of the revenue that “Fortnite” made through its direct payment system. It also asks for a permanent injunction banning the direct payment system across all of Epic’s apps on the App Store.
Goodbye “Sign in with Apple” — or not
On September 9 , Epic Games told consumers Apple “will no longer allow users” to authenticate using Sign in with Apple for Epic Games accounts as soon as September 11, warning consumers to update their accounts to move away from it.
The following day, Epic advised Apple provided an “indefinite extension” to Epic Games’ access to Sign in with Apple. However, it still recommended users update their accounts anyway.
In a statement, Apple said it wasn’t actively seeking to disable compatibility with Sign in with Apple.
On September 9 , Epic Games CEO Tim Sweeney wrote about how Apple was missing the bigger point of Epic’s actions. The thread, which suggested Apple was oversimplifying Epic’s actions in its countersuit, attempts to sway the court of public opinion over the matter.
Sweeney claims Apple has overextended its reach over consumer devices, that all users should be able to install software freely, and developers should be able to create and share apps as they wish.
After poking at Apple’s famous 1984 commercial and insinuating the current situation is “exactly what” the ad spot was about, he goes on to say Epic’s parody was striking back against an unfair system. Apple allegedly erodes the rights of consumers and developers by being an intermediary to “exert control and extract money.”
App Store guidelines massaged for gaming services
On September 11, Apple adjusted some of its App Store guidelines to make it possible for online game streaming services to exist on iOS, such as Microsoft Xcloud and Google Stadia. Though not directly connected to the Apple and Epic fight, they are covering similar territory.
Apple doesn’t allow an Apple Store within the App Store, as Epic wanted to implement, but does allow for the games on such streaming services to be submitted to the App Store as an individual app, including having its own App Store product page, appears in charts, can be reviewed, managed with ScreenTime, and comply with other App Store rules.
The “catalog app” must also comply, including providing an option for users to “pay for the subscription with an in-app purchase” and use Sign in with Apple, as well as linking to games on the service by pointing users to App Store listings instead of its own website.
Crucially, the rules still allow a service to enable off-app purchase confirmations, allowing access to content without using Apple’s payment mechanisms, but that must be done outside the app completely, and not how Epic implemented it as a separate in-app payment option.
In a filing on September 16, Apple accused Epic of using the whole App Store “Fortnite” dispute as promotion for the game, which Apple thought was declining in popularity on iOS.
“For reasons having nothing to do with Epic’s claims against Apple, Fortnite’s popularity is on the wane,” says Apple’s filing. “By July 2020, interest in Fortnite had decreased by nearly 70% as compared to October 4 2019. This lawsuit (and the front-page headlines it has generated) appears to be part of a marketing campaign designed to reinvigorate interest in Fortnite.”
Apple also denied that Epic had suffered its claimed reputational harm, suggesting “Epic has engaged in a full-scale, pre-planned media blitz surrounding its decision to breach its agreement with Apple, creating ad campaigns around the effort that continue to this day.”
“If Epic were truly concerned that it would suffer reputational injury from this dispute, it would not be engaging in these elaborate efforts to publicize it,” it continues. “From all appearances (including the #freefortnite campaign), Epic thinks its conduct here will engender goodwill, boost its reputation, and drive users to Fortnite, not the opposite. That is not harm.”
Epic denies marketing exercise
In a rebuttal, Epic counters Apple’s claims as it had “cherry-picked” the data. Apple’s 70% claim apparently was sourced from Google Trends data for search volumes, which started with a spike in interest caused by a popular in-game event.
In reality, Epic insists it saw increased daily user figures over the same ten-month period of “more than 39%.”
The filing fired back by refuting Apple’s claim “it is no monopolist,” due to a comparison where smartphones were “interchangeable” with computers and gaming consoles for the comparison of digital stores. Epic declared “that assertion is contrary to basic antitrust principles and common sense: a Sony PlayStation does not fit in your pocket but a smartphone does.”
The Coalition for App Fairness
On September 29, the Coalition for App Fairness was formed by a number of big-name app developers. The non-profit aims to highlight issues developers face when developing for the App Store.
The group of developers includes Epic Games, Spotify, and Tile among its founding members, as well as Deezer, Match, News Media Europe, and ProtonMail, among others.
The creation of the group occurs at a sensitive time for Apple, due to it also being under multiple antitrust investigations over its App Store dealings.
It published a list of ten principles that should be followed by app stores, and include many gripes mentioned previously by Apple’s critics. They include a decentralization of app hosting, a prevention of self-preferential practices, and a lowering of Apple’s commission cuts.
The Next Hearing
Apple and Epic Games are due to attend a court hearing at the U.S. District Court for the Northen District of California over the affair. AppleInsider will report on arguments and rulings that take place.
Hearing 2
During a lengthy and animated hearing on September 28 , Apple and Epic took turns trying to argue their case to Judge Yvonne Gonzalez Rogers. Epic was seeking a reinstatement of the Fortnite app in the App Store and for accounts linked to the Unreal Engine be protected from any further harm from Apple.
Judge Rogers was seemingly unconvinced by Epic’s arguments throughout the two-hour hearing. Among the issues was Rogers highlighting it was a matter of Epic’s own doing during times when Epic’s lawyers were urging there was harm suffered by Apple’s actions against it, and that Epic had forced Apple’s hand in the matter.
Rogers also pushed back against Epic’s repeated claims Apple was a monopolist, and admonished Epic for not being “forthright” with Apple itself. The judge even took time to call out Epic’s odd argument that Apple couldn’t compare a smartphone to a game console due to its size and portability, which Rogers countered by referencing that the Nintendo Switch exists in such a form.
The Judge made the suggestion the trial should be held in front of a jury, as it is a matter that are “important cases on the frontier of antitrust law.” Rogers also proposed the opinions of a federal judge may not be as useful as those of the general public, since “it is important enough to understand what real people think.”
Rogers set a deadline of January 6 for the filing of data for the trial, but the trial itself would take place sometime in July 2021, on a date to be determined.
A decision on Epic’s demands was to be declared at a later time.
Another still from Epic’s parody of Apple’s ‘1984’ Super Bowl commercial
Hearing 3 without a jury
On September 30, both Apple and Epic filed with the court that, after conferring, the decision should be made by the court itself and not the public.
Apple was originally pushing for a jury trial but withdrew its request to streamline proceedings. Mentioning Judge Roger’s admittance in a preliminary hearing that she didn’t want to “try two cases” and was “inclined to try both cases at once,” Apple said it was willing to forego a jury trial to get the ball rolling.
‘Fortnite’ stays out of App Store
On October 9, an Epic vs Apple ruling from Judge Rogers was published, with results mixed for both Apple and Epic. While Epic was able to protect the Unreal Engine-linked developer accounts, it was denied a request to force Apple to reinstate ‘Fortnite’ to the App Store.
“While consumers are feeling the impact of this litigation, the fact remains: these are business disputes,” said Rogers in the ruling about ‘Fortnite.’ “A punitive class action on behalf of all developers on these exact same issues was already in progress when Epic Games breached the agreements. Yet, Epic Games has never adequately explained its rush, other than its disdain for the situation. The current predicament is of its own making.”
For the Unreal Engine, Rogers feels removing access to accounts would be harmful to developers. “Apple’s aggressive targeting of separate contracts in an attempt to eradicate Epic Games and its affiliates fully from the iOS platform was unnecessary and imperiled a thriving third-party developer ecosystem,” wrote the Judge.
In a statement to AppleInsider, Apple expressed gratefulness on the court as it “recognized that Epic’s actions were not in the best interests of its own customers and that any problems they may have encountered were of their own making when they breached their agreement.”
Lack of discovery
A joint filing on October 13 ahead of a case management conference scheduled for October 19 had Apple and Epic complaining about how the other party is handling the discovery portion of the lawsuits. Both are claiming the other is being uncooperative, in different ways.
Epic accused Apple of failing to provide all of the needed documentation, with Apple’s list of custodians used to collate and supply relevant documents reportedly excluding co-founder and late CEO Steve Jobs and current CEO Tim Cook.
Epic also said Apple “repeatedly relied” on the two men during its earlier motion hearings, but Apple countered by pointing out they were referred to twice, namely Tim Cook’s statement to the U.S. House of Representatives Judiciary Committee and “an AppleInsider article quoting Steve Jobs.”
Apple says it has provided Epic with “the 3.6 million documents” produced by Apple during its developer class action and consumer class action suits, though Epic believes they could have been provided sooner.
Epic claims it has made “an initial production of more than 16,000 pages from the files of Timothy Sweeney,” Epic’s CEO, but Apple believes Epic may have “cherry-picked” the documents that may “omit a significant amount of relevant materials.”
Apple also claims Epic received a third-party discovery request before it formed its lawsuit against Apple, to which Epic allegedly told Apple to “just wait a bit,” then filed the lawsuit before responding to the subpoena.
Epic denies theft
On October 23 , Epic made another filing to the court, arguing its actions are a “far cry from the tortious – even purportedly criminal – conduct that Apple’s Opposition depicts.” This is in reference to Apple’s claims that “Epic’s flagrant disregard for its contractual commitments and other misconduct has caused significant harm to Apple.”
“Simply put, Epic did not ‘steal’ anything that belonged to Apple. Epic could not and did not ‘steal’ the proceeds from the sales of its own creative efforts. Nor did Epic interfere with any prospective economic advantage Apple sought to gain from ‘Fortnite’ users separate and apart from their interest in ‘Fortnite,” the filing claims.
Epic then accuses Apple’s theft accusation of boiling down to the “extraordinary assertion that Epic’s collection of payments by players of Epic’s game to enjoy the works of Epic’s artists, designers, and engineers is the taking of something that belongs to Apple.”
Epic was “forced to agree to make Apple its agent” for Apple Store sales as part of the license agreement, then openly admits “by offering ‘Fortnite’ users the choice of making purchases directly from Epic, Epic breached those contractual provisions (assuming they are legal.)”
Epic credits players
On November 10, Epic issued credits to macOS and iOS “Fortnite” players who bought the V-Bucks in-game currency, allowing them to use their purchases on other platforms while updates to the iOS and macOS versions of the game were effectively blocked.
Players on macOS received a credit the equivalent to unspent V-Bucks bought from Epic directly, while iOS players received the equivalent for the currency bought via the App Store itself.
Apple counterclaims limited to breach of contract
In a November 11 filing, Judge Yvonne Gonzalez Rogers of the U.S. District Court for the Northern District of California granted Epic a motion for judgment on tort-based counterclaims leveled by Apple. In effect, this tossed all of Apple’s counterclaims, except those relating to a breach of contract.
Apple had defended its arguments by insisting Epic “is stealing money from Apple,” and “The victim of theft has always had the right to sue for conversion to get its property back from the thief – irrespective of the technical means by which the conversion is accomplished.”
The Judge believed Apple had failed to show any independently wrongful act on Epic’s part beyond a breach of contract.
The Fight in Australia
On November 18, Epic filed a complaint with the Federal Court of Australia, bringing the Epic vs Apple legal fight to a new continent. Apple was accused of “substantially lessening competition” and a “misuse of market power,” echoing arguments in its US-based lawsuit.
“Apple has locked down and crippled the ecosystem by imposing an absolute monopoly on distribution and through the restrictions placed on in-app purchases,” Epic argues. “They are preventing entire categories of business and software applications from being developed in their ecosystem and this excessive control is bad for competition, choice, and innovation.”
Just like the U.S. battle, Epic is not seeking damages in Australia against Apple.
Apple wants Australian case tossed
The following month in December, the first hearing in the Australian case had Apple arguing Epic Games had contractually promised to settle disputes and litigation in the U.S. District Court for the Northern District of California. As such, Apple wanted the case in Australia to be tossed.
Epic’s argument to the court was that the case concerned “great competition harm,” and breached Australian law.
Federighi and Cue depositions demanded
On December 16, lawyers for Epic Games demanded Apple’s Craig Federighi and Eddy Cue be deposed as part of the U.S. trial. Both companies worked on preparing testimony and depositions, with Epic’s request being part of its effort to discredit Apple.
Epic’s lawyers explained to U.S. Magistrate Judge Thomas S. Hixson that Epic should be permitted the depositions of the two executives. Hixson postponed the decision on the request, but told Apple it would need to prove “extraordinary circumstances” if the pair were not to be deposed at all.
At that time, Apple had reportedly accepted 14 calls for witness depositions, including a four-hour session with CEO Tim Cook.
Epic also added it was too early to decide which witnesses were needed for the case.
In another bid to garner support, Epic Games and Samsung organized a guerrilla marketing campaign on December 21. This involved sending out care packages to influencers branded with the “Free Fortnite” logo and text.
Packaged in an Apple-style box, the package included a $160 Alpha industries MA-1 bomber jacket with embroidery, and a Samsung Galaxy Tab S7.
A ‘Free Fortnite’ care package sent to influencers.
Cook to undertake seven-hour deposition
Back in the United States, U.S. Magistrate Judge Thomas S. Hixson ruled on February 1 that Tim Cook must undergo a seven-hour deposition. At the same time, he denied an attempt by Apple to subpoena Samsung over how the game is distributed.
Hixson disagreed with Apple’s argument against it and in excusing Cook from the process, suggesting the argument “limits the length of a deposition, rather than barring it altogether.” Apple’s compromise of four hours was deemed inadequate.
“In these three antitrust actions, the facts of the case go way beyond the historical facts of what happened when,” the court concluded. “There is really no one like Apple’s CEO who can testify about how Apple views competition in these various markets that are core to its business model.”
On the request by Apple to subpoena Samsung for internal documents, Hixson denied it by describing it as “almost quirky.”
Samsung is not a party to the case.
“Frustrating” Apple to hand over payment processing info
On February 2, Magistrate Judge Hixson ordered Apple to hand over payment processing documentation, using its “best efforts” to produce them. This was in response to previous requests that Apple argued would take time to produce due to the size of the company.
“You’re not really offering a solution to this problem,” said Hixson to Apple’s counsel, Jay Srinivasan of Gibson Dunn & Crutcher. “You’re just saying No, we can’t do it.’ That feels frustrating and unsatisfactory to me.”
Apple countered that it had already produced some 10 million documents during the discovery process, versus Epic’s 5 million. Furthermore, it claimed some of the information requested by Epic could have been produced as part of the existing document haul, and that Epic was still holding out on some information.
Epic goes to the Australian Competition and Consumer Commission
With a lawsuit in Australia not enough for Epic Games, the company took its Epic vs Apple legal dispute to the country’s regulator on February 4 . It told the ACCC that Apple’s “unrestrained market power” is suppressing competition and innovation, and is artificially raising the price of iPhone and iPad apps.
The forced “30% Apple Tax” accentuates the pricing, Epic said, insisting the true commission should be closer to single digits.
“Apple’s conduct is symptomatic of unrestrained market power that results in significant harm to Australian consumers and the competitive process. In the absence of these anti-competitive restraints, app developers would have a greater ability to distribute their apps, leading to increased competition and innovation to the benefit of Australian consumers,” Epic’s submission reads.
Previously, Epic had praised the ACCC for investigating the App Store for alleged abuse of power.
Epic spent months planning App Store dispute
Epic’s decision to introduce a payment processing option to “Fortnite” was premeditated, Epic Games CEO Tim Sweeney confirmed in a February 10 interview. Months were spent on a battle plan, beginning in August 2020.
The planning enabled Epic to have a 60-page lawsuit at the ready, as well as a parody video, in what was known internally as “Project Liberty.”
“Epic’s frustration with Apple especially, and Google to some extent, had been building up for at least three years,” said Sweeney. “Ever since Fortnite grew to have a large audience, we felt stifled by several things.”
Sweeney goes on to claim the effort is to encourage free markets, and that the company was willing to invest heavily in the attempt to change the software industry. He did not reveal how much in legal fees or lost sales the project has cost so far, but did admit it cost “lots and lots” of senior leadership time.
Epic Games lobbyist-crafted App Store legislation rejected in North Dakota
A bill in North Dakota that would have forced Apple into allowing alternate payment mechanisms and app downloads outside the App Store was allegedly created with the assistance of Epic Games, it appears. On February 16, it was claimed draft legislation for Senate Bill No. 2333 was handed to lawmakers by a lobbyist hired by Epic Games.
Lobbyist Lacee Bjork Anderson, hired by Epic as well as the Coalition for App Fairness, is said to have provided North Dakota State Senator Kyle Davison the draft legislation of the bill. It was apparently equated as a way to “stop Apple and Google from forcing companies in the state to hand over a share of their app sales.”
Later in the same day that Epic’s alleged involvement leaked, the North Dakota State Senate rejected the measure.
The bill was seemingly crafted to hurt Apple the most if voted in and enforced. For example, it excluded game consoles from being affected by it, while the Google Play Store already allows alternate app marketplaces to exist.
While it failed in North Dakota, the fight over app store rules is far from over. The New York Times reports that lawmakers in Georgia and Arizona are considering nearly identical legislation. A state representative in Massachusetts said he was considering introducing a similar bill, and app store legislation is also being pushed in Wisconsin and Minnesota.
Epic Games files antitrust complaint against Apple in EU
After North Dakota rejected the anti-Apple bill, filed an antitrust complaint with the European Union against Apple, continuing the two companies’ dispute over the App Store. Despite being in disagreement with both Apple and Google, Epic Games singled out Apple for the complaint, which the “Fortnite” developer says has eliminated competition.
“What’s at stake here is the very future of mobile platforms.” says Epic Games CEO Tim Sweeney in a company blog post about the complaint. “Consumers have the right to install apps from sources of their choosing, and developers have the right to compete in a fair marketplace.”
“We will not stand idly by and allow Apple to use its platform dominance to control what should be a level digital playing field,” Sweeney continued. “It’s bad for consumers, who are paying inflated prices due to the complete lack of competition among stores and in-app payment processing. And it’s bad for developers, whose very livelihoods often hinge on Apple’s complete discretion as to who to allow on the iOS platform, and on which terms.”
The blog post says the company “has faced and been harmed by Apple’s anti-competitive restrictions.” It states that Apple’s removing “Fortnite” from the App Store was retaliation for Epic Games giving users a way to pay the developer directly.
Epic did not mention Google in the blog post or the E.U. complaint, despite Google removing “Fortnite” from the Play Store simultaneously, and for the same reason, as Apple. The post also implied that Epic Games has been forced into this dispute following Apple’s actions but does not mention that CEO Tim Sweeney has admitted spending months on a “battle plan” beforehand.
Apple has not responded to the E.U. antitrust filing. However, it has recently commented that “Epic’s problem is entirely self-inflicted and is in their power to resolve.”
Valve pushes back on Apple store data request
On February 19, a court filing revealed Apple had demanded Valve Software produce sales data relating to its Steam storefront. Apple wanted the data to demonstrate the sale and distribution of video games since 2015.
Apple wanted yearly sales of apps and in-app products, annual advertising revenue, sales of external products attributable to Steam, as well as annual revenues and annual earnings of Steam itself. There were also requests for lists of the name of each Steam store app, dates of availability, pricing, and in-app product details, as well as one for historical sales data.
Valve pushed back as the requests were burdensome, though technically available. With a large number of steps to be taken for each individual app, this becomes an overwhelming amount of work.
Furthermore, Valve claims that since it doesn’t make or sell smartphones or tablets, nor sells games for either, it shouldn’t be in the conversation at all. The Steam store sells PC and Mac games, not mobile titles, and it certainly doesn’t offer Fortnite, a game available directly from Epic’s storefront.
Apple’s requests stem from a repeated demand form the court for Apple and Epic to mutually define the market for the case to proceed. Apple believes this covers the entire gaming market, taking into account the similarity of App Store pricing to that of console game stores and Steam.
Epic favors a much narrower definition than Apple.
Epic’s UK complaint stumbles over jurisdiction
Epic’s January 14 complaint in the UK was stopped on February 22, following a ruling by the Competition Appeal Tribunal. Justice Roth ruled that Epic’s legal complaint couldn’t be properly tried in the UK, as the court lacks jurisdiction.
Epic’s complaint was against Apple UK and Apple US, with the former being a subsidiary of the latter. Both were being attacked in the complaint, with Epic reasoning the UK arm provided support to UK developers of apps that go into the App Store.
Justice Roth decided that Apple UK was “not a party” to developer agreements, nor responsible for the decisions of Apple US over which apps appear in the App Store. It was “difficult” to see how Apple UK could be liable for competition law breaches incurred by Apple US, the judge offered.
Furthermore, as the court didn’t have jurisdiction over the US arm, the complaint could not continue against Apple as it stood.
However, elements of the complaint were still able to proceed against Google, which was the second target of Epic Games.
Arizona bill tries to allow third-party payment systems
After a failure in North Dakota, another bill surfaced on February 22 that was similar in nature. The bill in Arizona, slated for a vote in the state’s House of Representatives, is limited in that it deals with payments, not third-party app storefronts.
The bill does try to push for third-party in-app payment systems to be adopted. In the bill’s language, companies whose downloads from Arizona users exceed 1 million are prohibited from requiring specific in-app payment systems be used as the only mechanism.
There are also provisions to prevent retaliation for app makers who use a third-party payment system. More pointedly, there is similar language used to carve out gaming consoles and music players from the proposed rules.
Bill co-sponsors State Reps. Regina Cobb and Leo Biasiucci, claim the bill could end the “monopoly” of Apple and Google on their respective mobile ecosystems.
An Arizona House Appropriations hearing was attended by Apple representatives, touting how the App Store has democratized software by bringing up earlier development and distribution burdens for developers, which would have been more costly before the advent of the App Store.
Scott Forstall goes missing
In a February 23 update to the Epic vs Apple legal action, Apple advised it was having trouble getting in touch with Scott Forstall, the former SVP of iOS at Apple. Forstall was offered for a deposition in December, which Epic accepted and believed Apple would provide dates for it to take place.
By February 5, ten days before the end of discovery, Apple informed Epic that Forstall had failed to respond to inquiries for a deposition. Apple provided Epic with a PO Box and a Twitter handle when asked for contact details from Epic, but claimed it wasn’t authorized to share Forstall’s phone number.
Former SVP of iOS Scott Forstall in a 2020 virtual interview.
Epic requested for Forstall’s deposition to take place after the discovery period, with Apple seemingly agreeing to an arbitrary deadline of March 10.
In a filing to the court, Apple claimed it didn’t object to a deposition of Forstall and that it indicated it expected its own counsel to represent Forstall at his deposition. Apple “never suggested” it would compel Forstall to attend.
Forstall has kept a very low profile, with his last major public outing occurring in May 2020. His Twitter account was last updated on October 29.
Apple “salted the earth” with data requests as the judge orders Valve to hand over data.
Valve Software failed in its bid to stop a request from Apple for data on games sold through the Steam gaming service, in a February 25 update to the US lawsuit. Magistrate Judge Thomas Hixson approved the request for data on 436 games sold on Steam, but limited it to a four-year period going back to 2017.
In his ruling, Hixston noted that Valve wasn’t the only company to have received a request from Apple, though didn’t state which others were affected. The judge’s response also suggested he was wary of Apple, with the iPhone maker having “salted the earth” with its many legal requests.
Valve has until a pre-trial hearing in March to produce the data.
Minnesota joins in with anti-App Store bill
Continuing the trend, a third bill surfaced in Minnesota on February 26 that wants to enable app developers to bypass the App Store’s in-app purchases mechanism. Echoing the other two states, the bill wants to allow developers to use third-party payment mechanisms, instead of being restricted to Apple and Google’s respective systems.
Like the Arizona bill, the Minnesota version steers clear of North Dakota’s inclusion of alternative app storefronts. It does include elements to prevent tech giants from retaliating against developers for using other payment systems.
Apple-Epic lawsuit trial to take place in May, possibly in-person
District Judge Yvonne Gonzalez Rogers decided that the trial between Apple and Epic in the Northern District of California should take place in May. Decided during a management conference on March 1, Judge Gonzalez indicated she preferred it to occur on May 3 at the earliest.
The trial is also one that Judge Gonzalez wants to hold in person, rather than doing it virtually. This would force witnesses to attend the physical courtroom in person, as well as quarantining for two weeks after the event.
The in-person trial was due to the case being important enough to do so in a non-virtual way, said the judge. There is also the suggestion that the witnesses may be more truthful in their testimony after being sworn in at the court itself.
Measures will be put in place to protect everyone involved, including appropriate social distancing and limiting admittance. Allowances for remote testimony would be provided, in cases of poor health or where travel is impractical.
While the court is intended to be a physical in-person session, the continuing troubles with COVID-19 could force the trial back online. Even so, Judge Gonzalez is keen for it to still take place in May.
Arizona voters appear to support App Fairness bill
A poll sponsored by the Coalition for App Fairness and conducted by Data Orbital suggests residents in Arizona are in favor of the state’s HB2005 proposals to break up App Store payment monopolies.
Results released on March 16 point to there being a 69% share of people for the bill, and 18.9% were not supportive. Another 11.8% of the 550 people surveyed were undecided on the matter.
When asked if tech firms have “too much power and influence over our lives,” 80.6% agreed overall, with 62.2% “strongly” doing so. 77.4% agreed that firms like Apple and Google “are large monopoly companies that put their own interest before the needs of small businesses and individuals.”
Elements of the survey are somewhat questionable, as participants weren’t given the whole story about the topics at hand. For example, while they were informed of the 30% commission fees, the policy of discounting the app commission down to 15% for companies earning less than $1 million wasn’t raised. Nor was the discounting of the same fee for app subscriptions that go on beyond a year.
Cook, Forstall, other executives set to testify
A tentative witness list submitted to the U.S. District Court for the Northern District of California on March 19 has Apple providing 11 current and former executives linked to the App Store for live questioning. A number of others will be available for deposition.
Those who will be offering live testimony include:
- CEO Tim Cook
- SVP of Software Engineering Craig Federighi
- Apple Fellow Phil Schiller
- App Store VP Matt Fischer
- Director of Commerce and Payments Eric Gray
- Senior Director of Developer Technical Services C.K. Haun
- Senior Director of Marketing Trystan Kosmynka
- Senior Director of Partnership Management and Worldwide Developer Relations Shaan Pruden
- Head of Game business Michael Schmid
- Head of Fraud Eng., Algorithms, and Risk Eric Friedman
- Former iOS chief Scott Forstall
Of the list, Cook is anticipated to sit for an hour apiece of examination and cross-examination, and a 10-minute redirect where he will speak on Apple’s corporate values, development and launch of the App Store, and industry competition. Federighi will be required for just over three hours, while Schiller will testify for 11 hours in total.
Epic is expected to bring their own current and former executives as witnesses, including CEO Tim Sweeney, COO Daviel Vogel, former CFO Joseph Babcock, and VP of marketing Matthew Weissinger.
The bench trial is scheduled to start on May 3.
Apple declares Epic as self-serving’ in Australia hearing
During a session on March 23 in an Australian court determining whether to postpone a case on the App Store complaint, Apple has described Epic Games as a Goliath that wasn’t trying to assist local developers. Instead, Epic was in a “self-serving” attempt to change the App Store itself.
Apple’s barrister Stephen Free SC told the court “and the essence of the dispute… is that Epic wants to redefine the terms of access in quite fundamental and self-serving ways.” Epic apparently wanted to ignore its “contractual promise to litigate only in the Northern district of California, he continued, and that Epic’s changes would fundamentally affect Apple’s business model.
In return, Neil Young QC speaking for Epic disputed the limited location litigation by claiming “Mandatory and protective laws of this forum override any private choice of jurisdiction.”
A decision wasn’t made at the time, but Justice Nye Perram said one would be delivered “pretty promptly.”
Court sets schedule for Epic-Apple trial
The March 23 Epic vs Apple pretrial order from the US District Court for the Northern District of California advised the court had reviewed tentative witness lists, and outlined the schedule for the trial itself.
Both sides are to be given 45 hours “to be used in whatever manner they choose for the bench trial.” On top of that, the court will also read up to four hours of deposition for each side, but any time used beyond the allotment will be taken out of the main 45-hour pool.
Deposition designations and counter designations are ordered to be supplied with all objections resolved by April 27, with copies of exhibits to be submitted by April 29.
The court has also ordered the parties to hire a retired judicial officer to resolve any objections. Both sides also must meet and confer to figure out if the deposition designation schedule must be resolved to allow for third-party arbitration of objections.
Trial attendees capped over COVID-19 concerns
On March 26, U.S. District Judge Yvonne Gonzalez Rogers limited the number of people who can attend the California trial in person. Apple and Epic will be limited to a maximum of six people per side in the courtroom at any time.
Attendees must wear masks, regardless of their status of coronavirus vaccination. Members of the press and the public will not be allowed into the courtroom, but will be able to listen to a live audio stream.
Epic adds complaint to UK competition regulator’s App Store probe
On March 4, the UK’s Competition and Markets Authority launched an investigation into Apple and its App Store, following a number of complaints over “unfair terms” for developers and other related accusations. On March 30, it was revealed Epic had joined the effort, by supplying its own complaint to the CMA.
In revealing its support for the investigation into alleged anticompetitive behavior, Epic declared Apple’s control over app distribution and payments “constitute a clear violation of the UK Competition Act of 1998.”
“By kneecapping the competition and exerting its monopoly power over app distribution and payments, Apple strips UK consumers of the right to choose how and where they get their apps, while locking developers into a single marketplace that lets Apple charge any commission rate they choose,” said Epic CEO Tim Sweeney.
Facebook and Apple quarrel over Epic dispute docs
A joint discovery letter filed with the U.S. District Court for the Northern District of California on April 5 reveals issues between Facebook and Apple’s legal team. Apple requested a “limited set of documents” required to cross-examine Facebook’s Vivek Sharma.
The request for around 17,000 documents supposedly relevant to the case is said by Facebook to be an’ untimely, unfair, and unjustified request to redo fact discovery,” with the social network having already provided more than 1,600 documents.
Apple claims Facebook has ignored its requests to send more documents. Facebook countered calling the timing “improper,” as the request was after the end of the discovery period.
Epic lays out its case as the injured party
Court filings from April 8 show Epic believes it has been damaged by Apple’s App Store control and its “arbitrary” review decisions. The lengthy 365-page submission from Epic sets out its case against Apple, with multiple arguments.
Among its arguments is the claim that while Apple says it has to operate the App Store in its current way to keep iOS safe, the same logic falls flat for macOS. In the case of Mac, Epic points out Apple says macOS is highly secure, and doesn’t force developers to sell only through the Mac App Store.
It also attacks assertions the App Review process is robust, including referring to internal documents where Apple’s head of Fraud Engineering Algorithms and Risk Eric Friedman likened App Store defenses to “bringing a plastic butter knife to a gunfight.”
Other items include Apple’s supposed bungling of the “Fortnite Chapter 2” launch, Epic’s knowledge that Apple would probably pull “Fortnite” from the App Store over payments, and surprise at Apple’s move to close Epic’s developer accounts.
Aus case pauses until US trial completes
On April 9, Australian Justice Nye Perram granted Apple a three-month stay of the country’s own Epic vs Apple lawsuit. A permanent stay could occur if Epic doesn’t commence a lawsuit in the U.S. alleging contraventions to Australian Consumer Law during the period.
A further stay can be applied if Epic continues to pursue litigation in U.S. courts, though the case could be brought back in Australia if the California court declines to determine the allegations.
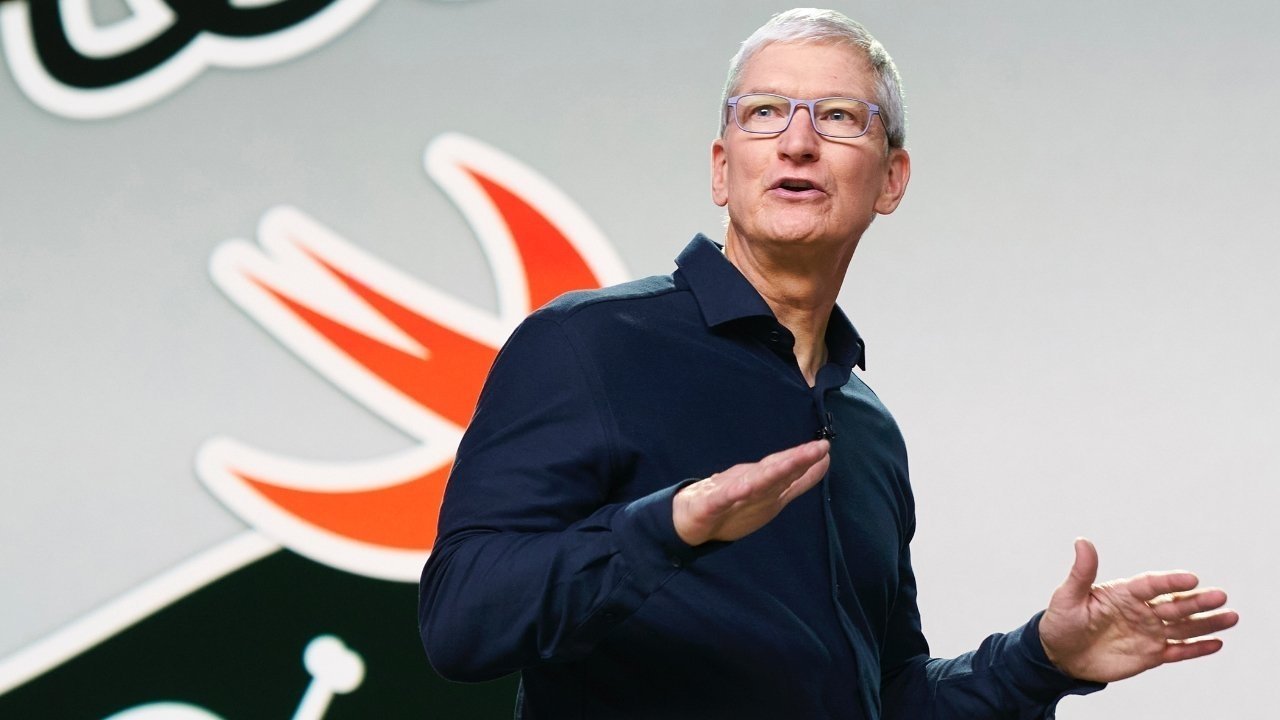
Tim Cook on Epic trial
An April 12 interview about developers in Canada had Tim Cook discussing the Epic Games lawsuit.
In the interview, Cook said of Apple’s supposed dominance “The view I have is Apple’s not dominant in any market it’s in. There’s fierce competition everywhere.”
Cook also believes the heart of the complaint is that Epic wants to use its own payment information, but “that would make the App Store a flea market, and you know the confidence level you have at the flea market.”
On Apple’s chances at the May 3 trial, Cook is upbeat. “I believe if we tell the story, the facts, if we can communicate those clearly, then I’m confident that we should prevail.”
Court warns against trial surprises
An April 12 filing at the U.S. District Court for the Northern District of California had Judge Yvonne Gonzalez Rogers denying a motion by Apple to prevent Epic from allowing certain third-party witnesses from taking part in the trial.
Apple wanted to exclude three witnesses from tech companies, claiming Epic had violated rules by listing employers instead of the actual witness names. Epic rejected the claim, saying it had properly disclosed of the names when it learned of the identities.
The Judge sided with Epic and denied Apple’s motion, before taking a moment to remind both sides of what the Court expects from the trial.
“The Court has repeatedly instructed that trial is not an opportunity for surprises,” the filing reads. “Instead, it is an opportunity for the Court to measuredly consider and weigh the relevant evidence to reach a final determination. This dispute presents no exception.”
Epic secures $200M from Sony
Epic completed a $1 billion funding round on April 13, raising more funds for the company ahead of its legal battle.
Of the disclosed funding, Sony is increasing its minority interest in the company with a $200 million infusion. Others include Appaloosa Management, Baillie Gifford, Fidelity Management, and funds managed by BlackRock, KKR, and ParkWest.
Witness Apple would have to modify software and hardware to enable third-party app stores
On April 14, Apple filed summaries from its expert witnesses ahead of its Epic trial. One of the filings is a rebuttal from Dr. Daniel L. Rubinfeld, claiming Apple would have to “redesign its hardware and software … to make the iPhone interoperable with alternative app stores and with apps that would not qualify under Apple’s app-review guidelines.”
Epic founder Tim Sweeney took to Twitter to call the statement “baloney,” in that iOS already “has a mechanism for users to install apps from the web,” via the Apple Enterprise Program. “Only contractual limitations prevent it from being sued for consumer software distribution.”
Apple provides written witness testimonies
On April 27, filings of Apple’s official written testimonies from its seven expert witnesses were delivered to the court ahead of the May 3 trial. The witnesses are made up of economics professors, legal representatives, and marketing experts.
- Lorin M. Hitt, Ph.D
- Francine Lafontaine, Ph.D
- Richard Schmalensee, Ph.D
- Daniel L. Rubinfeld
- Dominique Hanssens, Ph.D
- Aviel D. Rubin, Ph.D
- James E. Malackowski
Facebook gaming exec dropped by Epic
Facebook’s Vivek Sharma was previously listed to be a witness for Epic against Apple, but on April 28, it was found he was dropped.
The VP of gaming was at the center of a disagreement between Apple and Epic over documentation. Apple wanted a “limited set of documents” from Facebook for the cross-examination of Sharma, a request Facebook called “improper.”
Apple wanted court to block documents ‘inadvertently’ sent to Epic
A trio of documents were sent to Epic concerning Apple’s Small Business Program, which Apple said was inadvertently included in a pre-trial disclosure, a filing on April 28 showed. The three email threads concerned the development of the program, as well as legal discussions about securing the program against potential fraud and money laundering.
Apple claims the documents contained privileged information, and so should not be used by Epic in the trial. Epic reckoned the clawback was improper, and that Apple apparently reviewed the documents previously as being fine, before allegedly “reversing course.”
Epic kept “Fortnite” off MS xCloud over rival viewpoint, Sony’s a bigger Epic revenue source
Epic’s decision to keep Microsoft from hosting “Fortnite” on the xCloud gaming service was because Epic saw it as competition, a deposition that surfaced on April 28 revealed.
While Epic worked with Nvidia to include the game on the similar GeForce Now streaming service, the deposition revealed that Nvidiaagreed that all revenue “Fortnite” made on the platform went to Epic.
As Microsoft doesn’t allow rival app stores to use its platform directly, and doesn’t permit third-party payment platforms either, it is thought this may be another reason for Epic eschewing xCloud.
Documents also revealed that iOS isn’t Epic’s main source of “Fortnite” revenue. While iOS generated about 7% of Epic’s revenue, Sony’s platforms actually provided more revenue, and generated about 46.8% of its income.
App Store revenue estimates
Surfacing on May 1, testimony from Epic’s expert witness Ned Barnes, a financial and economics researcher, offers claims of how much Apple earns from the App Store.
According to the expert, using documents sourced from Apple, the App Store had an operating margin of 77.8% in the 2019 fiscal year, up from 74.9% in 2018.
Furthermore, as Barnes was allegedly informed by an Apple employee that the numbers didn’t show the full picture, the expert made calculations for new estimates. It was suggested the actual percentage was around 79.6% for both years.
Epic’s opening arguments
The trial began on May 3 with Epic offering its opening arguments against Apple. In it, Epic details its complaints, as well as throws in early punches against Apple.
Epic accused Apple of having a monopoly on iOS app distribution and App Store payments, then explained the lawsuit is intended to change the ecosystem for all developers since the “market will not self-correct.”
Epic likened iOS to macOS, with iOS allegedly deliberately made into a walled garden ecosystem. Apple could have easily adopted a more open distribution akin to macOS, Epic proposed.
The 30% fee Apple charges is also brought up, with emails from Apple executives used to show how the company itself considered altering the percentage. Other attacks were also made against the App Store Review process, the seeming uneven treatment of developers, and complaints from developers that Apple’s process is “arbitrary,” “unpredictable,” and “not consistent” in applying its rules.
Epic also covered its own Epic Games Store, which it says sells a variety of apps, including non-gaming apps and tools, and free content. “Fortnite,” the game that sparked the whole saga, is mentions as a social gathering space, while Epic’s “Metaverse” initiative is offered as a way for consumers to undertake experiences within the game involving other brands, such as live concerts or movie viewing sessions.
The opening argument also covered areas including latency in native apps versus streaming apps, and Apple being unaware of instances where customers switched from iOS to Android over app pricing.
Apple strikes back with its opening statement
In response, Apple’s opening statement provided a counter-argument, with Epic’s “Fortnite” revenue seemingly starting to stall. Rather than innovating, Epic supposedly turned to litigation.
“Epic, a $28 billion company, has decided it doesn’t want to pay for Apple’s innovations anymore,” Karen Dunn representing Apple said. “So Epic is here demanding that this court force Apple to let into its App Store untested and untrusted apps and app stores.”
Apple’s privacy and security dramatically outpaced its competitors, and created an opportunity to developers while maintaining quality, trustworthy apps for consumers.
The 30% is an industry-standard, but as most of the apps on the App Store are free, most developers don’t pay anything to Apple. Other monetization options are also available, such as in-app advertising.
Epic’s definition of the market is also said to be too narrow because of “multi-homing,” namely that there are many platforms that “Fortnite” can be played on. The majority of “Fortnite” players are on other platforms, Apple says, with iOS ranked in either third or fourth place, depending on most studies, indicating it is a competitive market.
By enabling alternative app stores and side-loading, Epic is asking Apple to turn iOS into Android and to remove its competitive advantage, the argument continued, something Apple nor its customers want.
Epic Games is said to be urging the court to force Apple into licensing its own intellectual property in a specific way, namely making it a “duty to deal” case. A reference is made to the Qualcomm precedent, where the Ninth Circuit rejected a lower court’s opinion and concluded it had erroneously imposed an antitrust duty on Qualcomm.
In effect, if Epic lost the case against Apple, the precedent could prove to be a major challenge to an appeal.
The margin argument brought by Epic that Apple’s sales margins are huge and that makes the commissions unnecessary are disputed by Apple, because the calculations only apply to one part of the iOS ecosystem. They don’t take into account software costs Apple pays to make the App Store function in the first place.
Apple concludes by pointing out that its business model is shared by many other companies, including Sony, Microsoft, and Nintendo. “If Epic prevails, other ecosystems will fall too,” said Dunn.
Phil Schiller mulled cutting App Store fees in 2011
Emails presented by Epic Games in its May 3 opening argument showed Apple had internally considered changing the 30% fee to another level.
In 2011, Phil Schiller asked Eddy Cue whether “we think our 70/30 split will last forever?” At the time, Schiller called himself a “staunch supporter” of Apple’s 30% cut, but said he didn’t believe it would remain “unchanged forever.”
It was proposed by Schiller that Apple could eventually alter the structure after the App Store reached $1 billion in profit per year, scaling it down to 25% or even 20% while maintaining the profit at $1 billion.
“I know that this is controversial, I just tee it up as another way to look at the size of the business, what we want to achieve, and how we stay competitive,” Schiller said at the time.
Apple has made changes to its fee structures over time, including cutting its commission of second-year subscriptions to 15% in 2016, while in 2020 it launched a program slashing the percentage to 15% for companies making less than $1 million.
Epic Games CEO Tim Sweeney took to the stand on May 3, telling of how Epic “didn’t initially take a critical view of Apple’s policies,” before eventually reaching the “realization of all the negative impacts of Apple’s policy.”
On whether there’s a difference between Apple’s 30% fee and of similar commissions for console-based sales, Sweeney said there’s a “general bargain” in the gaming industry where consoles are sold at a loss and needed game developers. As Apple sells the iPhone at a profit, the same bargain falls flat.
Sweeney was also asked about the “special deal” he wanted Epic to have from Apple. He claims it was more for Epic to come to an agreement with Apple, rather than a request for special treatment.
On the fateful hot-fix with the secondary payment option, Sweeney said he “wanted the world to see that Apple exercises total control over the availability of all software on iOS.”
Moving to V-bucks, the in-game currency of “Fortnite,” Sweeney said there weren’t any real costs to produce them. When Sweeney is asked about selling V-bucks on platforms owned by Microsoft, Sony, and Nintendo, which have policies preventing side-loading and requiring the use of a first-party payment system, Sweeney says Epic continues sales there because it agrees with the business models on those platforms.
Sweeney also confirmed Epic charged developers a 60% fee when it distributed other games on its platform in the 1990s.
Sweeney was also not “completely certain” Apple would pull the game from the App Store, but “hoped Apple would reconsider its policies.”
Apple has third of gaming market transactions, 7% of “Fortnite” revenue
In a note to investors, JP Morgan analyst Samik Chatterjee highlighted on May 4 some of the App Store details brought up during the trial.
For example, Apple estimates it accounts for between 23% and 38% of the total gaming transaction market, supporting its view that Apple doesn’t have a monopoly power over the market.
On “Fortnite,” Apple platforms only made a paltry 7% of Epic’s revenue for the game between March 2018 and July 2020. Meanwhile PlayStation and Xbox combined makes up 75% of revenue.
Apple-Facebook tensions span a decade
Emails raised in the Epic vs Apple lawsuit showed tensions between Facebook and Apple started as early as 2011. Emails between Steve Jobs, Scott Forstall, and Phil Schiller from July 2011 show a discussion between the men and Facebook CEO Mark Zuckerberg about the Facebook iPad app.
Forstall told Zuckerberg that “embedded apps” weren’t to be included in the iPad app, while Zuckerberg insisted it was part of “the whole FaceBook experience.
As a compromise, Facebook wanted to omit its directory of apps within the Facebook app, preventing third-party apps from running in an “embedded web view,” to allow user posts in the news feed related to apps, and for apps tapped in the news feed to switch users to the relevant native app or Safari.
Jobs agreed with most of the proposals, except for the third news-feed suggestion. Jobs also referred to the site as “Fecebooks,” though it is unclear if the term was a typographical error or an insult.
Zuckerberg disagreed with the counterproposal as there was “no obvious way to distinguish” between Facebook developers with relevant integrations.
Schiller chimed in, stating “I don’t see why we want to do that. All these apps won’t be native, they won’t have a relationship or license with us, we won’t review them, they won’t use our APIs or tools, they won’t use our stores, etc.”
Epic would’ve taken a special deal with Apple
On day 2 of the trial, Sweeney was on the stand again, admitting that if Apple said there was a special deal that would only be with Epic and no other developers, Epic would’ve taken the deal.
It appears the question was in reference to earlier attempts by Sweeney to negotiate special treatment, but in an attempt to downplay it by insinuating Apple was unwilling to offer such a deal or negotiate special treatment.
“The long-term evolution of Fortnite will be opening up Fortnite as a platform for creators to distribute their work to users and creators will make the majority of profits,” said Sweeney. “With Apple taking 30% off the top, it makes it very hard for Epic and creators to exist in this future world.”
Sweeney also contacted Tim Cook in 2015 to try and ge a more open App Store. In the request, Sweeney said “The App Store has done much good for the industry, but it doesn’t seem tenable for Apple to be the sole arbiter of expression and commerce over an app platform approaching a billion users.”
He also asked Apple to separate the App Store curation from compliance review and app distribution.
Apple’s Netflix scramble
On May 5, the court heard that Apple had to work to convince Netflix to continue using its payment system, once it learned of the streaming service’s plan to atop offering in-app subscriptions.
In 2018, Netflix ran a trial to understand the value of removing in-app subscriptions in some markets. Internal emails mention “concern” the test would “create a bad customer experience”, and could be a churn issue among subscribers on iOS.
Apple director of App Store Business Management Carson Oliver wrote to other Apple employees asking if Apple should take “punitive measures” in response to the trial. Other emails revealed Apple executives had met with Netflix to try and find a “middle-ground solution.”
Apple also made a presentation to convince Netflix to stick with IAP, as well as suggestions on how Apple and Netflix could work together, including an Apple TV bundle and a “video partner program.” “>Facebook and Apple started as early as 2011. Emails between Steve Jobs, Scott Forstall, and Phil Schiller from July 2011 show a discussion between the men and Facebook CEO Mark Zuckerberg about the Facebook iPad app.
Epic’s dev agreements ban rule-breakers
Apple’s legal team took a moment on May 5 to point out that while Epic is working to show Apple is restrictive in its developer agreements and guidelines against rule-breakers, Epic holds a similar position for implementing rules.
In a line of questioning, Epic Games Technical Director Andrew grant was asked if people cheating in “Fortnite” can be banned, which he answered yes. On a follow-up, Grant was asked if Epic’s brand was based on people having a good experience and that everyone is “on the same level playing field.”
“If the integrity of the game falls apart, and people believe the rules no longer apply to them, then people may no longer be inclined to play the game,” Apple’s lawyers continued, claiming that this could lead to a “downward spiral” of the platform.
Without stating it directly, Apple draws comparisons to Epic’s hot fix that added the secondary payment mechanism. Epic also has its own rules for developers using the Unreal Engine, and its own developer agreements.
Fortnite on iOS, via GeForce NOW
“Fortnite” is set to return to iOS, but not by a direct route. Instead, it is set to return via Nvidia’s GeForce NOW service.
In testimony, a “potential release date” for the game on Nvidia’s game streaming service is identified as October, though without any official announcement confirming as such outside the courtroom.
Nvidia secured the partnership due to making a deal with Epic that passes all revenue earned via the GeForce Now version to Epic directly. This eliminates any fees or commissions from the equation, such as charged by Apple for IAP or by rival service xCloud.
Apple’s “whitelist” for developers
App Store VP Matt Fischer told the court on May 6 about an email conversation with Apple Director of program Management Cindy Lin about automatic App Store subscription cancellations. Fischer wanted to know how Hulu could “switch people from IAP to Hulu Billing.”
Lin responded that Hulu was part of a set of developers with access to a special refund and cancellation feature, which it had used in 2015 to support an instant upgrade using a two-family setup, before Apple introduced built-in subscription upgrade and downgrade capabilities.
Fischer denied Apple gave special access to features to some developers and not others, but that sometimes Apple tests features with a small group of app makers before rolling it out widely.
On Epic, Fischer mentioned another pre-boot incident with Apple, where Epic asked Apple to change the policy to allow in-app gifting. Apple also “dropped everything we were doing and scrambled” to promote the Travis Scott concert within “Fortnite,” claiming it was a “really cool concept.”
Schiller on scam apps in 2012
Phil Schiller was concerned about scams and knock-off apps in the App Store as early as 2012, more documents revealed on May 6 showed.
An email from Schiller to the App Store team about an apparently fake version of Temple Run had Schiller asking “What the hell is this??? How does an obvious rip off of the super popular Temple Run, with no screenshots, garbage marketing text, and almost all 1-star ratings become the #1 free app on the store?”
Schiller also brought up other apps to the attention of the App Store Team, such as a fake palm reading app and another titled “Hide My Fart,” which he insisted “should never have been approved.”
Apple acquired SourceDNA in 2016
The purchase of malware detection startup SourceDNA by Apple is mentioned in testimony, an acquisition from 2016 that went unreported.
The startup, which created automated systems for checking apps for malware and malicious code, was previously being talked to for a potential acquisition by Epic Games in 2015. The XcodeGhost issue at the time apparently generated more interest within Apple to buy SourceDNA, said App Store Review process senior director Trystan Kosynka.
XcodeGhost was malware that had hit multiple apps in 2015, which included tools to secretly record information that violated Apple’s guidelines.
Following the acquisition, Kosmynka claims SourceDNA engineers rebuilt a newer tool based on its technology, which became part of the App Store Review process alongside other tools to catch malware.
Less than 1% of App Store Review rejections appealed
As part of his testimony, Kosmynka discussed App Store rejections and the appeals process. He says one way to look at mistakes is to see that less than 1% of rejections are actually appealed, with the vast majority upheld.
“I think the number of mistakes are a small fraction of the overall effectiveness of the process,” Kosmynka said, adding that Apple acknowledges a mistake has been made based on the number of appeals it receives.
App Store human review stations
On May 7, more information was provided on the App Store human review process, including images of the stations used by staff for app inspection. In one image, many Apple devices are shown, including an iMac, a MacBook Pro, a pair of iPhone models, a few iPads, and an Apple TV.
An App Store human review station.
Documents also reveal data about the App Review process. For example, between 2017 and 2019, for example, there was a 33% to 36% rejection rate for apps. The documents also reveal that about 4.8 million to 5 million apps are submitted each year.
On how long the app update submissions take to process, Kosmynka said “some take hours, some up to a minute.” The rejection rate for apps in 2020 was about 40%, up from previous years. About 215,000 submissions were denied for privacy violations.
Among the top reasons for app rejections, 14% of cases required more information, and 10% were where apps exhibited bugs. Approximately 60% of submissions are updates.
128M iOS users affected by 2015 XcodeGhost malware
Emails revealed during the trial reveal the scope of the XcodeGhost malware hack. A total of 128 million users downloaded more than 2,500 tainted applications, with around 18 million of those users based in the U.S.
The documents also showed Apple’s scramble to work out how serious the attack was and whether to notify victims. The sheer scale meant there were challenges in localizing the email for each country.
A mass-request tool that could have been used to send emails out is also mentioned, but there were limitations in mass emailing 128 million people, such as it potentially taking a week to complete.
Microsoft was denied request to bypass 30% commission
On May 7, an email thread from 2012 was revealed showing negotiations between Apple and Microsoft about its policies. In one case, ahead of the launch of Office for iPad, it seems that a request by Microsoft to work around the App Store commission was denied by Apple.
The email thread had Apple asking if Microsoft wanted to take part in WWDC that year, but Microsoft declined. Microsoft wanted Schiller and Cue to meet MS executives including Kirk Koenigsbauer, which Apple agreed to.
However, Apple was asked by Microsoft to allow the redirection of users to its own website for app purchases, bypassing the 30% fee. Schiller denied the request, stating in the email “We run the store, we collect the revenue.”
Other emails between Apple and Epic surfaced, showing in 2017 Epic executives were keen to meet Apple over the potential use of iPhone face-tracking technology to create animated characters. ARKit discussions continued into 2020.
After the release of the iPad Pro with LiDAR, Apple offered Epic a meeting with the ARKit team, as well as dangling the possibility of promoting Epic Games at WWDC that year.
Apple files to cast doubt on Microsoft testimony
In a filing on May 6, Apple asked the court to make an “adverse credibility finding regarding the testimony of Lori Wright,” who represented Microsoft at the trial.
During her testimony, Wright mentioned how Xbox sales were not profitable, and were a means to get more hardware to consumers, to earn more from game sales. Apple argued the testimony lacked the profit and loss statement that would be evidence to substantiate or disprove her testimony.
Apple had previously heard the reference and had requested documents to prove the claim, but Microsoft has so far declined to provide the requested proof.
It seems Apple is leaning on what was said by the court on April 13, where it warned expert witnesses that if they failed to make a “sufficient production of relevant documents to both parties,” the court will “weigh such a failure against the credibility of the testifying witness.” Such a failure could “warrant the striking of testimony,” something that could benefit Apple’s case.
$2B class action App Store lawsuit in UK
While the Epic vs Apple lawsuit attacks the App Store directly, the issue of Apple’s 30% commission has resurfaced in a new lawsuit in the United Kingdom.
Filed with London’s Competition Appeal Tribunal on May 11, the class-action lawsuit argues that the developer fee is passed on to consumers. It is argued Apple has overcharged nearly 20 million UK App Store customers for years with the “excessive” and “unlawful” 30% IAP cut.
Damages are sought at up to 1.5 billion pounds. If the tribunal approves the lawsuit, it would cover any UK-based users who have paid for apps, subscriptions, or in-app purchases on an iPhone or iPad since October 2015.
Like with the Epic lawsuit, the complaint follows similar arguments, including accusations of anti-competitive practices.
Apple responded by calling the lawsuit “meritless,” that the commission is “very much in the mainstream of those charged by all other digital marketplaces,” and reminding that most developers are eligible for a commission rate of 15%.
Epic witnesses criticize App Store anti-steering provisions
A pair of expert witnesses on May 11 argued Apple’s anti-steering provisions made it hard for iPhone owners to know they could use some apps on other devices.
Economist David Evans pointed to measures that prevent developers from advertising outside platforms and websites on the App Store. For example, while “Fortnite” V-Bucks could be “theoretically” bought on a website and applied to an account instead of through iOS, Apple prevents Epic from advertising that fact within the app.
While it was suggested the removal of such barriers would work “for the time being,” Evans offered that the solution wouldn’t be possible for apps that don’t have a website, or for consumers without easy access to a computer.
Stanford Economics professor Susan Athey also raised the anti-steering provisions in her testimony, in that consumers “can’t tell from looking at their app on their iPhone where they may be able to find that app” elsewhere. Subscriptions made on Apple’s platform are also stuck within the ecosystem, Athey added, and that a “middleware” system to allow alternative payment platforms or cross-platform app stores may be an answer.
Apple countered by pointing out Athey hadn’t analyzed how much money users would spend on repurchasing apps and subscriptions, as well as taking issue with Athey’s ties to Microsoft.
May 13 had the Apple and Epic expert witnesses disagreeing on whether iOS users are locked into the platform, despite the presence of other gaming platforms.
According to economic consulting firm Brattle Group chairman Michael Cragg, other versions of “Fortnite” aren’t a substitute for iOS play. Meanwhile Apple’s witnesses contend that players are not locked in, and have choices for where they can play the game.
“The hypothesis of the Apple experts is that multi-platform play is a way of creating a disciplining force for the Apple App Store,” Cragg says, adding that “from a practical perspective, that’s not happening in the marketplace.”
Mobile gaming isn’t interchangeable with console gaming as mobile’s more of a “fleeting experience,” according to Cragg, while console gaming was more like a Hollywood movie.
On Apple’s side, University of Pennsylvania Wharton economist Loin Hitt claimed Apple doesn’t have a monopoly in mobile gaming, as developers have the choice to make games for other platforms.
Hitt’s analysis of “Fortnite” players on iOS revealed 10.2% of all “Fortnite” players used iOS between March 2018 and July 2020, with the group accounting for about 13.2% of total “Fortnite” revenue.
However, “Fortnite” retained as much as 88% of what a player spent on the game after Apple kicked it from the App Store. Hitt says this demonstrates consumers are “willing to and able to” switch between platforms.
The “Roblox Experience”
By May 14, it was discovered that the trial had affected another major game that exists on iOS, but in an unexpected way. The developers behind “Roblox” had updated its website to refer to itself as an “experience” creation tool instead of a gaming platform, echoing arguments within the trial.
References to the word “game” were replaced with “experience,” with one tab title changed from “Games” to “Discover,” and “players” was adjusted to “people.”
“Roblox” was mentioned in testimony by Apple senior App Review director Trystan Kosmynka, who was “surprised” that it had been approved in 2017.
The game was raised in court as various gaming experiences are built by other developers within “Roblox” itself, which Epic hoped to leverage against Apple’s ban on third-party app stores and cloud-gaming services packaging rules. However, Kosmynka defended the approval, by saying that neither “Roblox” nor any of the experiences within it are actually games.
According to Kosmynka, games are “incredibly dynamic,” have a defined start and end, and challenges in place. While the experiences within “Roblox” uses maps and worlds, as wel as providing boundaries that the experiences are limited within, they weren’t games because they were contained within the sandbox of the app itself.
Expert says iOS could be like macOS without security drawbacks
Epic Games expert witness Professor James Mickens of Harvard University laid out the differences between iOS and macOS to the court on May 14. The distinctions included the security of the platform, app distribution methods, and third-party app access.
The App Review process provides negligible benefits to security over built-in defenses within iOS itself, said Mickens, due to the use of mechanisms such as sandboxing. When asked by the judge if iOS was more secure than macOS, Mickens believed it’s not “meaningfully more secure.”
Opening iOS to third-party app stores wouldn’t have a “meaningful difference on the security experience,” he continued, and that “it wouldn’t prevent users from only obtaining apps from the App Store.
Mickens also said it would be trivial to port security features like malware scanning and notorization to iOS.
On May 17, it was reported Tim Cook had spent hours per day practicing his testimony with prior trial attorneys. It was thought Cook would appear within the last week of the trial to give Apple’s case a strong finish.
A report claimed Cook had prepared by undertaking practice rounds with former prosecutors, selected by his legal team to try and simulate the expected experience of the witness stand.
Schiller: WWDC costs Apple $50M a year
In Phil Schiller’s testimony on May 17, it was revealed Apple’s WWDC event costs $50 million per year to put on. While the cost of the event isn’t charged to the App Store, developers attending do pay $1,500 per ticket, though it is unclear how much of the total cost is covered by ticket prices.
A new developer facility is under construction at the Apple Park campus, to allow developers to gain support from Apple engineers while building applications. Again, the cost of the project isn’t being directly charged against App Store operations, as it is being constructed by Apple’s facilities division.
Schiller also mentioned there are 5,000 people working on Apple refunds. The $99-per-year fee for developers was a flat rate to remove barriers of a previous program, which Schiller said cost upwards of $3,500, and exists to ensure the quality of apps.
Schiller on App Store commission, Amazon Streaming
Continuing Schiller’s testimony on May 17, Apple does reduce its 30% commission to 15% for in-app purchases, for certain apps that support the Apple TV app.
“The Apple TV team had a meeting with premium content providers and described the work they were going to do to integrate this new experience. For example, they had to integrate with our Siri voice assistant so we can find any show across any one of those app experience,” Schiller said.
He went on to admit the Epic Games lawsuit helped him get approval for the 15% small business program. While Epic’s lawsuit wasn’t the reason for its introduction, as it was reportedly in development since 2016, “it certainly helped.”
On anti-steering rules, Schiller said Apple doesn’t give customer emails to developers automatically, but they can be requested. Once obtained, they can be used to communicate with consumers about buying in-app items outside the App Store, but the emails cannot be targeted.
There was also discussion about Apple’s anti-fraud and piracy team, the differences between game services and movie apps, and cloud gaming services.
Schiller explains Apple data collection, favoritism, policies
Entering the second day for his testimony, Schiller on May 18 was asked about the kind of data Apple collects on its users. Schiller shot down accusations Apple did so to track users, claiming location services is about “geographically relevant apps” and not tracking where users are.
On the store-within-a-store rule, Schiller explained the reason they are banned is because “all the apps and services that are delivered through those stores are not reviewed by App Review.” He also defended a former guideline where developers were told not to go to the press with App Store complaints, as Apple didn’t want disputes to be fought publicly with media outlets not necessarily having “all the acts.”
Schiller refuted a claim the App Store favors Apple’s apps in search rankings, as it uses 42 different factors “regardless of whether the results show Apple apps more prominently.”
Other topics mentioned include the use of open-source software, in-app payments, the differences between iMessages and Texts, Apple’s first-party Contacts app, and attempts by the Apple Arcade team to reach out to internet influencers for promotion.
Apple: App Store isn’t an essential facility’
In a filing surfacing on May 19, Apple sought a partial ruling from the court about one of Epic Games claims. Epic claimed Apple violated the Sherman Act by denying it access to the App tore, and that iOS was an essential facility.
Apple argues that Epic hasn’t provided any support in its claim of iOS or the App Store being an essential facility, and that in fact its expert rejected the notion it should be treated as such.
Epic’s claims were spurious, as “Epic’s own experience, as established by the trial evidence, confirms that there is nothing ‘essential’ about iOS,” writes Apple. Instead, Apple proposes the “Epic’s own experience, as established by the trial evidence, confirms that there is nothing ‘essential’ about iOS,” writes Apple.”
Apple hoped the ruling could be made as soon as the case concludes.
Federighi blasts Mac security to prop up iOS App Store
Taking to the stand on May 19, Craig Federighi used questions about supporting multiple app stores to tout the security of iOS versus Mac.
Multiple app stores are “regularly exploited on the Mac,” said Federighi, and that there’s a “level of malware on the Mac that we don’t find acceptable.”
“iOS has established a dramatically higher bar for customer protection. The Mac is not meeting that bar today.”
Android is used as an example of the dangers of multiple app stores, pointing to its malware problem that’s “well understood in the security community.”
He also likened macOS and iOS as products for different purposes. Mac and macOS is like a car with “a certain level of responsibility required,” while iOS is intended to be safe enough for parents to let children use.
Despite blasting macOS, Federighi still insisted the Mac is “the safest possible” when operated correctly.
Federighi also defended the iOS walled garden approach, offering an opening up of iOS would subject users to malware due to the use of untrusted sources for downloads.
Apple earned more than $100M from Fortnite
Apple’s head of App Store business development for gaming Michael Schmid told the court on May 19 that Apple earned more than $100 million in revenue from “Fortnite.” Schmidt didn’t specify a dollar amount, nor if the value was north of $200 million, though based on earlier claims from Epic itself, the figure could be close to $300 million.
Schmidt said Apple also spent $1 million in marketing the game during its last 11 months on the App Store.
Apple’s attempted MS testimony exclusion a distraction’
Microsoft fired back at Apple’s attempt to exclude Xbox executive Lori Wright’s testimony on May 20, claiming it was a distraction by Apple.
“Apple is trying to distract from legitimate concerns from many companies across the industry about its App Store policies and practices, including its refusal to allow game streaming in the Apple App Store. Epic speaks and acts for itself, and Microsoft and many other companies have raised concerns through our own voices, including directly with Apple itself,” said Microsoft.
Wright’s testimony was also involuntary but forthright and thoughtful, Microsoft said, adding “That Apple does not like Ms. Wright’s testimony is clear. That Apple has no basis to challenge the substance of her testimony is equally clear”
Apple expert witnesses on App Store security, R&D spending
On May 20, several expert witnesses testified on behalf of Apple, with the first being marketing professor Dominique Hanssens, who has conducted studies on whether iPhone and iPad users regularly used other devices that could play “Fortnite,”
The results revealed 92% had other devices they regularly used, when asked of general users. For those who identified as “Fortnite” players, the figure grew to 97%, and 94% said they used that other device to play games.
Witness 2 was IP merchant bank Ocean Tomo CEO James Malackowski, who argued it was important for IP owners to have the right to determine how that IP is actually used. He was hired to assess the “innovative footprint” of iOS, including how other companies use it.
According to his testimony, Epic was seeking “essentially a compulsory license to all of the IP necessary to distribute apps to iOS users.”
Malackowski also reckons Apple spent $500 million on R&D in 2015, rising to $18 billion by 2020. Epic’s prayer for relief would “take away Apple’s control or Apple’s provisions in its license agreements,” reducing its compensation for technology it has produced.
Network security expert Aviel Rubin spoke about App Store Security. According to Rubin, Apple’s centralized distribution model offers “significant benefits,” including lower rates of malware infections and a lower volume of malicious apps.
Rubin also offered that malicious developers could use stores-within-stores to trick users into downloading infectious apps.
Cook takes to the stand
On May 21, Tim Cook made it to the stand, late in the Epic vs Apple proceedings as expected.
His testimony started with a reiteration that he had limited involvement in day-to-day operations of the App Store, and worked mostly in a review capacity.
“We’ve invested $100 billion since the start of the iPhone’s development, and that number has just accelerated,” Cook said. “We have a maniacal focus on the user and doing the right thing by the customer.”
Safety, privacy, and security were key components of Apple’s strategies, according to Cook, which helped with the creation of items such as App tracking Transparency.
On the subject of R&D spending, Cook says that its research efforts do benefit the App Store. He also maintained that R&D has increased each year. In 2018, Apple invested $14.2 billion in R&D. By 2019, that number hit $16.2 billion, up 14% year-over-year. In 2020, R&D spending reached $18.8 billion.
Cook said antitrust scrutiny wasn’t the driver of the small business program, but regulation “was in the back of my mind.”
Cook also likened the complaints of the anti-steering guidelines to as if Apple told Best Buy to add a sign informing customers they could get an iPhone across the street.
He also denied Apple was a dominant player in the smartphone industry, denied Apple made it hard for users to switch from iPhone to Android, but while he said he believed the App Store was profitable, the company doesn’t break down profitability in a granular manner.
If Epic forced Apple to allow side-loading apps and third-party app stores, Cook said the result would be a disaster. Apple already reviews 100,000 apps a week and rejects 40,000, and it wouldn’t take long for the ecosystem to become a “toxic mess.”
Cook objected to Epic’s argument on third-party processing, pointing to how consumers would have to re-enter their card details again, as well as the potential for fraud.
“Also, we would have to come up with an alternate way of collecting our commission. We would then have to figure out how to track what’s going on and invoice it and then chase the developers,” Cook said. “It seems like a process that doesn’t need to exist.”
Judge presses Cook on App Store model and competition
During the May 21 testimony, Judge Yvonne Gonzalez Rogers spent nearly 10 minutes questioning Tim Cook directly. It was the longest line of questioning she put to a witness in the trial.
Citing Apple’s wish to give users control, Rogers asked “what’s the problem with allowing users to have a cheaper option for content?” Cook replied by saying consumers already have a choice between “many different Android models and an iPhone.”
Rogers pressed further, proposing “But if they wanted to go get a cheaper Battle Pass and cheaper V-Bucks and they don’t know there’s not that option, what is the problem with Apple giving them that option?” Cook explained Apple still needed to get a return on its investment, but the judge didn’t seem satisfied with that answer.
Judge Rogers offered that gaming apps generated “a disproportionate amount of money relative to the IP,” and was effectively “subsidizing everyone else.” The Apple CEO said games transact on the platform, therefore game developers owe the commission.
Attention then turned to comparisons with game consoles, with the judge claiming Apple doesn’t compete in gaming app distribution. Cook countered saying it competed against the Xbox and Switch, as well as other platforms.
Ultimately, Rogers’ line of questioning expressed skepticism about Apple’s business model, as well as doubting the small business program for the App Store was launched to assist during the COVID-19 pandemic.
Trial ends with judge asking questions to lawyers
Rather than the usual closing arguments, the last day of the trial had Judge Yvonne Gonzalez Rogers asking questions of Apple’s and Epic’s lawyers.
Some friction was felt over the definition of the operating system market, with Epic saying Apple competes with Google while Apple says the comparison is a “distraction.”
Epic went on to offer that there’s no substitutes for market distribution via the App Store, and that sideloading and allowing third-party stores could be considered solutions.
There was also discussion about the conduct of Apple in terms of developer satisfaction and its policies, anti-steering provisions, and potential remedies to the entire situation.
Class Action Status requested for another lawsuit
Separate lawsuits by users and developers sought class-action status over a number of antitrust claims on June 4, shortly after the end of the Apple-Epic lawsuit.
The motion requested the class-action status for multiple lawsuits that are before Judge Rogers, who also presided over the Epic-Apple trial, with the motion also making multiple references to the trial.
Epic decries Apple’s App Store ‘propaganda’
Epic CEO Tim Sweeney complained via Twitter on June 24 about Apple’s marketing, stating “I really hope corporate propaganda campaigns don’t become a permanent fixture of the tech industry.” Sweeney continued by offering that, if a company has a problem, “just fix it and bear the costs.”
The comments were made following Epic’s 10-month campaign against Apple, which included its own propaganda video mimicking Apple’s “1984” ad,” as well as continued promotion of #FreeFortnite.
Apple tells Epic judge to consider a Supreme Court NCAA decision
On June 26, Apple’s legal team submitted a filing to the court, consisting of a copy of the NCAA V Alston Supreme Court decision. The filing was intended for Judge Rogers to read, in that it “provides guidance” for her future ruling.
The Supreme Court’s decision rejected the idea of that NCAA being immune from federal antitrust law, and that attempts by the NCAA to limit student athlete compensation to keep them classed as amateur should be subject to the same rule of reason analysis that applies to antitrust cases.
In effect, the Supreme Court says courts should be careful about rule of reason findings. It was considered that the decision probably helped Apple overall.
Epic-Apple lawsuit in Australia set for November 2022
Following the end of the U.S. lawsuit, Australia’s Federal Court decided on July 9 that similar legal action in the country could go ahead. The decision reverses a previous ruling that stalled the lawsuit until a ruling was made in the United States’ Epic vs Apple case.
By August 20, the country’s Federal Court set a conditional trial start date of November 2022. Justice Nye Perram said he did not want to delay proceedings any further.
Coalition for App Fairness originally Epic-funded to assist in App Store legal battles
On August 20, emails unearthed during discovery of the Epic-Apple lawsuit were revealed to show the creation of the Coalition for App Fairness.
The emails dated May 15, 2020, had Epic VP of Marketing Matt Weissinger proposing the creation of a coalition of like-minded developers, and to add more issues alongside Apple’s sales commission issue.
Part of the data dump included a contract between Epic Games and The Messina Group, a consulting firm for the foundation of the coalition. It was expected Epic would spend up to $700,000 on the Coalition during its lifetime.
While the group was intended to help promote Epic’s ideals in its lawsuit against Apple, the Coalition doesn’t appear to have offered a large amount of material about the suit on its website or in media materials, aside from social media posts and some press releases.
Coalition for App Fairness brands separate settlement a ‘sham’
In settling a separate lawsuit, Apple agreed to create a $100 million fund for developers in the United States, as well as allowing more direct access to users by developers. Commentary from the Coalition for App Fairness on August 27 declared the settlement wasn’t enough.
Apple’s sham settlement offer is nothing more than a desperate attempt to avoid the judgment of courts, regulators, and legislators worldwide,” said the organization in a statement. “This offer does nothing to address the structural, foundational problems facing all developers, large and small, undermining innovation and competition in the app ecosystem. Allowing developers to communicate with their customers about lower prices outside of their apps is not a concession and further highlights Apple’s total control over the app marketplace.”
“If this settlement is approved, app makers will still be barred from communicating about lower prices or offering competing payment options within their apps,” says the statement. “We will not be appeased by empty gestures and will continue our fight for fair and open digital platforms.”
Epic asks for developer account reinstatement
On September 9, Epic said it had asked Apple to reinstate its developer account. The request was made as Epic intended to re-release Fortnite on iOS in South Korea.
On August 31, the South Korean government voted to force Apple and Google into accepting alternative payment mechanisms in the App Store and Google Play. Since Fortnite with its third-party payment mechanism would be legal in the country, Epic wanted to release it to take advantage of the law change.
One day later, on September 10, Apple issued a statement that it would “welcome Epic’s return to the App Store if they agree to play by the same rules as everyone else.”
However, Apple adds “Epic has admitted to breach of contract and as of now, there’s no legitimate basis for the reinstatement of their developer account.” Since developers must accept the App Store’s guidelines, and Epic has refused to do so, Apple said it wasn’t prepared to consider a request in reinstatement until the rules are agreed to by Epic.
Ruling declares Apple’s not a monopoly, must allow alternate payment methods
In the September 10 publication of her ruling, Judge Yvonne Gonzalez Rogers largely handed Apple a victory in court. Chiefly for Apple it was a confirmation that Apple wasn’t a monopoly, and that Epic wasn’t able to demonstrate Apple was engaging in monopolistic behavior.
Apple does enjoy “considerable market share of over 55% and extraordinarily high profit margins,” the ruling reads, but this didn’t demonstrate antitrust conduct. “Success is not illegal.” There was no evidence of other critical factors that would be considered antitrust behavior, such as barriers for entry and decreasing innovation in the market.
“The Court does not find that it is impossible; only that Epic Games failed in its burden to demonstrate Apple is an illegal monopolist,” the ruling states.
However, it wasn’t a clear-cut win for the iPhone maker, as both sides won and lost in different ways.
For Apple, the biggest issue is an injunction to prohibit developers from including in apps “buttons, external links, or other calls to action that direct customers to purchasing mechanisms, in addition to In-App Purchasing and communicating with customers through points of contact obtained voluntarily from customers through account registration within the app.”
In short, developers won’t be forced to abide by Apple’s anti-steering policies, preventing them from saying there’s other payment mechanisms available to consumers. Apple has 90 days to comply with the injunction.
Apple also prevailed in arguments that Epic breached its contract clauses. Epic has to pay Apple damages equal to 30% of the $12 million it earned in revenue from its Epic Direct Payment system, plus interest.
The judge also agreed that Apple wasn’t unfairly retaliating against Epic by cutting access to its developer account.
Judge Rogers also reasoned that Epic’s claims were a play to control more of the gaming market. “As a major player in the wider video gaming industry, Epic Games brought this lawsuit to challenge Apple’s control over access to a considerable portion of this submarket for mobile gaming transactions,” wrote the judge. “Ultimately, Epic Games overreached.”
In response, Apple released a statement declaring “Today the Court has affirmed what we’ve known all along: the App Store is not in violation of antitrust law. As the Court recognized ‘success is not illegal.’ Apple faces rigorous competition in every segment in which we do business, and we believe customers and developers choose us because our products and services are the best in the world.”
On Twitter, Epic CEO Tim Sweeney thanked the court and vowed to “fight on.” Epic says it will be appealing the decision.
Immediate reactions to the Epic vs Apple ruling offered a variety of different views on the matter.
Long-time App Store commission opponent was pleased that the anti-steering provisions were affected by the court. “This and other developments around the world show that there is strong need and momentum for legislation to address these and many other unfair practices, which are designed to hurt competition and consumers.”
Advocacy group the App Association said the decision illustrates “Apple is not a monopolist and keeps in place the services and benefits our members rely on to compete on a global scale.” The changes still pose a risk that a few major companies could “avoid contributing equally to the App Store’s services.”
Smaller iOS developers seemed to offer the view that Apple had lost a major part of the case. Meanwhile, analysts generally feel Apple will weather the storm in the long run.
Apple stock closes 3% down
At the end of trading on September 10, Apple’s share price closed down $5.10, or 3.3% down, hitting $148.97 at the bell. Earlier in the day, trading peaked at $155.48 before enduring a decline shortly after 11 a.m. Eastern, around the time of the ruling.
Epic appeals the ruling
On September 12, Epic Games filed its appeal against the ruling to the U.S. Court of Appeals for the Ninth Circuit. The paragraph-long filing doesn’t offer reasons or explanations for the appeal, details that would be expected to arrive in a later, and considerably longer, filing.
Regulatory headaches caused by ruling
Judge Rogers’ ruling in the Epic-Apple lawsuit could cause problems for the U.S. government, as Epic failed to prove that Apple violated antitrust laws or that it was “an illegal monopolist.”
It is thought the Epic vs Apple ruling could apply an extra burden on attempts by the U.S. government to rein in tech giants for anti-competitive behavior. Since Apple was found not to have violated the Sherman Act, a law typically used to take on monopolistic firms, the ruling makes it harder for others to use the same law against Apple in the same way.
Apple’s justifications on restrictions applied to developers under the guise of platform security may also be a problem, due to Rogers saying the market two-sided. This therefore makes it harder for lawsuits and courts to determine the harms and benefits of multiple sides together.
In effect, a plaintiff couldn’t try to prove harm to just developers or consumers, they would have to prove net harm across all of the different groups that use the platform.
Even so, there is still a glimmer of hope for regulators, as Rogers said Apple was “near the precipice of substantial market power, or monopoly power,” and that it also failed to truly justify the 30% commission fee for many App Store transactions.
2% worst case scenario
A note to investors by Morgan Stanley on September 13 examining the risks and impact of the Epic vs Apple ruling to the App Store and Apple’s bottom line proposes that the damage to Apple could be fairly limited, even in a worst-case scenario.
It is reasoned that the ruling would prevent developers from adding their own direct payment method, but would free developers to steer users to alternate off-app payment systems. The friction from forcing users into managing multiple accounts rather than the quick and friction-free App Store payment system may work in Apple’s favor.
Few of the 30 million app developers on the App Store could feasibly afford to create so much friction, as most lack the brand, credibility, and marketing budget to do so. There are also consumer purchasing habits to consider, as they may be difficult to change in the first place.
It is reckoned that if Apple were to lose all revenue from the top 20 global app developers, the so-called worst case scenario, it would equal a 2% impact on revenue and a 5% hit to earnings-per-share.
Epic pays $6M to Apple
On September 13, Epic CEO Tim Sweeney confirmed the company had paid Apple $6 million for violating App Store rules, as per the judge’s ruling. Epic was ordered to pay damages related to revenue collected from “Fortnite” sales on the App Store following the company’s decision to set up its third-party in-app payment system.
Epic was ordered to pay Apple damages that equate to 30% of the $12,167,719 in revenue it earned from Epic Direct Payment on iOS between August and October 2020, plus 30% of revenue collected from November 1, 2020 through to September 10, 2021.
Fortnite won’t be back on iOS or Mac anytime soon
On September 22, Epic Games CEO Tim Sweeney said that Apple had decided to exercise its right to exclude the company from the App Store, meaning “Fortnite” won’t be returning for the moment. The letter from Apple lawyer Mark Perry to Epic also indicated that Apple wouldn’t consider any further reinstatement requests until “the district court’s judgement becomes final and nonappealable.”
According to Sweeney, this is a process that could take as long as five years to complete.
Apple appeals the ruling
On October 8, Apple filed an appeal of U.S. District Court Judge Yvonne Gonzalez Rogers’ ruling in the recent Epic vs Apple lawsuit, and seeks to stay an injunction that would force changes to the App Store’s “anti-steering” provisions.
The argument from Apple continued with its claim that directing users to alternate payment mechanisms is an inherently dangerous proposition, such as by sending users to malicious websites. It also hamstrings Apple’s efforts to fight fraud.
Epic responds to the appeal
Epic filed its opposition to Apple’s appeal on October 23, saying that Apple hasn’t done enough to legally prove it will be irreparably harmed by the changes, even if they are temporary.
Epic said that Apple doesn’t meet the legal standard that requires it to demonstrate it faces harm by compliance, using Apple’s positive post-ruling comments and delay in filing to pause the injunction as being signs Apple will be fine.
“The public interest favors denying (Apple’s appeal); an injunction is the only path to effective relief,” Epic’s argument reads. “History shows that in the absence of an injunction, Apple will not make any changes.”
Apple is partly complying with the injunction
In an October 30 update, Apple told the court it had complied with part of the injunction, and that it had appealed to stay the remainder of the injunction. It said “the immediate implementation of that aspect of the injunction would upset the integrity of the iOS ecosystem.”
Furthermore, as Epic Games doesn’t have any standing to secure or enforce an injunction due to having a lack of a developer account and no products in the App Store, the injunction therefore shouldn’t make it through a review.
Court denies request to delay App Store changes
Apple’s request to delay changes to its App Store rules as part of the Epic vs Apple lawsuit ruling was denied on November 10. In a brief in-court hearing, Judge Yvonne Gonzalez Rogers tossed the request.
“In short, Apple’s motion is based on a selective reading of this Court’s findings and ignores all of the findings which supported the injunction, namely incipient antitrust conduct including supercompetitive commission rates resulting in extraordinarily high operating margins and which have not been correlated to the value of its intellectual property,” Judge Rogers writes.
Epic’s Sweeney rails against Apple in South Korea
At a Coalition for App Fairness Global Conference on Mobile App Ecosystem Fairness in South Korea in November, Epic Games CEO continued to attack Apple and Google as major app platforms.
“Apple locks a billion users into one store and payment processor,” he said. “Now Apple complies with oppressive foreign laws, which surveil users and deprive them of political rights. But Apple is ignoring laws passed by Korea’s democracy. Apple must be stopped.”
Sweeney also called Google “crazy” for its system of fees, and praised the country’s new app store regulation.
Apple takes second swing against the injunction
On November 18, Apple’s lawyers made a second attempt to get Apple out from having to make changes to its App Store policies, before a December 9 implementation date, this time to the Court of Appeal.
“Apple Inc. has been ordered to change its business model in a way that will harm customers, developers, and Apple itself,” says the company in the filing. “The injunction should be administratively stayed before it becomes effective on December 9, and remain stayed until the appeals are resolved.”
“The district court erred in entering a nationwide, class-type injunction in a single-plaintiff case brought by a developer that has no apps on the App Store, proved no harm from the provisions at issue, and did not even directly challenge or seek to enjoin them,” continues the filing.
“Undisputed evidence establishes that Apple will be harmed by precipitous implementation of this unlawful and inequitable injunction,” says Apple. “Apple should not be required to change an integral part of its business model, which has been in place for more than a decade, until this Court decides the appeals on the merits.”
Apple tries last-minute appeal
Getting close to the wire on December 2, Apple petitioned a higher court to delay its implementation of changes to the App Store.
This time, Apple maintained the same arguments, but added that it would be a monumental task to implement them, which could take “months” to complete, as well as be detrimental to everyone involved.
“Given the injunction’s effective date of Dec. 9, Apple seeks immediate entry of an administrative stay that would expire 30 days after the Court’s ruling on the stay motion,” according to the filing.
Without a stay, Apple said that “the App Store will have to be reconfigured — to the detriment of consumers, developers, and Apple itself.”
Apple fails to get Epic Australia lawsuit dropped
While Apple is dealing with its US lawsuit with some success, it’s not having the same luck in Australia. A temporary stay on the lawsuit was overturned on in July by a full bench of the Federal Court in Sydney, with the High Court in Canberra refusing Apple’s request for special leave to appeal in December.
Along with overruling Apple’s appeal, the High Court also awarded costs against Apple.
The decision means Apple’s Australian case is set to proceed, potentially starting in November 2022.
Apple still intends to get its fair share
In a reply brief filed with the U.S. District Court for the Northern District of California in December, Apple supports a motion to stay an injunction that would force it to allow developers to add alternate payment links or buttons within apps.
The important part is that Apple’s attorneys shot down a suggestion by Epic Games that Apple wouldn’t get a cut of transactions that would occur outside of the App Store.
“That is not correct. Apple has not previously charged a commission on purchases of digital content via buttons and links because such purchases have not been permitted,” the brief reads. “If the injunction were to go into effect, Apple could charge a commission on purchases made through such mechanisms.”
In effect, Apple plans to implement some way to collect fees from developers, even if they were made outside the App Store.
Apple granted stay on anti-steering injunction
Apple on Dec. 8 won its bid to place a stay on anti-steering prohibitions that were set up to kick in on Dec. 9. Those provisions, included in the ruling by Judge Gonzalez Rogers, would have forced Apple to allow developers to add in-app links or buttons to alternate payment options.
The U.S. District Court of Appeals for the Ninth Circuit said that Apple could have the time it needs to make an argument in its appeal against the decision. Both Apple and Epic Games have appealed the court’s decision.
Apple was denied an earlier motion to stay the injunction by the U.S. District Court for the Northern District of California.
Coalition for App Fairness profile shows efforts against Apple
A December 2021 profile of the Coalition for App Fairness outlined how the group was created, expanded, and Epic’s involvement.
As part of the profile, it was said Epic originally planned to spend “80K-$100K” on the Coalition’s launch, which was thought to be an attempt to remove the game company’s image as being a “not sympathetic” player, by working with other smaller firms.
Despite having a decidedly pro-Epic and anti-Apple stance, the group apparently doesn’t think it’s an Epic litigation vehicle, with founding members keen to avoid that appearance.
As part of the organization’s techniques, it divides roles to specific member companies based on their expertise. For example, some dealt with strategy and communications, while others used their relations with international governments.
Nvidia GeForce Now returns “Fortnite” to the iPhone
While Apple hasn’t allowed Epic to bring Fortnite back to the App Store itself, the game has returned to iOS and iPadOS via an alternate route.
On January 13, Nvidia and Epic announced that “Fortnite” will be playable through the GeForce Now cloud streaming service. Rather than as a dedicated app, “Fortnite” would instead be playable via the Safari browser, using a native mobile variant optimized for touch-based controls instead of the existing PC-based port.
Nvidia opened up registrations for beta testers, for a limited trial later that month.
Epic: App Store antitrust judge made too many legal mistakes in ruling
In a January 20 appeal filing, Epic said that Judge Gonzalez Rogers “erred” in her antitrust rulings over the lawsuit. Epic’s attorneys say the judge erred in her interpretation of evidence and testimony, as well as disagreeing with the judge’s stance over Apple’s power in the market.
Insisting Apple “unlawfully maintains its monopolies in the iOS app distribution and in-app payment solutions markets by expressly excluding all competitors,” Epic says the judge didn’t define the market the same way that Epic did, nor in the wider definition offered by Apple.
Epic wants the Sherman Act claims and the judgment on Apple’s breach of contract reversed and overturned, complete with injunctive remedies. It also wants an appeals court to agree that there are errors in the ruling, leading to a retrial with extra instructions on how to adjudicate matters.
If the ruling isn’t reversed, Epic claims “this decision would upend established principles of antitrust law and, as the district court itself recognized, undermine sound antitrust policy.”
DOJ, 34 U.S. states side with Epic
A joint letter from attorneys general for 34 states and the District of Columbia told an appeals court that Apple continues to “stifle competition” with its App Store monopoly. The letter from January 28 firmly sides with Epic on the lawsuit.
“Apple’s conduct has harmed and is harming mobile app-developers and millions of citizens,” the states said. “Meanwhile, Apple continues to monopolize app distribution and in-app payment solutions for iPhones, stifle competition, and amass supracompetitive profits within the almost trillion-dollar-a-year smartphone industry.”
The U.S. Department of Justice also filed its own letter, albeit one not signed by assistant attorney general Jonathan Kanter. Kanter used to be the lead attorney for the Coalition for App Fairness.
Microsoft tells appeals court Apple must be stopped
Continuing the filings against Apple, Microsoft has joined the list of people providing supporting filings to the court. Microsoft’s amicus filing on February 1 is firmly on the side of Epic Games.
In its filing, Microsoft cites that it has a “unique – and balanced – perspective to the legal, economic, and technological issues this case implicates,” and it also “has an interest” in supporting antitrust law since it sells both hardware and software, like Apple.
Apple has “extraordinary gatekeeper power,” Microsoft said, before jabbing at the alleged errors in the ruling by the judge. The ruling has “potential antitrust issues [that] stretch far beyond gaming,” including many other areas that Apple operates within.
If the original ruling is upheld, Microsoft says it could “insulate Apple from meritorious antitrust scrutiny and embolden further harmful conduct.” The company further concludes that this would mean “innovation will suffer.”
Apple’s response to the appeal is expected in March.
Epic gains support from a knitting app
On February 6, the Seattle-based knitting startup Knitrino was found to be among companies that signed an amicus brief in November 2021 that supported Epic. It also provided a “friend of the court” brief in January to the U.S. Court of Appeals for the Ninth Circuit.
Knitrino’s beef with Apple was due to problems receiving approval from the App Store for its app, as policies prevented the sale of both physical and digital goods via the in-app system. Despite discussions, an appeal to the review board was rejected in 19 minutes.
Knitting app Knitrino joined the fray against Apple.
There were also complaints about a lack of options and outside control of the situation. However, Knitrino did eventually receive app store approval.
According to Yates, Apple has the ability to “wield the kind of power where they can say whether or not we can go into business, for something so arbitrary.” While the app has made it to the App Store, Yates would still “love to have an alternative.”
Apple says Epic’s appeal flawed and the ruling should stand
In a brief released on March 24, Apple declared Epic lost its trial because it failed to prove wrongdoing, and not because of any legal errors by the judge.
A Principal and Response Brief with the Ninth Circuit Court of Appeals basically argues that most of the rulings in the case should be affirmed by the ninth circuit. It also outlines an argument to reverse a ruling on anti-steering provisions.
Judge Yvonne Gonzalez Rogers did not make any legal errors in her decision, the brief states, opposing Epic Games’ argument that errors took place. “Epic lost because it ‘overreached’ by asserting claims on the frontier edges of antitrust law,” Apple reasons.
On the anti-steering arguments, Apple goes on to say the “measure evidence adduced by Epic is legally insufficient to support the UCL judgment.” Apple also says the Epic can no longer prove injury on the App Store, as it is no longer an Apple developer.
Apple gains support from Roblox, Koch Group founders in antitrust case
As the deadline for “friend of the court” briefings ended on March 31, it was found that Apple had received a number of submissions in its favor. The list supporting Apple included the ACT-App Association, the Computer & Communications Industry Association, the Washington Legal Foundation, and a group of national security experts and scholars.
More significantly, the collection included two major additions: Roblox and the Koch Group.
“Apple’s process for review and approval of apps available on the App Store enhances safety and security,” said Roblox in the filing, “and provides those apps greater legitimacy in the eyes of users.”
Meanwhile, the Americans for Prosperity Foundation, funded by the Koch brothers, was the first to file as part of the Koch Group’s support.
Fortnite on iPhone via Xbox Cloud Gaming
While still banned from sale in the App Store, “Fortnite” did become playable again on Apple’s devices, via a partnership between Epic Games and Xbox Cloud Gaming. A touch-friendly version of the game was made available through Microsoft’s platform in May, playable in a web browser.
This meant the game became playable on iPhones, iPads, and other devices, performed through the browser, thereby abiding by App Store rules concerning game-streaming services.
[youtube https://www.youtube.com/watch?v=drViMnExFFE]
In May, Apple told Australian authorities it had “serious concerns” with App Store antitrust conclusions. At the same time, Google said the proposals could cause “unintended harm.”
The conclusions were published by the Australian Competition and Consumer Commission in February following an examination of app store policies. Apple and Google’s responses were filed in February, but published in May.
Apple says its own “serious concerns about the implementation of [proposed] regulatory reforms,” include how it believes the ACCC is trying to reform issue that do not exist.
“[Some] reforms are directed at addressing hypothetical (rather than existing) problems insofar as conduct attributable to Apple is concerned,” says Apple’sfull filing. “[The] real-world market outcomes which will result from the proposed ‘reforms’ relevant to Apple, if they are implemented in the form proposed, would reduce incentives for dynamic firms like Apple to innovate and develop new and differentiated products”
The filing further says these reforms “would force Apple to redesign the iPhone” in ways that would “ultimately benefit only… a handful of powerful developers whose primary goal is to remove the [App Store’s] protections for consumers.”
“Apple is puzzled that the competition and consumer protection agency would prioritize purported competition concerns which lack cogent evidence of harm, over clear and present severe damage to users that they experience every day,” it continued.
Epic: Apple led court astray
In a brief filed in May, Epic claimed Apple misled the court, and that the judge erred in her interpretation of the market. The appeal reply and cross-appeal response brief by Epic said the court “committed multiple legal errors in rejecting Epic’s Sherman Act claims.”
The original lawsuit had Epic claiming there was a violation by Apple blocking access to the App Store, which Epic deemed an essential utility. The Sherman Act dictates free commerce and competition in the U.S. However, Epic also made a mistake in sustaining Apple’s restrictions.
“The court found substantial anticompetitive effects but erroneously credited justifications that do not advance competition and ignored its own factual findings establishing less restrictive alternatives,” the brief reads.
Epic also attempted a counterargument over claims its demands would weaken iOS security, by claiming Apple itself touts the security of Mac, which doesn’t have the same protections as iOS. Except during the trial, Apple said it found the level of malware on macOS unacceptable.
Epic CEO: App Store is a “disservice to developers”
In a May interview, Epic Games CEO Tim Sweeney claims both Apple and Google will get a “stranglehold over the metaverse” unless they are forced to change how they operate. Meanwhile, he also says Epic is a key player for the Metaverse’s future, but an altruistic one.
“Epic Games plans for the Unreal Engine to be a massive revenue driver for our customers and not so much for us,” he said. “We aim to give everybody the 3D real-time content creation tools they need to bring content to the metaverse and our aim is… to offer a premier destination for them to bring their content to.”
“So our business isn’t about extracting money from creators as much as helping them find opportunities,” he continued, “and profiting alongside them from the opportunities as they emerge.”
Epic Games CEO Tim Sweeney
By contrast, he says that Apple currently “completely obstructs all competition and market forces that would shape better app stores and better deals for consumers.”
“Epic’s view is that every company participating in the tech industry should have to compete, and should actually compete fairly, in every market in which they do business,” said Sweeney. “Apple competes in hardware fairly. Apple currently competes in stores unfairly.”
Sweeney continued, saying that the current policies of the major app stores will “dominate the metaverse” as well as all physical commerce occurring in virtual and augmented reality.
In disagreeing with how Apple talks about App Store earnings within the broader category of Services, Apple “makes it look like it’s actually revenue that Apple earned themselves, and it’s not. This, to Sweeney, is a “heist of grabbing an opportunity from developers,” a “shady accounting practice that should not be allowed,” and that “The App Store is not a service. The App Store is a disservice to developers.”
A new Metaverse Standards Forum to encourage the development of open standards gained a number of big players in the field in June, but not Apple.
The firms joining up include Adobe, Epic Games, Microsoft, Meta (formerly Facebook), Nvidia, and Qualcomm. A total of 35 companies joined the effort at launch.
While Apple has its own private reasons for not joining the group, it is unlikely to be financial, as at the time, membership was “open to any organization at no cost.” It is also unknown if Apple was asked if it wanted to become a founding member of the group.
Epic’s Support a Creator’ program pays only 5% of game content makers’ sales
A June report into Epic’s Fortnite and custom content made for the game reveals that Epic’s not doing a great job at providing funding to those third parties.
Creative firms producing in-game experiences found that dealing with brands directly was far more lucrative than dealing with Epic, which didn’t really have a major revenue sharing program in place for content.
Under the Support a Creator program, the nearest thing to a creator support scheme and intended for influencers, provided only a 5% cut to participants, and cash-outs were only possible after earning $100 in a 12-month period.
The astoundingly low percentage reflects badly against Apple’s 30% App Store commission from purchases, with the remainder handed to developers. Meanwhile, though Meta was attacked over plans to charge up to 47.5% for purchases, this is still a massive percentage against Epic’s payout.
Epic previously hinted that more monetization options would be available in the future.
Coalition for App Fairness: Public wants open App Store
A pair of polls from the Coalition for App Fairness claimed there was a need for competition with the App Store, and for the introduction of antitrust legislation.
June research from CAF claimed 79% of voters support the Open App Markets Act, which would force Apple into allowing third-party payment systems. 68% said Big Tech had too much power, and 79% were supportive of legislative efforts to open up the mobile app ecosystem.
On Apple’s power, 59% said Apple had too much, and 28% said Apple had the right amount.
However, some of the questions appeared to be leading, such as one directly telling participants that “Apple and Google have monopoly control over what apps are allowed in their app stores and how consumers are able to download the apps.”
CAF says the survey shows that there is “clear, overwhelming, and bipartisan support” for lawmakers to pass antitrust legislation.
Apple challenges self-preferencing services injunction
In July, in a cross-appeal brief submitted to the Ninth Circuit Court of Appeals, Apple argued the anti-steering injunction was “legally improper,” and that the court handed down an “unprecedented result” despite Epic failing to prove harm.
“Epic failed to prove direct or indirect harm,” the brief reads. “In the district court, Epic introduced no evidence of injury-in-fact at any point in time. The UCL judgment should be reversed for that reason alone.”
Apple argued Epic didn’t prove its legal requirement of “standing,” as Epic is no longer an iOS developer, and so cannot be injured from a guideline applying to those who still are. Apple also said there was insufficient evidence to prove that its anti-steering provision actually caused harm to market competition.
It also believes the injunction improperly applies to all iOS developers. The logic is that as Epic opted out of a class-action by filing its own lawsuit, Epic is the only plaintiff on which the injunction could apply.
Epic v Apple appeals to be heard on October 21.
The U.S. Court of Appeals said in August it will hear from Apple and Epic on October 21, 2022. Held in Courtroom 3 of the James R. Browning U.S. Courthouse in San Francisco, the case will see both sides appealing aspects of the earlier ruling.
Epic will be arguing the overall ruling was flawed, with Apple “unlawfully” maintaining monopolies in iOS app distribution and in-app payment solutions. Meanwhile, Apple will go after the anti-steering aspects, claiming Epic didn’t produce enough evidence to prove the ruling.
On the day, each side will have just 20 minutes to make their case to the court, according to the format of the appeals court itself.
U.S. DOJ wants part in appeals process
The U.S. Department of Justice requested in September to take part in the appeals hearing in the Epic-Apple case. Officials are asking to take part in oral arguments.
“The United States believes that its participation at oral argument would be helpful to the court, especially in explaining how the errors (in antitrust law interpretation) could significantly harm antitrust enforcement beyond the specific context of this case,” the Justice Department wrote in the filing.
Neither party opposed the move, but Apple has stated that it wants the Justice Department’s argument time to come out of Epic’s time or be granted additional time.
Department of Justice gets permission to argue Epic Games’ side
Following its earlier request to participate in oral arguments, the Department of Justice has been granted time at the court.
The DoJ will be presenting for 10 minutes during the appeal, with lawyers wanting to explain to the court details of the proper legal framework for evaluating antitrust issues. It is expected this will include a repetition of prior claims that Apple’s victory could harm antitrust enforcement.
This includes “multiple legal errors” in the court’s interpretation of the Sherman Act for antitrust issues.
Coalition for App Fairness and Epic Games complain about App Store price hikes outside US
Apple increased App Store prices for many non-consumers in September, but without providing a direct reason. The hikes equated to about a 20% increase in prices, making a 0.99 euro app cost 1.19 euros.
Following the hikes, the Coalition for App Fairness and Epic Games’ Tim Sweeney both complained about the move.
Coalition executive director Rick VanMeter said the changes were made “without the input or consent of app developers, which highlights the extent of Apple’s market power.” He continued “In no other industry can a business single-handedly increase the prices of another business’s products.”
Epic CEO Tim Sweeney offered his own comparison painting Apple as a commercial landlord telling tenants they had to increase their prices without giving them any say in the matter.
“Developers don’t want to raise their app prices in the EU and UK,” Sweeney said in a follow-up tweet. “Consumers don’t want app price increases in the EU and UK. Central banks fighting inflation don’t want app price inflation.”
Epic Games pays $520M to settle child privacy and dark pattern violations
On December 19, it was revealed Epic agreed to pay a record-setting $520 million to settle a pair of FTC allegations into child privacy violations and into tricking players of “Fortnite” into making purchases.
$275M of the total is a civil penalty over COPPA violations, under claims Epic collected the personal information of players under the age of 13, without notifying parents or securing consent. The penalty is the highest assessed by the FTC in enforcing COPPA.
The remaining $245M is to go into consumer refunds over in-game item and perk sales using so-called dark patterns. They are characterized as attempts to trap customers by making it hard to cancel paid services, and other similar techniques.
In the case of Epic, it is alleged that Fortnite used inconsistent and hard-to-understand button configurations, prompting unintended purchases. Cancellation and refund features were also allegedly difficult to find, while there were threats of locking accounts when customers disputed charges through credit card companies.
‘Fortnite’ will return to iPhone in 2023, says Epic CEO
In New Years tweets, Epic Games CEO Tim Sweeney seemingly suggested that “Fortnite” could return to iOS and iPadOS in 2023.
An initial tweet for December 31, 2022 declared “Next year on iOS!,” while a follow-up reply had Sweeney sharing an image taken from within “Fortnite” itself.
While Sweeney didn’t clarify the cryptic tweets, it seems that there is an intention to revive the game on iOS after its extended time-out.
It is unknown how this could occur, but it would depend on one of a number of outcomes to happen. On the more remote end of the equation is a reconciliation between Epic and Apple, and a return of the game to the App Store itself.
A more likely scenario is Epic taking advantage of law changes in Europe in the form of the Digital Markets Act, which could force Apple into allowing third-party app storefronts onto iOS, among other policy changes.
‘Fortnite’ further crippled on iOS with January 30 update
On January 30, 2023, players of “Fortnite” had to face new restrictions in order to play the game, affecting how V-Bucks could be spent.
Players of the version 13.40 edition of the game on iOS and Mac stopped players from spending the virtual currency. It also required gamers to be over 18 to play, and for everyone to agree to new terms and conditions.
The change was due to Epic Games wanting all versions to use the then-current suite of EPic Online Services, which includes parental controls, purchasing defaults, and parental verification features.
Epic must pay $245M after luring customers into ‘Fortnite’ purchases
Epic was dinged $245 million by the FTC over its use of so-called “Dark Patterns” that led players to make unwanted purchases in the game. The fine was part of a previously-announced $520 million settlement from December.
The FTC declared that Epic’s use of counterintuitive and inconsistent button layouts could allow players to easily make an incorrect button press and make a payment. It was also alleged that Epic made it easy for children to make purchases without requiring parental consent.
Epic was also accused of locking, or threatening to lock, accounts of customers who proceeded to dispute unauthorized charges with credit card companies after the purchase.
In March, Epic CEO Tim Sweeney said Apple was a major “roadblock in the way of Epic’s vision for a metaverse.” In discussions at the Game Developers Conference 2023, Epic believed the metaverse should be open and that “it can’t be another walled garden.”
“[Apple will] either try to crush the metaverse, or extract all the profit from it. One or the other,” said Sweeney.
“Apple doesn’t let you use a competing browser engine. So they can do the same thing with the metaverse, so [they] can say, ‘you must use Apple’s limited metaverse engine, you can’t build your own, you can’t use Unreal.”
“If we just build this thing in an open environment then companies can live on their merits,” Sweeney added. “We very much like that because we have a history of winning on the merits when given the chance and we’re terribly frustrated at markets like iOS where you just can’t make an Epic Games Store for iOS because Apple says ‘You can’t compete with us’!”
Apple triumphant in Epic Games ‘Fortnite’ antitrust appeal
On April 24, 2023, the U.S. Ninth Circuit Court of Appeals affirmed the lower court’s decision from 2021, rejecting claims from Epic that the App Store policies violated federal laws, specifically about the forbidding of third-party app marketplaces.
However, not everything went Apple’s way. Of the nine claims in the appeal, a tenth did go Epic’s way. The court upheld the district court’s decision over California’s Unfair COmpetition Law, which means Apple will still have to perform previously agreed upon anti-steering changes.
“Today’s decision reaffirms Apple’s resounding victory in this case, with nine of ten claims having been decided in Apple’s favor,” a statement from Apple said. “For the second time in two years, a federal court has ruled that Apple abides by antitrust laws at the state and federal levels.”
“The App Store continues to promote competition, drive innovation, and expand opportunity, and we’re proud of its profound contributions to both users and developers around the world. We respectfully disagree with the court’s ruling on the one remaining claim under state law and are considering further review.”
The ruling states that Apple makes it clear that by improving security and privacy, “it is tapping into consumer demand and differentiating its products from those of its competitors— goals that are plainly procompetitive rationales.”
Along with consumer surveys indicating security is important, the ruling cites Tim Sweeney, noting “Even Epic’s CEO testified that he purchased an iPhone over an Android smartphone in part because it offers ‘better security and privacy.'”
With Apple’s restrictions, users are still free to choose whether to use iOS and its security, or to go elsewhere, such as on Android. “Apple’s restrictions create a heterogenous market for app-transaction platforms which, as a result, increases interbrand competition— the primary goal of antitrust law.”
The court also found that Epic’s assertions it could match Apple’s notarized apps model without human review didn’t establish that it would be “virtually as effective” in practice. The court found “compelling” Apple’s explanation for why human review is necessary, and that Epic “did not explain how, if at all” a purely automated process could screen for such threats.
On In-App Payments, the court determined the restrictions “have procompetitive effects that offset their anticompetitive effects.”
Apple & Epic Games both appealing ‘Fortnite’ App Store antitrust ruling
A joint request was made by Apple and Epic to the appeals court in June to review its decision that may compel Apple to alter its payment practices in the App Store, but for completely different reasons.
Following April’s ruling, which determined Apple had violated an state unfair competition law in California but didn’t violate US antitrust regulations, Apple challenged a national injunction, asserting that it is “procompetitive” and not breaching antitrust laws.
Epic, meanwhile, contended its allegations against Apple directly relate to the fundamental objective of US antitrust law, which is to promote competition. Also, Epic accused the appeals court of not thoroughly examining and weighing the consumer benefits asserted by Apple against the anticompetitive consequences of its practices.
Apple petitions Supreme Court to overrule ‘Fortnite’ lawsuit
On July 3, 2023, Apple filed to take the battle to the U.S. Supreme Court to reverse the Court of Appeals ruling that affects App Store policies.
Apple’s legal team motioned for a reconsideration of an April ruling the U.S. Ninth Circuit Court of Appeals on the matter. While in April the court upheld most of a previous decision in the case, it later rejected attempts by Epic and Apple to revisit the decision.
Apple’s motion claims that the appeals court reached too far by issuing a nationwide injunction against Apple over alleged violations of California state unfair competition law. The petition states it raises “far-reaching and important” questions about the power of judges in issuing broad injunctions.
Apple’s App Store anti-steering rules put on hold as it appeals Supreme Court
Apple was granted a motion on July 17 to pause a decision that would force a change to “anti-steering” App Store rules, while it worked on its Supreme Court appeal.
Under the motion, Apple gained another 90 days before it would need to make changes to the rules.
Judge scolds Apple’s lawyers over appeals arguments
Apple’s lawyers were chided by a U.S. judge in the ruling granting the 90 day delay on the rules.
Judge Milan Smith wrote in the ruling that the delay is allowed because of “our general practice of granting a motion for a stay if the arguments presented therein are not frivolous.”
“I write separately to express my view that, while the arguments in Apple’s motion may not be technically frivolous,” wrote Judge Smith, “they ignore key aspects of the panel’s reasoning and key factual findings by the district court.”
“When our reasoning and the district court’s findings are considered,” continued the ruling, “Apple’s arguments cannot withstand even the slightest scrutiny.”
“Apple’s standing and scope-of-the-injunction arguments simply masquerade its disagreement with the district court’s findings and objection to state-law liability as contentions of legal error,” said Judge Smith.
Epic asks U.S. Supreme Court to enforce lower court’s App Store order
On July 27, Epic asked the Supreme Court to uphold the lower court’s ruling that was affected by Apple’s 90-day stay.
It was reckoned that, as a result of that petition, Apple could technically delay any major changes to the App Store. By default, the company now has 90 days before it needs to make any changes, and it could get even longer if SCOTUS decides to hear the case.
Supreme Court backs Apple in App Store payment row — for now
On August 9, 2023, the U.S. Supreme Court answered Epic’s request to force Apple to make changes to its anti-steering policies before the end of the appeals process. The court rejected the request.
Judge Elena Kagan did not cite any reasons for declining the request.
Epic takes its ‘Fortnite’ fight with Apple to the Supreme Court
On September 27, 2023, Epic took the last possible shot at winning its Epic vs Apple battle, by bringing the case to the Supreme Court for review. In a writ of certiorari, Epic asked for review of the entire antitrust case and its rulings.
Apple wants Supreme Court to reverse Epic’s only ‘Fortnite’ antitrust victory
One day after Epic filed its own motion to the Supreme Court for a review of the case, on September 28, 2023, Apple did the same thing. More specifically, it asked for a review of the one section it failed to win.
While Epic wants a review of practically all of the case by the Supreme Court, Apple wants a reexamination of the count that didn’t go its way, about anti-steering practices that prevent developers from telling users of alternative purchasing options.
It is now down to the Supreme Court to determine whether or not to take up either petition, with decisions expected before the end of 2023.