

Developers uses most of the React patterns without even thinking of the patterns greatness in creating user interfaces. We are going to see some of those patterns no one talks about, but uses unintentionally, that boost the UI trust.
When using them, the developers put no intentional effort to uplift the UI trust. But it happens. Those are micro interactions that help for detailing the UI by sending feedback based on user actions. These hidden micro interactions make the UI rich, intuitive and improve the user experience.
A simple React-State-driven micro interaction
This tiny React example manages a button’s press state. It triggers class based on the pressed/released state change of the button element.
//Button press down micro-instruction
const [pressed, setPressed] = useState(false); // button elment to render on the interface
<button
onMouseDown={() => setPressed(true)}
onMouseUp={() => setPressed(false)}
className=className={`
transition-transform duration-150 ${pressed ? "scale-95" : "scale-100"}
`}
>
Save
</button>
This example code 1) allows mouse-down and mouse-up action -> 2) change the 'pressed' state -> 3) triggers class

Common React Micro-Interactions that increase user trust
Micro interactions are added in React just like that. These are created by React patterns that are hidden to explain in most of the documentations and tutorials. They are treated as small UX detailing process rather than known as patterns. But, these are greatly contributing in UI enrichment. They helps to improve the UI to make users trust the interface.
The list below show the different micro interaction techniques to send feedback to the UI.
- Press down micro interaction when clicking a button.
- Dynamic validation on input.
- On hovering micro interaction to change the background or add shadow.
- Showing spinner on processing background job.
- Shaking animation for Reacting to errors.
Press down/up Effect
This Pressable React wrapper is about to have a child clickable element. It consistantly perform the following micro interaction loop for user action.
- It captures user’s click.
- Acknowledge by calling on-press event handler.
- Then send feedback by enabling the press effect via class.
- Let the user trust the UI.
This React article has the code for using this Pressable wrapper for a ButtonPending component. That component enables the button ‘disabled’ logic based on the ‘loading’ state. If the ‘loading = true’, it will make the button to caption to show “Subscribing…”.
The complete child component of this Pressable wrapper is clickable. This feature increases the success rate of capturing the user-click.
src/components/Pressable.jsx
export default function Pressable({ children, onPress, className }) { return ( <div className={`pressable ${className || ''}`} onClick={onPress}> {children} </div> );
}

src/components/ButtonPending.jsx
export default function ButtonPending({ loading, children, onClick }) { return ( <button className="button-pending" disabled={loading} onClick={onClick}> <span style={{ flex: 1, textAlign: 'center' }}> {loading ? 'Subscribing...' : children} </span> </button> );
}
Micro interaction feedback with Ripple effect
The Ripple effect create an expanded, faded circular view around the click-point. It strongly acknowledges user-click action using this feedback. User will trust the UI by getting this instant visual confirmation.
The click co-ordinates are captured by getBoundingClientRect() to create the absolute positioning of the Ripple.
This component has the reference for the the click target by using React useRef. When the user click on the containerRef, an active ripple instance is created and disappears.
src/components/Ripple.jsx
import { useState, useRef } from 'react'; export default function Ripple({ children }) { const [ripples, setRipples] = useState([]); const containerRef = useRef(null); const addRipple = (e) => { const rect = containerRef.current?.getBoundingClientRect(); if (!rect) return; const size = Math.max(rect.width, rect.height); const x = e.clientX - rect.left - size / 2; const y = e.clientY - rect.top - size / 2; const ripple = { id: Math.random(), x, y, size }; setRipples((prev) => [...prev, ripple]); setTimeout(() => setRipples((prev) => prev.filter((r) => r.id !== ripple.id)), 650); }; return ( <div className="ripple-container" ref={containerRef} onMouseDown={addRipple}> {ripples.map((r) => ( <div key={r.id} className="ripple" style={{ left: r.x, top: r.y, width: r.size, height: r.size }} /> ))} {children} </div> );
}
Dynamic validation shows error on form section
Form validation is called at the moment when users giving input. It will send feedback by showing validation error immediately. This will build trust by showing instant feedback.
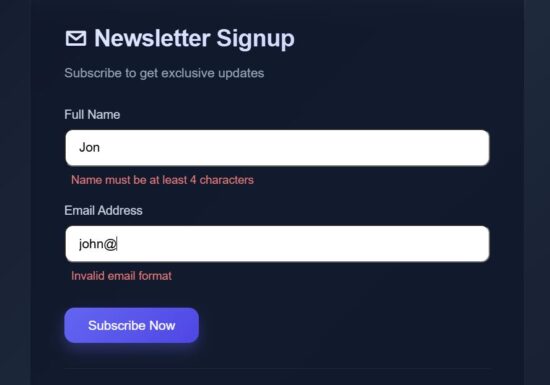
This React FormSection component has the reference for all the React state variables needed for enabling this micro interaction concept.
This section accepts form data and call a field level validation on typing the input. This example validates the Name and Email fields. Once the user enters wrong data or giving input in wrong format, then the field level validation error will be managed in the fieldErrors.
The field onchange handler update only the current field data with the formData state then calls the field specific validation.
src/components/FormSection.jsx
export default function FormSection({ formData, fieldErrors, loading, setFormData, validateField, setError }) { return ( <> <div className="form-group"> <label>Full Name</label> <input type="text" placeholder="John Doe" value={formData.name} onChange={(e) => { const val = e.target.value; setFormData({ ...formData, name: val }); validateField("name", val); setError(false); }} disabled={loading} /> {fieldErrors.name && <p className="field-error">{fieldErrors.name}</p>} </div> <div className="form-group"> <label>Email Address</label> <input type="email" placeholder="john@example.com" value={formData.email} onChange={(e) => { const val = e.target.value; setFormData({ ...formData, email: val }); validateField("email", val); setError(false); }} disabled={loading} /> {fieldErrors.email && <p className="field-error">{fieldErrors.email}</p>} </div> </> );
}
React micro interaction on hover
On hovering an element, the animation effect can be given in different ways. The HoverLift and HoverApplyBorder wrapper helpers are most frequently used micro interaction techniques.
These functions encloses hovered target with the lift effect or border.
src/components/HoverLift.jsx
export default function HoverLift({ children }) { return <div className="hover-lift">{children}</div>;
}
src/components/HoverApplyBorder.jsx
export default function HoverApplyBorder({ children }) { return ( <div className="hover-border"> {children} </div> );
}
Micro interaction pattern used during progressing user request
When submitting a form, the user request is taken to the backend and the process will be going on. During the processing time, the useDelayedLoader will be shown to the form near the button. Also, the FadePresence wrapper is applied to the form component to dim the UI. It lets the user know that the form-action request is taken for processing. It will build trust about the user interface.
src/components/useDelayedLoader.js
import { useState, useEffect } from 'react';
export default function useDelayedLoader(isLoading, delay = 450) { const [showLoader, setShowLoader] = useState(false); useEffect(() => { let timer; if (isLoading) { timer = setTimeout(() => setShowLoader(true), delay); } else { // defer state update to next tick to avoid ESLint warning timer = setTimeout(() => setShowLoader(false), 0); } return () => clearTimeout(timer); }, [isLoading, delay]); return showLoader;
}
src/components/FadePresence.jsx
export default function FadePresence({ show, children }) { return ( <div className="fade-presence" style={{ opacity: show ? 1 : 0.5, transform: show ? 'translateY(0)' : 'translateY(10px)', pointerEvents: show ? 'auto' : 'none', }} > {children} </div> );
}
Show response or progressing state of the form submission
src/components/StatusSection.jsx
export default function StatusSection({ loading, showLoader, success, error }) { return ( <div className="status-box"> {showLoader && loading && ( <div className="loader"> <div className="loader-spinner" /> <span>Subscribing...</span> </div> )} {!loading && success && ( <div className="success"> <span className="success-icon">✓</span> <p>Check your email to confirm</p> </div> )} {!loading && error && ( <div className="error-box"> <span className="error-icon">!</span> <p>Please fill all fields</p> </div> )} </div> );
}
Send feedback effect on success or failure

src/components/ShakeOnError.jsx
export default function ShakeOnError({ isError, children }) { return <div className={isError ? 'shake' : ''}>{children}</div>;
}

src/components/PulseOnSuccess.jsx
export default function PulseOnSuccess({ success, children }) { return <div className={success ? 'pulse' : ''}>{children}</div>;
}
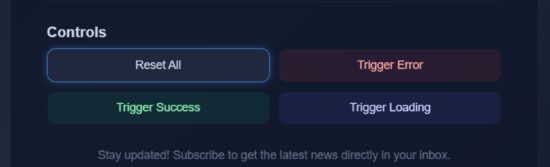
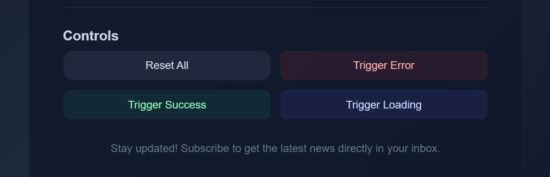
Button controls that triggers React micro interaction loop
Most of the micro interactions are added to the “Subscribe Now” button. Added to that, an additional button interfaces are provided in the code to have a quick experiment with the effects.
These controls will show you the hover lift effect and update the status section without completing the form.
src/components/ControlsSection.jsx
import HoverApplyBorder from "./HoverApplyBorder";
import Ripple from "./Ripple";
export default function ControlsSection({ setError, setSuccess, setLoading, setFormData, setFieldErrors }) { return ( <div className="controls"> <h3 className="controls-title">Controls</h3> <div className="button-grid"> <HoverApplyBorder> <Ripple> <button className="control-btn reset" onClick={() => { setError(false); setSuccess(false); setLoading(false); setFormData({ email: "", name: "" }); setFieldErrors({ name: "", email: "" }); }}> Reset All </button> </Ripple> </HoverApplyBorder> <HoverApplyBorder> <button className="control-btn error" onClick={() => { setError(false); setTimeout(() => setError(true), 50); setSuccess(false); setLoading(false); }}> Trigger Error </button> </HoverApplyBorder> <HoverApplyBorder> <button className="control-btn success" onClick={() => { setSuccess(false); setTimeout(() => setSuccess(true), 50); setError(false); setLoading(false); }} > Trigger Success </button> </HoverApplyBorder> <HoverApplyBorder> <button className="control-btn loading" onClick={() => { setLoading(true); setTimeout(() => setLoading(false), 2000); }} > Trigger Loading </button> </HoverApplyBorder> </div> </div> );
}
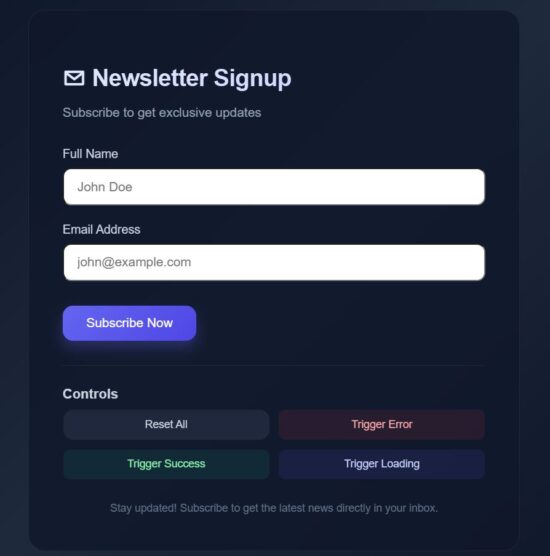
React frontend form uses micro interaction techniques
This is the landing page JSX that uses all the components and wrapper classes we have seen above. This script will be useful how the micro interaction wrapper are used in the React frontend components.
src/App.jsx
import { useState } from "react";
import Pressable from "./components/Pressable";
import ShakeOnError from "./components/ShakeOnError";
import FadePresence from "./components/FadePresence";
import PulseOnSuccess from "./components/PulseOnSuccess";
import HoverLift from "./components/HoverLift";
import ButtonPending from "./components/ButtonPending";
import useDelayedLoader from "./components/useDelayedLoader"; import FormSection from "./components/FormSection";
import StatusSection from "./components/StatusSection";
import ControlsSection from "./components/ControlsSection"; export default function App() { const [loading, setLoading] = useState(false); const [error, setError] = useState(false); const [success, setSuccess] = useState(false); const [formData, setFormData] = useState({ email: "", name: "" }); const [fieldErrors, setFieldErrors] = useState({ name: "", email: "" }); const showLoader = useDelayedLoader(loading, 450); const handleSubmit = () => { setSuccess(false); setError(false); const isNameEmpty = !formData.name.trim(); const isEmailEmpty = !formData.email.trim(); if (isNameEmpty || isEmailEmpty) { setTimeout(() => setError(true), 20); return; } if (validateField("name", formData.name, true) || validateField("email", formData.email, true)) { return; } setLoading(true); setTimeout(() => { setLoading(false); setSuccess(true); setTimeout(() => { setFormData({ email: "", name: "" }); setFieldErrors({ name: "", email: "" }); }, 1500); }, 1300); }; const validateField = (field, value, returnOnly = false) => { let message = ""; if (field === "name") { if (!value.trim()) message = "Name is required"; else if (value.trim().length < 4) message = "Name must be at least 4 characters"; } if (field === "email") { const emailRegex = /^[^\s@]+@[^\s@]+\.[^\s@]+$/; if (!value.trim()) message = "Email is required"; else if (!emailRegex.test(value)) message = "Invalid email format"; } if (!returnOnly) { setFieldErrors((prev) => ({ ...prev, [field]: message })); } return message; }; return ( <div className="container"> <main> <ShakeOnError isError={error}> <PulseOnSuccess success={success}> <div className="card"> <header> <h1>✉ Newsletter Signup</h1> <p className="subtitle">Subscribe to get exclusive updates</p> </header> <FadePresence show={!loading}> <FormSection formData={formData} fieldErrors={fieldErrors} loading={loading} setFormData={setFormData} validateField={validateField} setError={setError}/> </FadePresence> <div className="action-row"> <HoverLift> <Pressable onPress={handleSubmit}> <ButtonPending loading={loading}>Subscribe Now</ButtonPending> </Pressable> </HoverLift> <StatusSection loading={loading} showLoader={showLoader} success={success} error={error} /> </div> <div className="divider"></div> <ControlsSection setError={setError} setSuccess={setSuccess} setLoading={setLoading} setFormData={setFormData} setFieldErrors={setFieldErrors} /> <footer>Stay updated! Subscribe to get the latest news directly in your inbox.</footer> </div> </PulseOnSuccess> </ShakeOnError> </main> </div> );
}
Output:
Some of the libraries to build micro-interaction and animation in React
These are some of the useful libraries that ease the process of building React app with micro-interaction techniques and smooth animation effects.
- Framer Motion – It is suitable to use for its perfect result for on hover or on Press effects, enter or exit transition, layout shift micro-interactions.
- React Spring – It is known for its smooth drag and drop, expand-collapse, and toggle effects.
- AutoAnimate – It is popularly known for its auto DOM changes with minimal config.
- GSAP – GreenSock animation is recommended for an embedding platform for imposing complex animation on the frontend. The example for the complex animations are, chained effects, SVG morphing and more.
Conclusion
We have seen how do micro-interactions increase UI trust. An interactive and intuitive web interface impresses endusers and encourages them to use it. React web app using micro interaction patterns earns user trust by sending appropriate feedback to the interface.
The feedbacks close the loop to let the users understand that their actions are taken for processing. Various kind of feedbacks are used to acknowledge the users. These are the commonly used techniques in gain the user’s trust.
- Displaying feedback messages.
- Animation effects like shaking login when entering wrong credentials.
- Animated icons to show tick on successful payment transactions.
We see some of the micro interaction techniques to show status, progress bar, or to shake UI if something went wrong.
References:
