Suppose you have a PDF file, but it’s too large and you’d like to compress it (perhaps you want to reduce its size to allow for faster transfer over the internet, or perhaps to save storage space).
Even more challenging, suppose you have multiple PDF files you’d like to compress.
Multiple online options exist, but these typically allow a limited number of files to be processed at a time. Also of course there is the extra time involved in uploading the originals, then downloading the results. And of course, perhaps you are not comfortable sharing your files with the internet.
Fortunately, we can use Python to address all these concerns. But before we learn how to do this, let’s first learn a little bit about PDF files.
About Compressing PDF Files
According to Dov Isaacs, former Adobe Principal Scientist (see his discussion here) PDF documents are already substantially compressed.
The text and vector graphics portions of the documents are already internally zip-compressed, so there is little opportunity for improvement there.
Instead, any file compression improvements are achieved through compression of image portions of PDF documents, along with potential loss of image quality.
So compression might be achievable, but the user must choose between how much compression versus how much image quality loss is acceptable.
Setup
A programmer going by the handle Theeko74 has written a Python script called “pdf_compressor.py”. This script is a wrapper for ghostscript functions that do the actual work of compressing PDF files.
This script is offered under the MIT license and is free to use as the user wishes.
Hint: make sure you have ghostscript installed on your computer. To install ghostscript, follow this detailed guide and come back afterward.
Ultimately we will be writing a Python script to perform the compression.
So we create a directory to hold the script, and use our preferred editor or IDE to create it (this example uses Linux command line to make the directory, and uses vim as the editor to make script “bpdfc.py”; use your preferred choice for creating the directory and creating the script within it):
$ mkdir batchPDFcomp

$ cd batchPDFcomp

$ vim bpdfc.py
We won’t write out the script just yet – we’ll show some details for the script a little later in this article.
When we do write the script, within it we’ll import “pdf_compressor.py” as a module.
To prepare for this we should create a subdirectory below our Python script directory.
Also, we’ll need to copy pdf_compressor.py into that subdirectory, and we’ll need to create a file __init__.py within the same subdirectory (those are double underscores each side of ‘init’):
$ mkdir pdfc

$ cp ~/Downloads/pdf_compressor.py ~/batchPDFcomp/pdfc/

$ cd pdfc

$ vim __init__.py
What we have done here is created a local package pdfc containing a module pdf_compressor.py.
Note: The presence of file __init__.py indicates to Python that that directory is part of a package, and to look there for modules.
Now we are ready to write our script.
The PDF Compression Python Script
Here is our script:
from pdfc.pdf_compressor import compress

compress('Finxter_WorldsMostDensePythonCheatSheet.pdf', 'Finxter_WorldsMostDensePythonCheatSheet_compr.pdf', power=4)
As you can see it’s a very short script.
First we import the “compress” function from “pdf_compressor” module.
Then we call the “compress” function. The function takes as arguments: the input file path, the output file path, and a ‘power’ argument that sets compression as follows, from least compression to most (according to the documentation in the script):
Compression levels:
0: default
1: prepress
2: printer
3: ebook
4: screen
Running the Script
Now we can run our script:
$ python bpdfc.py

Compress PDF...

Compression by 51%.

Final file size is 0.2MB

Done.

$
We have only compressed one PDF document in this example, but by modifying the script to loop through multiple PDF documents one can compress multiple files at once.
However, we leave that as an exercise for the reader!
We hope you have found this article useful. Thank you for reading, and we wish you happy coding!
The Bootstrap navbar is a menu responsive header with navigation. Bootstrap supports enabling many UI effects with this navbar component. For example,
Sticky navbar on scrolling the content.
Slide-in effect by using Bootstrap expand-collapse
Mobile-friendly responsive menu navigation.
This article is for creating a Bootstrap sticky navbar on the page top header. It shows both static and dynamic content on the navigation header. Let us see how to display a sticky navbar on a page using Bootstrap.
This quick example shows code to display the stick navbar. It includes Boostrap into the code by using CDN URL. You can also install Bootstrap via composer into your application vendor directory.
It uses Bootstrap sticky-top to the .navbar element.
It is hidden for printing but can be overridden by adding .d-print to the .navbar.
It lets assistive mechanism to identify navbar by using <nav>. Bootstrap recommends to add role=”navigation” attribute for the <div> like containers.
Uses of Bootstrap sticky navbar
The Bootstrap sticky navbar provides a fixed header element mostly at the top. Sometimes, it will be used in the page and form footer.
The following list of items shows some of the uses of a sticky navbar in a website.
To create a fixed header menu. Eg: The header menu links like ‘Contact’, ‘Request a quote’ will be useful if they are sticky on scroll.
To create fixed footer links. Eg: The social media share option in the footer can be sticky to let the user to share the content at any time of reading.
To keep a HTML form footer sticky on scroll. The payment form with the ‘Pay now’ or ‘Buy now’ control should be fixed regardless of the page scroll. It reduces friction and allows users to buy the product easily.
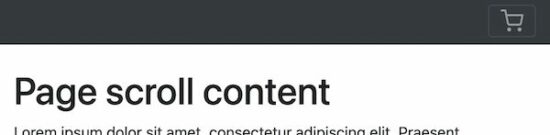
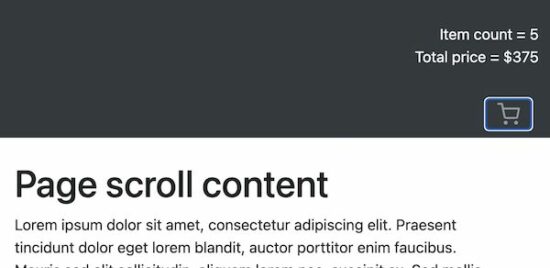
The below screenshot cart icon and the expanded cart info. It displays the number of items in the cart and the total amount.
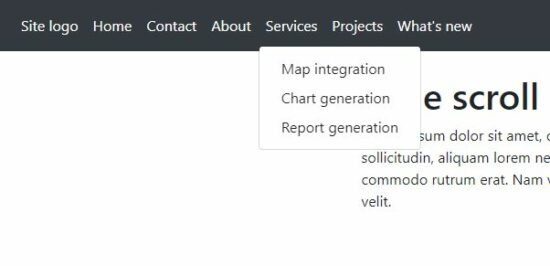
Dynamic menu in the sticky navbar
This example includes HTML as like as the static menu example. The difference is the menu items are from the database.
This code uses a PHP class DataSource.php to process the database operations. It uses MySqli with prepared-statement to access the database.
bootstrap-sticky-navbar-dynamic.php
<?php
namespace Phppot; use Phppot\DataSource;
require_once __DIR__ . '/DataSource.php';
$conn = new DataSource();
$query = "SELECT * FROM tbl_menu where parent = 0";
$mainresult = $conn->select($query);
?>
<!DOCTYPE html>
<html>
<head>
<meta name="viewport" content="width=device-width, initial-scale=1">
<link href="https://cdn.jsdelivr.net/npm/bootstrap@5.1.3/dist/css/bootstrap.min.css" rel="stylesheet">

<script src="https://cdn.jsdelivr.net/npm/bootstrap@5.1.3/dist/js/bootstrap.bundle.min.js"></script>
</head>
<style>
.container { height: 1000px;
}
</style>
<body> <nav class="navbar navbar-expand-lg navbar navbar-expand-sm sticky-top navbar-dark bg-dark"> <button class="navbar-toggler" type="button" data-toggle="collapse" data-target="#navbarSupportedContent" aria-controls="navbarSupportedContent" aria-expanded="false" aria-label="Toggle navigation"> <span class="navbar-toggler-icon"></span> </button> <div class="collapse navbar-collapse" id="navbarSupportedContent"> <ul class="navbar-nav mr-auto"> <?php foreach ($mainresult as $key => $val){?> <li class="nav-item dropdown active"><a class="nav-link " href="#" id="navbarDropdown" role="button" data-toggle="dropdown" aria-haspopup="true" aria-expanded="false"><?php echo $mainresult[$key]["menu_name"];?></a> <?php $query = "SELECT * FROM tbl_menu where parent= ?"; $paramType = "i"; $paramValue = array( $mainresult[$key]["id"] ); $subresult = $conn->select($query, $paramType, $paramValue); ?> <?php if (! empty($subresult)) {?> <div class="dropdown-menu" aria-labelledby="navbarDropdown"> <?php foreach ($subresult as $k => $v) {?> <a class="dropdown-item" href="#"><?php echo $subresult[$k]["menu_name"];?></a> <?php }?> </div> <?php } } ?> </li> </ul> <form class="form-inline my-2 my-lg-0"> <input class="form-control mr-sm-2" type="search" placeholder="Search" aria-label="Search"> <button class="btn btn-outline-success my-2 my-sm-0" type="submit">Search</button> </form> </div> </nav> <div class="container"> <div class="row"> <div class="col-12 py-4"> <h1>Page scroll content</h1> Lorem ipsum dolor sit amet, consectetur adipiscing elit. Praesent tincidunt dolor eget lorem blandit, auctor porttitor enim faucibus. Mauris sed elit sollicitudin, aliquam lorem nec, suscipit ex. Sed mollis rhoncus scelerisque. Morbi varius a est sed luctus. Morbi sapien velit, venenatis a sapien vitae, commodo rutrum erat. Nam volutpat diam ac convallis egestas. Nunc convallis tempor hendrerit. Aenean turpis quam, viverra eu eros quis, ornare tristique velit. </div> </div> </div>
</body>
</html>
Responsive Bootstrap sticky navbar
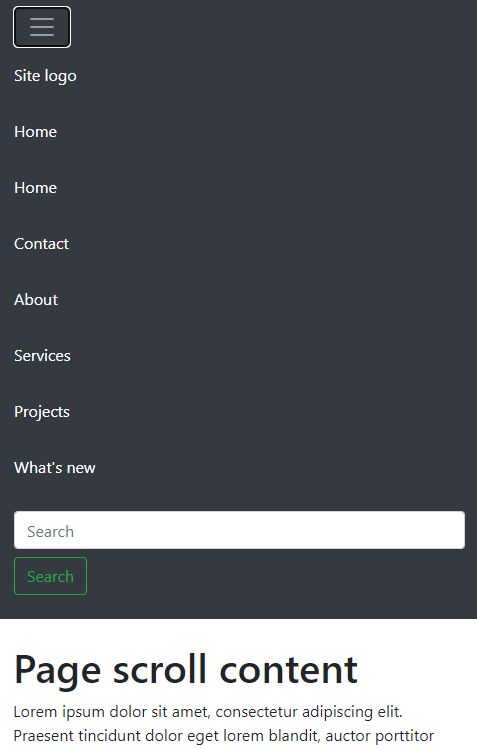
Bootstrap navbar is responsive by default. In a mobile viewport, it displays a slide-down responsive menu. On clicking the menu-expand icon it drops down the menu items.
[freebies.indiegala.com] As the top unhacker in Smash Security, join forces with the AI companion Weedy to become an unstoppable duo and hunt down the 5k Worm.
Capcom Sale, up to 83% OFF
[www.indiegala.com] Resident Evil, Monster Hunter, Devil May Cry, Street Fighter, Mega Man and more.
Save 73% on DRAGON BALL Z: KAKAROT
[www.indiegala.com] Relive the story of Goku and other Z Fighters in DRAGON BALL Z: KAKAROT! Beyond the epic battles, experience life in the DRAGON BALL Z world as you fight, fish, eat, and train with Goku, Gohan, Vegeta and others. Explore the new areas and adventures as you advance through the story and form powerful bonds with other heroes from the DRAGON BALL Z universe....
As orphans, Jenn and Tristan's life path brought them to a mysterious scientist, who took them in and cared for them as his own children. But one day, he disappeared under very odd circumstances.
While searching desperately for him, the duo found a hidden cellar and the Moon Gate portal, transporting them to a dangerous parallel world where goblins thrive.
Your adventure begins as you fight to bridge these two very different worlds.
Young Souls is a gorgeous 2D brawler meets story-rich action RPG. Fight hordes of belligerent goblins, level up with hundreds of weapons and accessories, explore, and journey between worlds, as rebellious twins battle their way to save their foster father.
Will Smith Was Asked To Leave After Oscars Slap But He Refused, Academy Says
The newest chapter of the Will Smith/Chris Rock drama at the Oscars has unfolded. The Academy of Motion Picture Arts and Sciences said that Smith was asked to leave the venue after he struck Rock on stage, but the Independence Day star refused, according to the Associated Press. TMZ's sources, meanwhile, say this is not the case and that Smith was told by a producer that he could stay. Some said Smith could stay and others wanted him gone, according to the report.
"There were various discussions during several commercial breaks, but they never reached a consensus," TMZ reported.
Smith, who has publicly apologized to Rock and the Academy, is facing potential disciplinary action. The Academy's board met this week to begin discussions about punishing Smith for violating its conduct standards. Smith could be suspended or expelled from the Academy, or face other sanctions, the group said. Harvey Weinstein, Roman Polanski, and Billy Cosby are among the very small group of people to have been expelled from the Academy.
City of Brass is a recurring giveaway, being given once on the Epic Store on May 2019. The games are free to keep until Apr 7th 2022 - 15:00 UTC.
Next week's freebie: Rogue Legacy The Vanishing of Ethan Carter
We are welcoming everyone to join our discord[discord.gg]. We are more active there on finding giveaways, small or large, and there are daily raffles you can participate.
Swap the element at index i with the element at index j, so that the element list[i] is now at position j and the original element list[j] is now at position i.
Examples:
Swapping indices 0 and 2 in list [1, 2, 3] modifies the list to [3, 2, 1].
Swapping indices 1 and 2 in list [1, 2, 3] modifies the list to [1, 3, 2].
Swapping indices 1 and 3 in list ['alice', 'bob', 'carl', 'denis'] modifies the list to ['alice', 'denis', 'carl', 'bob'].
Method 1: Multiple Assignment
To swap two list elements by index i and j, use the multiple assignment expression lst[i], lst[j] = lst[j], lst[i] that assigns the element at index i to index j and vice versa.
lst = ['alice', 'bob', 'carl']

i, j = 0, 2 # Swap index i=0 with index j=2

lst[i], lst[j] = lst[j], lst[i] print(lst)

# ['carl', 'bob', 'alice']
The highlighted line works as follows:
First, it obtains the elements at positions j and i by running the right-hand side of the assignment operation.
Second, it assigns the obtained elements in one go to the inverse indices i and j (see left-hand side of the assignment operation).
To help you better understand this code snippet, I’ve recorded a quick video that shows you how the generalization of multiple assignment, i.e., slice assignment, works as a Python One-Liner:
Method 2: Swap Two Elements by Value Using indexof()
Let’s quickly discuss a variant of this problem whereby you want to swap two elements but you don’t know their indices yet.
To swap two list elements x and y by value, get the index of their first occurrences using the list.index(x) and list.index(y) methods and assign the result to variables i and j, respectively. Then apply the multiple assignment expression lst[i], lst[j] = lst[j], lst[i] to swap the elements.
The latter part, i.e., swapping the list elements, remains the same. The main difference is highlighted in the following code snippet:
lst = ['alice', 'bob', 'carl']

x, y = 'alice', 'carl' # Get indices i and j associated with elements x and y

i, j = lst.index(x), lst.index(y) # Swap element at index i with element at index j

lst[i], lst[j] = lst[j], lst[i] print(lst)

# ['carl', 'bob', 'alice']
Do you need a quick refresher on the list.index() method?
Background: The list.index(value) method returns the index of the value argument in the list. You can use optional start and stop arguments to limit the index range where to search for the value in the list. If the value is not in the list, the method throws a ValueError.
Feel free to also watch the following quick explainer video:
Python One-Liners Book: Master the Single Line First!
Python programmers will improve their computer science skills with these useful one-liners.
Python One-Linerswill teach you how to read and write “one-liners”: concise statements of useful functionality packed into a single line of code. You’ll learn how to systematically unpack and understand any line of Python code, and write eloquent, powerfully compressed Python like an expert.
The book’s five chapters cover (1) tips and tricks, (2) regular expressions, (3) machine learning, (4) core data science topics, and (5) useful algorithms.
Detailed explanations of one-liners introduce key computer science concepts and boost your coding and analytical skills. You’ll learn about advanced Python features such as list comprehension, slicing, lambda functions, regular expressions, map and reduce functions, and slice assignments.
You’ll also learn how to:
Leverage data structures to solve real-world problems, like using Boolean indexing to find cities with above-average pollution
Use NumPy basics such as array, shape, axis, type, broadcasting, advanced indexing, slicing, sorting, searching, aggregating, and statistics
Calculate basic statistics of multidimensional data arrays and the K-Means algorithms for unsupervised learning
Create more advanced regular expressions using grouping and named groups, negative lookaheads, escaped characters, whitespaces, character sets (and negative characters sets), and greedy/nongreedy operators
Understand a wide range of computer science topics, including anagrams, palindromes, supersets, permutations, factorials, prime numbers, Fibonacci numbers, obfuscation, searching, and algorithmic sorting
By the end of the book, you’ll know how to write Python at its most refined, and create concise, beautiful pieces of “Python art” in merely a single line.
DOWNLOAD JAVA 11 How time flies! Over the last several months, Oracle announced changes to evolve the Java platform ensuring it continues forward with a vibrant future for users. Those advances included: Increasing the pace and predictability of delivery Since the release of Java 9, the Java platfor...
Why do we need a contact form on a website? It is to enable (prospective) customers to connect with you.
Elon Musk says, “…maximize the area under the curve of customer happiness…”.
So, increasing the possibilities of reading the customer’s mind will drive us forward to attain the goal. The contact form interface is one of the tools to know our customers.
Let’s design a simple and useful contact form component for your website. The below sections explain how to create a contact form from the scratch.
Uses of a contact form in a website
There are a few more advantages of having a contact form interface.
It helps have conversions by knowing the requirement of the customers.
It helps to know the scope of improvements.
It helps to collect the end users’ ideas and opinions relevant to the business model.
About this example
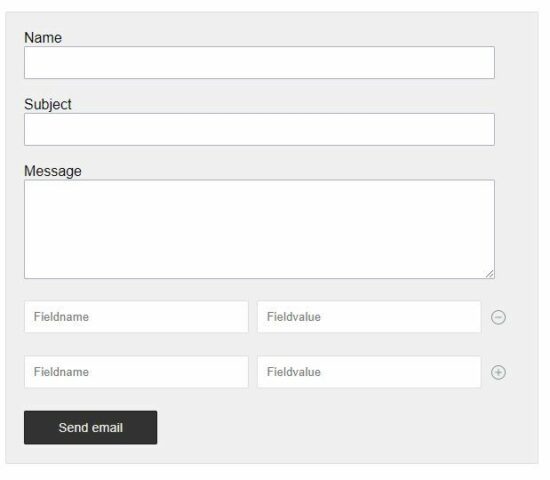
This example code is for designing an HTML contact form with the following features.
This HTML contact form backend code allows both send an email and the store-to-database action. But, The store-to-database feature is optional and disabled initially.
This configuration file has the flag to enable or disable the store-to-database feature.
By default, the ENABLE_DATABASE flag is set to false. Make it true to show the “store-to-database” control in the UI.
It requires the form action PHP file to process data submitted by the user.
It includes the form validation javascript and required jQuery dependency.
By connecting all the contact form example components, this file lets the HTML contact form be interactive.
It shows two controls to save to the database or to send an email. By default the save to the database control will be hidden. It is configurable to display this option.
Form validation can be done either on the server-side or client-side. But, validation on the client-side with Javascript is very usual. And it is quite easy and seamless also.
So, I created a jQuery-based validation script to validate the HTML contact form. It requires all fields to be mandatory except the custom fields.
The contact form custom fields are optional. But, in PHP, it checks the custom field name and value not to be empty. This server-side validation will be done before preparing the contact-form action parameter.
Other JavaScript handlers
This contact.js file does not only include the validation handler. But also, defines handlers to add, delete custom field rows in the UI.
It allows anyone row of custom field inputs to be in the HTML contact form. It is coded in the showHideControls() function of the below file.
contact.js
function validate() { var valid = true; $(".info").html(""); var userName = document.forms["mailForm"]["userName"].value; var subject = document.forms["mailForm"]["subject"].value; var userMessage = document.forms["mailForm"]["userMessage"].value; if (userName == "") { $("#userName-info").html("(required)"); $("#userName").css('background-color', '#FFFFDF'); valid = false; } if (subject == "") { $("#subject-info").html("(required)"); $("#subject").css('background-color', '#FFFFDF'); valid = false; } if (userMessage == "") { $("#userMessage-info").html("(required)"); $("#userMessage").css('background-color', '#FFFFDF'); valid = false; } handleLoader(valid); return valid;

}

function handleLoader(valid) { if (valid == true) { if ($("#savetodatabase")) { $("#savetodatabase").hide();// hide submit } $("#send").hide(); $("#loading-image").show();// show loader }

}

function addMore() { $(".input-row:last").clone().insertAfter(".input-row:last"); $(".input-row:last").find("input").val(""); showHideControls();

}

function remove() { $(".input-row:last").remove(".input-row:last"); $(".plus-button:last").show(); $(".minus-button:last").hide(); $(".input-row:last").find("input").val("");

}

function showHideControls() { $(".plus-button").hide(); $(".minus-button").show(); $(".minus-button:last").hide(); $(".plus-button:last").show();

}
PHP contact form action to send email or store to Database
Generally, the contact form action will send an email with the body of posted form data. This example gives additional support to store the posted message and the details in the database.
This will be suitable when the HTML contact form is used to collect the following.
Users’ feedback
Support request
Project inquiry
Comments
This PHP code handles the form submission by checking the posted action index. It uses the PHP mail() function to send the HTML contact form email. If you want to send an email via SMTP using the PHPMailer library, the link has the code for it.
Refer PHP.net manual to know more about this mail() function.
If the user clicks the ‘Save to database’ button, it connects the Database via the DataSource class. It triggers insert action by sending the form data in the query parameters.
This .sql file contains the create a statement and required indices of the tbl_contact table.
Import this SQL after setting up this example code in your PHP environment.
Note: This is only required if you need the “Store to database” option.
database.sql
-- -------------------------------------------------------- --

-- Table structure for table `tbl_contact`

-- CREATE TABLE `tbl_contact` ( `id` int(11) NOT NULL, `userName` varchar(255) NOT NULL, `subject` varchar(255) NOT NULL, `userMessage` text NOT NULL

) ENGINE=InnoDB DEFAULT CHARSET=utf8mb4; -- -------------------------------------------------------- --

-- Table structure for table `tbl_custom_field`

-- CREATE TABLE `tbl_custom_field` ( `id` int(11) NOT NULL, `contact_id` int(11) NOT NULL, `fieldName` varchar(11) NOT NULL, `fieldValue` varchar(11) NOT NULL

) ENGINE=InnoDB DEFAULT CHARSET=utf8mb4; --

-- Indexes for dumped tables

-- --

-- Indexes for table `tbl_contact`

--

ALTER TABLE `tbl_contact` ADD PRIMARY KEY (`id`); --

-- Indexes for table `tbl_custom_field`

--

ALTER TABLE `tbl_custom_field` ADD PRIMARY KEY (`id`); --

-- AUTO_INCREMENT for dumped tables

-- --

-- AUTO_INCREMENT for table `tbl_contact`

--

ALTER TABLE `tbl_contact` MODIFY `id` int(11) NOT NULL AUTO_INCREMENT; --

-- AUTO_INCREMENT for table `tbl_custom_field`

--

ALTER TABLE `tbl_custom_field` MODIFY `id` int(11) NOT NULL AUTO_INCREMENT;
Conclusion
I hope this article gives you a useful contact form component for your website. It will be helpful to have a good idea to create a form like this on your own.
Custom field integration with contact forms a rare and tricky requirement. Share your thoughts in the comments section to continue posting useful codes.
[www.indiegala.com] Fusion! With the power of anime and gaming combined, the Anime Sale was born! Official anime/manga video games, anime-inspiring games, famous classic/modern Japanese franchises, otaku-favorite titles & more.


 Hint: make sure you have