Welcome, Guest
You have to register before you can post on our site.

Username
  

Password


Search Forums

(Advanced Search)

Forum Statistics
» Members: 20,946
» Latest member: blackopsdlc
» Forum threads: 22,010
» Forum posts: 22,977

Full Statistics

Online Users
There are currently 3149 online users.
» 0 Member(s) | 3144 Guest(s)
Applebot, Baidu, Bing, Facebook, Google

Latest Threads
[DevBlog MS] Microsoft is...
Forum: C#, Visual Basic, & .Net Frameworks
Last Post: xSicKxBot

» Replies: 0
» Views: 12
[WoW Retail News] BlizzCo...
Forum: World of Warcraft
Last Post: xSicKxBot

» Replies: 0
» Views: 13
What is Celestial Codex i...
Forum: PC Discussion
Last Post: xSicKxBot

» Replies: 0
» Views: 13
[Ubuntu News] Fine tune y...
Forum: Linux, FreeBSD, and Unix types
Last Post: xSicKxBot

» Replies: 0
» Views: 11
[WoW Retail News] Xal'ata...
Forum: World of Warcraft
Last Post: xSicKxBot

» Replies: 0
» Views: 31
[Ubuntu News] Scaling And...
Forum: Linux, FreeBSD, and Unix types
Last Post: xSicKxBot

» Replies: 0
» Views: 22
[WoW Retail News] Comment...
Forum: World of Warcraft
Last Post: xSicKxBot

» Replies: 0
» Views: 20
How to unlock Maya Aguina...
Forum: PC Discussion
Last Post: xSicKxBot

» Replies: 0
» Views: 25
[Steam Release] The Unive...
Forum: New Game Releases
Last Post: xSicKxBot

» Replies: 0
» Views: 30
[DevBlog MS] Creating a m...
Forum: C#, Visual Basic, & .Net Frameworks
Last Post: xSicKxBot

» Replies: 0
» Views: 38

 
  [Oracle Blog] Building JDK 11 Together
Posted by: xSicKxBot - 04-02-2022, 06:00 PM - Forum: Java Language, JVM, and the JRE - No Replies

Building JDK 11 Together

With the recent release of Java 11, it’s time to look back at the development of the second feature release in the new semi-annual release cadence. Let’s celebrate the many contributions in the OpenJDK Community from many individuals and organizations — we all built JDK 11, together! JDK 11 Fix Rati...

https://blogs.oracle.com/java/post/build...1-together

Print this item

  [Tut] Convert Bytes To Floating Point Numbers
Posted by: xSicKxBot - 04-02-2022, 06:00 PM - Forum: Python - No Replies

Convert Bytes To Floating Point Numbers

Summary: The struct module in Python, taken from the C programming language, lets you convert bytes to and from floating point numbers.


Problem: How to convert bytes to floating point numbers?

A quick look at the solution:


A Brief Introduction to Struct


The struct module has three main methods for data conversion:

  • unpack(),
  • pack()
  • calcsize().

➦ You can use the unpack() method to convert bytes to floating point numbers. The method accepts data format and the byte to be converted.

struct.unpack("f", <byte>)

➦ On the other hand, the pack() method helps in converting data types to bytes.

struct.pack("f", <floating point number>)

Where f stands for floats. As you will see in other parts of this tutorial, the struct module handles different data types such as characters, integers and floats. But before that, you should understand bytes, floating point numbers, and the concept of structs.

Definition Of Bytes And Floating Point Numbers


This section focuses on the roots of bytes and data formats.

Unlike humans that represent numbers in base 10 (0 to 9 digits), computers understand the language of 1s and 0s. A pair of 1 and 0 is a binary digit, shortened as a bit. So, the computer converts data into a series of 1s and 0s (bits) before storing them in the memory.

Likewise, non-numerical data get stored as bytes. For instance, a character occupies 1 byte of memory. An array of characters forms a string.


Format Type in C programming language size in bytes
c char 1
b signed char 1
B unsigned char 1
? _Bool 1
h short 2
H unsigned short 2
i int 4
I unsigned int 4
l long 4
L unsigned long 4
q long long 8
Q unsigned long long 8
s char[]
f float 4

Now that you understand how a computer interprets various data types, it would be best to learn how the struct module uses them to convert bytes to floating point numbers. Since struct has been taken from the C programming language, hence, a deeper understanding of how it works in C is crucial.

Struct Padding vs Packing


In the C programming language, a struct is a user-defined data type. Unlike other variables, a struct combines different data types in a structure. Here is an example.

struct Fruit { char firstLetter; int total;
};

We are creating a blueprint of a Fruit with a firstLetter character, and total integer. We can create a banana from the Fruit model, assigning it b as firstLetter and 23 as total.

struct Fruit fruit1 = { 'b', 23 };

Printing the size of each attribute,

printf("firstLetter is %d bytes and total is %d bytes \n", sizeof(fruit1.firstLetter),sizeof(fruit1.number));

we get the result as

firstLetter is 1 bytes and total is 4 bytes

The size of fruit1 should be (1 + 4 =) 5 bytes, right? Let’s check.

Size of fruit1 is 8 bytes

It turns out our computer uses more memory to store smaller data quantities. That happens due to a concept called padding.

CPU reads 4 bytes of data per cycle. For the first cycle, it adds three bytes of space to the available (1) byte and returns the result. Next, it finds 4 bytes and returns them. In total, it records (4 + 4 =) 8 bytes.

Padding wastes memory while reducing CPU cycles. Struct packing comes in to store more bytes in less memory.

#include <stdio.h>
#pragma pack(1) struct Fruit { char firstLetter; int number;
}; int main () { struct Fruit fruit1 = { 'b', 23 }; // printf("firstLetter is %d bytes and total is %d bytes \n", sizeof(fruit1.firstLetter),sizeof(fruit1.number)); printf("Size of fruit1 is %d bytes \n", sizeof(fruit1)); return 0;
}

We include #pragma pack(1) header with pack function of value 1 to reduce the memory wastage when compiling and assembling data. This time around, the struct size is what we expect: 1 byte + 4 bytes = 5 bytes.

Size of fruit1 is 5 bytes 

The key takeaway is that struct is a C programming language data structure for storing user-defined data types. Unlike other data types, it combines a continuous stream of different data types. The various data types consume more memory due to padding, something we can control using struct packing.

We can apply the concept of struct to convert data types to bytes in Python, as illustrated below.

How To Use The Struct Module In Python


Unlike C, which speaks to the memory through data types and compiling, Python is a high-level, dynamically-typed programming language. Most operations occur through modules (classes) that get translated and compiled to produce bytes. One such module is the struct module.
The struct module has three methods: pack(), unpack(), and calcsize(). The pack method accepts two parameters: format and data to be converted to bytes. Like the struct blueprint in C, the format part of the pack function in Python accepts various data types. For example,

struct.pack('iif', 2, 4, 7.68)

This means converting integer 2, integer 4 and float 7.68 to a stream of bytes. i stands for an integer while f represents floats.

You can represent repeating integers by a numeral. For example, iii can map to 3i. Also, you can separate the data types with a space. For example, 3i f is another representation for 3if.

We can check the format size by importing the module,

import struct 

and using its calcsize() method.

struct.calcsize('3if')

In the same way, we can convert a floating point number into bytes. Assume we want to convert 3.76 to bytes. We can do that using the following code.

byteData = struct.pack('f', 3.76) print(byteData)

Output:

b'\xd7\xa3p@'

Here, b stands for bytes. The other parts may differ as per computer depending on the memory address system and endianness. Let’s now find floating point numbers from bytes.

Convert Bytes To Floating Point Numbers


The unpack function accepts format, and the byte stream then converts it to a floating point number. For example, we can decode b'\xd7\xa3p@' as follows.

byteData = struct.unpack('f', b'\xd7\xa3p@') print(byteData)

The result is a tuple containing a floating point number with a massive number of decimal points.

(3.759999990463257,)

We can extract the result by surrounding the input with square brackets.

[byteData] = struct.unpack('f', b'\xd7\xa3p@')

The result of printing the output is 3.759999990463257.

The extended decimal output from a reduced input size shows the essence of scientific notation in computing. It also proves the reason for the preference of floating point numbers over integers.

Apart from efficiency, handling floating point numbers comes with speed since much work has gone into building floating point numbers over the years.

Conclusion


The struct module with its unpack() method helps convert bytes to floating point numbers. It would help to understand other methods such as pack() and calcsize because, from them, you can generate bytes from various data types.

Another way to ease handling the conversion is understanding the ins and outs of the struct module, as explained in this tutorial.


https://www.sickgaming.net/blog/2022/03/...t-numbers/

Print this item

  [Tut] PHP File Upload to Server with MySQL Database
Posted by: xSicKxBot - 04-02-2022, 06:00 PM - Forum: PHP Development - No Replies

PHP File Upload to Server with MySQL Database

by Vincy. Last modified on February 1st, 2022.

File upload is an important component in building websites. This article will help you to implement a file upload to the server feature with PHP and a MySQL database.

Example use cases of where the file upload may be needed in a website,

Let us see how to code PHP file upload for a website. You can split this article into the following sections.

  1. PHP file upload – A quick example.
  2. File upload – server-side validation.
  3. Upload file to the server with database.
  4. Upload file as a blob to the database.

PHP file upload – Quick example


<?php if (isset($_FILES['upload_file'])) { move_uploaded_file($_FILES["upload_file"]["tmp_name"], $_FILES["upload_file"]["name"]);
}
?>
<form name="from_file_upload" action="" method="post" enctype="multipart/form-data"> <div class="input-row"> <input type="file" name="upload_file" accept=".jpg,.jpeg,.png"> </div> <input type="submit" name="upload" value="Upload File">
</form>

This quick example shows a simple code to achieve PHP file upload. It has an HTML form to choose a file to upload. Let the form with the following attributes for supporting file upload.

  1. method=post
  2. enctype=multipart/form-data

By choosing a file, it will be in a temporary directory. The $_FILES[“upload_file”][“tmp_name”] has that path. The PHP move_uploaded_file() uploads the file from this path to the specified target.

$_FILES[‘<file-input-name>’][‘tmp_name’] PHP file upload temporary path
$_FILES[‘<file-input-name>’][‘name’] File name with extension
$_FILES[‘<file-input-name>’][‘type’] File MIME type. Eg: image/jpeg
$_FILES[‘<file-input-name>’][‘size’] File size (in bytes)
$_FILES[‘<file-input-name>’][‘error’] File upload error code if any
$_FILES[‘<file-input-name>’][‘full_path’] Full path as sent by the browser

The form allows multi-file upload by having an array of file input.

PHP file upload configuration


Ensure that the server environment has enough settings to upload files.

  • Check with the php.ini file if the file_uploads = on. Mostly, it will be on by default.

More optional directives to change the default settings


  • upload_tmp_dir – to change the system default.
  • upload_max_filesize – to exceed the default limit.
  • max_file_uploads – to break the per-request file upload limit.
  • post_max_size – to breaks the POST data size.
  • max_input_time – to set the limit in seconds to parse request data.
  • max_execution_time – time in seconds to run the file upload script.
  • memory_limit – to set the memory limit in bytes to be allocated.

File upload – server-side validation


When file uploading comes into the picture, then there should be proper validation. It will prevent unexpected responses from the server during the PHP file upload.

This code checks the following 4 conditions before moving the file to the target path. It validates,

  • If the file is not empty.
  • If the file does not already exist in the target.
  • If the file type is one of the allowed extensions.
  • If the file is within the limit.

It shows only the PHP script for validating the uploaded file. The form HTML will be the same as that of the quick example.

file-upload-validation.php

<?php
if (isset($_POST["upload"])) { // Validate if not empty if (!empty($_FILES['upload_file']["name"])) { $fileName = $_FILES["upload_file"]["name"]; $isValidFile = true; // Validate if file already exists if (file_exists($fileName)) { echo "<span>File already exists.</span>"; $isValidFile = false; } // Validate file extension $allowedFileType = array( 'jpg', 'jpeg', 'png' ); $fileExtension = strtolower(pathinfo($fileName, PATHINFO_EXTENSION)); if (! in_array($fileExtension, $allowedFileType)) { echo "<span>File is not supported. Upload only <b>" . implode(", ", $allowedFileType) . "</b> files.</span>"; $isValidFile = false; } // Validate file size if ($_FILES["upload_file"]["size"] > 200000) { echo "<span>File is too large to upload.</span>"; $isValidFile = 0; } if ($isValidFile) { move_uploaded_file($_FILES["upload_file"]["tmp_name"], $fileName); } } else { echo "No files have been chosen."; }
}
?>

Upload file to the server with database


This section gives a full-fledged PHP file upload example. It is with add, edit, preview, list images features. The add/edit allows users to choose an image file to upload to the server.

The home page displays a list of uploaded images with edit, delete action controls. The edit screen will show the preview of the existing file.

PHP file upload and add a new row to the database


This code is for showing a HTML form with a file upload option. This allows users to choose files to upload to the server.

The PHP code receives the uploaded file data in $_FILES. In this code, it checks for basic file validation to make sure of its uniqueness.

Then, it calls functions to upload and insert the file path to the database.

The uploadImage runs PHP move_upload_files() to put the uploaded file in a directory.

The insertImage calls database handlers to insert the uploaded path to the database.

image-upload-list-preview-edit/insert.php


<?php
namespace Phppot; use Phppot\DataSource;
require_once __DIR__ . '/lib/ImageModel.php';
$imageModel = new ImageModel();
if (isset($_POST['send'])) { if (file_exists('../uploads/' . $_FILES['image']['name'])) { $fileName = $_FILES['image']['name']; $_SESSION['message'] = $fileName . " file already exists."; } else { $result = $imageModel->uploadImage(); $id = $imageModel->insertImage($result); if (! empty($id)) { $_SESSION['message'] = "Image added to the server and database."; } else { $_SESSION['message'] = "Image upload incomplete."; } } header('Location: index.php');
} ?>
<html>
<head>
<link href="assets/style.css" rel="stylesheet" type="text/css" />
</head>
<body> <div class="form-container"> <h1>Add new image</h1> <form action="" method="post" name="frm-add" enctype="multipart/form-data" on‌submit="return imageValidation()"> <div Class="input-row"> <input type="file" name="image" id="input-file" class="input-file" accept=".jpg,.jpeg,.png"> </div> <input type="submit" name="send" value="Submit" class="btn-link"> <span id="message"></span> </div> </form> <script src="https://code.jquery.com/jquery-3.6.0.min.js" integrity="sha256-/xUj+3OJU5yExlq6GSYGSHk7tPXikynS7ogEvDej/m4=" crossorigin="anonymous"></script> <script src="assets/validate.js"></script>
</body>
</html>
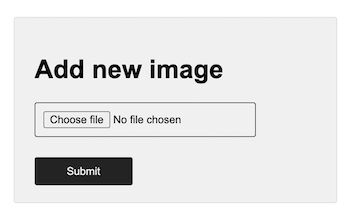
php file upload form

List of uploaded images with edit, delete actions


This is an extension of a usual PHP file upload example. It helps to build a file library interface in an application.

This page reads the uploaded images from the database using PHP.  The getAllImages function returns the image path data in an array format.

The list page iterates this array and lists out the result. And it links the records with the appropriate edit, delete controls.

image-upload-list-preview-edit/index.php


<?php
namespace Phppot; use Phppot\DataSource;
require_once __DIR__ . '/lib/ImageModel.php';
$imageModel = new ImageModel();
?>
<html>
<head>
<title>Display all records from Database</title>
<link href="assets/style.css" rel="stylesheet" type="text/css" />
</head>
<body> <div class="image-datatable-container"> <a href="insert.php" class="btn-link">Add Image</a> <table class="image-datatable" width="100%"> <tr> <th width="80%">Image</th> <th>Action</th> </tr> <?php $result = $imageModel->getAllImages(); ?> <tr> <?php if (! empty($result)) { foreach ($result as $row) { ?> <td><img src="<?php echo $row["image"]?>" class="profile-photo" alt="photo"><?php echo $row["name"]?> </td> <td><a href="update.php?id=<?php echo $row['id']; ?>" class="btn-action">Edit</a> <a on‌click="confirmDelete(<?php echo $row['id']; ?>)" class="btn-action">Delete</a></td> </tr> <?php } } ?> </table> </div> <script src="https://code.jquery.com/jquery-3.6.0.min.js" integrity="sha256-/xUj+3OJU5yExlq6GSYGSHk7tPXikynS7ogEvDej/m4=" crossorigin="anonymous"></script> <script type="text/javascript" src="assets/validate.js"></script>
</body> </html>
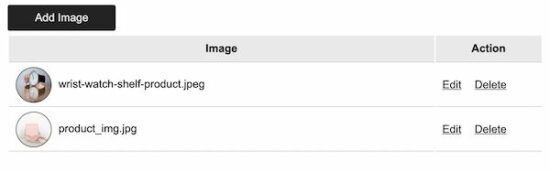
list uploaded files from server

Edit form with file preview


This shows an edit form with an uploaded file preview. It allows replacing the file by uploading a new one.

The form action passes the id of the record to update the file path in the database.

The PHP code calls the updateImage with the upload result and the record id.

image-upload-list-preview-edit/update.php


<?php
namespace Phppot; use Phppot\DataSource;
require_once __DIR__ . '/lib/ImageModel.php';
$imageModel = new ImageModel();
if (isset($_POST["submit"])) { $result = $imageModel->uploadImage(); $id = $imageModel->updateImage($result, $_GET["id"]);
}
$result = $imageModel->selectImageById($_GET["id"]); ?>
<html>
<head>
<link href="assets/style.css" rel="stylesheet" type="text/css" />
</head>
<body> <div class="form-container"> <h1>View/Edit image</h1> <form action="?id=<?php echo $result[0]['id']; ?>" method="post" name="frm-edit" enctype="multipart/form-data" on‌submit="return imageValidation()"> <div class="preview-container"> <img src="<?php echo $result[0]["image"]?>" class="img-preview" alt="photo"> <div>Name: <?php echo $result[0]["name"]?></div> </div> <div Class="input-row"> <input type="file" name="image" id="input-file" class="input-file" accept=".jpg,.jpeg,.png" value=""> </div> <button type="submit" name="submit" class="btn-link">Save</button> <span id="message"></span> </div> </form> <script src="https://code.jquery.com/jquery-3.6.0.min.js" integrity="sha256-/xUj+3OJU5yExlq6GSYGSHk7tPXikynS7ogEvDej/m4=" crossorigin="anonymous"></script> <script src="assets/validate.js"></script>
</body>
</html>
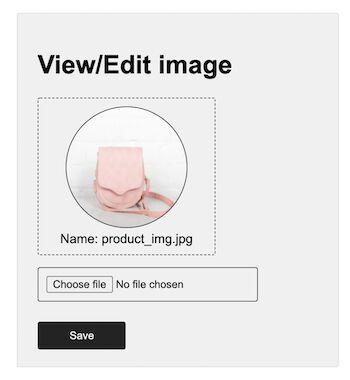
file edit form with preview

The delete action is triggered after user confirmation. It removes the file path from the database.

delete.php


<?php
namespace Phppot; use Phppot\DataSource;
require_once __DIR__ . '/lib/ImageModel.php';
$imageModel = new ImageModel();
$id=$_REQUEST['id'];
$result = $imageModel->deleteImageById($id);
header("Location: index.php");
?>

PHP model class to upload file


It contains functions to upload files to a directory and to the database. The PHP file upload function sets a target to put the uploaded file.

It processes the PHP $_FILES array to get the file data. It prepares the database query by using the file parameter to perform read, write.

imageModel.php


<?php
namespace Phppot; use Phppot\DataSource; class ImageModel
{ private $conn; function __construct() { require_once 'DataSource.php'; $this->conn = new DataSource(); } function getAllImages() { $sqlSelect = "SELECT * FROM tbl_image"; $result = $this->conn->select($sqlSelect); return $result; } function uploadImage() { $imagePath = "uploads/" . $_FILES["image"]["name"]; $name = $_FILES["image"]["name"]; $result = move_uploaded_file($_FILES["image"]["tmp_name"], $imagePath); $output = array( $name, $imagePath ); return $output; } public function insertImage($imageData) { print_r($imageData); $query = "INSERT INTO tbl_image(name,image) VALUES(?,?)"; $paramType = 'ss'; $paramValue = array( $imageData[0], $imageData[1] ); $id = $this->conn->insert($query, $paramType, $paramValue); return $id; } public function selectImageById($id) { $sql = "select * from tbl_image where id=? "; $paramType = 'i'; $paramValue = array( $id ); $result = $this->conn->select($sql, $paramType, $paramValue); return $result; } public function updateImage($imageData, $id) { $query = "UPDATE tbl_image SET name=?, image=? WHERE id=?"; $paramType = 'ssi'; $paramValue = array( $imageData[0], $imageData[1], $_GET["id"] ); $id = $this->conn->execute($query, $paramType, $paramValue); return $id; } /* * public function execute($query, $paramType = "", $paramArray = array()) * { * $id = $this->conn->prepare($query); * * if (! empty($paramType) && ! empty($paramArray)) { * $this->bindQueryParams($id, $paramType, $paramArray); * } * $id->execute(); * } */ function deleteImageById($id) { $query = "DELETE FROM tbl_image WHERE id=$id"; $result = $this->conn->select($query); return $result; }
}
?>

Upload image as a blob to the database


Though this example comes as the last, I guess it will be very useful for most of you readers.

Uploading the file as a blob to the database helps to move the file binary data to the target database. This example achieves this with very few lines of code.

Uploading image file blob using database insert


This file receives the uploaded file from PHP $_FILES. It extracts the file binary data by using PHP file_get_contents() function.

Then, it binds the file MIME type and the blob to the prepared query statement.

The code specifies the parameter type as ‘b’ for the file blob data. First, it binds a NULL value for the blob field.

Then, it sends the file content using send_long_data() function. This function specifies the query parameter index and file blob to bind it to the statement.

file-blob-upload/index.php

<?php
if (!empty($_POST["submit"])) { if (is_uploaded_file($_FILES['userImage']['tmp_name'])) { $conn = mysqli_connect('localhost', 'root', '', 'blog_eg'); $imgData = file_get_contents($_FILES['userImage']['tmp_name']); $imageProperties = getimageSize($_FILES['userImage']['tmp_name']); $null = NULL; $sql = "INSERT INTO tbl_image_data(image_type ,image_data) VALUES(?, ?)"; $stmt = $conn->prepare($sql); $stmt->bind_param("sb", $imageProperties['mime'], $null); $stmt->send_long_data(1, $imgData); $stmt->execute(); $currentId = $stmt->insert_id; }
}
?> <html>
<head>
<link href="assets/style.css" rel="stylesheet" type="text/css" />
</head>
<body> <div class="form-container"> <h1>Upload Image Blob</h1> <form action="" method="post" name="frm-edit" enctype="multipart/form-data" > <?php if(!empty($currentId)) { ?> <div class="preview-container"> <img src="image-view.php?image_id=<?php echo $currentId; ?>" class="img-preview" alt="photo"> </div> <?php } ?> <div Class="input-row"> <input type="file" name="userImage" id="input-file" class="input-file" accept=".jpg,.jpeg,.png" value="" required> </div> <input type="submit" name="submit" class="btn-link" value="Save"> <span id="message"></span> </div> </form>
</body>
</html>

This file is to read a blob from the database and show the preview. It will be specified in the <img> tag ‘src’ attribute with the appropriate image id.

file-blob-upload/image-view.php

<?php $conn = mysqli_connect('localhost', 'root', '', 'blog_eg'); if(isset($_GET['image_id'])) { $sql = "SELECT image_type,image_data FROM tbl_image_data WHERE id = ?"; $stmt = $conn->prepare($sql); $stmt->bind_param("i", $_GET['image_id']); $stmt->execute(); $result = $stmt->get_result(); $row = $result->fetch_array(); header("Content-type: " . $row["image_type"]); echo $row["image_data"]; } mysqli_close($conn);
?>
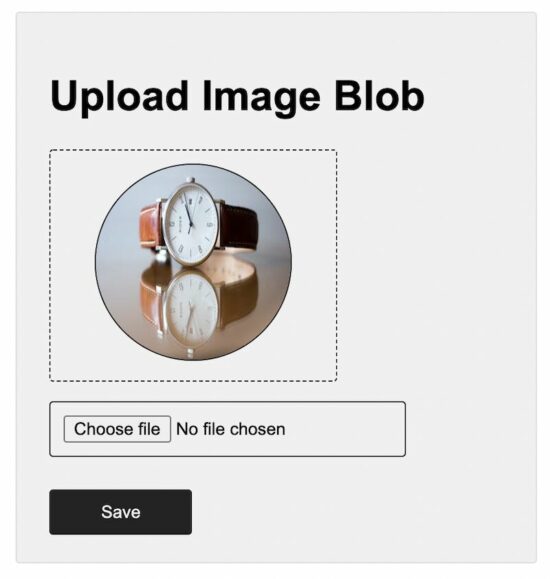
php file upload blob to server

Conclusion


Thus, we have seen a detailed article to learn file upload. I swear we have covered most of the examples on PHP file upload.

We saw code in all levels from simple to elaborate file upload components. I hope, this will be helpful to know how to build this on your own.
Download

↑ Back to Top


https://www.sickgaming.net/blog/2022/02/...-database/

Print this item

  (Indie Deal) Kawaii Novels Bundle, Borderlands 3 & Train Sim Sales
Posted by: xSicKxBot - 04-02-2022, 06:00 PM - Forum: Deals or Specials - No Replies

Kawaii Novels Bundle, Borderlands 3 & Train Sim Sales

Kawaii Novels Bundle | 6 Steam VN Games | 93% OFF
[www.indiegala.com]
Containing various Visual Novels including Otome, Mystery, Detective, Adventure, Dating, RPG, Strategy, Comedy elements, but not missing the cute/kawaii factor, this selection of interactive anime fiction video games brings: Little One, Detective Kobayashi, Heart Fragment, Takorita Meets Fries, How to Sing to Open Your Heart & Lotus Reverie: First Nexus.

Borderlands 3 & Dovetail Sales
[www.indiegala.com]
[www.indiegala.com]
https://www.youtube.com/watch?v=oEdzIi3-mb0
Stay Inside, Stay Safe and Enjoy Good Games.
Check out IndieGala on Twitter, YouTube & Facebook[www.facebook.com]


https://steamcommunity.com/groups/indieg...4073777889

Print this item

  News - Elden Ring: Where To Get The Crystal Sword
Posted by: xSicKxBot - 04-02-2022, 06:00 PM - Forum: Lounge - No Replies

Elden Ring: Where To Get The Crystal Sword

If you're slinging magic as a sorcerer in Elden Ring, you'll probably want to keep a backup melee weapon for when you run out of FP. You have plenty of options from which to choose, but the Crystal Sword ranks among one of the most visually striking of the bunch. It may not necessarily be the best weapon you can find in the game, but if you'd like to rock it for those sweet looks and reasonable damage, we'll tell you where you can find it.

Crystal Sword explained

The Crystal Sword is a straight sword that requires 13 Strength, 10 Dexterity, and 15 Intelligence to wield. It's a decent melee option for sorcery builds, but unless you're really sold on its cool aesthetic, there are definitely some more powerful options available.

The weapon skill on the Crystal Sword is Spinning Slash. This is a pretty common weapon skill that does pretty much exactly what it says and deals some passable damage, though you'd probably benefit from a different Ash of War to make the most of the Crystal Sword.

Continue Reading at GameSpot

https://www.gamespot.com/articles/elden-...01-10abi2f

Print this item

  (Free Game Key) Announcing Our Partnership With Epic Games
Posted by: xSicKxBot - 04-02-2022, 06:00 PM - Forum: Deals or Specials - No Replies

Announcing Our Partnership With Epic Games

Hello Everyone!

We don't make these kind of announcements often, so i'd figure we should be honest with our community in regards with our standings. For a couple of months we have been struggling financially to meet our monthly upkeep to maintain our brand, from humbly paying all our moderators to keeping up with our servers.

Today we announce that GrabFreeGames has been officially acquired by EpicGames[i.imgur.com]! Our partnership was made final with the email[i.imgur.com]Igor received.

What Does This Mean?

Moving forward, our group will be primarily used as a promotional venue for the Epic Store and their products. We will stop posting any freebies related to other platforms aside for Epic (inb4 "but you already did that" joke). I understand there have been some contentious environment in the past with a small number of our users seeing so many Epic Store announcement freebies but less Steam or any other platforms.

We can assure you that Epic always had our best interest at heart and is looking to improve the gaming industry one at a time (After you post this message, make sure you delete this bolded text) - Eric (Epic Games PR Management)


We are encouraging everyone to not join our discord[discord.gg]. The place is currently transitioning under new management and we would like some privacy for the time being.

?GrabFreeGames.com ?Twitter ?Steam Curator ?Facebook[fb.me]?Discord[discord.gg]
❤️Support us: ✔️HumbleBundle Partner[www.humblebundle.com] Epic Tag: GrabFreeGames


https://steamcommunity.com/groups/GrabFr...9647586824

Print this item

  PC - Aztech: Forgotten Gods
Posted by: xSicKxBot - 04-02-2022, 06:00 PM - Forum: New Game Releases - No Replies

Aztech: Forgotten Gods


Some things are best left forgotten. Aztech Forgotten Gods is the cyber-stone action-adventure following Achtli, a young woman who battles the colossal Forgotten Gods. To uncover the truth behind her far-future Mesoamerican metropolis, she'll have to turn the Gods' power against them, as she soars through the city with power and grace.

Publisher: Lienzo

Release Date: Mar 10, 2022


https://www.metacritic.com/game/pc/aztec...otten-gods

Print this item

  How to Set your Spawn Point in Minecraft (Java+Bedrock) 1.18.x+
Posted by: SickProdigy - 03-31-2022, 08:54 PM - Forum: Minecraft - No Replies

How to Set your Spawn Point in Minecraft

This Minecraft tutorial explains how to set your spawn point (spawnpoint) in the game with screenshots and step-by-step instructions.

What is a Spawn Point?

Let's start by first explaining what a spawn point is.

[Image: completed_kill_command.png]

When you die in Minecraft, you will respawn again in your world. The place that you respawn after you die is called your spawn point.

Where is your Spawn Point?

Initially your spawn point is where you started when the world was created but you can change your spawn point at any time.

There are 2 ways to change your spawn point:

  1. Sleep in a bed. When you sleep in a bed at night, you will reset your spawn point. You can sleep in multiple beds but the last bed that you slept in before you die is where you will respawn.
  2. Use the /spawnpoint command. This command allows you to quickly set your spawnpoint with a game command (ie: cheat).

For the purposes of this tutorial, we will explore how to use a bed to change your spawn point.

Steps to change your Spawn Point

1. Place a Bed

It is most common for you to sleep in your bed at night during your game. If you don't have a bed in your inventory, you can quickly make one with a crafting recipe for a bed.
Add the bed to your hotbar and make sure that it is the selected item in the hotbar.
Next, position your pointer (the plus sign) on the block where you want to place your bed. You need at least two blocks to place your bed. You should see the block become highlighted in your game window.

[Image: how_to_use_bed1.png]

The game control to place the bed depends on the version of Minecraft:
  • For Java Edition (PC/Mac), right click on the block.
  • For Pocket Edition (PE), you tap on the block.
  • For Xbox 360 and Xbox One, press the LT button on the Xbox controller.
  • For PS3 and PS4, press the L2 button on the PS controller.
  • For Wii U, press the ZL button on the gamepad.
  • For Nintendo Switch, press the ZL button on the controller.
  • For Windows 10 Edition, right click on the block.
  • For Education Edition, right click on the block.
[Image: how_to_use_bed2.png]

You should see your bed appear on the block that you selected. Congratulations, you have somewhere to sleep at night.

2. Sleep in the Bed

Now that you have placed your bed in your Minecraft world, you need to wait for night (or use a cheat to change to night).

[Image: how_to_use_bed3.png]

Now that it is night, you can sleep in the bed.

TIP: You can not sleep in the bed during the day!
The game control to sleep in the bed depends on the version of Minecraft:
  • For Java Edition (PC/Mac), right click on the bed.
  • For Pocket Edition (PE), you tap on the bed.
  • For Xbox 360 and Xbox One, press the LT button on the Xbox controller.
  • For PS3 and PS4, press the L2 button on the PS controller.
  • For Wii U, press the ZL button on the gamepad.
  • For Nintendo Switch, press the ZL button on the controller.
  • For Windows 10 Edition, right click on the bed.
  • For Education Edition, right click on the bed.

[Image: how_to_use_bed4.png]

While you are sleeping, you will see a Leave Bed button appear. If you click this button, it will return you to your world while it is still night.
If you wait, it will turn to morning and you will automatically wake up standing next to your bed.

[Image: how_to_use_bed5.png]

Now that you have slept in your bed, your spawn point will be reset. If you die in the game, you will respawn in this location. That is a great way to not get lost in your Minecraft world.
Congratulations, you just learned how to set your spawn point in Minecraft.

Print this item

  Rust RCON Admin Tool | Control your server with ease.
Posted by: SickProdigy - 03-31-2022, 08:31 PM - Forum: PC Discussion - No Replies

Hello everyone, and welcome.

Hosting a rust server? I'm sure you need help adminning it, check below! \/

List of what it can do (for each version of the game)

Legacy:

  • Spawn in items
  • Set time of day
  • Teleport
  • Ban
  • Kick
  • Call Airdrops
  • In game message
  • Turn Godmod on/off
  • Turn PVP on/off
  • Notice Popup
  • Commands
  • View who is online

Experimental:
  • Ban
  • Kick
  • View who is online
  • Admin Chat
  • Possibly more coming

If you find you want to use this software please head to this link and grab it up and use it.
https://www.rustadmin.com/
 
Here's a list of console commands you can use:
Useful Rust Console Commands for the Average Player and Admins

Looking to join a rust server?
Try our promoted server Smokers Paradise 2x; Custom Plugins and Maps | Monthly Wipe
135.148.70.123:26980

or  Smokers Paradise 5x; Custom Plugins and Maps | Monthly Wipe
135.148.83.213:7005

Print this item

  [Oracle Blog] JDK 11 Is Released!
Posted by: xSicKxBot - 03-31-2022, 08:07 PM - Forum: Java Language, JVM, and the JRE - No Replies

JDK 11 Is Released!

JDK 11 is live! Download it from the Java SE Downloads page. See the JDK 11 Release Notes for detailed information about this release. Highlights include: Oracle JDK Migration Guide has been updated for JDK 11 with a description of the major differences between the JDK 10 and JDK 11 releases as well...

https://blogs.oracle.com/java/post/jdk-11-is-released

Print this item
