Posted by: xSicKxBot - 11-27-2019, 12:39 AM - Forum: Lounge
- No Replies
Call Of Duty: Modern Warfare's First Free Content Season Dated And Detailed
Call of Duty: Modern Warfare is preparing to launch its first round of post-launch content, and Infinity Ward promises it's "our most ambitious season of content ever." It will begin on December 3, and the studio has laid out a roadmap of what we can expect when it goes live.
The studio gave the date and teaser in a pair of tweets and a more detailed blog post. The content roadmap shows lots of new maps, along with modes, guns, and Spec Ops missions. The maps include Crash, Vacant, and Shipment in multiplayer, Cargo, Atrium, and unspecified additional maps in 2v2 Gunfight, and Port in Ground War mode.
Meanwhile, multiplayer will add three more modes: Reinforce, Gunfight OSP, and Infected. Spec Ops will get Bomb Squad, Grounded, Pitch Black, Just Reward, and more, and new guns include the Ram-7 and Holger-26. It will come to PC, Xbox One, and PS4 simultaneously, as there's no more PS4 timed exclusivity.
A new gun or two may be welcome, seeing as Infinity Ward has had to make multiple attempts at balancing one particular shotgun. This season kickoff will be the official state of Modern Warfare's battle pass, which it's utilizing for post-launch content without splintering the player base with map packs. That means all the maps and modes above will be available for everyone. You'll be able to earn anything with an impact on gameplay, such as weapons or attachments, while you can pay extra for cosmetic items.
If you don't yet have Modern Warfare but want to get in on it before the season drops, there are some good discounts available with Black Friday sales.
Crash (Multiplayer Map): The iconic Call of Duty 4: Modern Warfare map has returned with all the flanking routes and action-packed rooftop encounters you remember.
Vacant (Multiplayer Map): An abandoned office, previously visited in Call of Duty 4: Modern Warfare, leads to intense interior combat across the complex.
Shipment (Multiplayer and Gunfight Map): The classic Call of Duty 4: Modern Warfare map where fast and frenetic action reigns supreme.
Port (Ground War Map): Battle across massive shipping crates, cranes, buildings and streets in this unique Ground War map experience.
Cargo (Gunfight Map): An open-roof storage vessel for shipping containers, on docks of London.
Atrium (Gunfight Map): The centerpiece of a Verdansk palace, still intact despite the conflict raging nearby.
Additional Maps: Look for additional multiplayer maps as Season 1 progresses.
Reinforce (Multiplayer Mode): A hybrid of Dom and S&D, a single-life mode with both teams competing for control of three flags.
On Site Procurement (O.S.P.) (Gunfight Mode): A tactically rich 2v2 mode with a twist: Begin with just your fists, and gather equipment as the match progresses.
Infected (Multiplayer Mode): It’s hunt or be hunted in this survival party game mode!
Additional Modes: Look for more modes as Season 1 continues.
Bomb Squad (Special Ops Experience): Forces still loyal to Barkov have planted explosives around the city of Al-Raab. You’re here to defuse the situation.
Grounded (Special Ops Experience): Enemies have seized Barkov’s former airbase. Engage and eliminate them.
Pitch Black (Special Ops Experience): Infiltrate Barkov’s former estate and recover all required intel before an exfill in a Tactical Rover.
Just Reward (Special Ops Experience): Your squad targets the head of an enemy financial operation, hacking his data centers, and gaining intel.
Additional Content: Look for more Special Ops content as Season 1 continues.
Modern Warfare Battle Pass
Ram-7 New Weapon: Introducing a new fully automatic bullpup Assault Rifle with integrated picatinny rails at 3, 6, and 9 o’clock.
Holger-26 New Weapon: LMG spec of the Holger model rifle, with integrated sight rail and drum magazine for additional ammunition-carrying capacity.
Unity have announced their Black Friday Sale for 2019… which is actually on Monday. On Monday December 2nd 400 assets are going to be on sale for 50% off. On each day leading up to Cyber Monday they have an individual asset on sale for 70% Off. The limited time deals are:
Keep in mind you only have the single day to pick up each asset for 70% off, although I would assume most assets will also be available as part of the 50% off sale on Monday. You can learn more about the sale and the assets involved in the video below. The above links contain an affiliate code giving GFS a small commission, so thanks a ton if you use them!
It’s that time of year again – the time of crazy deals, stupendous sales, and apparently something to do with Thanksgiving. As a Brit I don’t really understand that last part, but luckily the ‘cheap’ part of Black Friday has invaded the UK like a hostile virus, so we get to benefit from another sales event.
It makes Christmas shopping easier, that’s for sure.
Black Friday 2019 App Deals
We’re going to update this list as we go, but here are some of our favourite app sales currently running for Black Friday:
Remember, since Apple stopped their affiliate scheme (Google’s never had one) we don’t get any money for recommending these to you.
Black Friday 2019 Hardware
It’s not something we really look at here on PT, but Hardware’s just as important to mobile gamers as consoles and PC parts are to our brethren in the rest of the gaming industry – we often have to pay a lot more! As an experiment this year, I’m going to list any hardware deals (probably tablets) I spot that seem good, or at least note-worthy.
I’ll probably end up sending you to Amazon a lot, since we’re affiliated and get some money if you buy.
Posted by: xSicKxBot - 11-26-2019, 02:35 PM - Forum: Windows
- No Replies
Rethinking cyber learning? Consider gamification
As promised, I’m back with a follow-up to my recent post, Rethinking how we learn security, on how we need modernize the learning experience for cybersecurity professionals by gamifying training to make learning fun. Some of you may have attended the recent Microsoft Ignite events in Orlando and Paris. I missed the conferences (ironically, due to attending a cybersecurity certification boot camp) but heard great things about the Microsoft/Circadence joint Into the Breach capture the flag exercise.
If you missed Ignite, we’re planning several additional Microsoft Ignite The Tour events around the world, where you’ll be able to try your hand at this capture the flag experience. Look for me at the Washington, DC event in early February.
In the meantime, due to the great feedback I received from my previous blog—which I do really appreciate, especially if you have ideas for how we should tackle the shortage of cyber professionals—I’ll be digging deeper into the mechanics of learning to understand what it really takes to learn cyber in today’s evolving landscape.
Today, I want to address the important questions of how a new employee could actually ramp up their learning, and how employers can prepare employees for success and track the efficacy of the learning curriculum. Once again, I’m pleased to share this post with Keenan Skelly, chief evangelist at Boulder, Colorado-based Circadence.
Here are some of some of her recommendations from our Q&A:
Q: Keenan, in our last blog, you discussed Circadence’s “Project Ares” cyber learning platform. How do new cyber practitioners get started on Project Ares?
A: The way that Project Ares is set up allows for a user to acquire a variety of different skill levels when launched. It’s important to understand what kind of work roles you’re looking to learn about as a user as well as what kinds of tools you’re looking to understand better before you get started on Project Ares. For example, if I were to take some of my Girls Who Code or Cyber Patriot students and put them into the platform, I would probably have them start in the Battle School. This is where they’re going to learn about basic cybersecurity fundamentals such as ports and protocols, regular expressions, and the cyber kill chain. Then they can transition into Battle Rooms, where they’ll start to learn about very specific tools, tactics, and procedures or TTPs, for a variety of different work roles. If you’re a much more skilled cyber ninja, however, you can probably go ahead and get right into Missions, but we do recommend that everyone who comes into Project Ares does some work in the Battle Rooms first, specifically if they are trying to learn a tool or a skill for their work role.
Project Ares also has a couple of different routes that an expert or an enterprising cybersecurity professional can come into that’s really focused more on their role. For example, we have an assessments area based entirely on the work role. This aligns to the NIST framework and the NICE cybersecurity work roles. For example, if you’re a network defender, you can come into that assessment pathway and have steps laid out before you to identify your skill level in that role as you see below:
Assessment pathway.
Q: What areas within Project Ares do you recommend for enterprise cyber professionals to train against role-based job functions and prepare for cyber certifications?
A: You might start with something simple like understanding very basic things about your work role through a questionnaire in the Battle School arena as seen in the illustrations below. You may then move into a couple of Battle Rooms that tease out very detailed skills in tools that you would be using for that role. And then eventually you’ll get to go into a mission by yourself, and potentially a mission with your entire team to really certify that you are capable in that work role. All this practice helps prepare professionals to take official cyber certifications and exams.
Battle School questionnaire.
Battle School mission.
Q: Describe some of the gamification elements in Project Ares and share how it enhances cyber learning.
A: One of the best things about Project Ares is gamification. Everyone loves to play games, whether it’s on your phone playing Angry Birds, or on your computer or gaming console. So we really tried to put a lot of gaming elements inside Project Ares. Since everything is scored within Project Ares, everything you do from learning about ports and protocols, to battle rooms and missions, gives you experience points. Experience points add up to skill badges. All these things make learning more fun for the user. For example, if you’re a defender, you might have skill badges in infrastructure, network design, network defense, etc. And the way Project Ares is set up, once you have a certain combination of those skill badges you can earn a work role achievement certificate within Project Ares.
This kind of thing is taken very much from Call of Duty and other types of games where you can really build up your skills by doing a very specific skill-based activity and earn points towards badges. One of the other things that is great about Project Ares is it’s quite immersive. For example, Missions allows a user to come into a specific cyber situation or cyber response situation (e.g., water treatment plant cyberattack) and have multimedia effects that demonstrate what is going—very much reflective of that cool guy video look. Being able to talk through challenges in the exercises with our in-game advisor, Athena, adds another element to the learning experience as shown in the illustration below.
Athena was inspired by the trends of personal assistants like Cortana and other such AI-bots, which have been integrated into games. So things like chat bots, narrative storylines, and skill badges are super important for really immersing the individual in the process. It’s so much more fun, and easier to learn things in this way, as opposed to sitting through a static presentation or watching someone on a video and trying to learn the skill passively.
Athena—the in-game advisor.
Q: What kinds of insights and reporting capability can Project Ares deliver to cyber team supervisors and C-Suite leaders to help them assessing cyber readiness?
A: Project Ares offers a couple great features that are good for managers, all the way up to the C-Suite, who are trying to understand how their cybersecurity team is doing. The first one is called Project Ares Trainer View. This is where a supervisor or manager can jump into the Project Ares environment, with the students or with the enterprise team members, and observe in a couple of different ways.
The instructor or the manager can jump into the environment as Athena, so the user doesn’t know that they are there. They can then provide additional insight or help that is needed to a student. A supervisor or leader can also jump in as the opponent, which gives them the ability to see someone who is just breezing by everything and maybe make it a little more challenging. Or they can just observe and leave comments for the individuals. This piece is really helpful when we’re talking about managers who are looking to understand their team’s skill level in much more detail.
The other piece of this is a product we have coming out soon called Dendrite—an analytics tool that looks at everything that happens at Project Ares. We record all the key strokes and chats a user had with Athena or any with other team members while in a mission or battle room. Cyber team leads can then see what’s going on. Users can see what they’re doing well, and not doing well. This feedback can be provided up to the manager level, the senior manager level, and even to the C-Suite level to demonstrate exactly where that individual is in their particular skill path. It helps the cyber team leads understand what tools are being used appropriately and which tools are not being used appropriately.
For example, if you’re a financial institution and you paid quite a bit of money for Tanium, but upon viewing tool use in Dendrite, you find that no one is using it. It might prompt you to rethink your strategy on how to use tools in your organization or look at how you train your folks to use those tools. These types of insights are absolutely critical if you want to understand the best way to grow the individual in cybersecurity and make sure they’re really on top of their game.
The Dendrite assessment and analysis solution.
Q: How can non-technical employees improve their cyber readiness?
A: At Circadence, we don’t just provide learning capabilities for advanced cyber warriors. For mid-range people just coming into the technical side of cybersecurity, we have an entire learning path that starts with a product called inCyt. Now, inCyt is a very fun browser-based game of strategy where players have some hackable devices they must protect—like operating systems and phones. Meanwhile, your opponent has the same objective: protect their devices from attacks. Players continually hack each other by gathering intel on their opponent and then launching different cyberattacks. While they’re doing this, players get a fundamental understanding of the cyber kill chain. They learn things like what reconnaissance means to a hacker, what weaponizing means to a hacker, what deploying that weapon means to a hacker, so they can start to recognize that behavior in their everyday interactions online.
Some people ask why this is important and I always say, “I used to be a bomb technician, and there is no possible way I could defuse an IED or nuclear weapon without understanding how those things are put together.” It’s the same kind of concept.
It’s impossible to assume that someone is going to learn cyber awareness by answering some questions or watching a five-minute phishing tutorial after they have already clicked a link in a suspicious email. Those are very reactive ways of learning cyber. inCyt is very proactive. And we want to teach you in-depth understanding of what to look for, not just for phishing but for all the attacks we’re susceptible to. inCyt is also being used by some of our customers as a preliminary gate track for those who are interested in cybersecurity. So if you demonstrate a very high aptitude within inCyt, we would send you over to our CyberBridge portal where you can start learning some of the basics of cybersecurity to see if it might be the right field for you. Within our CyberBridge access management portal, you can then go into Project Ares Academy, which is just a lighter version of Project Ares.
Professional and Enterprise licenses in Project Ares pave more intricate learning pathways for people to advance in learning, from novice to expert cyber defender. You’ll be able to track all metrics of where you started, how far you came, what kind of skill path you’re on, and what kind of skill path you want to be on. Very crucial items for your own work role pathway.
How to close the cybersecurity talent gap
Keenan’s perspective and the solution offered by Project Ares really helps to understand how to train security professionals and give them the hands-on experience they require and want. We’re in interesting times, right? With innovations in machine learning and artificial intelligence (AI), we’re increasingly able to pivot from reactive cyber defense to get more predictive. Still, right now we’re facing a cybersecurity talent gap of up to 4 million people, depending on which analyst group you follow. The only way that we’re going to get folks interested in cybersecurity is to make it exactly what we have been talking about: a career-long opportunity to learn.
Make it something that they can attain, they can grow in, and see themselves going from a novice to a leader in an organization. This is tough right now because there are relatively few cybersecurity operators compared to demand, and the operators on the front lines are subject to burnout. With uncertain and undefined career paths beyond tactical SecOps, what is there to look forward to?
We need to get better as a community in cybersecurity, not only protect the cybersecurity defenders that we have already, but also help to bring in new cybersecurity defenders and offenders who are really going to push the boundaries of where we’re at today. This is where we have an excellent and transformational opportunity to introduce more immersive and gamified learning to improve the learning experience and put our people in a position to succeed.
Bookmark the Security blog to keep up with our expert coverage on security matters and follow us at @MSFTSecurity for the latest news and updates on cybersecurity.
Welcoming our new Fedora Community Action and Impact Coordinator
Good news, everybody! I’m pleased to announce that we have completed our search for a new Fedora Community Action and Impact Coordinator, and she’ll be joining the Open Source Program Office (OSPO) team to work with Fedora as of today. Please give a warm welcome to Marie Nordin.
If you’ve been involved in Fedora, you may have already been working with Marie. She’s a member of the Fedora Design and Badges teams. Her latest contribution to the Design Team is the wallpaper for F31, a collaboration with Máirín Duffy. Marie has made considerable contributions to the Badges project. She has designed over 150 badge designs, created documentation and a style guide, and mentored new design contributors for years. Most recently she has been spear-heading a bunch of work related to bringing badges up to date on both the development and UI/UX of the web app.
Marie is new to Red Hat, joining us after 5 years of involvement with the Fedora community. She was first introduced to Fedora through an Outreachy internship in 2013 working on Fedora Badges. Marie’s most current full time position was in the distribution industry as a purchasing agent, bid coordinator, and manager. She also has a strong background in design outside of her efforts for Fedora, working as a freelance graphic designer for the past 8 years.
I believe that Marie’s varied background in business and administration, her experience with design, and her long term involvement with and passion for Fedora makes her an excellent fit for this position. I’m excited to work with her as both a colleague on her team at Red Hat and as a Fedora contributor.
Feel free to reach out with congratulations, but give her a bit to get fully engaged with Fedora duties.
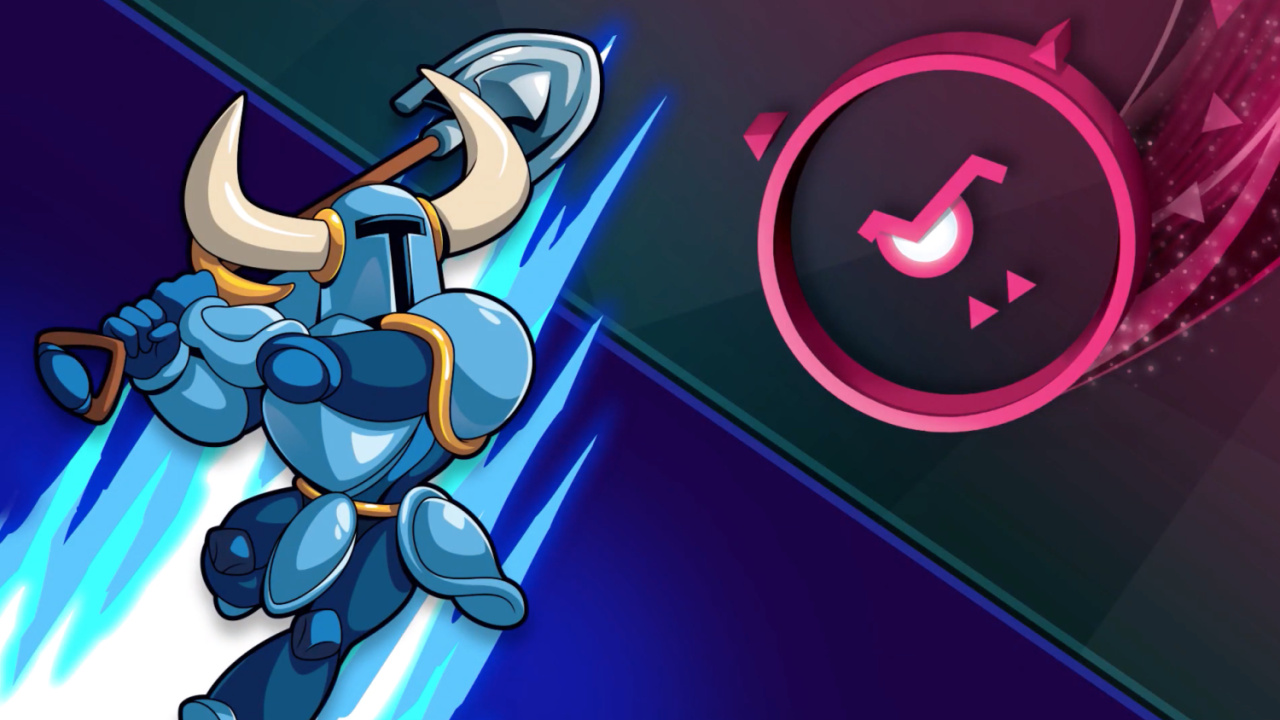
Just Shapes & Beats Digs Up Exclusive Shovel Knight Remixes For Free DLC
The chaotic rhythm-based gameplay of Just Shapes & Beats is about to get a whole lot “Shovelier” with the launch of some new and exclusive Shovel Knight tracks headed our way on 4th December.
Developer Berzerk Studio has teamed up with Yacht Club Games to release Just Shapes & Beats’ second free batch of DLC, known as ‘Mixtapes’, and features four exclusive remixes of beloved tracks from the games. Plague Knight, Specter Knight, King Knight and, of course, Shovel Knight will all get in on the musical bullet-hell action.
Here’s the lowdown (you can get a sneaky listen in the new trailer above):
– Danimal Cannon – Strike the Earth! (remix) – Rainbowdragoneyes – Flowers of Antimony (remix) – Kubbi – In the Halls of the Usurper (remix) – Shirobon – La Danse Macabre (remix) <— BRAND NEW BOSS
These new tracks can be played in the game’s Challenge mode and can be unlocked using Beat Points or with each character’s respective amiibo figure. As it happens, full amiibo support is also on the way, with any other figure of your choosing granting you 100 Beat Points per day (up to five times) when you scan it.
You don’t need to ask us twice when it comes to more Shovel Knight music. Just Shapes & Beats is available from the eShop for £15.09.
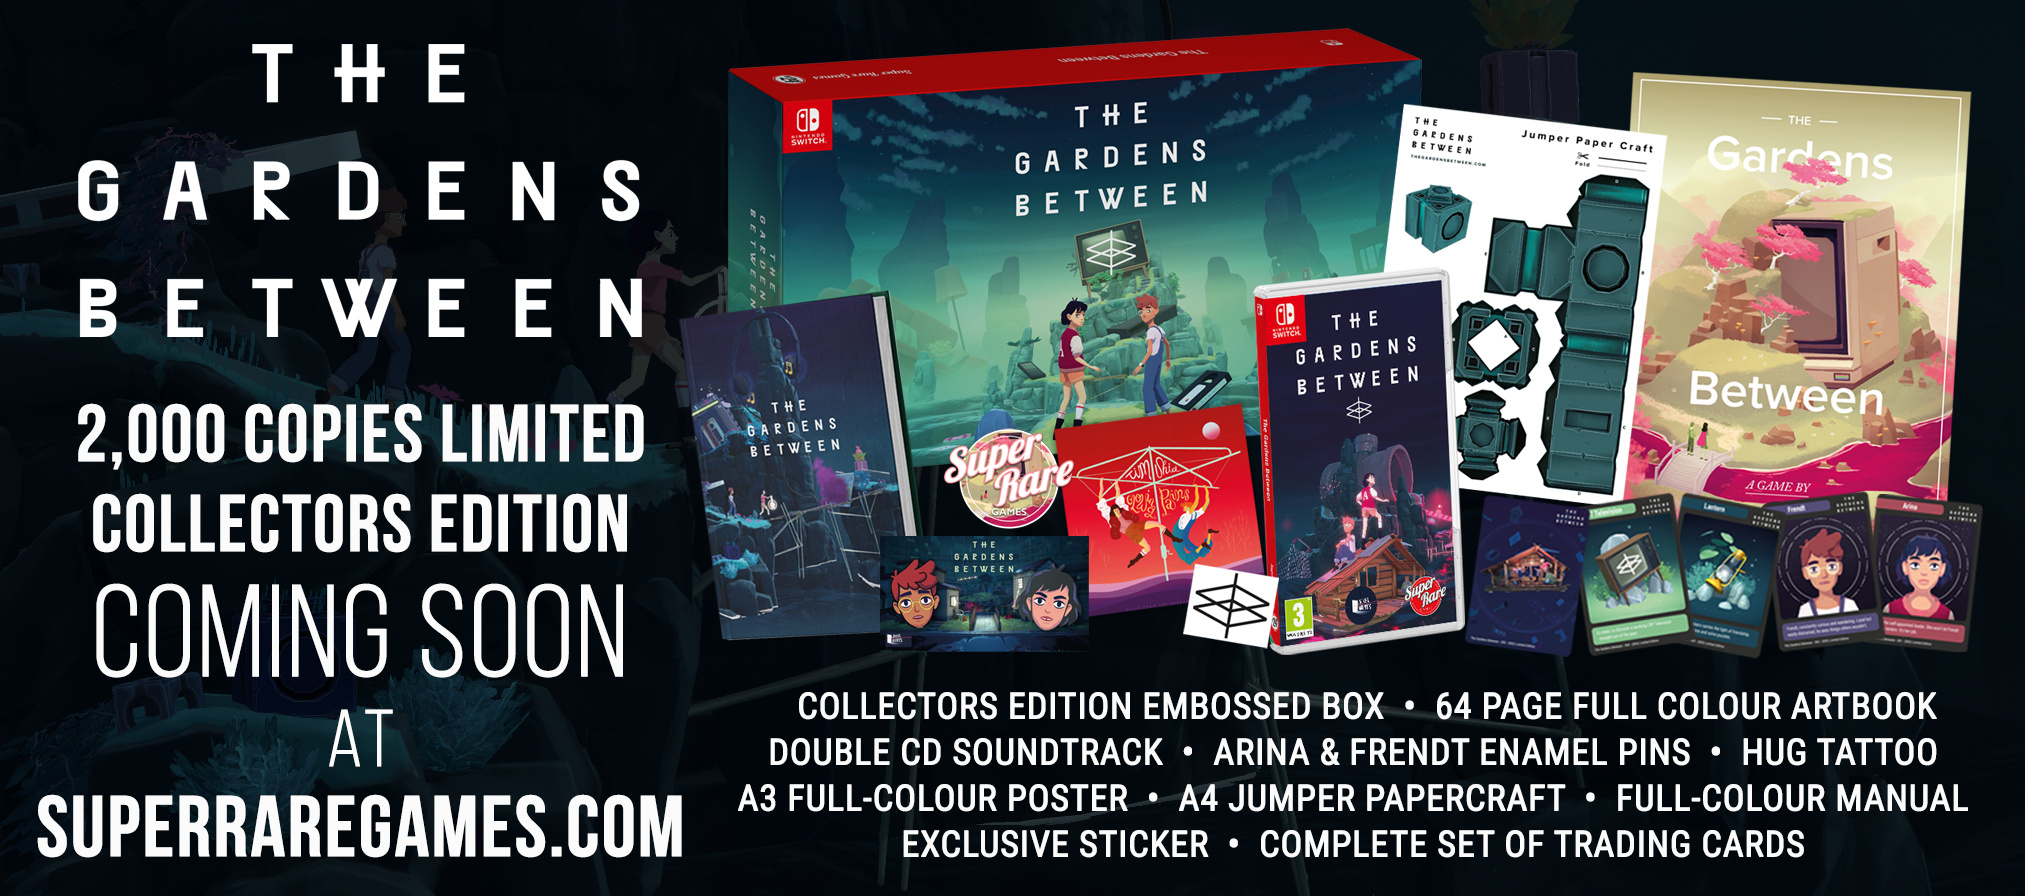
Pre-Orders For The Gardens Between’s Physical Switch Release Go Live This Week
The latest indie game to get a physical release on Nintendo Switch is The Gardens Between, and pre-orders are going live later this week.
Originally confirmed a few months back, this partnership sees Super Rare Games releasing The Voxel Agent’s chilled out puzzler in both standard and collector’s editions. There will only be 5,000 units available in total, 2,000 of which will be collector’s editions.
The standard edition will cost you £30, with the collector’s release having a £66 asking price. Here’s what you get for the extra cash:
– 64 page hardback artbook showing the journey from initial concepts to the release of the game – A3 Poster – 2 exclusive pins – Water tattoo of the games logo – Papercraft of the jumper (character in the game) – CD soundtrack
Pre-orders go live on 28th November at 6pm BST. If you want to know more about this one before making up your mind, feel free to check out our full review – we’ll leave a snippet for you below.
Relaxing as it is taxing, The Gardens Between offers a poignant coalescence of charming visuals, a relaxing soundtrack and a bittersweet story. The simplicity of its control scheme hides an incredibly clever and frighteningly intricate puzzle formula that sees you rewinding and playing time like an omnipresent director. Its unique setup makes it one of the most unusual puzzlers on Nintendo Switch.
Xbox All Access available to U.S. Xbox Insiders This Weekend
Hey everyone, we have some exciting news! We’ll be giving a select group of Xbox Insiders in the U.S. early access to the Xbox All Access program on Amazon.com between November 16th and November 17th, ahead of when the program launches in the United States on November 18th.
In late October, Team Xbox reintroduced Xbox All Access, including an all-new upgrade option for Project Scarlett. This offer has everything you need to play right out of the box for as little as $19.99 (USD) per month for 24 months.1
Xbox One consolebundle – Players can choose between Xbox One X, Xbox One S, or Xbox One S All-Digital Edition bundles.
24-month membership to Xbox Game Pass Ultimate – Xbox Game Pass Ultimate includes all the benefits of Xbox Live Gold, including online multiplayer, and access to over 100 great games on console and PC.
Upgrade Option – Option to upgrade to Project Scarlett once it’s available in Holiday 2020.
Players who purchase an Xbox One console with Xbox All Access have the option to upgrade to Project Scarlett once it’s available Holiday 2020 and they’ve made 18 payments. As a limited time offer this holiday season, players who purchase an Xbox One X with Xbox All Access through December 31, 2019, have the option to upgrade to the next Xbox console in as few as 12 months and once Project Scarlett has officially launched.3
Xbox Insiders in the US must register at this link to be eligible to participate. A group will be selected in this early access opportunity.
The selected Xbox Insiders will receive a follow-up email from Amazon with more information.
Participants will then go through the purchase experience on Amazon.com between November 16th and November 17th.
Participants must be over the age of 18 and willing to check eligibility for the program, including completing an application and consenting to a soft credit check with our financing partner, Citizens One.
The soft credit check will not impact your credit score or credit report. You’ll be given the option to proceed with a full credit check when making the purchase.
If you do not have an Amazon.com account, please sign up with this link.
This Xbox Insider early access is to ensure the processes for making an Xbox All Access purchase on Amazon.com, and the Xbox Game Pass Ultimate activation, are simple and easy-to-understand for users. If you have any issues with the purchase or activation processes, please use one of the following contact options:
Microsoft for Xbox All
Access product or Xbox Game Pass activation questions
Amazon
for questions related to making an Xbox All Access purchase on Amazon.com
Citizens One at 888-522-9881 for questions about
financing or the credit application
We look forward to your feedback. Thank you for helping us bring Xbox All Access to the U.S later this month!
More Information
This early access opportunity is limited to selected participants. Microsoft may suspend or terminate the early access opportunity at any time in its discretion. You may not share the registration link or any images of the purchase experience with anyone else. If you are found to violate that restriction, your ability to participate in the early purchase opportunity may be revoked.
1With approval of Citizens One Line of Credit at 0% APR and 24-month term. Subject to individual credit approval. Total payment amount from $479.76; taxes, shipping, and other charges are extra and may vary (estimated retail price with Xbox One S All-Digital Edition console; prices will vary by console and retailer). See Citizens One Line of Credit Agreement at https://www.citizensone.com/XAA for full terms and conditions.
2At participating retailers; prices vary by console. 24-month subscription to Xbox Game Pass Ultimate includes Xbox Live Gold, Xbox Game Pass for Console, Xbox Game Pass for PC, and other benefits; game catalog varies over time. Internet access required (ISP fees apply). Membership conversion: your existing Xbox Live Gold and Xbox Game Pass membership(s) will automatically convert to
Ultimate at a conversion ratio, learn more xbox.com/gamepass. Digital Direct: Your 24-month Xbox Game Pass Ultimate membership is delivered directly to your console during set-up and is available in Settings; no codes required. Warranty: console is under a 1 year limited hardware warranty (90 days for controller/accessories) regardless of length of financing. (Microsoft Limited Hardware Warranty: https://support.microsoft.com/warranty). Upgrade: Upgrade option after the equivalent of 18 payments for the next Xbox console only,
coming Holiday 2020 (excludes Xbox One X, S, and S All Digital Edition). New contract, terms, and pricing apply. Upgrading from Xbox One S All-Digital Edition will require payment of a $20 upgrade fee (subject to change). The fee will be billed by Citizens One and will be due according to the first statement issued following the upgrade. Requires return of console, controller, and power cord in good condition. The next Xbox console available under the upgrade option is subject to FCC rules and will comply with the appropriate FCC rules when available. See product and upgrade terms at Xbox.com/XboxAllAccessTerms.
3Special Holiday Upgrade Offer: Upgrading to Project Scarlett is subject to its release and availability at the time you attempt to exercise your upgrade option. Upgrade requires at least 12 payments on your original Xbox All Access contract, and
purchase of a new 24-month Xbox All Access contract for Project Scarlett, expected Holiday 2020. Offer valid for original purchase of Xbox One X with Xbox All Access through Dec 31, 2019; not available with Xbox One S. New contract, terms, and pricing apply. Requires return of console in good condition. Project Scarlett is subject to FCC rules and will comply with the appropriate FCC rules when available. See product and upgrade terms at Xbox.com/XboxAllAccessTerms.
State of Decay 2, from Xbox Games Studios’ Undead Labs, headed to Steam
State of Decay 2, the multiplayer zombie survival game from Xbox Game Studios subsidiary Undead Labs, is headed to Steam next year.
The game officially debuted for Xbox One and PC back in 2018 but until now had only been up for sale on the latter through Microsoft’s own PC game storefront.
It isn’t the first time an Xbox Game Studios published title has crossed over to Valve’s massive platform, but it’s always notable when one of those first-party titles makes the jump.
The Steam version of State of Decay 2 will also feature cross-play between the Steam, Windows Store, and Xbox One versions as well, meaning the Steam launch stands to open the game to players that may not have had its previous two platforms in their sights.
In a blog post, Undead Labs notes that a Steam launch has long been one of the most requested features for State of Decay 2. The first game notably launched on Steam, and later relaunched as State of Decay: Year One Survival Edition. Microsoft Studios signed on to publish its follow up State of Decay 2 as an Xbox One and Windows exclusive, and it released shortly before Microsoft announced it had acquired Undead Labs midway through 2018.
Madden NFL 20 is one of the year's biggest games, and you can bet it's going to be on sale for Black Friday 2019 this weekend. In fact, most places have already told us their deals on EA's football game, and you can get it for as low as $27 over at Walmart in the coming days.
Walmart's Black Friday sale kicks off on November 27 and includes many other games, in addition to Madden. Most of their prices edge out Best Buy, GameStop, and Target, though there are a few that are cheaper at other retailers. We'll be sure to keep you up to date on the lowest prices right here on GameSpot.
EA's latest football game received a score of 8/10 in our Madden NFL 20 review. GameSpot's Eddie Makuch praised its new X-Factor abilities, week-to-week challenges, and on-the-sticks gameplay, the latter of which he says is "the best it's ever been." However, the story elements of the QB1 mode and the minimal changes to Franchise mode left him wanting.
"Madden NFL 20 is an improved version of the annualized professional football series that excels in some areas and leaves something to be desired in others," he wrote. "The new QB1 career mode--which includes a barebones NCAA football experience--overall feels like a half-baked idea that doesn't deliver anything meaningful or interesting. When it comes to the on-the-field action, however, the new X-Factor and Superstar abilities shake up the familiar gameplay formula to give seasoned players and newcomers alike a fresh way to scheme plays and orchestrate strategy on both sides of the ball."