Do you have a list but you want to convert it to a Python set? No problem! Use the set(...) constructor and pass the list object as an argument. For example, if you have a list of strings friends, you can convert it to a set using the call set(friends).
Here’s an example code snippet:
friends = ['Alice', 'Bob', 'Ann', 'Liz']
s = set(friends)
print(s)
# {'Ann', 'Alice', 'Bob', 'Liz'}
Try it yourself in our interactive Python shell:
Exercise: Add another string 'Alice' to the list friends and see the resulting set. How many elements do the list and the set have?
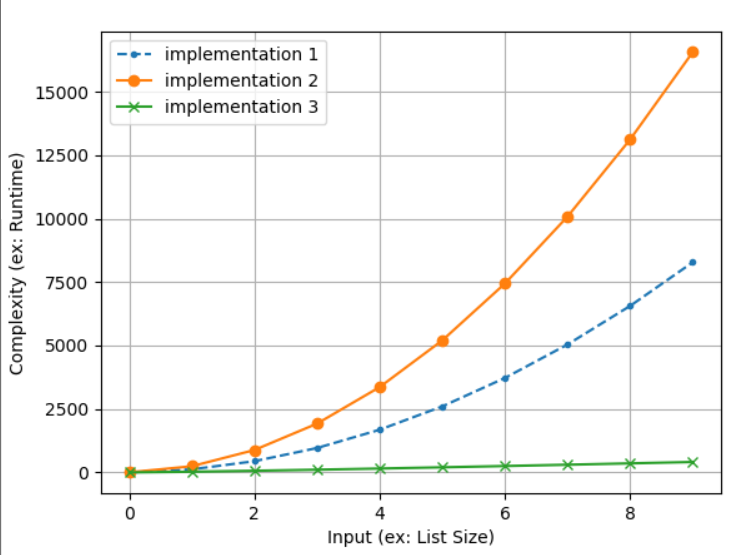
Python List to Set Time Complexity
The time complexity of converting a list to a set is linear in the number of list elements. So, if the set has n elements, the asymptotic complexity is O(n). The reason is that you need to iterate over each element in the list which is O(n), and add this element to the set which is O(1). Together the complexity is O(n) * O(1) = O(n * 1) = O(n).
Here’s the pseudo-code implementation of the list to set conversion method:
def list_to_set(l): s = set() # Repeat n times --> O(n) for x in l: # Add element to set --> O(1) s.add(x) return s friends = ['Alice', 'Bob', 'Ann', 'Liz', 'Alice']
s = list_to_set(friends)
print(s)
# {'Ann', 'Alice', 'Bob', 'Liz'}
Need help understanding this code snippet? Try visualizing it in your browser—just click “Next” to see what the code does in memory:
Python List to Set Remove Duplicates
The set data structure is one of the basic collection data types in Python and many other programming languages.
A set is an unordered collection of unique elements. (Read more on the Ultimate Guide to Python Sets)
- Collection: A set is a collection of elements like a list or a tuple. The collection consists of either primitive elements (e.g. integers, floats, strings), or complex elements (e.g. objects, tuples). However, in a set all data elements must be hashable because it heavily relies on the hash function to implement the specification.
- Unordered: Unlike lists, sets are unordered because there is no fixed order of the elements. In other words, regardless of the order you put stuff in the set, you can never be sure in which order the set stores these elements.
- Unique: All elements in the set are unique. Each pair of values
(x,y)in the set produces a different pair of hash values(hash(x)!=hash(y)). Hence, each pair of elementsxandyin the set are different.
Thus, you can remove all duplicates from a list x by converting it into a set and back into a list using the command list(set(x)). However, the ordering information may be lost in the process (as a set is, by definition, unordered).
friends = ['Alice', 'Bob', 'Ann', 'Liz', 'Alice', 'Bob']
print(friends)
# ['Alice', 'Bob', 'Ann', 'Liz', 'Alice', 'Bob'] dup_free = list(set(friends))
print(dup_free)
# ['Bob', 'Alice', 'Liz', 'Ann']
This way, the resulting list doesn’t have any duplicates—but it also has lost the order of elements: strings 'Liz' and 'Ann' switched their order after conversion. This may be different on your computer!
Python List to Set to List: list(set(x))
By converting a list x to a set and back to a list with the nested constructor expression list(set(x)), you achieve two things:
- You remove all duplicates from the original list
x. - You lose all ordering information. The resulting list may (or may not) have a complete new ordering of the remaining elements.
There’s no way out: the set data structure is more efficient than the list data structure only because it’s less powerful.
It’s like compressing an image: by removing information from the original image, the new image needs less resources on your computer at the cost of having a lower quality. If you convert the lossy-compressed image (or the set for that matter) back into the original data structure, it doesn’t look the same anymore.
This highlights an important trade-off in programming: always choose the right data structure for the particular problem at hand.
Python List to Set Preserve Order
But what if you want to preserve the order when converting a list to a set (and, maybe, back)? (You’d only do this to remove duplicates).
I’ve written a detailed article on this topic so check it out if you need more info.
Efficient Method: A shorter and more concise way is to create a dictionary out of the elements in the list to remove all duplicates and convert the dictionary back to a list. This preserves the order of the original list elements.
lst = ['Alice', 'Bob', 'Bob', 1, 1, 1, 2, 3, 3]
print(list(dict.fromkeys(lst)))
# ['Alice', 'Bob', 1, 2, 3]
- Convert the list to a dictionary with
dict.fromkeys(lst). - Convert the dictionary into a list with
list(dict).
Each list element becomes a new key to the dictionary. For example, the list [1, 2, 3] becomes the dictionary {1:None, 2:None, 3:None}. All elements that occur multiple times will be assigned to the same key. Thus, the dictionary contains only unique keys—there cannot be multiple equal keys.
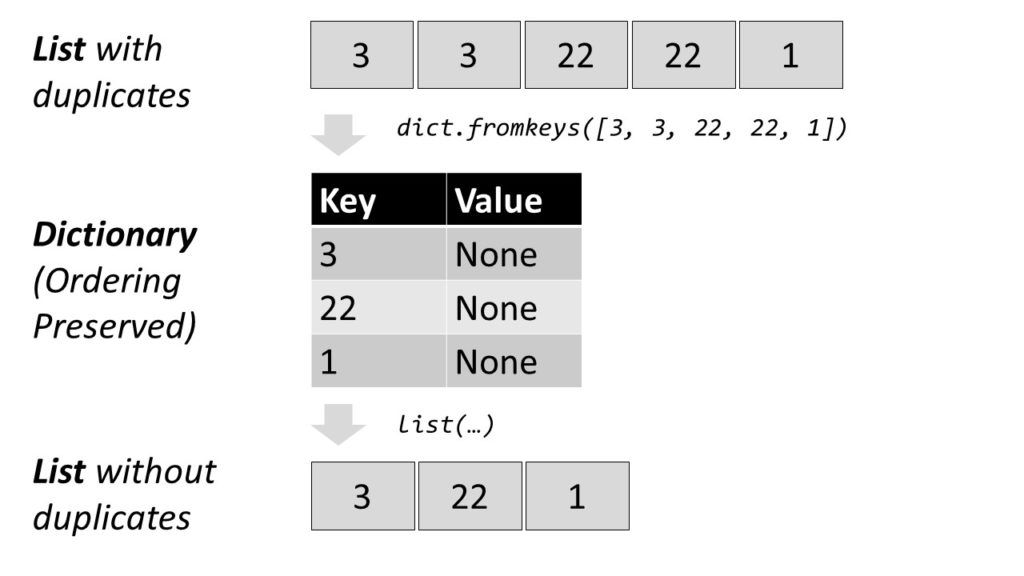
As dictionary values, you take dummy values (per default).
Then, you convert the dictionary back to a list, throwing away the dummy values.
Here’s the code:
>>> lst = [1, 1, 1, 3, 2, 5, 5, 2]
>>> dic = dict.fromkeys(lst)
>>> dic
{1: None, 3: None, 2: None, 5: None}
>>> duplicate_free = list(dic)
>>> duplicate_free
[1, 3, 2, 5]
This way, you can simply use the ordered dictionary data type.
Related blog articles:
- Python Remove Duplicates From List of Lists
- Python List Remove
- The Ultimate Guide to Python Dictionaries!
Python List to Set Error: Unhashable Type List
A common error is to try to convert a set to a list with unhashable data types. Here’s what happens if you try to convert a list of lists into a set:
users = [['Alice', 23, 'female'], ['Bob', 26, 'male'], ['Ann', 31, 'female']] s = set(users)
print(s)
The result is an error message unhashable type: 'list'.
'''
Traceback (most recent call last): File "C:\Users\xcent\Desktop\code.py", line 6, in <module> s = set(users)
TypeError: unhashable type: 'list' '''
Why are lists unhashable?
Because they are mutable: you can change a list by appending or removing elements. If you change the list data type, the hash value changes (it is calculated based on the content of the list). This directly violates the definition that a “hash value […] never changes during its lifetime” (see here).
Key takeaway: mutable data types are not hashable. Therefore, you cannot use them in sets.
So, how to solve it? Simply convert the inner lists into an immutable collection type such as a tuple:
users = [('Alice', 23, 'female'), ('Bob', 26, 'male'), ('Ann', 31, 'female')] s = set(users)
print(s)
# {('Bob', 26, 'male'),
# ('Ann', 31, 'female'),
# ('Alice', 23, 'female')}
Now, the result is a set of tuple elements. As tuples are immutable, the hash value will never change and you can create a set out of them.
Where to Go From Here?
Enough theory, let’s get some practice!
To become successful in coding, you need to get out there and solve real problems for real people. That’s how you can become a six-figure earner easily. And that’s how you polish the skills you really need in practice. After all, what’s the use of learning theory that nobody ever needs?
Practice projects is how you sharpen your saw in coding!
Do you want to become a code master by focusing on practical code projects that actually earn you money and solve problems for people?
Then become a Python freelance developer! It’s the best way of approaching the task of improving your Python skills—even if you are a complete beginner.
Join my free webinar “How to Build Your High-Income Skill Python” and watch how I grew my coding business online and how you can, too—from the comfort of your own home.