Playing with any large language model (LLM), such as GPT-4, is fascinating.
But it doesn’t give you an accurate understanding of where AGI is heading because one isolated snapshot provides limited information. You can gain more insight into the growth and dynamicity of LLMs by comparing two subsequent snapshots.
Roughly speaking, it’s less interesting to see where baby AGI is and more interesting to look at how it evolves.
To gain more insight on this, Emily has just contributed another interesting Finxter blog article:
It’s fascinating to observe how the concept of transformers introduced in the 2017 paper “Attention is all you need” has scaled so remarkably well.
In essence, the significant advancements made in AI over the past four years have mostly come from scaling up the transformer approach to an incredible magnitude. The concept of GPT (Generative Pre-trained Transformers) has remained largely unchanged for around six years.
They just threw more data and more hardware on the same algorithm. This was possible due to the higher amount of scalability and degree of parallelization unlocked by the transformer idea.
“In this work we propose the Transformer, a model architecture eschewing recurrence and instead relying entirely on an attention mechanism to draw global dependencies between input and output. The Transformer allows for significantly more parallelization … the Transformer is the first transduction model relying entirely on self-attention to compute representations of its input and output without using sequence-aligned RNNs or convolution.”
My main takeaway from comparing GPT-3.5 to GPT-4 is that the limits of performance improvements are not yet reached by simply throwing more and more data and hardware on these models. And when the performance (=IQ) of transformer models ultimately converges — probably at a super-human IQ level — we’ll still be able to change and improve on the underlying abstractions to eke out additional IQ.
Likely, transformers will not remain the last and best-performing model for all future AI research. We have tried only the tip of the iceberg on what scale these models go. I wouldn’t be surprised if the data sets and computational power of future GPT models increased by 1,000,000x.
Truly an exciting time to be alive!
I’m scared and fascinated at the same time. It’s so new and so dangerous. Ubiquitous disruption of the work marketplace is already happening fast. I’d estimate that in our economy, we already have north of one billion “zombie jobs”, i.e., job descriptions that could be fully automated with ChatGPT and code. I know of closed-loop AI models under government review that classify cancer with almost zero error rate. Medical doctors with lower accuracy are still doing the classification – but for how long?
A new era is starting. When we went from 99% to 1% farmers, we accomplished a massive leap of free work energy that led to an explosion of collective intelligence. The same is happening now: 99% of the jobs will be gone sooner than we expect. A massive amount of free energy will catapult humanity forward like we’ve never experienced in the history of humanity.
Buckle up for the ride. I’ll be here to help you navigate the waters until my job will be disrupted too and AGI will help you more effectively than I ever could.
The future is bright!
Chris
This was part of my free newsletter on technology and exponential technologies. You can join us by downloading our cheat sheets here:
In this article, I will cover accessing multiple matches of a regex group in Python.
Regular expressions (regex) are a powerful tool for text processing and pattern matching, making it easier to work with strings. When working with regular expressions in Python, we often need to access multiple matches of a single regex group. This can be particularly useful when parsing large amounts of text or extracting specific information from a string.
To access multiple matches of a regex group in Python, you can use the re.finditer() or the re.findall() method.
The re.finditer() method finds all matches and returns an iterator yielding match objects that match the regex pattern. Next, you can iterate over each match object and extract its value.
The re.findall() method returns all matches in a list, which can be a more convenient option if you want to work with lists directly.
Problem Formulation: Given a regex pattern and a text string, how can you access multiple matches of a regex group in Python?
Understanding Regex in Python
In this section, I’ll introduce you to the basics of regular expressions and how we can work with them in Python using the ‘re‘ module. So, buckle up, and let’s get started!
Basics of Regular Expressions
Regular expressions are sequences of characters that define a search pattern. These patterns can match strings or perform various operations like search, replace, and split into text data.
Some common regex elements include:
Literals: Regular characters like 'a', 'b', or '1' that match themselves.
Metacharacters: Special characters like '.', '*', or '+' that have a special meaning in regex.
Character classes: A set of characters enclosed in square brackets (e.g., '[a-z]' or '[0-9]').
Quantifiers: Specify how many times an element should repeat (e.g., '{3}', '{2,5}', or '?').
These elements can be combined to create complex search patterns. For example, the pattern '\d{3}-\d{2}-\d{4}' would match a string like '123-45-6789'.
Remember, practice makes perfect, and the more you work with regex, the more powerful your text processing skills will become.
The Python ‘re’ Module
Python comes with a built-in module called ‘re‘ that makes it easy to work with regular expressions. To start using regex in Python, simply import the ‘re‘ module like this:
import re
Once imported, the ‘re‘ module provides several useful functions for working with regex, such as:
Replaces all occurrences of a regex pattern in a string with a specified substitution.
By using these functions provided by the ‘re‘ module, we can harness the full power of regular expressions in our Python programs. So, let’s dive in and start matching!
Working with Regex Groups
When working with regular expressions in Python, it’s common to encounter situations where we need to access multiple matches of a regex group. In this section, I’ll guide you through defining and capturing regex groups, creating a powerful tool to manipulate text data.
Defining Groups
First, let’s talk about how to define groups within a regular expression. To create a group, simply enclose the part of the pattern you want to capture in parentheses. For example, if I want to match and capture a sequence of uppercase letters, I would use the pattern ([A-Z]+). The parentheses tell Python that everything inside should be treated as a single group.
Now, let’s say I want to find multiple groups of uppercase letters, separated by commas. In this case, I can use the pattern ([A-Z]+),?([A-Z]+)?. With this pattern, I’m telling Python to look for one or two groups of uppercase letters, with an optional comma in between.
Capturing Groups
To access the matches of the defined groups, Python provides a few helpful functions in its re module. One such function is findall(), which returns a list of all non-overlapping matches in the string.
For example, using our previous pattern:
import re
pattern = r'([A-Z]+),?([A-Z]+)?'
text = "HELLO,WORLD,HOW,AREYOU"
matches = re.findall(pattern, text)
print(matches)
This code would return the following result:
[('HELLO', 'WORLD'), ('HOW', ''), ('ARE', 'YOU')]
Notice how it returns a list of tuples, with each tuple containing the matches for the specified groups.
Another useful function is finditer(), which returns an iterator yielding Match objects matching the regex pattern. To extract the group values, simply call the group() method on the Match object, specifying the index of the group we’re interested in.
An example:
import re
pattern = r'([A-Z]+),?([A-Z]+)?'
text = "HELLO,WORLD,HOW,AREYOU" for match in re.finditer(pattern, text): print("Group 1:", match.group(1)) print("Group 2:", match.group(2))
This code would output the following:
Group 1: HELLO
Group 2: WORLD
Group 1: HOW
Group 2:
Group 1: ARE
Group 2: YOU
As you can see, using regex groups in Python offers a flexible and efficient way to deal with pattern matching and text manipulation. I hope this helps you on your journey to becoming a regex master!
Accessing Multiple Matches
As a Python user, sometimes I need to find and capture multiple matches of a regex group in a string. This can seem tricky, but there are two convenient functions to make this task a lot easier: finditer and findall.
Using ‘finditer’ Function
I often use the finditer function when I want to access multiple matches within a group. It finds all matches and returns an iterator, yielding match objects that correspond with the regex pattern .
To extract the values from the match objects, I simply need to iterate through each object :
import re pattern = re.compile(r'your_pattern')
matches = pattern.finditer(your_string) for match in matches: print(match.group())
This useful method allows me to get all the matches without any hassle. You can find more about this method in PYnative’s tutorial on Python regex capturing groups.
Using ‘findall’ Function
Another option I consider when searching for multiple matches in a group is the findall function. It returns a list containing all matches’ strings. Unlike finditer, findall doesn’t return match objects, so the result is directly usable as a list:
import re pattern = re.compile(r'your_pattern')
all_matches = pattern.findall(your_string) print(all_matches)
This method provides me with a simple way to access all the matches as strings in a list.
Practical Examples
Let’s dive into some hands-on examples of how to access multiple matches of a regex group in Python. These examples will demonstrate how versatile and powerful regular expressions can be when it comes to text processing.
Extracting Email Addresses
Suppose I want to extract all email addresses from a given text. Here’s how I’d do it using Python regex:
import re text = "Contact me at [email protected] and my friend at [email protected]"
pattern = r'([\w\.-]+)@([\w\.-]+)\.(\w+)'
matches = re.findall(pattern, text) for match in matches: email = f"{match[0]}@{match[1]}.{match[2]}" print(f"Found email: {email}")
This code snippet extracts email addresses by using a regex pattern that has three capturing groups. The re.findall() function returns a list of tuples, where each tuple contains the text matched by each group. I then reconstruct email addresses from the extracted text using string formatting.
Finding Repeated Words
Now, let’s say I want to find all repeated words in a text. Here’s how I can achieve this with Python regex:
import re text = "I saw the cat and the cat was sleeping near the the door"
pattern = r'\b(\w+)\b\s+\1\b'
matches = re.findall(pattern, text, re.IGNORECASE) for match in matches: print(f"Found repeated word: {match}")
Output:
Found repeated word: the
In this example, I use a regex pattern with a single capturing group to match words (using the \b word boundary anchor). The \1 syntax refers to the text matched by the first group, allowing us to find consecutive occurrences of the same word. The re.IGNORECASE flag ensures case-insensitive matching. So, no repeated word can escape my Python regex magic!
Conclusion
In this article, I discussed how to access multiple matches of a regex group in Python. I found that using the finditer() method is a powerful way to achieve this goal. By leveraging this method, I can easily iterate through all match objects and extract the values I need.
Along the way, I learned that finditer() returns an iterator yielding match objects, which allows for greater flexibility when working with regular expressions in Python. I can efficiently process these match objects and extract important information for further manipulation and analysis.
Google engineers are regular expression masters. The Google search engine is a massive text-processing engine that extracts value from trillions of webpages.
Facebook engineers are regular expression masters. Social networks like Facebook, WhatsApp, and Instagram connect humans via text messages.
Amazon engineers are regular expression masters. Ecommerce giants ship products based on textual product descriptions. Regular expressions rule the game when text processing meets computer science.
As artificial intelligence (AI) continues to make strides in tech, the new “hot” jobs look nothing like the old ones. Programming has just been made accessible to billions via a new skill called “prompting”.
The new hot Silicon Valley job role is that of a Prompt Engineer, who plays a critical part in training and “pulling” value out of AI chatbots, particularly those utilizing the ChatGPT framework, to improve their responses to user inputs. Given that millions of new apps emerge that have “ChatGPT at the heart“, i.e., the backend consists of an engineered ChatGPT prompt and nothing else, prompt engineers are highly sought-after in today’s marketplace!
Figure: Prompting is the skill of the exponential age!
But is it the right job for you? Let’s answer one part of this question, i.e., How much dough can you make as a prompt engineer in the US?
Given the complexity and expertise required for prompt engineering, professionals in this field are compensated accordingly to their skills and experience. Annual income for prompt engineers in the US can range from $95,900 to $180,000, with some positions even offering up to $335,000 a year[1][2].
With job postings numbering in the thousands [1], the demand for prompt engineers is clear, showcasing the value that companies place on these professionals.
The significance of prompt engineering stems from the concept of garbage in, garbage out, which essentially posits that the quality of an AI’s input determines the quality of its output [3]. As AI continues to develop, companies must invest in skilled prompt engineers to ensure continuous improvement and refinement of chatbot responses.
Overview of ChatGPT
ChatGPT is a powerful language model that has revolutionized the way we interact with artificial intelligence (AI) systems. As a member of the large language models (LLMs) family, ChatGPT excels in understanding and generating human-like responses based on given prompts . Prompt engineering is an essential skill for working with ChatGPT, as it helps enforce rules, automate processes, and tailor the generated output to specific needs and requirements .
With ChatGPT’s increasing importance in industries like customer support, content creation, and programming, prompt engineers are in high demand .
In the United States, annual salaries for these professionals range from $95,900 to $180,000, with 3,916 job postings available on Indeed.com at the time of writing [source]. The job market for prompt engineers is thriving across various sectors, thanks to the versatility of the ChatGPT technology .
One of the key elements of prompt engineering is a set of prompt patterns that help guide ChatGPT’s responses. These patterns are effectively communicated through prose rather than code, making it possible for non-programmers to contribute immensely to the AI field .
In a nutshell, ChatGPT’s capabilities coupled with the growing need for prompt engineering skills offer promising opportunities for professionals seeking high-income careers in AI-driven sectors .
Role of Prompt Engineers
Prompting is the new programming. Prompt engineers get the most out of large language models (LLMs) such as ChatGPT by asking the right questions and in the right way using informal natural language rather than a formal programming language. By improving these prompts, prompt engineers advance the capabilities of AI language models for various applications, such as chatbots and language translation software.
Prompt engineers play a crucial role in the development and refinement of AI chatbots like ChatGPT. These experts work with prose, rather than code, to test the AI system’s functionality and identify its shortcomings . This helps developers address any issues and maximize the AI’s potential source.
Their responsibilities include crafting carefully worded prompts to uncover hidden capabilities and vulnerabilities in the AI. This process enables prompt engineers to work closely with developers, optimizing the chatbot’s performance and ensuring user satisfaction source.
Skills of Prompt Engineers
Hard Skills
Crucial hard prompt engineering skills include:
Understanding the nuances of large language models (LLMs) like ChatGPTsource
Writing effective and precise prompts to enforce rules, automate processes, and guide the AI’s output quantity and quality source
Strong understanding of natural language processing (NLP) and machine learning (ML): A prompt engineer should have a solid foundation in NLP and ML to create effective prompts that generate accurate and relevant responses.
Continuous learning and improvement: A prompt engineer should be committed to continuous learning and improvement to stay up-to-date with the latest advancements in NLP and ML and improve their skills and knowledge. After all, one thing we can be sure of is that prompting in 3 years will look nothing like today!
Soft Skills
Optional but helpful “soft” prompt engineering skills include:
Proficiency in programming languages: Knowledge of programming languages such as Python, Java, and C++ is useful for prompt engineers to develop and implement effective algorithms.
Experience with deep learning frameworks: Familiarity with deep learning frameworks such as TensorFlow and PyTorch is helpful but optional for prompt engineers to design and train neural networks for language generation.
Understanding of data structures and algorithms: A prompt engineer should have a solid understanding of data structures and algorithms to develop efficient and scalable solutions for language generation.
Knowledge of database management: A prompt engineer should be proficient in database management to store and retrieve large amounts of data required for language generation.
Strong analytical and problem-solving skills: A prompt engineer should have strong analytical and problem-solving skills to analyze large amounts of data, identify patterns, and develop effective solutions for language generation.
Excellent communication and collaboration skills: A prompt engineer should have excellent communication and collaboration skills to work effectively with cross-functional teams and stakeholders.
Creative thinking and innovation: A prompt engineer should be able to think creatively and innovatively to develop unique and effective prompts that generate accurate and relevant responses.
Attention to detail: A prompt engineer should have a keen eye for detail to ensure that the prompts they create are accurate and free of errors.
As industries increasingly rely on AI chatbots, the demand for prompt engineers is set to grow . The role combines creative thinking, language expertise, and a deep understanding of AI to ensure the technology delivers on its promise of effective automation and productive brainstorming source.
Here are the specific requirements of a real “prompt engineering” job in the wild (source):
This section will discuss various factors influencing the annual income of prompt engineers working with ChatGPT. Several elements contribute to the differences in pay, including experience, location, education, and the industry they work in.
Experience
Like any profession, experience plays a significant role in determining the salary of prompt engineers. Their income is likely to increase as their skills develop and they gain a deeper understanding of the technology.
Experts in the field can command salaries ranging from $250,000 to $330,000 a year, reflecting their exceptional proficiency and talent in handling AI systems like ChatGPT (source).
Location
The geographical location of a prompt engineer can also impact their earnings. Specific areas, especially tech hubs like Silicon Valley or Seattle, may offer higher salaries due to the concentration of large tech companies, startups, and innovative projects. However, the cost of living in these regions may also be higher, potentially affecting take-home pay.
Education
While some candidates may be primarily self-taught or come from diverse educational backgrounds, having a formal education in a relevant field, such as computer science, engineering, or linguistics, can positively impact prompt engineers’ salaries.
Employers may view an advanced degree as an indicator of a candidate’s dedication and expertise in their craft, leading to higher compensation packages.
The industry in which a prompt engineer works can also influence their income. Different sectors may require specialized knowledge or expertise, which could translate to premium pay for those with the right skills.
For example, AI applications in finance, health care, or legal services might demand prompt engineers with domain-specific experience, leading to higher salaries in those industries.
Current Salaries and Trends
The demand for prompt engineers working with ChatGPT has surged in recent years, leading to attractive salary packages across the United States. A prime example is San Francisco-based AI start-up Anthropic, which currently offers a salary range of $175,000 to $335,000 for a prompt engineer and librarian role (source).
Such competitive salaries reflect prompt engineers’ expertise in the cutting-edge AI field , with their skills significantly impacting the development and performance of language models that cater to various industries.
Although salary ranges vary depending on factors such as location and experience level, prompt engineers typically enjoy higher incomes than their counterparts in other engineering professions. For context, the median annual wage for engineers across the United States was $91,098 in 2023, with 33.8k salaries reported (source).
Considering these figures, it’s evident that prompt engineering positions in the emerging AI sector are a lucrative choice for professionals seeking attractive career opportunities .
Some noteworthy trends in the prompt engineering domain include:
Increased demand for AI prompt engineers in tech hubs like Silicon Valley
A growing focus on cross-disciplinary skillsets, such as NLP and programming languages like Python
Collaboration among industry professionals to address ethical concerns surrounding AI development
Overall, the field of prompt engineering is dynamic and ever-evolving, with ample prospects for professionals looking to carve a niche in this exciting domain .
Comparisons to Similar Roles
When considering the annual income of prompt engineers, it’s helpful to compare their salaries with those of similar roles in the tech industry. For instance, let’s take a look at data scientists, software engineers, and AI researchers.
Data scientists, who analyze and interpret large datasets to assist businesses in decision-making, often earn around $120,000 annually in the US.
On the other hand, software engineers, responsible for designing, coding, and testing applications, can expect yearly salaries ranging from $110,000 to 180,000, depending on their experience and location within the country.
AI researchers, who study and develop cutting-edge artificial intelligence algorithms, typically receive higher compensation than data scientists and software engineers. Their annual salaries can start at $150,000 and go as high as $500,000 for highly experienced individuals or those working at prestigious research institutions.
Compared to these roles, prompt engineers enjoy competitive salaries, some reaching up to $335,000 a year, despite not requiring degrees in tech fields. This can be attributed to the unique combination of skills they possess, as well as the growing demand for experts who can effectively test and improve generative AI models like ChatGPT.
Job Growth and Demand
Again, this graphic tells an exciting story:
The rise of AI has generated a new job title: Prompt Engineer. These professionals specialize in working with ChatGPT systems and are in high demand.
As AI adoption increases across various industries, the need for skilled prompt engineers continues to grow. Companies like Anthropic, a Google-backed startup, are offering significant salaries, ranging from $175,000 to $335,000 per year for this role.
Prompt engineering is considered a valuable skill in the age of AI, as it improves the overall productivity of specific occupations, like lawyers and CPAs. As more companies integrate AI technologies into their operations, job opportunities for prompt engineers are expected to increase.
Interestingly, some companies are hiring prompt engineers with little to no technical background. This highlights the value placed on communication and language understanding in the field. As artificial intelligence becomes more entrenched in everyday life, prompt engineering skills may eventually become as essential as learning how to use a search engine (Axios).
Overall, the job growth and demand for prompt engineers is on a promising trajectory as the AI industry continues to expand. One thing is certain: prompt engineers will play a key role in shaping the future of AI-powered communication and productivity.
In summary, ChatGPT prompt engineers have become crucial professionals in the AI industry. With a growing demand and a salary that can reach up to $300,000 a year, they are carving out an important niche with a bright future.
Their work in developing and refining AI system interactions has made technology more efficient and user-friendly. Companies like OpenAI, Alphabet, and Meta are making significant investments in generative AI technologies, further highlighting the importance of these specialists.
As artificial intelligence continues to grow, we can expect prompt engineers to play a valuable role in shaping how human-AI conversations evolve. Exciting times lie ahead for this field, so let’s watch this space as AI continues its upward trajectory!
Let’s go through the functions using “code snippets”:
Find a location by name (from_geocode)
With the geocode method of the GoogleMapPlotter object, we can display a given address and its neighbourhood on the map.
Parameters of the method: location (str), zoom (int), apikey (str)
After creating your map, you have two options, either save the HTML file (.draw()) or store it as a string (with .get()). I use the .draw() method, where the only parameter is the file to create and its path.
The code imports the gmplot library, which is a Python wrapper for the Google Maps API. It then creates a new GoogleMapPlotter object named gmap for the location “Budapest” using the from_geocode() method. This method uses the Google Maps API to retrieve the latitude and longitude of the location, which is necessary to display the map.
Finally, the draw() method is called on the gmap object to generate and save the map as an HTML file named budapest_map.html.
Coordinates of a location (geocode)
If you want to know the coordinates of a location, use .geocode(). As an input parameter, pass the name (str) of the place you are looking for and your API key. This returns a tuple of the lat/long coordinates of the given location (float, float).
The code calls the geocode() method on the GoogleMapPlotter object to obtain the latitude and longitude of a location specified as a string. In this case, the location is “Budapest, Hungary”. The apikey parameter is also passed to this method to authenticate the Google Maps API.
Text on your map (text)
If you want to place custom text on your map, you can do it with .text(), using the text label’s Latitude and Longitude parameter.
It is possible to color the text with the color=str parameter, which can be the color name ('black'), hexadecimal ('#000000'), or matplotlib-like ('k').
import gmplot
apikey = ' ' # (your API key here)
gmap = gmplot.GoogleMapPlotter(47.519350864380385, 19.010462124312387, zoom = 17, apikey=apikey)
finxter_text = ['f', 'i', 'n', 'x', 't', 'e', 'r']
colors = ['limegreen', 'cyan', 'gold','orange', 'limegreen', 'cyan', 'orange']
j = 0
lat = 47.529266431577625
lng = 19.00500303401821
for i in finxter_text: gmap.text(lat, lng, i, color = colors[j]) j += 1 lng += 0.001
Result:
Drop marker (marker)
Show markers. The required parameters are, of course, the Latitude and Longitude coordinates (float, float), and additional optional parameters can be used to customize the markers:
color (str) which can be the name of the color ('black'), hexadecimal ('#000000'), or matplotlib-like ('k')
title (str) : Hover-over title of the marker.
precision (int) : Number of digits after the decimal to round to for lat/long values. Defaults to 6.
label (str) : Label displayed on the marker.
info_window (str) : HTML content to be displayed in a pop-up info window.
draggable (bool) : Whether or not the marker is draggable.
gmap.enable_marker_dropping() allows markers to be dropped onto the map when clicked. Clicking on a dropped marker will delete it.
Note: Calling this function multiple times will just overwrite the existing dropped marker settings.
Parameters:
color str: Color of the markers to be dropped.
title str: Hover-over title of the markers to be dropped.
label str: Label displayed on the markers to be dropped.
draggable bool: Whether or not the markers to be dropped are draggable.
Result:
The code adds a marker to the Google Maps plot. The marker is placed at the latitude and longitude coordinates (47.51503432784726, 19.005350430919034) and is labeled 'finxter'.
The info_window parameter sets the information displayed when the user clicks on the marker. In this case, it is a link to the Finxter Academy website.
The draggable parameter is set to False, meaning that the user cannot move the marker.
The fourth line enables marker dropping, meaning the user can add new markers to the plot by clicking on the map.
The final line saves the plot to an HTML file named marker.html.
Route planning (directions)
Using the Directions API, you can display route planning between any points. The origin and destination coordinates are given as parameters (float, float). Optionally, the waypoints as list of tuples and the travel_mode as str can also be specified. The travel modes are:
DRIVING (Default) indicates standard driving directions using the road network.
BICYCLING requests bicycling directions via bicycle paths & preferred streets.
TRANSIT requests directions via public transit routes.
WALKING requests walking directions via pedestrian paths & sidewalks.
The fourth line adds a route to the plot using the directions() method.
The starting point of the route is at latitude 47.5194613766804 and longitude 19.000656008676216, and the ending point is at latitude 47.520243896650946 and longitude 19.00204002854648.
The waypoints parameter is set to a list containing one set of latitude and longitude coordinates (47.520888742275, 18.99871408933636).
The fifth line adds another route to the plot, starting at the same point as the previous route and ending at the same point as the previous route, but with different waypoints.
The sixth line adds a third route to the plot, with a starting point at latitude 47.52226897515179 and longitude 19.00018393988221, an ending point at latitude 47.520243896650946 and longitude 19.00204002854648, and a set of waypoints containing one set of latitude and longitude coordinates (47.52088149688948, 19.002871513347902).
Display many points (scatter)
The scatter() allows you to place many points at once. In addition to the necessary lat (float) and lon (float) parameters, the following optional parameters are:
The fourth line defines a list of latitude and longitude coordinates as tuples, representing the locations of individual letters of the word 'finxter'.
The fifth line uses the scatter() method of adding the letters to the plot as points. The scatter() method takes the latitude and longitude coordinates as separate arguments using the unpacking operator (*letters).
The color parameter is set to a list of colors that correspond to the letters. The s parameter specifies the size of the points, the ew parameter specifies the width of the edge around the points, and the title and label parameters specify the title and label of each point, respectively.
Draw circle (circle)
Sometimes it is useful to draw a circle. In addition to specifying the center lat, lng, and radius of the circle, you can also to specify the following:
edge_alpha/ea float: Opacity of the circle’s edge, ranging from 0 to 1. Defaults to 1.0.
edge_width/ew int: Width of the circle’s edge, in pixels. Defaults to 1.
face_alpha/alpha float: Opacity of the circle’s face, ranging from 0 to 1. Defaults to 0.5.
color/c/face_color/fc str: Color of the circle’s face. Can be hex (“#00FFFF”), named (“cyan”), or matplotlib-like (“c”). Defaults to black.
The fourth line uses the circle() method to add a circle to the plot.
The circle() method takes the latitude and longitude coordinates of the center of the circle as its first two arguments, followed by the radius of the circle in meters.
The face_alpha parameter specifies the transparency of the circle fill, while the ec and fc parameters specify the color of the circle edge and fill, respectively.
Polyline (plot)
A polyline is a line composed of one or more sections. If we want to display such a line on our map, we use the plot method. In addition to the usual lats [float], lons [float] parameters, you can specify the following optional parameters:
color/c/edge_color/ec str : Color of the polyline. Can be hex (“#00FFFF”), named (‘cyan’), or matplotlib-like (‘c’). Defaults to black.
alpha/edge_alpha/ea float: Opacity of the polyline, ranging from 0 to 1. Defaults to 1.0.
edge_width/ew int: Width of the polyline, in pixels. Defaults to 1.
precision int: Number of digits after the decimal to round to for lat/lng values. Defaults to 6.
This line creates a list of latitude-longitude pairs that define the vertices of a polygon. The zip(*[...]) function is used to transpose the list so that each pair of latitude-longitude values becomes a separate tuple.
gmap.plot(*f, edge_width = 7, color = 'limegreen')
This line plots the polygon on the Google Map. The plot() function takes the *f argument, which is unpacked as separate arguments, representing the latitude and longitude values of the polygon vertices. The edge_width parameter sets the width of the polygon edges in pixels and the color parameter sets the color of the edges.
radius [int]: Radius of influence for each data point, in pixels. Defaults to 10.
gradient [(int, int, int, float)]: Color gradient of the heatmap as a list of RGBA colors. The color order defines the gradient moving towards the center of a point.
opacity [float]: Opacity of the heatmap, ranging from 0 to 1. Defaults to 0.6.
max_intensity [int]: Maximum intensity of the heatmap. Defaults to 1.
dissipating [bool]: True to dissipate the heatmap on zooming, False to disable dissipation.
precision [int]: Number of digits after the decimal to round to for lat/lng values. Defaults to 6.
weights [float]: List of weights corresponding to each data point. Each point has a weight of 1 by default. Specifying a weight of N is equivalent to plotting the same point N times.
First, a list of tuples called letters is created. Each tuple contains two values representing latitude and longitude coordinates of a point on the map.
Then, an instance of the GoogleMapPlotter class is created with a specified center point, zoom level, and an API key.
Next, the heatmap method of the GoogleMapPlotter object is called, passing in the letters list as positional arguments, along with other parameters.
The radius parameter determines the radius of each data point’s influence on the heatmap, while the weights parameter determines the intensity of each data point’s contribution to the heatmap.
The gradient parameter is a list of tuples representing the color gradient of the heatmap, with each tuple containing four values representing red, green, blue, and alpha values.
Finally, the opacity parameter determines the transparency of the heatmap.
Picture above the map (ground_overlay)
Overlay an image from a given URL onto the map.
Parameters:
url [str]: URL of image to overlay.
bounds [dict]: Image bounds, as a dict of the form {'north':, 'south':, 'east':, 'west':}.
Optional Parameters:
opacity [float]: Opacity of the overlay, ranging from 0 to 1. Defaults to 1.0.
The variable url contains the URL of an image that will be used as the ground overlay. The bounds dictionary defines the north, south, east, and west coordinates of the image on the map.
Finally, the ground_overlay method is called on the GoogleMapPlotter object, passing the URL and bounds variables as arguments. The opacity parameter is set to 0.3 to make the overlay partially transparent. The resulting map is saved to a file called overlay.html using the draw method.
Plot a Polygon
Parameters:
lats [float]: Latitudes.
lngs [float]: Longitudes.
Optional Parameters:
color/c/edge_color/ec str: Color of the polygon’s edge. Can be hex (“#00FFFF”), named (“cyan”), or matplotlib-like (“c”). Defaults to black.
alpha/edge_alpha/ea float: Opacity of the polygon’s edge, ranging from 0 to 1. Defaults to 1.0.
edge_width/ew int: Width of the polygon’s edge, in pixels. Defaults to 1.
alpha/face_alpha/fa float: Opacity of the polygon’s face, ranging from 0 to 1. Defaults to 0.3.
color/c/face_color/fc str: Color of the polygon’s face. Can be hex (“#00FFFF”), named (“cyan”), or matplotlib-like (“c”). Defaults to black.
precision int: Number of digits after the decimal to round to for lat/lng values. Defaults to 6.
Defines a set of coordinates for a polygon named finxter_in_Budapest.
Calls the gmap.polygon() method with the *finxter_in_Budapest argument to draw the polygon on the map. The face_color, face_alpha, edge_color, and edge_width parameters define the appearance of the polygon.
Saves the map as an HTML file named 'poligon.html' using the gmap.draw() method.
Display grid (grid)
The parameters are used to specify the grid start and end points and the width and length of the grid.
This code generates a Google Map centered at latitude 47.519350864380385 and longitude 19.010462124312387, with a zoom level of 14. It then adds a grid to the map with vertical lines spaced 0.0025 degrees apart between longitude 19.0 and 19.05, and horizontal lines spaced 0.0025 degrees apart between latitude 47.50 and 47.53. Finally, it saves the resulting map with the grid to an HTML file named "grid.html".
Let’s put it together and see where I found “finxter”!
Congratulations, now you’ve learned how to draw almost anything on Google Maps with a few lines of code. While gmplot is a powerful library, it has some limitations (e.g., I can’t figure out how to change the color of the path), so maybe other modules like geopandas are a good place to learn more.
A Few Final Words on gmplot
gmplot is a Python library that allows the user to plot data on Google Maps. It provides a simple interface to create various types of maps, including scatterplots, heatmaps, ground overlays, and polygons.
With gmplot, the user can add markers, lines, and shapes to the map, customize colors, labels, and other properties, and export the map to a static HTML file.
The library uses the Google Maps API and requires an API key to be able to use it. gmplot is a useful tool for visualizing geospatial data and creating interactive maps for data exploration and analysis.
Info: I haven’t used any affiliate links in this list, so you know there’s no bias. If you want to boost your ChatGPT skills, feel free to download our ChatGPT cheat sheet for free here.
If you want more cheat sheets and be on the right side of change, feel free to join our free email academy on learning exponential technologies such as crypto, Blockchain engineering, ChatGPT, Python, and meaningful coding projects.
ChatGPT technology has seen use in various industries, such as customer support, content creation, virtual assistance, and many others. For those looking to stay abreast of cutting-edge AI technology or seeking to implement ChatGPT into their products or services, learning from the best books is paramount to their success.
In our search for the best ChatGPT books, we analyzed numerous texts, focusing on their coverage of concepts, functionality, and real-world applications. We identified top contenders that help you master this technology quickly and thoroughly, ensuring your success in leveraging ChatGPT for your personal endeavors or professional projects.
Best ChatGPT Books
Discover our top picks for the best ChatGPT books available on Amazon.
If you’re aiming to stay ahead in the AI-driven digital media landscape, “The ChatGPT Revolution” is a must-read.
Pros
Insightful AI industry knowledge
Practical tips for career transition
Well-organized information
Cons
Relatively short in length
Only in English
Independently published
As someone who’s always on the lookout for the next big thing in AI, I couldn’t wait to get my hands on “The ChatGPT Revolution.” I must say, this book didn’t disappoint. The detailed information about how AI is transforming the digital media landscape makes it engaging and easy to follow, even for a non-expert like me.
One of the critical aspects that stood out to me is the book’s focus on career transition for digital media professionals. It not only highlights the in-demand AI skills but also provides a list of learning resources to guide you in the right direction. This book is a treasure trove for anyone looking to break into the AI job market!
Although the book’s length seems a bit short, the content is undoubtedly rich in valuable insights and practical tips. My only regret is not having access to a translated version for my non-English-speaking friends. But overall, “The ChatGPT Revolution” is an indispensable resource for anyone interested in AI or digital media. Trust me, you won’t want to miss this one.
If you’re eager to conquer the world of social media marketing, this book will equip you with the power of ChatGPT and practical strategies.
Pros
Demystifies the use of AI in social media marketing
Offers valuable insights for beginners and experts alike
Provides real-world examples and case studies
Cons
Not suitable for those uninterested in AI integration
Requires time investment to fully grasp concepts
Not a shortcut to instant success
As someone who has read “ChatGPT & Social Media Marketing: The Ultimate Guide,” I can confidently say that it provides a deep understanding of how artificial intelligence, particularly ChatGPT, can revolutionize one’s social media marketing approach. The book is packed with helpful tips and tools to create engaging and effective campaigns, regardless of the platform you’re using.
Going through this guide felt like a journey of discovering new ways to enhance my social media presence. It highlights the importance of crafting captivating content, and how ChatGPT can significantly aid in that process. The book also addresses common challenges faced by marketers and offers practical solutions to overcome them.
In conclusion, if you’re looking to up your social media marketing game using AI, this book is a must-read. It may not be a magical key to instant success, but it will certainly provide you with the knowledge and tools needed to stay ahead of the competition. Give it a try, and let ChatGPT help you become the world’s best social media manager!
The ChatGPT Millionaire is a must-read for those who want to learn how to utilize ChatGPT to create financial success online.
Pros
Helpful for beginners and professionals alike
Practical and applicable tips
Engaging and easy-to-understand writing
Cons
A bit short and compact
Some filler ChatGPT responses
May not suit everyone’s needs
The ChatGPT Millionaire is a fantastic guide that introduces readers to the world of ChatGPT, making it accessible for both newbies and seasoned professionals. With its real-life examples and applicable tips, this book brings value to anyone eager to leverage the power of ChatGPT for financial gains.
Although the book is concise with its 114 pages, it manages to offer valuable information in an easy-to-digest manner. However, some readers might find it too short to cover every aspect of ChatGPT. A few filler ChatGPT responses in the book might also come across as unnecessary, though they do provide context for the technology.
Overall, The ChatGPT Millionaire is a valuable resource on its subject matter, and despite some minor shortcomings, it’s worth adding to your reading list if you are keen to explore the potential of ChatGPT in creating wealth and success online.
An enlightening read for those eager to dive deep into the ChatGPT world, uncovering the artificial intelligence behind it and how it works.
Pros
Insightful explanations
Easy-to-understand language
Practical examples
Cons
Limited audience appeal
May need prior AI knowledge
Few visual aids
Having just finished reading “The AI Question and Answer Book,” I am amazed by how this book unravels the complexity of ChatGPT in a digestible manner. The author breaks down the intricate workings of artificial intelligence and how it pertains to ChatGPT throughout the book’s 205 pages.
What I truly appreciate in this volume is the clear language used to explain technical concepts, making it an excellent resource for both beginners and advanced AI enthusiasts alike. It covers various aspects of ChatGPT, offering a comprehensive understanding of the technology that powers it.
However, the book does have a few drawbacks. It caters mostly to individuals with an interest in AI, making its appeal somewhat limited. Additionally, readers may need to have a basic understanding of AI to fully appreciate the content. The lack of visual aids may also hinder comprehension for some readers. Nonetheless, this fascinating read will undoubtedly offer valuable insights into the world of ChatGPT and artificial intelligence.
If you’re an educator looking to effectively utilize ChatGPT, this guide is a fantastic resource to help you achieve maximum results.
Pros
Comprehensive coverage of ChatGPT applications
Aligns well with ‘What Works Best’ framework
Accessible language for educators
Cons
No text-to-speech option
Lacks enhanced typesetting
Page Flip feature not available
Just finished going through “A Teacher’s Prompt Guide to ChatGPT” and found it to be an excellent resource for educators who are eager to incorporate ChatGPT into their teaching repertoire. The author masterfully covers the core applications of ChatGPT and aligns them with the ‘What Works Best’ framework, ensuring that the content is relevant and beneficial for educators.
In my experience with the book, the language used is easily digestible for teachers from various backgrounds. The guide maintains a practical tone throughout, avoiding complicated jargon that might hinder a seamless learning experience. However, there’s room for improvement in terms of accessibility features.
Unfortunately, the guide doesn’t include text-to-speech, enhanced typesetting, or Page Flip features, which could be a deal-breaker for some users who rely on these options for a more accessible reading experience. Despite these drawbacks, I still believe that “A Teacher’s Prompt Guide to ChatGPT” is a valuable tool for educators to better understand and apply ChatGPT in their classrooms.
If you’re looking to explore the fascinating world of advanced AI language generation, this book serves as a fantastic guide.
Pros
In-depth user perspective
Up-to-date AI language model
Easy to follow & informative
Cons
Only 70 pages
Independently published
Limited physical dimensions
ChatGPT: Best Uses According to ChatGPT dives deep into the potential applications of AI-powered language models. The author has done a phenomenal job explaining the different capabilities of this advanced language model, discussing its uses, and shedding light on how it can transform industries.
While the book is fairly short, it packs a punch in terms of content. Readers get a unique perspective on what makes ChatGPT such a game-changer, thanks to the author’s engaging writing. The book offers a truly eye-opening look at how ChatGPT’s language generation capabilities can be utilized effectively for various purposes.
Overall, ChatGPT: Best Uses According to ChatGPT is a compelling read for anyone looking to understand and enhance their AI language model experience. It provides practical and enlightening tips on how to maximize the benefits of using ChatGPT, without resorting to exaggerated claims or false statements.
A comprehensive must-read for those interested in leveraging ChatGPT and AI technologies to enhance their skills and career prospects.
Pros
Informative and beginner-friendly
Up-to-date and relevant content
Text-to-speech and screen reader support
Cons
No X-Ray feature
Some reviews report formatting issues
Can be difficult for some readers
As someone who recently dived into the world of ChatGPT and AI, I found this book to be an invaluable resource. It does an exceptional job of breaking down complex concepts into digestible information for readers with little to no experience.
One aspect of the book that stood out to me was the depth of content and its relevance to today’s ever-evolving AI landscape. The author goes above and beyond to ensure that the reader is not only able to understand the basics of ChatGPT but also appreciates the greater role of AI technologies in our lives and professions.
While the book’s formatting could use some improvement, I found the support for text-to-speech and screen readers to be a huge plus! It made the learning experience much more accessible, especially for readers with visual impairments or learning differences. However, the lack of an X-Ray feature is a minor drawback for those who depend on it for quick reference.
A must-read for recruiters looking to enhance their process with AI, Curtis Germany’s e-book delivers practical insights and tips.
Pros
Brief, informative read
Relevant examples of AI in recruitment
Accessible for non-IT professionals
Cons
Short length may leave readers wanting more
Narrow focus on recruitment industry
Lacks exploration of broader AI applications
As someone who has just read “ChatGPT The Recruiter’s New Best Friend,” I can confidently say this e-book is a great resource for recruiters looking to integrate AI into their workflow. The author explains in layman’s terms how ChatGPT can streamline various recruitment tasks, from sourcing to job offers.
Curtis Germany’s engaging writing style makes understanding the concepts a breeze, even for those unfamiliar with AI. He shares valuable insights that can be immediately applied to enhance daily tasks, boosting productivity in recruitment efforts. Moreover, the book’s short length makes it easy to digest, maximizing the time spent reading and applying its principles.
Despite its practical focus, it has a few drawbacks. The book’s brevity may leave some readers wanting more detailed and expansive information on broader AI applications. However, if you are a recruiter or an HR professional eager to dip your toes into the AI pool, this e-book offers the perfect starting point!
This book is a must-have for anyone looking to supercharge their AI communication skills and improve productivity with OpenAI’s ChatGPT platform.
Pros
Offers over 200 useful prompts
Elevates productivity by 10x
Applicable for ChatGPT and GPT-3
Cons
Only 62 pages of content
No X-Ray support
English language only
As someone who recently delved into “OpenAI’s ChatGPT prompts book to increase productivity by 10x,” I found it to be an invaluable resource for mastering the art of AI communication. The book features an extensive collection of prompts, specifically designed to work seamlessly with ChatGPT and GPT-3 platforms.
With over 200 stimulating prompts, you’re bound to find plenty of inspiration for crafting engaging conversations with AI. The most significant selling point of the book is its potential to increase your productivity by ten-fold. While reading, I noticed a marked improvement in my ability to generate compelling responses from my AI conversation partners, saving time and effort on tasks that once felt tedious.
However, the 62-page length of the book might leave some readers wanting more. Additionally, it would have been nice to see support for Amazon’s X-Ray feature, which enhances the reading experience through helpful information and insights. Overall, this book is an excellent investment for those seeking to up their AI communication game and unlock the true potential of ChatGPT and GPT-3.
If you’re looking to delve into the world of ChatGPT technology, this comprehensive guide should be your go-to resource.
Pros
Expertly written and easy to understand
Highly relevant in today’s AI-driven world
Adopts a hands-on approach with practical examples
Cons
Only available in paperback format
112 pages may feel a bit condensed for the topic
Independently published, which may affect credibility for some
The book “ChatGPT-4: Transforming the Future: A Comprehensive How-to Guide on Harnessing the Power and Potential of AI” is a must-read for anyone curious about this fascinating AI technology. After going through its 112 pages, I found the content to be insightful, well-organized, and highly informative.
One of the things that stood out to me was the book’s clarity in explaining complex concepts. The author has done a commendable job at breaking down ChatGPT-4 technology and its potential applications in a way that even a beginner can grasp with ease. Additionally, this guide is packed with real-world examples and hands-on techniques that will surely improve your understanding of AI capabilities in practical scenarios.
The only downside is that the book is currently available only in paperback format, which might not be ideal for those who prefer digital reading material. Additionally, given its independent publication, skeptics may question its credibility compared to a book released by a more established publisher. Regardless, “ChatGPT-4: Transforming the Future” proves to be a valuable resource, and I highly recommend it to anyone looking to explore AI’s potential through the lens of ChatGPT technology.
Working with dates is a common task in programming, and Python provides robust tools for handling them. One such tool is regular expressions, which can be used to match and validate date strings in a specific format. In this article, we will explore how to use Python regex patterns to match dates in the "YYYY-MM-DD" format.
Matching a date string in the "YYYY-MM-DD" format requires a regex pattern that accounts for four-digit years, two-digit months between 01 and 12, and two-digit days between 01 and 31. This can be achieved by creating an expression that considers the range of valid values for each date component and ensures the proper placement of hyphens.
The use of regular expressions in Python helps validate date strings and offers flexibility in extracting or manipulating date components. Understanding the basics of regex patterns and applying them to date matching can enhance your ability to work effectively with date-related data in your Python projects.
Matching YYYY-MM-DD Format
In this section, we will learn how to match dates in the 'YYYY-MM-DD' format using Python regular expressions. We will explore building the regex pattern and validating dates using the re module in Python. Let’s get started!
Building the Regex Pattern
The first step is to build a regex pattern that matches the desired date format. For the 'YYYY-MM-DD' format, a pattern may look like this:
To validate a date string and check if it matches the 'YYYY-MM-DD' format, we will use Python’s re module. Let’s import the module and create a function to validate dates:
import re def validate_date(date_string): pattern = "^\d{4}-\d{2}-\d{2}$" if re.match(pattern, date_string): return True else: return False
Now we can use the validate_date() function to check if a date string is valid:
date = "2023-03-30"
is_valid = validate_date(date)
print(is_valid) # Returns True if the date is valid; otherwise, False.
That’s it! Now you know how to build a regex pattern for the ‘YYYY-MM-DD’ date format and validate dates using Python’s re module. Happy coding!
Alternative Approach to Match a Date ‘YYYY-MM-DD’
In this section, we will explore an alternative approach to matching dates in the ‘YYYY-MM-DD’ format using Python regular expressions (regex). This method provides a more concise and efficient way to match dates.
Instead of matching each component of the date separately, you can use a single regex pattern that takes care of all the components at once. Using this approach, we would match the year, month, and day components, along with the separators, in a single pattern. Here’s an example:
date_pattern = r'(\d{4})-(\d{2})-(\d{2})'
This pattern uses the following elements:
\d{4} to match exactly four digits for the year
- as a separator between the year, month, and day components
\d{2} to match exactly two digits for the month and day components
Once you have defined the regex pattern, you can use the re module to search for and extract dates in the specified format. For example:
import re text = "The meeting is scheduled for 2023-04-15 and the deadline is 2023-03-30."
matched_dates = re.findall(date_pattern, text)
print(matched_dates) # [('2023', '04', '15'), ('2023', '03', '30')]
As you can see, this alternative approach makes it easier to spot and extract dates in the ‘YYYY-MM-DD’ format using Python regex.
Real-World Applications
Python Regex is a powerful tool for working with text, and one of its many applications is matching dates in the 'YYYY-MM-DD' format. In this section, we will explore two real-world use cases for this pattern: date validation in user input, and extracting dates from text.
Date Validation in User Input
When developing a software application, it’s common to require users to input dates in a specific format, such as 'YYYY-MM-DD'. Python Regex can be used to ensure that the entered date matches the desired format before it’s saved or processed. This helps maintain data consistency and prevents potential issues related to invalid date inputs.
For example, you can use the following regex pattern to match a date in the 'YYYY-MM-DD' format:
date_regex = re.compile(r'(\d{4}-\d{2}-\d{2})')
Extracting Dates from Text
Another common application for Python Regex is extracting dates from large blocks of text, such as documents or web pages. This can be particularly useful when working with historical records, reports, or any text where dates are mentioned in the 'YYYY-MM-DD' format.
Using the regex pattern mentioned earlier, you can search through a given text and extract all instances of dates in the desired format:
date_matches = re.findall(date_regex, text)
The results can then be further processed, analyzed, or visualized depending on what you want to achieve with the extracted data.
Python Regex Library
Regex Basics
Regular expressions (regex) are powerful tools used in programming to find and manipulate text based on specific patterns. In Python, the re module provides all the necessary functions to work with regular expressions. Let’s explore some essential regex concepts and how they can help us match dates in ‘YYYY-MM-DD’ format.
Creating Regex Patterns
Regex patterns consist of special characters and literals that define a specific search pattern. For instance, to match the ‘YYYY-MM-DD’ date format, we can use the following pattern:
r'\d{4}-\d{2}-\d{2}'
This pattern includes:
\d – a digit character
{4} – exactly 4 repetitions of the previous element
- – a literal hyphen character
Thus, the pattern looks for 4 digits followed by a hyphen, 2 digits, another hyphen, and finally 2 more digits.
re Module Functions
The re module in Python provides various functions to work with regex patterns, such as:
search() – searches for the first occurrence of a pattern in a string
findall() – returns all non-overlapping matches in a string as a list
sub() – replaces all occurrences of a pattern with a specified replacement
To match a date in the 'YYYY-MM-DD' format, you can use the re module, as shown in this example:
import re pattern = r'\d{4}-\d{2}-\d{2}'
date_string = 'The event takes place on 2023-04-15.' match = re.search(pattern, date_string)
if match: print('Date found:', match.group(0))
This code snippet defines a regex pattern, searches for it in the provided string, and prints the matched date if found. Remember, regex patterns are incredibly versatile, so you can customize them to fit your specific needs!
If you want to keep learning Python, check out our free Finxter cheat sheets here:
Some big-time celebs (Musk, Wozniak, and more) have signed a petition to put a hold on the development of AI systems stronger than GPT-4. I’m really curious to hear what other people think about this. On the one hand, I get where they’re coming from, but even if it did happen, would it really make any difference? I kinda doubt it, to be honest.
Google Brain had an incredible concept back in 2006! You could chat with Google and use it to search for things and even pay for them. Just imagine if they had implemented this incredible idea back then! It’s mind-blowing to think about!
OpenAI has put their money into NEO, a humanoid robot from 1X. They are confident it will have a great influence on the future of work. ChatGPT and robots could be arriving sooner than expected. Their goal is to construct robots with human-level dexterity.
ChatGPT is an incredible code interpreter that can help you complete university assignments in no time! It can scan databases and analyze the data, create visualizations, and even allow you to play with data using plain English! It also supports file uploads and downloads. This would have been a lifesaver during my university days!
Webflow is taking a leap forward with AI! Now you can quickly build components using Artificial Intelligence. I’m especially excited about this since I use Webflow to design websites for people.
ChatGPT Plugin: Your Personal Recipe and Shopping Assistant
ChatGPT Plugin is your personal assistant to help you find the perfect restaurant, recommend delicious recipes, compile all the necessary ingredients, and even purchase them using Instacart!
Expedia has outdone themselves with their new plugin – it’s already better than any website out there for booking flights! It can help you find flights, resorts, and activities to do!
Unlock the Power of ChatGPT with the Retrieval Plugin
The Retrieval plugin provides ChatGPT with an incredible memory ! All you need to do is wear a microphone throughout the day, transcribe the audio, and give it to ChatGPT – it will remember all the information you said. With the Retrieval plugin, you can instantly recall anything you need! There are countless useful applications for this revolutionary technology.
The ChadCode plugin is revolutionizing coding! It allows you to quickly search across your files and create GitHub issues in an instant. The possibilities are endless, and it truly changes coding for the better!
The first GPT-4-generated iOS game is now available on the App Store! Mate had no experience with Swift; all code was completely AI-generated. It won’t be long until the App Store is flooded with AI-built games – it’s only a matter of time!
Real-time Emotion Detection with AI – Endless Possibilities ?
Real-time emotion detection with AI is now possible! While I’m not entirely sure of its use cases, I can imagine people coming up with some crazy ideas for this technology.
Stay connected with your furry friends through voice chat on your Macbook Pro! We won’t have to type anymore, as we can just chat with Artificial Intelligence (AI) like Jarvis. I wrote about this in my newsletter – no need to type out your messages anymore!
Mark Cuban Proposes Training AI Models with Liberal Arts Majors –
Mark Cuban made an interesting comment suggesting that people with liberal arts or other non-engineering degrees could train AI models for specific use cases and tasks. This idea could potentially lead to significant financial gains if successful. What do you all think about this proposal?
Investing in AI: Emad Mostaque on GPT-4 Competitor
Emad Mostaque, CEO of Stability AI, estimates that building a GPT-4 competitor could cost anywhere between 200-300 million, provided the right people are in place. He also noted that it would take a minimum of 12 months to build an open-source GPT-4, and an immense amount of focus and hard work.
A 3D artist opened up about how their job has been transformed since the release of Midjourney. They can now create a character in only two to three days, compared to the weeks it would take before. Though they don’t necessarily love it, they even admit that Midjourney does a better job than they can do. It’s sadly thought-provoking to read, as one can imagine how enjoyable it used to be for them to make art. This change is going to have a significant impact on many people in various creative fields.
This lad built an entire iOS app , including payments , in a few hours! It was a relatively simple app, but had sooo many use cases, enabling him to get proof of concepts out in a single day. Crazy times ahead!
Someone is currently learning how to create 3D animations using AI. As this technology gets refined, I can imagine it becoming a streamlined process and making a lot of people some serious money.
These folks are constructing an earpiece that will provide you with conversation topics and questions when speaking to someone. Just imagine taking this along to a job interview or a date !
Have you ever dreamed of having a website that’s exactly what you want without having to do any of the work? Well, now it’s possible with AI-powered website building! This demo looks so amazing – website building is going to be so much easier and it’s crazy!
Put on your glasses and let AI take the reins! As technology advances, it’s becoming increasingly difficult to tell when someone is being assisted by AI in conversations. So get ready for a whole new world of AI-assisted conversations!
AI Generators Replacing Models: Levi’s Diversity Move
Levi’s is striving for greater diversity in their advertising by turning to AI image generators instead of hiring diverse models. It’s likely that this kind of technology will become more and more common, and could potentially spell trouble for models in the long run, as AI image generators are getting increasingly realistic.
This investor recounts a funny story about how he spoke to a founder who took all of his advice and fed it to GPT-4, an advanced natural language processing algorithm. They even used Eleven Labs’ AI-generated answers! Hilarious stuff!
Someone hooked up the GPT-4 artificial intelligence to Blender 3D animation and the results are unbelievable! The combination of AI and 3D animation is pushing the boundaries of creativity.
When doctors were unable to diagnose what was ailing the pup, GPT4 came to the rescue and proved to be spot-on with its suggested causes. Who would’ve thought it was possible?! It’s truly amazing!
A research paper suggests that GPT-4 can improve its performance by up to 30% simply by having it consider “why were you wrong.” Taking this feedback into account, the AI is capable of generating new prompts for itself, propelling the pace of its learning to lightning-fast speeds.
GPT-4 and Replit: Breaking Down the Technological Barrier
You can literally ask GPT-4 for a plugin idea, have it code it, and then watch it go live on Replit! It’s gonna be so unbelievably easy to create new types of single-use apps soon, especially if you have a niche use-case. And you can do this with practically no coding knowledge – the technological barrier to solving problems using code is vanishing before our eyes!
Say goodbye to tedious form-building by hand! We’re excited to announce that a new open-source AI form builder is coming soon! This state-of-the-art technology will make it easier and faster than ever to create forms. It’s gonna be pretty neat!
Create entire videos of talking AI people: When this technology gets better, we won’t be able to tell the difference between what’s real and what’s AI!
Someone created a cityscape using AI and then asked Chatbot GPT-3 to write the code to port it into virtual reality. From words to wondrous virtual worlds!
Someone managed to get GPT-4 to write an entire book – and while it may not be amazing, it’s still quite impressive! With the advent of helpful plugins and progress to GPT-5 and GPT-6, this accomplishment will likely become even easier and of higher quality in the future.
Request an App with a Single Prompt – The Future of App Development?
Have you heard about Replit’s new software that allows you to literally request an app and have it built for you? It’s unbelievable! As AI continues to improve, we may see whole functioning apps being built with a single prompt. This could be world-changing!
Langchain makes it easy and powerful to develop on their platform. Whether you’re a beginner or an experienced engineer, you’ll find that building with Langchain is fast, reliable, and easy. So, why not give it a try?
Create stunning 3D scenes in no time with the power of text! With this revolutionary editing technique, making complex 3D scenes is easier than ever before.
GPT-4’s Emotional Genius: An Entrepreneur’s Opportunity for Fortune
GPT-4 is proving to be incredibly adept at recognizing the many nuances of human emotions and states of mind – it’s so effective that it can even help to resolve conflicts between couples . Reports have been cropping up about its effectiveness as a therapeutic tool – good, ethical or otherwise – and there is undeniably great potential to help many people without breaking the bank. All that’s needed now is for an ambitious entrepreneur to seize the opportunity and create a successful business around GPT-4 to make a fortune .
Replacing Siri with ChatGPT – A Clever iOS Shortcut
Check out this clever lad who created an iOS shortcut that replaces Siri with ChatGPT! With this shortcut, users can interact with ChatGPT instead of Siri, adding a unique twist to their virtual assistant experience.
Integrate Chatbot and Zapier for Endless Possibilities
Zapier allows you to integrate more than 5000 apps, turning your possibilities into an infinite playground. By combining Chatbot and Zapier, you can create an array of unique use cases that can be further enhanced with other apps.
We’ve likely already seen the paper discussing how GPT-4 displays signs of artificial general intelligence (AGI), but here’s a link just in case. It states, “We believe that it could reasonably be viewed as an early (yet still incomplete) version of an AGI system.”
Mind-blowing AI Agent Creates Subtasks and Solutions
This guy made an AI agent that can break down a task into sub-tasks and come up with solutions for each part. It’s totally insane to watch it in action – I highly suggest catching the clip below. Here’s the link to the “paper” and his summary of how it all works.
Make Remote Job Interviews a Breeze with This Clever Tool!
There’s now an awesome tool that can help you ace remote job interviews with ease. It listens in to the interview and provides you with suggestions on what to say – making those nerve-wracking virtual interviews a piece of cake!
Perplexity Launches New Mobile App: A ChatGPT Alternative for Instant Answers with Cited Sources
Perplexity has just released their new mobile app – a cutting-edge ChatGPT alternative featuring instant answers and cited sources. Get the app now and access on-the-go answers in a flash!
As we all know, Django is a Python framework used for building complex web applications. Yet, it can also be used for building simple ones. In this tutorial, I’m going to show you how I built an English dictionary app, a simple Django project for beginners.
It takes time for a beginner to fully understand how Django works. But the key is consistency. If you keep building projects, you will gradually know enough to be dangerous with Django.
Scroll to the end to see the full code on GitHub!
A Dictionary App?
A dictionary is an application used to get a particular word’s meaning. No matter how proficient we are in English, some words are far beyond our understanding. There are also words we may not know how to pronounce efficiently, especially those originating from a different language.
Furthermore, we may want to know a synonym or antonym of a given word. This is where a dictionary comes in handy. With a dictionary, we get to know not only the meaning of a word but how it is pronounced, what parts of speech it belongs to, and how it is used in a sentence. Students, no doubt, appreciate the importance of having a dictionary.
How Will We Get The Data?
How will we build this dictionary app so that when users search for a particular word, they get the meaning?
We have two options. Either we use PyDictionary, a Python module and an API that scrapes an online dictionary website or we perform the web scraping ourselves. None of these methods comes without a drawback.
The drawback is the challenge that comes with web scraping. Many websites sometimes change their HTML structures to prevent people or bots from accessing their content. So, if an API is not actively maintained, it can quickly become useless. This is the case with PyDictionary. Therefore, we are going to perform web scraping.
Doing so will undoubtedly gain some valuable experience in web scraping, a very broad concept in Python programming. Still, we are at the mercy of website owners. They can change the HTML structures of their websites unexpectedly.
Prerequisites
This tutorial assumes you are familiar with Python, HTML, and Bootstrap. If not, please you are required to have at least a basic knowledge before attempting this project. Basic knowledge of Django, though not required, can speed up the learning process.
Getting started
Create a new folder for this project. Then you do the following:
Create a virtual environment python3 -m venv .venv
Activate the virtual environment source .venv/bin/activate
Install the required libraries in the virtual environment pip install django tzdata requests bs4
Create a requirements.txt file to keep a record of the module versions. pip freeze > requirements.txt
Creating Django Project and Application
i. Creating the project django-admin startproject project . This creates a folder called project in the current directory.
ii. Creating the application python3 manage.py startapp dictionary The manage.py file is an executable file used to run Django commands
iii. Applying migrations python3 manage.py migrate
iv. Checking to see if the installation was successful python3 mange.py runserver
Once you see the above image, you are good to go.
Registering the App
In settings.py file This step is important whenever an app is created. Navigate to the project folder. Open the settings.py file and scroll down to the INSTALLED_APPS section.
We have registered the app in the settings.py file. The settings.py file is used to configure the whole project.
In the urls.py file Open the urls.py file in the project folder and add this:
from django.contrib import admin from django.urls import path, include urlpatterns = [ path('admin/', admin.site.urls), path('', include('dictionary.urls')), ]
We have registered the app-level URL. Let’s now create it.
Creating the App URL
This will be done inside the dictionary folder. Create a urls.py file inside the folder and add this:
from django.urls import path
from . import views urlpatterns = [ path('', views.homeView, name='home'), path('search', views.searchView, name='search'),
]
“from . import views” tells Django to import the views.py file residing in the dictionary folder.
The empty string indicates the home page URL which is http://127.0.0.1:8000/ if you are using the local server.
This is where users will be directed when the web page is opened.
For the 'search' string, the URL will be http://127.0.0.1:8000/search. We will be creating two functions in the views.py file as indicated.
Notice the name argument in the path() function, this is another way to refer to the URLs in the template files without using the exact URLs.
Creating Views
In this file, we are going to perform the web scraping we mentioned earlier. The first function, the homeView() is fairly simple. We just render the index.html page once the app is opened.
from django.shortcuts import render
import requests
from bs4 import BeautifulSoup as bs # Create your views here. def homeView(request): return render(request, 'index.html')
But the searchView() function is a little bit complex. We want to display three things when a user searches for the meaning of a word: meaning, synonyms, and antonyms.
So, we perform web scraping on two online dictionary websites. The first will display the meaning and the second will display the synonyms and antonyms.
def searchView(request): word = request.GET['search'] response = requests.get(f'https://dictionary.com/browse/{word}') response2 = requests.get(f'https://thesaurus.com/browse/{word}') if response: soup_1 = bs(response.text, 'html.parser') meaning = soup_1.find_all('div', {'value': '1'}) meaning_1 = meaning[0].getText() else: word = f'Sorry, we couldn\'t find your word {word} in our records.' meaning = '' meaning_ = '' if response2: soup_2 = bs(response2.text, 'html.parser') synonyms = soup_2.find_all('a', {'class': 'css-1kg1yv8 eh475bn0'}) synonym_list = [] for i in range(len(synonyms)): synonym_list.append(synonyms[i].text.strip()) antonyms = soup_2.find_all('a', {'class': 'css-15bafsg eh475bn0'}) antonym_list = [] for i in range(len(antonyms)): antonym_list.append(antonyms[i].text.strip()) else: synonym_list = '' antonym_list = '' results = { 'word': word, 'meaning': meaning_1, 'synonyms': synonym_list, 'antonyms': antonym_list } return render(request, 'search.html', results)
We import the requests module which uses the get() method to scrape the contents of the two websites.
The result is a cruel HTML code staring at you. BeautifulSoup, invaluable for web scraping does its job well to pull the data out of the HTML content. This now makes it possible to search the parsed data.
For our first search using the find_all() method from BeautifulSoup, we want a text wrapped in a div tag with the value 1. This is where the website owners kept the meaning of a particular word on the dictionary.com website.
So, we use the getText() method to get the text.
The second and third searches look similar to the first but instead of a div, we search in a tag. The words were kept in a tag to make it easy for visitors to be redirected to that particular word if they want to find the definition.
Instead of searching for a value, we search for a CSS class. We then append the results to their respective variables. If you are new to web scraping, you may wonder how we know where those particular words reside.
The answer is found in a browser’s developer tools, preferably Chrome Developer Tools. This is the reason I suggest familiarizing yourself with HTML before attempting this project.
Finally, we render the results on the search.html page. Notice the else statements. This is run if the word is not found on the website. Let’s now create the HTML files.
Creating Templates
Create a folder named templates in the current directory (not in the project or app folder). Then go to the settings.py file to let Django know of this development. In the file, import the os module. Then scroll to the TEMPLATES section and add this:
The main HTML files will inherit from the base.html file. Open the base.html file and add the following:
<!DOCTYPE html>
<html lang="en"> <head> <meta charset="UTF-8"> <meta http-equiv="X-UA-Compatible" content="IE=edge"> <meta name="viewport" content="width=device-width, initial-scale=1.0"> <title>Dictionary App</title> <!-- CSS only --> <!-- we are getting bootstrap5 from the CDN --> <link href="https://cdn.jsdelivr.net/npm/bootstrap@5.2.0-beta1/dist/css/bootstrap.min.css" rel="stylesheet">
</head> <body> <div class="container mt-4"> <div class="row"> <div class="mt-4 p-5 bg-success text-white rounded mb-3"> <h1>Django English Dictionary</h1> </div> <div class="col-md-12"> {% block content %} <!-- here we will inject the content of every page that inherits from the base page --> {% endblock %} </div> </div> </div>
</body> </html>
Then, in the index.html add the following:
<!-- the index page is inheriting from the base page -->
<!-- the extends tags are used for inheriting from the base page -->
{% extends 'base.html' %} <!-- the block content tags for containing content of the page -->
{% block content %} <form action="search"> <div class="input-group"> <input type="text" required class="form-control" name="search" placeholder="Search your favorite word......."> <div class="input-group-append"> <button class="btn btn-success" type="submit"> Search </button> </div> </div> </form> {% endblock %}
Recall in the searchView() function, we send a GET request to get the word input by our user from a form that bears the name 'search.' Can you now see it in the form?
There will be a problem if you use it otherwise. Finally, add the following to the search.html file.
We use Django templating language to render the results of the searchView() function to the HTML. Alright, we are done. Run the server once again and you should see something similar to the images below.
That is the index.html web page. Once you search for a word, the search.html page is displayed as you can see below.
Do you see how each of the pages inherits everything in the base.html file?
Conclusion
We have successfully come to the end of this project. I strongly believe you have learned a lot of things you can apply to your projects. If certain things aren’t clear you may wish to read other project articles.
As a Python developer, I’ve always been fascinated by the simplicity and versatility of the language. Python has always been my go-to language for all my programming needs, from its clean syntax to the vast array of libraries available. I recently had to work on a project requiring me to convert numbers to their hexadecimal, octal, and binary representations. While there are several ways to do this in Python, I discovered the f-string Python Hex, Oct, and Bin methods, which turned out to be the most efficient and straightforward approach. In this blog post, I’ll share my personal experience with this method and show you how to use it to convert numbers efficiently.
A Short Overview (Promised)
Python’s f-strings, also known as “formatted string literals”, have been introduced in Python 3.6 and offer a more efficient and readable way to format strings. They improve upon the older string formatting methods, such as using %-formatting and the str.format() method.
One of the key advantages of f-strings is their ability to handle various numeric representations, such as hexadecimal (hex), octal (oct), and binary (bin).
Handling hex, oct, and bin values in Python with f-strings is quite simple, thanks to the built-in support for these number systems. These can easily be incorporated into f-strings by using specific format specifiers within curly braces that contain the expressions to be evaluated and formatted at runtime. This allows you to seamlessly integrate hexadecimal, octal, and binary values into their strings without resorting to clumsier methods or additional function calls.
When working with f-strings in Python, you can use {variable:x} for hex, {variable:o} for oct, and {variable:b} for bin.
F-String Basics
One powerful feature of f-strings is their ability to format numbers in different bases, such as hexadecimal (hex), octal (oct), and binary (bin). To represent numbers in these formats, you can use the appropriate format specifier:
Hexadecimal: {x:X}
Octal: {x:o}
Binary: {x:b}
For example, to convert an integer into its hexadecimal representation, you can use the following f-string:
x = 255
hex_string = f"x in hex is: {x:X}"
print(hex_string) # Output: "x in hex is: FF"
Similarly, for octal and binary representations, you can use the respective format specifiers within the f-string:
x = 255
oct_string = f"x in oct is: {x:o}"
bin_string = f"x in bin is: {x:b}"
print(oct_string) # Output: "x in oct is: 377"
print(bin_string) # Output: "x in bin is: 11111111"
Using f-strings, you can create more readable and efficient code when working with different number systems in Python .
To format a number in hexadecimal with f-strings, you can use the format specifier {variable:x}. If you want zero padding, use the format specifier {variable:0Nx}, where N is the desired number of digit characters.
x = 255
hex_string = f"0x{value:02x}"
# Output: "0xff"
Similarly, to format a number in octal representation, use the format specifier {variable:o}.
y = 63
octal_string = f"0o{y:03o}"
# Output: "0o077"
For binary representation, you can use the format specifier {variable:b}.
z = 10
binary_string = f"0b{z:04b}"
# Output: "0b1010"
In addition to numerical formats, you can also use other format specifiers like:
Decimal: {variable:d}
Floating-point: {variable:.Nf} (where N is the number of decimal places to round)
Percentage: {variable:.N%}
Hexadecimal Representation
You can easily represent numbers in hexadecimal notation using f-strings in Python. Hexadecimal is a base-16 numeric system that uses sixteen distinct symbols – 0-9 representing zero to nine and A-F for ten to fifteen. It is widely used in computer programming and digital electronics.
You can use the format specifier within curly braces to convert a number to its hexadecimal representation using f-strings. For example:
number = 255
hex_num = f"{number:x}"
print(hex_num) # Output: "ff"
The same can be achieved using the format() function:
You can also include the 0x prefix by using the # flag in the format specifier:
number = 255
hex_num = f"{number:#x}"
print(hex_num) # Output: "0xff"
Hexadecimal representation can be helpful in various situations, such as when working with colors in CSS or addressing memory locations in computer systems.
Octal Representation
In Python, working with octal representations is smooth and straightforward thanks to built-in functions and f-strings. An octal number system has a base of 8, which means it uses eight symbols: 0, 1, 2, 3, 4, 5, 6, and 7. Converting between decimal and octal values can be accomplished with ease.
To obtain the octal representation of an integer in Python, simply use the oct() function. This function takes an integer as input and returns its octal representation as a string:
octal_value = oct(42) # 42 in decimal equals '0o52' in octal
With f-strings, you can elegantly include octal values directly in your strings. To do this, use the format specifier {value:#o} within an f-string:
number = 42
formatted_string = f"The octal representation of {number} is {number:#o}"
# Output: "The octal representation of 42 is 0o52"
Here are some essential points to remember when working with octal representations in Python:
Octal literals can be defined by adding a 0o prefix to the number: octal_number = 0o52.
Using arithmetic operations on octal numbers works the same as on decimal numbers: result = 0o52 + 0o10.
Convert between integer and octal string representations with the int() and oct() functions, respectively.
Binary Representation
In Python, f-strings are a convenient option for formatting strings, which can be used for various purposes like binary, octal, and hexadecimal representations. In this section, we’ll focus on the binary representation using f-strings.
To display a binary value of an integer using f-strings, you can use the formatting specifier b followed by the variable you want to convert inside the curly braces. The syntax looks like this: f"{variable:b}".
As an example, let’s say we want to display the binary representation of the number 5:
number = 5
binary_representation = f"{number:b}"
print(binary_representation) # Output: 101
Now, you can use a loop to display binary representations for a range of numbers. Let’s say we want to print binary values for numbers 0 to 5:
for i in range(6): print(f"{i} in binary is {i:08b}")
This will output the following:
0 in binary is 00000000
1 in binary is 00000001
2 in binary is 00000010
3 in binary is 00000011
4 in binary is 00000100
5 in binary is 00000101
Note the use of 08b within the f-string. The number 8 indicates the minimum width, and leading zeros are used to fill any remaining space. This ensures that binary values are displayed with a consistent width, making the output easier to read.
Conversion Functions
This section will focus on Python’s f-string capabilities for converting between hexadecimal, octal, and binary number systems. The primary goal is to make these conversions as simple as possible using f-string syntax.
Int to Hex, Oct, and Bin
When working with integers, you can easily convert them to their corresponding hexadecimal, octal, and binary representations using f-string formatting. Here are some examples:
This simple f-string syntax allows you to convert integers to their corresponding representation within an f-string using the 'x', 'o', and 'b' format specifiers.
String to Hex, Oct, and Bin
For converting strings to their hexadecimal, octal, and binary representations, you can use the following approach:
import binascii text = "Hello, World!" # Convert the string to bytes
text_bytes = text.encode('utf-8') # Use binascii to convert bytes to hex, oct, and bin
hex_string = binascii.hexlify(text_bytes).decode('utf-8')
oct_string = "".join([f"{char:o}" for char in text_bytes])
bin_string = "".join([f"{char:08b}" for char in text_bytes])
In this example, we first convert the string to bytes using the 'utf-8' encoding. Then we utilize the binascii module to convert bytes to their hexadecimal representation. We use list comprehension and f-string formatting for octal and binary conversions to achieve the same result.
Incorporating f-strings allows you to conveniently and efficiently perform conversions between various number systems in Python. This technique can be particularly beneficial when dealing with data representation and manipulation tasks.
Formatting Specifiers and F-Strings
The formatted string literals allow you to embed expressions inside the string, which are evaluated and formatted using the __format__ protocol.
Formatting numbers in hex, oct, and bin is quite easy with f-strings. Here are some examples:
Hexadecimal: f"{number:x}"
Octal: f"{number:o}"
Binary: f"{number:b}"
You have the option to add formatting specifiers and padding to your f-Strings. For instance, you can center the output and add zero-padding:
f" {data:^14s}" .format(f" {data:#04x}")
This snippet first converts the data to hexadecimal using {data:#04x} and then centers the output with {data:^14s} (from Stack Overflow).
Here’s a brief table that demonstrates how to format numbers using f-Strings:
Type
Example
Output
Hexadecimal
f"{15:x}"
f
Octal
f"{15:o}"
17
Binary
f"{15:b}"
1111
Utilizing f-Strings and various formatting specifiers can help you efficiently manage complex string formatting tasks in your Python projects .
To keep boosting your Python skills and stay on track with the emerging technologies of the exponential age (e.g., ChatGPT), check out our free cheat sheets and email academy here:
Python provides an effective way of handling multiline strings, which you might have encountered when working with lengthy text or dealing with code that spans multiple lines. Understanding how to correctly write a raw multiline string in Python can be essential for maintaining well-structured and easily readable code.
Ordinarily, we express strings in Python using single or double quotes.
However, when it comes to multiline strings, Python offers a special syntax for defining these types of text. To create a multiline string, you can use triple quotes, either single or double, at the beginning and end of your string.
To correctly write a raw multiline string in Python, use the letter “r” before your opening triple quotes while enclosing your string with triple quotes. For example: r'''This is a raw\n Multiline String'''.
This denotes a raw string and preserves special characters such as backslashes (used for escape sequences) without interpreting them as part of the string. Doing so lets you easily and efficiently handle long strings spanning multiple lines in your Python code.
Understanding Raw Strings
In Python, raw strings are a convenient way to represent strings literally, without processing escape characters. This can be particularly useful when working with regular expressions or dealing with file system paths. To create a raw string, simply prefix the string literal with an r or R character.
For example, a regular string containing a backslash (such as in a file path) would need to be escaped:
normal_string = 'C:\\Users\\John\\Documents'
With raw strings, you don’t need to escape the backslashes:
raw_string = r'C:\Users\John\Documents'
Both of these variables will hold the same string value.
When it comes to creating raw multiline strings, you can use triple quotes """ or ''' combined with the raw string prefix to achieve the desired result. Here’s an example:
raw_multiline_string = r"""This is a
raw multiline string
with backslashes \t and \n
that are not escaped."""
This string will preserve the backslashes and newlines as they appear between the triple quotes.
It is important to note that raw strings cannot end with an odd number of backslashes, as the final backslash would escape the final quote character:
# This will raise a SyntaxError
invalid_raw_string = r"This is not valid\"
To deal with this limitation, you can concatenate a regular string with the final backslash:
valid_raw_string = r"This is valid" + "\\"
Multiline Strings
In Python, multiline strings are created using triple quotes, either three single quotes (''') or three double quotes ("""). This allows you to include quotes, tabs, and newlines within the string without using escape characters. Here is an example of a multiline string:
multiline_string = """This is a
multiline string in Python
with newlines, tabs, and "quotes"."""
If you want to create a raw multiline string, you’ll need to use a different approach, as the r prefix only works for single-line strings. One way to achieve this is by combining raw strings and parentheses, adding an r prefix to each part of the string. This will preserve the string’s escape characters:
raw_multiline_string = (r"on\e" r"\\tw\\o")
Keep in mind that when using parentheses, the line break will not be included in the string. You can manually add a line break using the \n escape character in the appropriate location like this:
This method allows you to create raw multiline strings while preserving the escape characters and maintaining readability in your Python code.
Remember: it’s essential to use the r prefix for each part of the string to ensure it’s treated as a raw string. For more information, check out the discussion on Stack Overflow.
3 Ways to Combine Raw and Multiline Strings
In Python, you can combine raw and multiline strings to create a string that spans across multiple lines, while also preserving special characters and escape sequences. This section will explain different ways to achieve this combination.
One common approach is to use triple quotes for creating a multiline string. By using three single quotes (''') or three double quotes ("""), you can create a multiline string that retains any whitespace and can include special characters. To add a raw string, use the r prefix before the triple quotes:
raw_multiline_string = r"""This is a raw
multiline string with a backslash: \\
and a new line \n is just character literals."""
Another way to write a raw multiline string is by using parentheses and string concatenation. Each line of the string can be enclosed in single or double quotes, followed by a space to ensure a single whitespace character divides them. Add the r prefix before each quoted line to maintain the raw string format:
raw_multiline_string = (r"This is a raw" r" multiline string with a backslash: \\" r" and a new line \n is just character literals.")
Alternatively, you can use the + operator to concatenate multiple raw strings, creating a multiline string. This approach allows you to explicitly specify newline characters or other special characters as needed:
raw_multiline_string = (r"This is a raw" + "\n" r" multiline string with a backslash: \\" + "\n" r" and a new line \n is just character literals.")
With these techniques, you can create raw multiline strings that are easier to read and maintain in your Python code.
Multiline Raw String Use Cases and Examples
This section reviews some use cases and examples demonstrating how to correctly write a raw multiline string in Python.
Using raw multiline strings is beneficial when dealing with strings containing many backslashes or with regular expressions. In these scenarios, raw strings prevent the need to escape backslashes, making the code more readable.
Here’s a basic example of creating a raw multiline string:
multiline_raw_string = r"""This is a raw \
multiline string in Python. \\
You don't need to escape the backslashes \\."""
In this example, the backslashes are preserved in the text as they’re written, without the need to escape them, thanks to the r prefix before the triple quotes.
Suppose you want to match a file path pattern in a text, using a regular expression. Without raw strings, you’d need to escape the backslashes:
import re pattern = 'C:\\\\Users\\\\[A-Za-z0-9]+\\\\Documents'
text = 'C:\\Users\\JohnDoe\\Documents\\example.txt' result = re.search(pattern, text)
print(result.group())
With raw strings, the regex pattern becomes more readable, as you don’t need to escape the backslashes:
import re pattern = r'C:\\Users\\[A-Za-z0-9]+\\Documents'
text = 'C:\\Users\\JohnDoe\\Documents\\example.txt' result = re.search(pattern, text)
print(result.group())
In both examples, the output is the same:
C:\Users\JohnDoe\Documents
These examples demonstrate the benefits of using raw multiline strings in Python, especially when working with text that contains special characters like backslashes or incorporating regular expressions in your code.
Feel free to check out our full guide on raw strings here:

 Recommended: [Blog] 10 High-IQ Things GPT-4 Can Do That GPT-3.5 Can’t
 “In this work we propose the Transformer, a model architecture eschewing recurrence and instead relying entirely on an attention mechanism to draw global dependencies between input and output. The Transformer allows for significantly more parallelization … the Transformer is the first transduction model relying entirely on self-attention to compute representations of its input and output without using sequence-aligned RNNs or convolution.”
 My main takeaway from comparing GPT-3.5 to GPT-4 is that the limits of performance improvements are not yet reached by simply throwing more and more data and hardware on these models. And when the performance (=IQ) of transformer models ultimately converges — probably at a super-human IQ level — we’ll still be able to change and improve on the underlying abstractions to eke out additional IQ.


 .
. 

 .
.  :
: all the matches as strings in a list.


 .
. .
.  .
.


 . The role combines creative thinking, language expertise, and a deep understanding of AI to ensure the technology delivers on its promise of effective automation and productive brainstorming


 For instance, let’s take a look at data scientists, software engineers, and AI researchers.

 . As more companies integrate AI technologies into their operations, job opportunities for prompt engineers are expected to increase.
 . As artificial intelligence becomes more entrenched in everyday life, prompt engineering skills may eventually become as essential as learning how to use a search engine
 but it did help me write the code snippet explanation (which I attached after each code output).


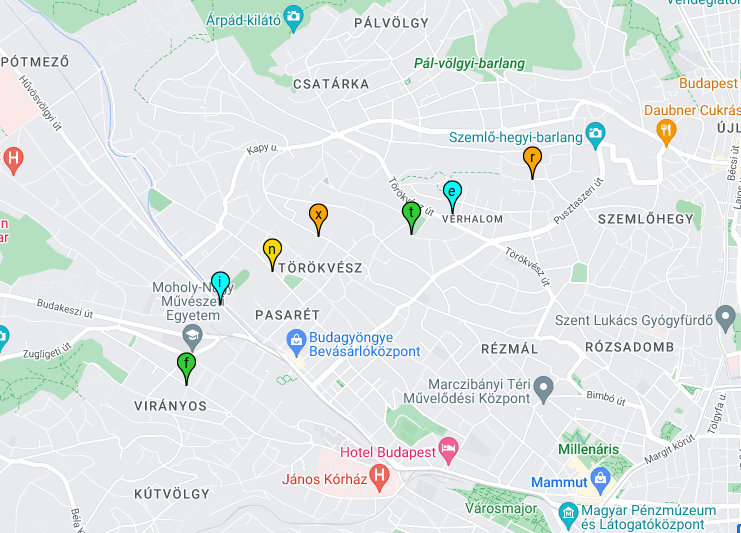


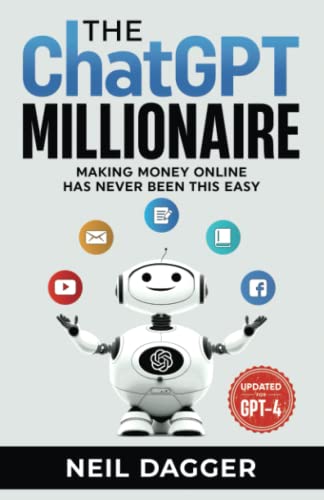


 Nonetheless, this fascinating read will undoubtedly offer valuable insights into the world of ChatGPT and artificial intelligence.
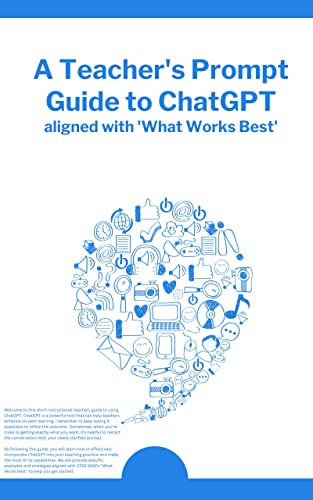

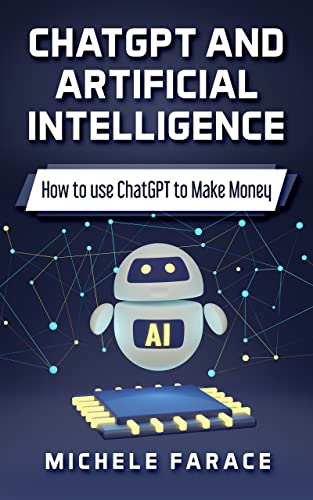


 Now you know how to build a regex pattern for the ‘YYYY-MM-DD’ date format and validate dates using Python’s

 spot and extract dates in the ‘YYYY-MM-DD’ format using Python regex.

 Recommended:
  Musk, Wozniak, and more) have signed a petition
 to put a hold on the development of AI systems stronger than GPT-4. I’m really curious to hear what other people think about this. On the one hand, I get where they’re coming from, but even if it did happen, would it really make any difference? I kinda doubt it, to be honest.
  It also supports file uploads and downloads.
  This would have been a lifesaver during my university days!


 iOS game is now available on the App Store!
  Mate had no experience with Swift; all code was completely AI-generated. It won’t be long until the App Store is flooded with AI-built games – it’s only a matter of time!

 ?
? We won’t have to type anymore, as we can just chat with Artificial Intelligence (AI) like Jarvis.
  It was a relatively simple app, but had sooo many use cases, enabling him to get proof of concepts out in a single day. Crazy times ahead!
 glasses and let AI take the reins! As technology advances, it’s becoming increasingly difficult to tell when someone is being assisted by AI in conversations. So get ready for a whole new world of AI-assisted conversations!
 I’ve been dying of laughter for days because I genuinely thought it was real the first time I saw it!

 Hilarious stuff!

 GPT4 Saves the Day: A Dog’s Miraculous Recovery!
 Building with Langchain Just Got Easier!


 .
.


