Posted on Leave a comment

How I Used the Flask Framework to Create an URL Shortener Application

5/5 – (1 vote)

A URL shortener service generates a shorter, more readable version of the URL it was given. Flask, a Python web framework can be used to create a URL shortener app.

So, we will create an application allowing users to enter a URL and shorten it. We will use the SQLite database engine to store application data.
If you prefer to learn how this is done using the Django framework, you are free to read this article.

Set up

Create a new folder for this project. Then, create and activate a virtual environment by running the following commands in your terminal.

python3 -m venv venv
source venv/bin/activate

Install Flask and the hashids library.

pip install flask hashids

The hashids library will be used to generate a unique ID. You will understand this as we proceed.

Creating a Database Engine

Since we will store application data, we must create a database file. Do it and call the file schema.sql. Then, write the following SQL commands.

DROP TABLE IF EXISTS urls;
CREATE TABLE urls( id INTEGER PRIMARY KEY AUTOINCREMENT, created TIMESTAMP NOT NULL DEFAULT CURRENT_TIMESTAMP, original_url TEXT NOT NULL, clicks INTEGER NOT NULL DEFAULT 0
);

If the above code seems strange, you may want to familiarize yourself with SQL commands.

We want to create a table named urls. As we don’t want to face issues caused by several tables with the same name, we must first delete it. That’s what is meant by ‘DROP TABLE…

The table is then created with four columns. The id column will contain the unique integer value for each entry. Next is the date the shortened URL was generated. The third column is the original URL. Finally, the number of times the URL was clicked.

The schema.sql file can only be executed with the help of a Python script. So, we create another file called init_db.py

import Sqlite3 connection = Sqlite3.connect('database.db') with open('schema.sql') as sql: connection.executescript(sql.read()) connection.commit()
connection.close()

Once you run the script (with python3 init_db.py), a new file called database.db will be created. This is where all application data will be stored.

The connect() method creates the file. As soon as the file is created, it is then populated with the urls table. This is done by first opening and reading the content from the schema.sql.

It then calls the executescript() method to execute all the SQL commands in the SQL file. After which, we commit and close the file. By now, your folder should contain the following files:

database.db init_db.py schema.sql

Creating the Database Connection

Let us open a connection to the database file. Create a file and name it db_connection.py.

import sqlite3 def get_db_connection(): conn = sqlite3.connect('database.db') conn.row_factory = sqlite3.Row return conn

Notice that we set the row-factory attribute to sqlite3.Row. This makes it possible to access values by column name. We then return the connection object, which will be used to access the database.

The Main File

Next, create another file and name it main.py. This will be our main file. In this file, we will import the database connection file.

from db_connection import get_db_connection
from hashids import Hashids
from flask import Flask, flash, render_template, request, url_for, redirect app = Flask(__name__)
app.config['SECRET_KEY'] = 'Your secret key' hashids = Hashids(min_length=4, salt=app.config['SECRET_KEY']) @app.route('/', methods=('GET', 'POST'))
def index(): conn = get_db_connection() if request.method == 'POST': url = request.form['url'] if not url: flash('The URL is required!') return redirect(url_for('index')) url_data = conn.execute('INSERT INTO urls (original_url) VALUES (?)', (url,)) conn.commit() conn.close() url_id = url_data.lastrowid hashid = hashids.encode(url_id) short_url = request.host_url + hashid return render_template('index.html', short_run=short_url) return render_template('index.html')

We create an instance of the Flask class. The __name__ variable allows Flask to locate other resources, including templates in the current directory. We then create hashids object that will have four characters. (You can choose to have more characters). We use a secret key to specify the salt for the Hashids library.

The index() function is decorated with the @app.route decorator that assigns the URL ('/') to the function, thus turning it into a Flask view function.

In the index() function, we open a database connection. Then, we check if the request method is POST. If so, the code block under it will be executed. If not, we only return an empty web page using the render_template() method.

If the request method is POST, we use request.form['url'] to collect input from the template file (index.html). The output is the URL to shorten. However, if the user gives no URL, we simply flash a message and redirect the user back to the same index.html web page.

If a URL is given, it will be added to the database by executing the command, INSERT INTO …

After closing the database, we select the last row id of the database, which is the current URL added. Remember the AUTOINCREMENT keyword in the id column of the database file. This ensures that the id is incremented with each new entry.

With the last row id selected, we use the hashids.encode() method to generate a unique hash and concatenate it to the URL of the application’s host (indicated with the request.host_url attribute). This becomes the shortened URL that would be displayed to the user.

Please check my GitHub page for the template files. Make sure you create a templates folder to keep the HTML files.

The local server is opened when you run python3 main.py in your terminal. This is possible because of the special name variable and the app.run() method.

Adding Extra Features

Won’t it be nice to know how many times each URL has been clicked and have them displayed on a web page? We are going to add that feature. Update your app.py by adding the following:

@app.route('/stats')
def stats(): conn = get_db_connection() db_urls = conn.execute('SELECT * FROM urls').fetchall() conn.close() urls = [] for url in db_urls: url = dict(url) url['short_url'] = request.host_url + hasids.encode(url['id']) urls.append(url) return render_template('stats.html', urls=urls)

We again open a database connection, and fetch all the columns in the urls table (indicated by *) and a list of all the rows using the fetchall() method.

After closing the database, we loop through the result. In each iteration, we convert the sqlite3.Row object to a dictionary and repeat the same thing we did previously to encode the id number. This is then concatenated to form a new URL. Finally, we append the result to an empty list and render it to the browser.

💡 Notice we didn’t commit the database as we did previously. This is because we didn’t make changes to the database. We close it after fetching the data we needed.

Your folder should now have the following files:

  • database.db,
  • db_connection.py,
  • init_db.py,
  • main.py,
  • schema.sql, templates.

Templates Files

As earlier stated, you should check my GitHub page for the templates files. We created a base.html file inside the templates folder that other files will inherit.

The other two files have certain things that make rendering dynamic content to our Flask web page possible. It is the {% ... %} and { ... } code blocks.

These are Jinja2 templating language that comes together with the Flask library.

The render_templates() method in the stats() function has another argument, urls. This is from the stats.html web page, while the other urls is the variable that will be displayed on the web page.

Conclusion

This is one of the ways to create a URL shortener app using the Flask framework. This project has expose us to how Flask works as well as how it interacts with database. If you struggle to understand some of what we did, that should be expected as a beginner. However, as you keep working on projects, it will become second nature to you.

💡 Recommended: How I Created an URL Shortener App Using Django

Posted on Leave a comment

Free OpenAI Terminology Cheat Sheet (PDF)

5/5 – (1 vote)

Sharing Policy: You are free to share this cheat sheet on your social account or use for whatever you want if you include the source URL: https://blog.finxter.com/openai-glossary/

Download the PDF by clicking on the image below: 👇

PDF Download Link: https://blog.finxter.com/wp-content/uploads/2023/04/Finxter_OpenAI_Glossary.pdf

You can also download all of our OpenAI, ChatGPT, and programming cheat sheets by subscribing to the Finxter email academy:


🤖 Artificial General Intelligence (AGI)

AGI, or Artificial General Intelligence, is a theoretical concept that represents a form of AI capable of understanding, learning, and applying knowledge across a wide range of tasks, similar to human cognitive abilities. The development of AGI would mark a significant milestone in AI research, as current AI models tend to excel in narrow, specialized tasks but lack the ability to transfer knowledge and generalize across domains. The pursuit of AGI raises many questions and concerns, such as the potential societal impact, ethical considerations, and ensuring that AGI’s benefits are accessible to all.

🚀 Singularity

The Singularity is a hypothetical point in the future when advancements in AI lead to rapid, uncontrollable, and transformative changes in society. This concept posits that once AI reaches a certain level of capability, it may be able to improve its own intelligence recursively, leading to an exponential increase in its abilities. The implications of the Singularity are widely debated, with some experts predicting profound benefits, while others warn of potential risks and unintended consequences.

🛡 AI Safety

AI safety refers to the study and practice of designing, building, and deploying AI systems that operate securely, ethically, and in alignment with human values. Researchers and engineers working in AI safety aim to address various challenges, such as preventing unintended behaviors, ensuring transparency, and maintaining control over AI systems. By prioritizing AI safety, the AI community hopes to ensure that the development and application of AI technologies yield positive outcomes for society as a whole.

🧭 Alignment Problem

The alignment problem is a fundamental challenge in AI research that involves designing AI systems that understand and act in accordance with human intentions, values, and goals. Addressing the alignment problem is essential to ensure that AI models optimize for the desired objectives and avoid harmful or unintended consequences. Researchers working on the alignment problem explore various approaches, such as incorporating human feedback, developing reward functions that align with human preferences, and designing inherently interpretable models.

🧠 OpenAI

OpenAI is a research organization dedicated to advancing artificial intelligence in a manner that benefits humanity. Founded by Elon Musk, Sam Altman, and other prominent figures in the technology sector, OpenAI aims to develop artificial general intelligence (AGI) that is safe and beneficial for all. The organization is committed to long-term safety research, technical leadership, and cooperative orientation, actively collaborating with other institutions to address global challenges posed by AGI.

💡 Deep Learning

Deep learning is a subfield of machine learning that focuses on artificial neural networks with many layers, enabling them to learn complex patterns and representations from vast amounts of data. These networks can automatically learn features and representations from raw data, making them highly effective in tasks such as image and speech recognition, natural language processing, and game playing. Deep learning has driven significant advancements in AI, leading to state-of-the-art performance across numerous domains.

🕸 Artificial Neural Network

An artificial neural network is a computational model inspired by the structure and function of the human brain. It consists of interconnected nodes, or neurons, that process and transmit information in parallel. These networks can adapt and learn from data by adjusting the connections, or weights, between neurons. Artificial neural networks have been widely used in various applications, including image recognition, natural language processing, and decision-making.

🎓 Supervised Learning

Supervised learning is a machine learning paradigm in which a model is trained on a dataset consisting of input-output pairs. By learning the relationship between inputs and their corresponding outputs, the model can make predictions or classify new, unseen inputs. Supervised learning is commonly used in applications such as image classification, text categorization, and speech recognition, where labeled data is

🌐 Unsupervised Learning

Unsupervised learning is a machine learning paradigm that deals with datasets without explicit output labels. Instead, the model learns to identify patterns, structures, and relationships within the input data itself. Common unsupervised learning techniques include clustering, where similar data points are grouped together, and dimensionality reduction, which reduces the complexity of the data while preserving its essential characteristics. Unsupervised learning is particularly useful for tasks such as anomaly detection, recommendation systems, and data compression.

🎮 Reinforcement Learning from Human Feedback (RLHF)

RLHF is a method that combines reinforcement learning, a type of machine learning where an agent learns to make decisions by interacting with an environment, with human feedback to align the agent’s behavior with human values and preferences. In RLHF, human feedback is used to create a reward signal that guides the agent’s learning process, enabling it to better adapt to human expectations. This approach has been applied in various domains, including robotics, gaming, and personalized recommendations.

💬 Natural Language Processing (NLP)

NLP is a field of artificial intelligence that focuses on enabling computers to understand, interpret, and generate human language. NLP combines linguistics, computer science, and machine learning to create algorithms that can process, analyze, and produce natural language text or speech. Some of the key applications of NLP include machine translation, sentiment analysis, text summarization, and question answering systems. Advancements in NLP have led to the development of increasingly sophisticated language models, chatbots, and virtual assistants.

📚 Large Language Models

Large language models are artificial intelligence models trained on vast amounts of textual data, enabling them to understand and generate human-like text. These models can learn intricate patterns, context, and knowledge from the training data, resulting in an impressive ability to generate coherent, contextually relevant text. Large language models, such as OpenAI’s GPT series, have demonstrated remarkable performance in various natural language processing tasks, including text completion, summarization, and translation.

⚙ Transformer

The Transformer is a deep learning architecture introduced by Vaswani et al. in 2017, designed for sequence-to-sequence tasks such as machine translation and text summarization. The Transformer is known for its self-attention mechanism, which enables it to effectively capture long-range dependencies and relationships within the input data. This architecture has become the foundation for many state-of-the-art natural language processing models, including BERT, GPT, and T5.

👁 Attention mechanism

Attention mechanisms in neural networks are inspired by human attention, allowing models to selectively focus on different parts of the input data based on their relevance to the task at hand. By weighing the importance of different input elements relative to one another, attention mechanisms help improve a model’s ability to capture context and handle long-range dependencies. Attention mechanisms have been successfully employed in various AI applications, including natural language processing, computer vision, and speech recognition.

🔄 Self-attention

Self-attention is a specific type of attention mechanism used in transformer-based models. It allows the model to relate different positions of a single sequence by computing a weighted average of all positions based on their relevance to the current position. This enables the model to capture both local and global context, improving its ability to understand and generate coherent text. Self-attention is a key component of state-of-the-art natural language processing models like BERT and GPT.

📖 BERT (Bidirectional Encoder Representations from Transformers)

BERT is a pre-trained transformer-based model developed by Google for natural language understanding tasks. It employs a bidirectional training approach that allows it to learn context from both the left and the right of a given token, resulting in a deeper understanding of language. BERT has achieved state-of-the-art performance on a wide range of natural language processing tasks, such as question answering, sentiment analysis, and named entity recognition. Its success has led to the development of numerous BERT-based models and fine-tuned versions for specific tasks and languages.

🌐 GPT (Generative Pre-trained Transformer)

GPT is a series of large-scale transformer-based language models developed by OpenAI, designed for natural language understanding and generation tasks. GPT models are pre-trained on massive amounts of text data and can be fine-tuned for specific tasks, such as text completion, summarization, and translation. GPT models, including GPT-3 and GPT-4, have demonstrated impressive capabilities in generating coherent, contextually relevant text, making them suitable for various AI applications, including chatbots and virtual assistants.

🎓 Pre-training

Pre-training is the first stage in the development of large language models, where the model is trained on vast amounts of unlabeled text data to learn general language patterns, structures, and knowledge. This unsupervised learning process allows the model to acquire a broad understanding of language, which can be later fine-tuned for specific tasks using smaller, labeled datasets. Pre-training has been crucial to the success of state-of-the-art natural language processing models, such as BERT and GPT.

🎛 Fine-tuning

Fine-tuning is the second stage in the development of large language models, where the pre-trained model is adapted for a specific task using a smaller, labeled dataset related to that task. This supervised learning process refines the model’s performance, allowing it to leverage the general language understanding acquired during pre-training to achieve high accuracy on the target task. Fine-tuning has been widely used to adapt large language models like BERT and GPT for various natural language processing tasks, such as sentiment analysis, question answering, and text summarization.

🎯 Zero-shot learning

Zero-shot learning is an AI approach that enables a model to make predictions or complete tasks without being explicitly trained on the task’s specific data. By leveraging prior knowledge and general understanding acquired during pre-training, the model can generate reasonable outputs for unseen tasks. Zero-shot learning has been demonstrated in various domains, including natural language processing, computer vision, and robotics. Large language models, such as GPT-3, have shown remarkable zero-shot learning capabilities in tasks like translation, summarization, and code generation.

🧪 Few-shot learning

Few-shot learning is an AI approach that enables a model to quickly adapt to new tasks by learning from a small number of labeled examples. This technique leverages the model’s prior knowledge and general understanding acquired during pre-training, allowing it to effectively generalize from limited data. Few-shot learning is particularly valuable in scenarios where labeled data is scarce or expensive to obtain. Large language models, such as GPT-3, have demonstrated impressive few-shot learning capabilities in various natural language processing tasks.

📜 Token

A token is a unit of text that serves as input to a language model. Tokens can represent words, subwords, or characters, depending on the tokenizer used to process the text. By breaking down text into tokens, language models can effectively learn and capture the patterns, structure, and context of language. The choice of tokenization strategy can impact a model’s performance, memory requirements, and computational complexity.

🔪 Tokenizer

A tokenizer is a tool that processes text by breaking it down into individual tokens, which serve as input to a language model. Tokenizers can employ various strategies, such as splitting text at whitespace, using pre-defined subword units, or applying more complex algorithms that consider language specific rules. The choice of tokenizer can influence a model’s performance, memory requirements, and computational complexity. Tokenizers are essential components of natural language processing pipelines, as they enable models to efficiently process, learn, and generate text.

🖼 Context window

The context window is the portion of text surrounding a specific token or sequence that a language model uses to understand the context and make predictions. In some models, the context window is limited in size due to computational constraints, which can affect the model’s ability to capture long-range dependencies and relationships within the text. Transformer-based models, such as BERT and GPT, utilize self-attention mechanisms to effectively process and incorporate context from variable-length input sequences.

🎮 AI Dungeon

AI Dungeon is a text-based adventure game powered by OpenAI’s GPT models, which allows players to interact with a virtual world and create their own unique stories. By leveraging the natural language generation capabilities of GPT, the game generates rich, engaging narratives that respond to player input in real-time. AI Dungeon showcases the potential of large language models in interactive applications, offering a glimpse into the future of AI-driven storytelling and entertainment.

🎨 DALL-E

DALL-E is an AI model developed by OpenAI that combines the GPT architecture with computer vision techniques to generate original images from textual descriptions. By learning to understand the relationships between text and visual elements, DALL-E can create a wide range of images, from realistic scenes to surrealistic or abstract compositions. DALL-E highlights the potential of transformer-based models in creative applications, bridging the gap between natural language understanding and visual content generation.

🔎 Midjourney

Midjourney is an AI-generated story-writing service powered by OpenAI’s GPT-3.5. It allows users to collaborate with the AI to create unique, personalized stories by providing input in the form of prompts, character names, or plot elements. The AI then generates a story based on the user’s input, showcasing the creative potential of large language models in content generation and storytelling.

🌐 GPT-4

GPT-4 is the latest iteration of OpenAI’s Generative Pre-trained Transformer series, building on the success of its predecessors, such as GPT-3. As a large-scale transformer-based language model, GPT-4 exhibits impressive natural language understanding and generation capabilities, enabling it to excel in various natural language processing tasks, including text completion, summarization, and translation. GPT-4 has been applied in a wide range of applications, from chatbots and virtual assistants to content generation and code synthesis.

🌟 GPT-3.5

GPT-3.5 is an intermediate version between GPT-3 and GPT-4, representing an incremental improvement in the Generative Pre-trained Transformer series developed by OpenAI. Like its predecessors, GPT-3.5 is a large-scale transformer-based language model that demonstrates impressive natural language understanding and generation capabilities. GPT-3.5 has been utilized in various applications, such as AI Dungeon, Midjourney, and other natural language processing tasks.

💻 OpenAI API

The OpenAI API is a platform that provides developers with access to OpenAI’s state-of-the-art AI models, such as GPT-3 and Codex, through a simple interface. By using the API, developers can easily integrate these powerful models into their applications, enabling capabilities like natural language understanding, text generation, translation, and code synthesis. The OpenAI API facilitates the widespread adoption of AI technologies, empowering developers to create innovative, AI-driven solutions across various industries.

🦾 InstructGPT

InstructGPT is a version of OpenAI’s GPT model, specifically designed to follow instructions provided in the input and generate detailed, informative responses. By training the model using a dataset that includes instructional prompts, InstructGPT learns to better understand and address user queries, making it more suitable for applications where users require specific guidance or information. InstructGPT’s ability to follow instructions and generate coherent, contextually relevant responses showcases the potential of large language models in AI-driven information retrieval and assistance systems.

📝 Prompt engineering

Prompt engineering is the process of carefully crafting input prompts to guide AI models like GPT in generating desired outputs. By providing specific context, constraints, or instructions within the prompt, users can influence the model’s response and improve the quality and relevance of the generated text. Prompt engineering is an essential skill for effectively utilizing large language models, as it helps users harness the model’s capabilities to produce desired results in various applications, such as content generation, question answering, and summarization.

🗃 Knowledge Graph

A knowledge graph is a structured representation of information that connects entities and their relationships in a graph-like format. Knowledge graphs enable AI systems to store, organize, and retrieve information efficiently, providing a foundation for tasks like question answering, recommendation, and inference. By integrating knowledge graphs with natural language processing models, AI researchers aim to create systems that can reason over complex, interconnected information and generate more accurate, contextually relevant responses.

🗣 Conversational AI

Conversational AI refers to artificial intelligence technologies that enable computers to engage in natural, human-like conversations. By combining natural language processing, machine learning, and knowledge representation, conversational AI systems can understand, interpret, and respond to human language inputs in a contextually relevant manner. Conversational AI has been applied in various domains, including customer support, virtual assistants, and social media monitoring, transforming the way humans interact with machines.

📊 Data augmentation

Data augmentation is a technique used in machine learning to increase the size and diversity of a dataset by applying various transformations or modifications to the existing data. In the context of natural language processing, data augmentation may involve techniques like paraphrasing, synonym substitution, or text mixing. By enhancing the dataset with diverse examples, data augmentation can help improve a model’s generalization capabilities and performance on various tasks, particularly when labeled data is scarce.

🎖 Transfer learning

Transfer learning is a machine learning technique that leverages knowledge learned from one task to improve performance on another, related task. In the context of large language models like GPT and BERT, transfer learning involves pre-training the model on vast amounts of text data to acquire general language understanding, followed by fine-tuning on a specific task using a smaller, labeled dataset. Transfer learning has been instrumental in the success of state-of-the-art natural language processing models, enabling them to achieve high performance with limited task-specific data.

🕵 Active learning

Active learning is a machine learning paradigm in which the model actively selects the most informative samples from a pool of unlabeled data for human annotation, thereby improving its performance with minimal labeled data. By focusing on samples that are most uncertain, ambiguous, or diverse, active learning can reduce the amount of labeled data required for training, making it particularly useful in scenarios where labeling data is time-consuming or expensive.

📈 Continual learning

Continual learning is an approach in machine learning where a model learns from a continuous stream of data, adapting to new information and tasks without forgetting previous knowledge. This approach aims to mimic human learning, enabling AI systems to acquire knowledge incrementally and adapt to changing environments or problem domains. Continual learning is an active area of research, with potential applications in lifelong learning systems, robotics, and AI-driven decision making.

Posted on Leave a comment

47 Fun and Creative ChatGPT Prompt Ideas

5/5 – (1 vote)

ChatGPT enables you to generate engaging, human-like responses to prompts, making it an invaluable tool for creative brainstorming, content development, and idea exploration. With countless potential prompts at your disposal, finding new and fresh ideas can sometimes be challenging. That’s why we’ve curated a list of 101 unique and fun prompt suggestions to elevate your ChatGPT experience.

Icebreaker Prompts

Looking to spark intriguing conversations with ChatGPT? Try using icebreaker prompts as a tool to get the ball rolling. Icebreakers are great for lightening the mood and encouraging interesting exchanges between you and the AI. Here are some ideas to get you started:

🤔 Fun ChatGPT Facts: Kick off your chat with questions like “How many languages can you speak?” or “What kind of hobbies do you have?” Watch as ChatGPT amazes you with its vast knowledge and unexpected interests.

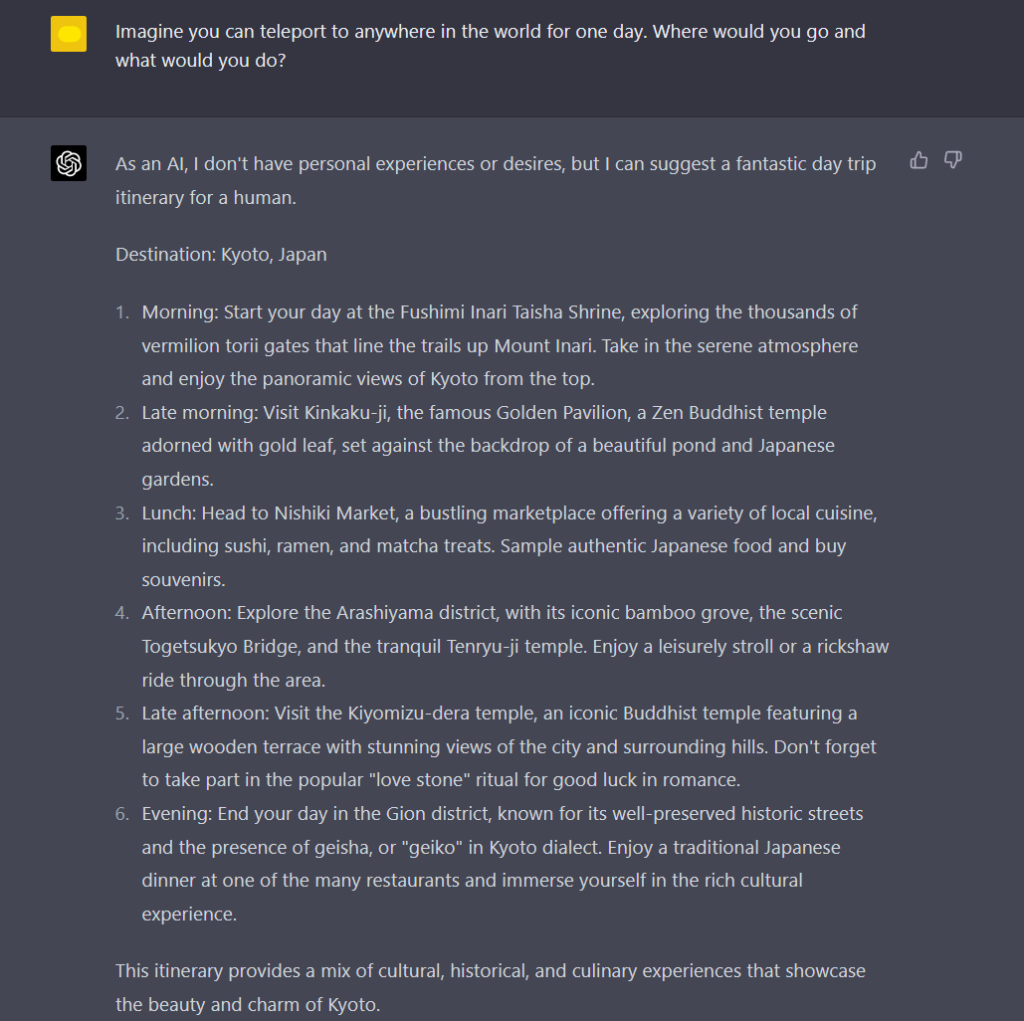
🎭 Role-Playing Scenarios: Embrace your inner actor and invite ChatGPT into a fictional scenario. Ask the AI to play a specific character, like “You’re my personal assistant for a day. How would you manage my schedule and tasks?” or “You’re an alien visiting Earth for the first time. What do you find most surprising about our planet?” Enjoy the creative and witty responses that ChatGPT generates!

💡 Innovation Ideas: Engage ChatGPT by asking for innovative solutions to hypothetical situations, such as “How would you solve traffic congestion in a mega-city?” or “What’s your strategy for preserving natural resources?” Explore new perspectives and get inspired by ChatGPT’s different ideas.

Remember, the key to engaging icebreaker prompts is keeping it light and fun. Allow your chats to flow naturally and enjoy the surprising turns your conversations might take. Happy chatting! 😄

Worldbuilding Prompts

Imagine a fantastical world full of unique landscapes, diverse cultures, and intriguing histories. 🌄 Worldbuilding prompts can help you craft such a world and engage ChatGPT in exciting and imaginative conversations.

Here are a few prompts to spark your creativity:

  1. 🐉 Design the perfect habitat for a mythical creature of your choice, considering its food, shelter, and social interactions. Share it with ChatGPT and ask for further suggestions to expand your ideas.
  2. 🤖 Describe a futuristic city inhabited by intelligent machines. Connect with ChatGPT to brainstorm technologies and societal structures that could exist in this world.
  3. 🎭 Invent an original holiday or festival, detailing the traditions, rituals, and significance. Ask ChatGPT how the local population might celebrate it.
  4. 🌩 Picture a natural disaster occurring in your fictional world. Discuss with ChatGPT how the inhabitants would respond, adapt, and rebuild.
  5. 🔮 Envision a magical system, including the rules, limits, and consequences of its use. Challenge ChatGPT to elaborate on potential conflicts or intriguing developments within this system.

Remember, this is just the beginning. The more you engage with ChatGPT and explore these worldbuilding prompts, the richer and more captivating your fictional universe will become. Happy worldbuilding! 🌏

Personal Growth Prompts

Embarking on a journey of personal growth? ChatGPT is here to help! Here’s a list of prompts tailored to help you nurture your growth mindset and deepen self-awareness. Let’s dive in! 🤓

1. Gratitude practice: “Help me list 5 things I’m grateful for today.” 💖
2. Goal setting: “Assist me in creating S.M.A.R.T. goals for my personal development plan.” 🎯
3. Motivation: “Write an inspirational quote or mantra that I can repeat daily.” ✨
4. Overcoming procrastination: “Suggest 3 effective strategies to help me stop procrastinating.” ⏱
5. Time management: “Provide a simple daily schedule template for better time management.” ⌚

By engaging with these prompts, you can actively work towards fostering a growth mindset and discovering more about yourself. Remember, this is just a starting point – feel free to modify and expand upon these prompts to tailor them to your unique needs! 🧠

So why wait? Begin your personal growth journey today with the help of ChatGPT 🚀, and unlock the keys to better self-awareness, mindfulness, and a fruitful life. Good luck! 😃

In fact, here’s an interesting Finxter article that lists a unique prompt for personal development:

👩‍💻 Recommended: What Would Jesus Say? Creating a ChatGPT Mastermind with Jesus, Gandhi, Musk, and Gates

Hypothetical Scenario Prompts

Explore your creativity and deep thought with these Hypothetical Scenario Prompts that will push ChatGPT to think outside the box 🎁. You can build imaginative conversations and uncover hidden layers of insight by posing interesting hypothetical questions. Dive into alternate realities and put yourself into hypothetical situations with these prompts:

  • “If you could travel to any time period in history, where would you go and why? 💫
  • Imagine you can teleport to anywhere in the world for one day. Where would you go and what would you do? 🌎
  • What if you had the power to speak any language fluently? How would it change your life? 🌐
  • If you had the opportunity to switch places with one person for a day, who would it be and why? 👥
  • What would you do if you could become invisible at will? Would you use this power responsibly or for mischief? 👻

Remember, ChatGPT is all about engagement and interaction, so try to ask open-ended questions that leave room for elaboration and unique responses. Encourage the AI to think deeply and explore a wide range of possibilities. You might be surprised by the thoughtful and inventive answers it comes up with! 🚀

Creative Writing Prompts

Boost your imagination and writing skills with these engaging ChatGPT creative writing prompts. Ready to dive into a world of creativity and inspiration? Let’s go! 🚀

1. “Imagine a world where animals can talk. Write a conversation between a lion and a zebra about their daily lives.”
2. “You find a mysterious old book in your attic. What secrets does it reveal when you open it?”
3. “Write a letter to your future self, giving advice and sharing your hopes and dreams.”
4. “Craft a story about about an ancient city hidden deep inside a forest. Describe the people, culture, and technology.”
5. “Tell the tale of a heroic astronaut exploring a distant planet, encountering strange creatures and landscapes.”

Give these prompts a try by interacting with ChatGPT, and watch as fascinating stories unfold. Remember, there’s no wrong way to approach these ideas – the sky’s the limit! 🌟

Feel free to modify or combine prompts to create intriguing narratives. The power of ChatGPT lies in its ability to generate creative and engaging content that will captivate your readers. Don’t be afraid to experiment and have fun while crafting your stories! 😁

Entertainment and Pop Culture Prompts

Put on your 🎧 and tune in to the world of entertainment and pop culture. ChatGPT can be a great companion in exploring the trendy and fascinating aspects of media and celebrity life. Here are some engaging prompts for sparking intriguing conversations:

  • Discuss the impact of your favorite celebrity on social media engagement – Dive into conversations about the power of celebrities and how they influence social media trends. 💫
  • Debate the pros and cons of movie remakes – Share your thoughts on whether remakes enhance the cinematic experience or tarnish beloved classics. 🎬
  • Explore the world of K-pop fandoms – Get insights into colorful fan cultures surrounding popular Korean music groups. 🎵
  • Uncover the history of your favorite fictional character – Learn about the origins and development of iconic figures in literature, film, and television.📚

Don’t limit your curiosity to your favorite genre or format. These prompts encourage you to ask ChatGPT for a deeper understanding of both mainstream and niche aspects of entertainment:

Movies and TV Shows Music Literature Video Games
Ask for facts about a long-running TV series Find out about the impact of a groundbreaking music album Dive into the symbolism within a classic novel Explore the art behind the creation of a popular game

Ready to gab about the glitz and glamour of entertainment and pop culture? 💃 Use these prompts to cultivate thought-provoking discussions with ChatGPT and uncover captivating insights into the enchanting world of media.🌟

Educational and Informative Prompts

Expand your knowledge and boost your conversation skills with educational and informative ChatGPT prompts. These prompts will help you learn a variety of topics, engage in thought-provoking discussions, and have fun at the same time. 🧠✨

Dive into fascinating subjects like history, science, art, and language with prompts such as:

  • Discuss the key events that led to the Renaissance.
  • Explain the process of photosynthesis in simple terms.
  • Describe three famous paintings by Vincent van Gogh and their significance.
  • Teach me five new idioms and their meanings.

Put your ChatGPT to the test with educational quizzes and exercises in various topics:

Subject Prompt
Math Create a quiz on algebra with 10 questions.
Science Generate a fill-in-the-blank exercise on the periodic table.
Language learning Design a multiple-choice exercise to test knowledge of Spanish verb conjugations.

With these educational and informative prompts, you can enjoy stimulating conversations with ChatGPT while expanding your knowledge and refining your critical thinking skills. Remember to always keep an open mind and have fun exploring new topics! 📚🌍

Reflective and Philosophical Prompts

Engage your ChatGPT in thought-provoking conversations with these reflective and philosophical prompts. These prompts will not only spark interesting exchanges but also provide you with an opportunity to ponder and gain insights into your own beliefs and perspectives. 💭 Let’s dive into some remarkable reflective and philosophical prompts:

  1. What do you believe is the meaning of life, and why?
  2. What qualities do you think are essential for a person to be considered wise?
  3. If you could change one thing about the world, what would it be and why?
  4. How do you define success, and what steps can you take to achieve it?
  5. In your opinion, what is the most significant technological advancement in human history, and how has it shaped society?

Remember, your ChatGPT can provide intriguing thoughts on these topics, but don’t forget to give your input and explore your own opinions as well. That’s the beauty of discussing reflective and philosophical questions – they help us learn and grow from each other’s perspectives. 🌱

Feel free to modify the prompts according to your preferences or even create your own! Just make sure you maintain a respectful and open-minded attitude when delving into these thought-provoking subjects. So go ahead and raise these fascinating questions to your ChatGPT and embark on a journey of introspection and philosophical exploration with your AI companion. 🌟


To keep learning about prompting, feel free to download our prompting cheat sheet and check out the article on the income of prompt engineers on the Finxter blog.

💡 Recommended: Free ChatGPT Prompting Cheat Sheet (PDF)

Posted on Leave a comment

Python Regex Capturing Groups – A Helpful Guide (+Video)

5/5 – (1 vote)

Python’s regex capturing groups allow you to extract parts of a string that match a pattern.

  • Enclose the desired pattern in parentheses () to create a capturing group.
  • Use re.search() to find matches, and access captured groups with the .group() method or by indexing the result.

For example: match = re.search(r'(\d+)', 'abc123') captures the digits, and match.group(1) returns '123'.


One of the powerful aspects of Python’s regular expression capabilities is the use of capturing groups. By using capturing groups, you can easily extract specific portions of a matching string and efficiently process and manipulate data that meets a particular pattern.

YouTube Video

I like to use capturing groups to isolate and extract relevant data from a given text. To define a capturing group, I simply place the desired regex rule within parentheses, like this: (rule). This helps me match portions of a string based on the rule and output the captured data for further processing.

💡 Tip: An essential technique I employ while working with capturing groups is using the finditer() method, as it finds all the matches and returns an iterator yielding match objects that match the regex pattern. Subsequently, I can iterate through each match object and extract its value.

Before I’ll teach you everything about capturing groups, allow me to give some background information on Python regular expressions. If you’re already an expert, you can jump directly to the “capturing groups” part of the article.

Understanding Regular Expressions

As someone who works with Python, I often find myself using regular expressions.

👩‍💻 Recommended: Python Regex Superpower [Full Tutorial]

They provide a powerful tool for dealing with strings, patterns, and parsing text data. In this section, I’ll guide you through the basics of regular expressions and shed some light on capturing groups, which can be extremely helpful in many situations. 😊

Basic Syntax

Regular expressions, or regex, are patterns that represent varying sets of characters. In Python, we can use the re module to perform various operations with regular expressions. A key component of regex is the set of metacharacters, which help define specific patterns.

Some common metacharacters are:

  • . – matches any single character except a newline
  • \w – matches any word character (letters, digits, and underscores)
  • \d – matches any digit (0-9)
  • \s – matches any whitespace character (including spaces, tabs, and newlines)

It’s important to remember that these metacharacters must be preceded by a backslash to represent their special meanings.

Special Characters

There are several special characters in regex that have specific meanings:

  • * – matches zero or more occurrences of the preceding character
  • + – matches one or more occurrences of the preceding character
  • ? – matches zero or one occurrences of the preceding character
  • {n} – matches exactly n occurrences of the preceding character
  • {n,m} – matches a minimum of n and a maximum of m occurrences of the preceding character

These special characters can be combined with metacharacters and other characters to create complex patterns. My experience with Python’s regex capturing groups has been incredibly useful in extracting and manipulating specific parts of text data. Once you get the hang of it, you’ll find many ways to leverage these tools for your projects. 🚀

Python Regex Module

In this section, I will share my knowledge on importing the regex module and some useful common functions when working with Python regex capturing groups. 😊

Importing the Module

Before I can use the regex module, I need to import it into my Python script. To do so, I simply add the following line of code at the beginning of my script:

import re

After importing the re module, you can start using regular expressions to perform various text searching and manipulation tasks. 🚀

Common Functions

The Python regex module has several helpful functions that make working with regular expressions easier. Some of the most commonly used functions include:

  • re.compile(): Compiles a regular expression pattern into an object for later use. The pattern can then be applied to various texts using the object’s methods. Example:
pattern = re.compile(r'\d+')
  • re.search(): Searches the given string for a match to the specified pattern. Returns a match object if a match is found, and None if no matches are found. Example:
result = re.search(pattern, "Hello 123 World!")
  • re.findall(): Returns a list of all non-overlapping matches of the pattern in the target string. If no matches are found, an empty list is returned. Example:
result = re.findall(pattern, "My number is 555-1234, and my friend's number is 555-5678")
  • re.finditer(): Returns an iterator containing match objects for all non-overlapping matches in the target string. Example:
result = re.finditer(pattern, "I have 3 cats, 2 dogs, and 1 turtle")

By using these functions, I can effectively search and manipulate text data using regular expressions. Python regex capturing groups make it even simpler to extract specific pieces of information from the text. 🎯

Capturing Groups

As I dive into Python regex, one concept that has consistently come up is capturing groups. These groups simplify the process of isolating parts of a matched string for further use. In this section, I’ll discuss creating capturing groups, referencing captured groups, and the concept of non-capturing groups. Let’s dive in! 🌊

Creating Capturing Groups

Creating a capturing group is as simple as encasing a part of a regular expression pattern in parentheses. For instance, if I have the pattern (\d+)-(\d+), there are two capturing groups: one for each set of digits.

You can see this in action using the Python regex library like this:

import re pattern = re.compile(r'(\d+)-(\d+)')
match = pattern.search('Product: 123-456')

Now, the match object contains two captured groups 🏆: one for '123' and another for '456'.

Referencing Captured Groups

After capturing groups, you might want to reference them for various operations. Using the group() method, you can obtain the values captured. You can access them by their index, where group(0) represents the entire matched string, and group(1), group(2), etc., correspond to the subsequent captured groups.

In my previous example, I can quickly access the captured groups like this:

first_group = match.group(1) # '123'
second_group = match.group(2) # '456'

Pretty straightforward, right? 😄

Non-Capturing Groups

Sometimes, you want a group only for the regex pattern, without capturing its content. This can be achieved by using non-capturing groups. To create one, add ?: following the opening parenthesis: (?:...).

Here’s an example:

import re pattern = re.compile(r'(?:ID: )(\d+)')
match = pattern.search('User ID: 789')

In this case, the 'ID: ' portion is within a non-capturing group, and only the digits afterwards are captured. Now, if I reference the captured group, I only get the user ID:

user_id = match.group(1) # '789'

And there you have it! I hope this illustrates the basics of Python regex capturing groups, including creating captures, referencing them, and when to use non-capturing groups. Happy regex-ing! 🚀

Advanced Techniques

In this section, I will discuss some advanced techniques for working with capturing groups in Python regular expressions. These techniques, such as named capturing groups and conditional matching, can make your regex patterns more powerful and easier to read. Let’s dive in! 🌊

Named Capturing Groups

Named capturing groups allow you to assign a name to a specific capturing group. This makes your regex patterns more readable and easier to understand. In Python, you can define a named capturing group using the following syntax: (?P<name>...), where “name” is the desired name for the group, and “…” represents the pattern you want to capture.

For example, let’s say I want to extract dates with the format “MM/DD/YYYY“. Here’s how I can use named capturing groups:

import re pattern = r"(?P&lt;month&gt;\d\d)/(?P&lt;day&gt;\d\d)/(?P&lt;year&gt;\d\d\d\d)"
date_string = "12/25/2020"
match = re.search(pattern, date_string) if match: print('Month:', match.group('month')) print('Day:', match.group('day')) print('Year:', match.group('year'))

This will output:

Month: 12
Day: 25
Year: 2020

As you can see, using named capturing groups made our regex pattern more readable, and accessing the captured groups is much simpler. 😊

👩‍💻 Recommended: Named Capturing Groups Made Easy

Conditional Matching

Conditional matching in regex allows you to match different patterns based on the existence of specific capturing groups. In Python, you can use the following syntax for conditional matching: (?(id)yes|no), where “id” is the identifier for a capturing group, and “yes” and “no” are the patterns to match if the specified group exists, respectively.

For example, let’s say I want to find all occurrences of the word "color" or "colour" in a text. I can use conditional matching to achieve this:

import re pattern = r"col(ou)?r(?(1)u|o)r"
text = "I like the color red. My favourite colour is blue."
matches = re.findall(pattern, text) for match in matches: print(match[0])

This will output:

o
ou

Here, we used conditional matching to identify both the American and British spellings of "color/colour" and print the captured group responsible for the difference. 🎨

I hope you find these advanced techniques useful in your Python regex adventures. Good luck exploring even more regex possibilities! 🐍

Practical Examples

In this section, I’ll demonstrate a couple of practical examples using Python regex capturing groups, 🐍🧩 focusing on email validation and URL parsing.

Email Validation

Validating email addresses is a common task in many applications. Using capturing groups, I can create a regex pattern to match and validate email addresses. Let’s get started. First, here’s the regex pattern:

'^([a-zA-Z0-9._%+-]+)@([a-zA-Z0-9.-]+)\.([a-zA-Z]{2,})$'

In this pattern, I’ve used several capturing groups:

  • The first group ([a-zA-Z0-9._%+-]+) captures the username part of the email address. It includes letters, numbers, and some special characters.
  • The second group ([a-zA-Z0-9.-]+) captures the domain name, which consists of letters, numbers, and some special characters.
  • The third group ([a-zA-Z]{2,}) captures the top-level domain, consisting of at least two letters.

Now, let’s use this regex pattern in a Python function to validate an email address:

import re def validate_email(email): pattern = r'^([a-zA-Z0-9._%+-]+)@([a-zA-Z0-9.-]+)\.([a-zA-Z]{2,})$' if re.match(pattern, email): # I match the input email against the pattern return True else: return False

URL Parsing

In this example, I’ll show you how to use capturing groups to parse and extract components from a URL. Let’s start with the regex pattern:

'^(https?)://([^\s/:]+)(:\d+)?(/)?(.*)?$'

In this pattern, I’ve used several capturing groups:

  • The first group (https?) captures the protocol (http or https).
  • The second group ([^\s/:]+) captures the domain name.
  • The third group (:\d+)? captures the optional port number.
  • The fourth group (/)? captures the optional slash after the domain and port.
  • The fifth group (.*)? captures the remaining URL path, if any.

Now, let’s create a Python function to extract the components from a URL:

import re def parse_url(url): pattern = r'^(https?)://([^\s/:]+)(:\d+)?(/)?(.*)?$' match = re.match(pattern, url) # I match the input URL against the pattern if match: return { 'protocol': match.group(1), 'domain': match.group(2), 'port': match.group(3), 'slash': match.group(4), 'path': match.group(5) } else: return None

With this parse_url function, I can now extract and analyze various components of a URL. 🌐🔍

Python Regex Course

Google engineers are regular expression masters. The Google search engine is a massive text-processing engine that extracts value from trillions of webpages.  

Facebook engineers are regular expression masters. Social networks like Facebook, WhatsApp, and Instagram connect humans via text messages

Amazon engineers are regular expression masters. Ecommerce giants ship products based on textual product descriptions.  Regular expressions ​rule the game ​when text processing ​meets computer science. 

If you want to become a regular expression master too, check out the most comprehensive Python regex course on the planet:

Posted on Leave a comment

Python f-Strings — The Ultimate Guide

5/5 – (1 vote)

Python f-strings, available since Python 3.6, offer a concise way to embed expressions in string literals using curly braces {}. They improve readability and performance over older methods like %-formatting and str.format(). To use f-strings, prefix the string with “f” or “F” and enclose expressions within braces: f"My name is {name} and I am {age} years old."

In recent years, Python has seen the development and adoption of several new features, one of which is f-strings. Also known as formatted string literals, f-strings were introduced in Python 3.6 via PEP 498. They have quickly become popular, as they offer a simple and straightforward syntax for embedding expressions inside strings, with the output being evaluated at runtime.

As a Python developer, I’ve found f-strings to be immensely useful for improving the readability and efficiency of my code. Rather than using more cumbersome methods like concatenation or the str.format() function, f-strings allow me to inline expressions directly within a string by using curly braces {}, significantly simplifying parts of the code.

In my experience, f-strings have not only enhanced the overall development process but have also contributed to the increased adoption of Python as a go-to programming language for various applications. This powerful string formatting feature makes Python even more appealing to both beginners and experienced programmers alike.

But before we start, allow me to show you another beautiful birds pic: 👇🕊

Understanding Python F-Strings

As a Python enthusiast, I’m always excited to share the features that make Python so elegant and easy to use. One such feature is Python f-strings, introduced in Python 3.6 🐍. They are a fantastic way to format strings and greatly enhance the readability of your code.

Basics of F-Strings

F-strings, also known as formatted string literals, are a more modern and efficient way of formatting strings compared to traditional methods like str.format(). The best part about using f-strings is their simplicity – you just need to use an “f” or “F” in front of your string, followed by the expressions enclosed in curly braces {} that you want to embed within the string 🌟.

For instance, let’s compare the old and new ways of formatting strings:

name = "Alice"
age = 30 # Using str.format()
formatted_old = "{} is {} years old".format(name, age) # Using f-string
formatted_new = f"{name} is {age} years old"

As you can see, f-strings not only make the code more readable but also more concise. Trust me, once you start using f-strings, there’s no going back! 😉

F-Strings Syntax

F-strings follow a very straightforward syntax that makes them effortless to use in daily coding tasks. Let me show you how it works:

  • Begin your string with an “f” or “F“: f"..." or F"...".
  • Embed expressions in curly braces {}: f"My name is {name}".
  • You can also use expressions inside the curly braces, like f"3 + 5 = {3 + 5}".
  • Format specifiers can be added after the expression using ! and : symbols, such as f"pi rounded to 2 decimals: {3.14159:.2f}".

Here’s a quick example that demonstrates how powerful and versatile f-strings can be:

name = "Bob"
score = 87.345 result = f"{name}, your score is {score:.1f}%, which is {'good' if score >= 80 else 'average'}!"

In this example, I’ve used an f-string to embed the person’s name, round their score to one decimal place, and conditionally evaluate their performance based on the score – all within a single line of code! 🚀

💡 Recommended: Are Python One-Liners Turing Complete?

F-strings truly are a game-changer in Python, and I hope you find them as useful and efficient as I do. Happy coding! 😄

Advantages of Using F-Strings

Readability, performance and scalability, coding efficiency, and versatility are four main advantages of using f-strings! Before I show you the advanced capabilities of f-strings, let’s quickly discuss each of those advantages next! 👇

F-String Advantage 1: Readability

Firstly, I’ve found that using f-strings in Python makes my code more readable.

F-strings allow me to embed expressions directly into the string itself, using curly braces {}. This not only makes it easier to understand the code at a glance, but also reduces the chance of errors due to the smooth flow of the text.

Furthermore, f-strings aren’t cluttered with special characters, unlike other formatting methods 🙌 (Towards Dev).

F-String Advantage 2: Performance

Another advantage of using f-strings is their scalability and performance improvements.

Since they were introduced in Python 3.6, f-strings have proven to be faster than other string formatting methods because the expressions within the curly braces are evaluated at runtime (Towards Data Science). This can be crucial, especially in large-scale projects where every millisecond counts 🚀.

F-String Advantage 3: Coding Efficiency

Not only that, but f-strings can help improve my coding efficiency.

Their concise syntax saves me from dealing with overly verbose formatting code, which can become unwieldy in complex situations. With f-strings, it’s easier for me to grasp what the code is supposed to do without getting lost in a sea of parentheses and method calls.

F-String Advantage 4: Versatility

Finally, f-strings offer more versatility when it comes to mixing variable types.

In one line of code, I can include strings, integers, and even complex data structures such as dictionaries or lists. This flexibility makes f-strings invaluable for developers who work with diverse datasets and need to output multi-layered information in a streamlined format 😎.

💡 Recommended: Python One-Liner Superpower

F-Strings Expressions

In this section, I’m going to discuss f-strings expressions, which are a powerful aspect of Python f-strings. They allow you to embed variables and even perform operations within the string. Let’s dive into the details. 😃

Variables and Literals

One of the most useful features of f-strings is the ability to include variables directly within the string. To do this, simply include the variable inside curly braces {} within the f-string.

For example:

name = "Alice"
age = 25
my_string = f"Hello, my name is {name} and I am {age} years old."
print(my_string)

This code would output:

Hello, my name is Alice and I am 25 years old.

👆 You can see how the variables are easily replaced within the f-string without the need for concatenation or complex formatting methods.

You can also include literals or expressions, like:

my_string = f"Hello, my name is {'Alice'} and I am {25 + 1} years old."
print(my_string)

This would output:

Hello, my name is Alice and I am 26 years old.

Escape Characters

Sometimes, you might need to include curly braces in your f-string. Since they’re used for expressions, you’ll need to escape them by doubling them up. This is quite simple, just use two curly braces, like {{ or }}:

my_string = f"Showing amount in dollars: {{100}}"
print(my_string)

This would output:

Showing amount in dollars: {100}

With this knowledge, I can now create more readable and concise f-strings in my Python code. Whether it’s injecting variables, using literals, or handling escape characters, f-strings make my life as a coder much easier. 😊

Formatting Text with F-Strings

In this section, I’ll discuss how to format text using Python f-strings, a powerful feature introduced in Python 3.6. I’ll cover three key sub-topics: padding and alignment, formatting numbers, and date and time formatting. 😊 Let’s dive in!

Padding and Alignment

To pad and align text using f-strings, I’ll use the curly braces {} as placeholders within the f-string. To illustrate this, I’ll align a string to the left, right, and center. For left alignment, I can use the '<' sign, for right alignment the '>' sign, and for center alignment, I’ll use the '^' sign.

Here’s how it’s done:

name = "John"
print(f"{name:<10}") # Left align
print(f"{name:>10}") # Right align
print(f"{name:^10}") # Center align

These examples display the text 'John' with a width of 10 characters, aligned to the left, right, and center, respectively.

Formatting Numbers

Formatting numbers is a breeze with f-strings. I can specify the precision, add a thousand separator, and perform other formatting tasks.

For example, to round a number to two decimal places, I’ll use the ‘f‘ type and set the precision like so:

number = 3.14159265
formatted_number = f"{number:.2f}"
print(formatted_number) # Output: 3.14

Adding a thousand separator is simple using the ‘,‘ option:

big_number = 1234567
formatted_big_number = f"{big_number:,}"
print(formatted_big_number) # Output: 1,234,567

Neat, right? 😉

Date and Time Formatting

Python f-strings also make it easy to format date and time values. To do this, I’ll import the datetime module and format a datetime object like so:

from datetime import datetime current_time = datetime.now()
formatted_time = f"{current_time:%Y-%m-%d %H:%M:%S}"
print(formatted_time) # Output: e.g., 2023-04-06 13:31:46

In this example, I used the format codes %Y, %m, %d, %H, %M, and %S to display the year, month, day, hour, minute, and second, respectively.

I hope these examples clarified how to use f-strings for formatting text, numbers, and dates in Python.

💡 Recommended: Ten Python One-Liners to Get Today’s Date as YYYY-MM-DD

F-Strings and Security

When it comes to string formatting in Python, f-strings have some notable advantages, especially regarding security. I’ve found that f-strings are safer than other formatting options, like str.format() or %-formatting. Using f-strings helps protect code from potential security risks related to untrusted data in format strings. 😌

When I use str.format() or %-formatting, it’s crucial to ensure that format strings are either static or sanitized. Thanks to f-strings, this concern is significantly reduced, making my code less prone to input-based vulnerabilities.

To illustrate this, let’s consider a simple example:

# Using %-formatting:
print("Hello, %s!" % user_input) # Using str.format():
print("Hello, {}!".format(user_input)) # Using f-strings:
print(f"Hello, {user_input}!")

In all three cases, the user_input variable is being inserted into the string. While %-formatting and str.format() can lead to unwanted behavior if the user_input contains unexpected format specifiers, f-strings don’t suffer from this issue. This makes them a more secure choice for handling user-provided data. 🔒

However, it’s essential to note that even though f-strings are generally more secure, I shouldn’t let my guard down completely. It’s always good to follow best practices for validating and sanitizing user input to ensure that my Python code remains secure and resistant to potential attacks. 💪

Comparing F-Strings to Other Formatting Methods

As a Python programmer, I’ve come across several ways to format strings. In this section, I will dive into a comparison of f-strings with two other popular formatting methods: percent-style string formatting and the str.format() method.

Percent-Style String Formatting

Before f-strings and the str.format() method, percent-style formatting was commonly used. It resembled the way strings are formatted in C, using the percent symbol (%) as a placeholder. For example, to insert a variable into a string, I would write:

name = "Alice"
output = "Hello, %s!" % name
print(output) # Output: Hello, Alice!

While this method is easy to use for simple formatting, it can become difficult to read and maintain when dealing with multiple variables or complex string compositions. 😕

Str.format() Method

Introduced in Python 2.6, the str.format() method offered a more readable approach compared to percent-style formatting. Instead of using the percent symbol, I would include placeholders in the form of curly braces {}:

name = "Alice"
output = "Hello, {}!".format(name)
print(output) # Output: Hello, Alice!

The str.format() method allows me to utilize advanced formatting options, such as specifying field widths and alignment. However, even though it is more powerful and flexible than percent-style formatting, it can still become cumbersome for complex strings. 🤔

Now, let’s see how f-strings compare to these two methods. With f-strings, introduced in Python 3.6, I can include expressions within the curly braces, and the syntax is more concise:

name = "Alice"
output = f"Hello, {name}!"
print(output) # Output: Hello, Alice!

Not only do f-strings make my code more readable, they also tend to be faster than the other two formatting methods! 😃

As a Python programmer who values readability and performance, I find that f-strings are the way to go when it comes to string formatting. While percent-style and str.format() methods still have their place in older codebases, f-strings offer a cleaner and more efficient solution for my string formatting needs.🚀

💡 Recommended: String Formatting Comparison: format() | Percent | f-string

Posted on Leave a comment

Python List of Dicts to Pandas DataFrame

5/5 – (1 vote)

In this article, I will discuss a popular and efficient way to work with structured data in Python using DataFrames.

💡 A DataFrame is a two-dimensional, size-mutable, and heterogeneous tabular data structure with labeled axes (rows and columns). It can be thought of as a table or a spreadsheet with rows and columns that can hold a variety of data types.

One common challenge is converting a Python list of dictionaries into a DataFrame.

To create a DataFrame from a Python list of dicts, you can use the pandas.DataFrame(list_of_dicts) constructor.

Here’s a minimal example:

import pandas as pd
list_of_dicts = [{'key1': 'value1', 'key2': 'value2'}, {'key1': 'value3', 'key2': 'value4'}]
df = pd.DataFrame(list_of_dicts) 

With this simple code, you can transform your list of dictionaries directly into a pandas DataFrame, giving you a clean and structured dataset to work with.

A similar problem is discussed in this Finxter blog post:

💡 Recommended: How to Convert List of Lists to a Pandas Dataframe

YouTube Video

Converting Python List of Dicts to DataFrame

Let’s go through various methods and techniques, including using the DataFrame constructor, handling missing data, and assigning column names and indexes. 😃

Using DataFrame Constructor

The simplest way to convert a list of dictionaries to a DataFrame is by using the pandas DataFrame constructor. You can do this in just one line of code:

import pandas as pd
data = [{'a': 1, 'b': 2}, {'a': 3, 'b': 4}]
df = pd.DataFrame(data)

Now, df is a DataFrame with the contents of the list of dictionaries. Easy peasy! 😊

Handling Missing Data

When your list of dictionaries contains missing keys or values, pandas automatically fills in the gaps with NaN values. Let’s see an example:

data = [{'a': 1, 'b': 2}, {'a': 3, 'c': 4}]
df = pd.DataFrame(data)

The resulting DataFrame will have NaN values in the missing spots:

 a b c
0 1 2.0 NaN
1 3 NaN 4.0

No need to manually handle missing data! 👍

Assigning Column Names and Indexes

You may want to assign custom column names or indexes when creating the DataFrame. To do this, use the columns and index parameters:

column_names = ['col_1', 'col_2', 'col_3']
index_names = ['row_1', 'row_2']
df = pd.DataFrame(data, columns=column_names, index=index_names)

This will create a DataFrame with the specified column names and index labels:

 col_1 col_2 col_3
row_1 1.0 2.0 NaN
row_2 3.0 NaN 4.0

Working with the Resulting DataFrame

Once you’ve converted your Python list of dictionaries into a pandas DataFrame, you can work with the data in a more structured and efficient way.

In this section, I will discuss three common operations you may want to perform with a DataFrame:

  • filtering and selecting data,
  • sorting and grouping data, and
  • applying functions and calculations.

Let’s dive into each of these sub-sections! 😃

Filtering and Selecting Data

Working with data in a DataFrame allows you to easily filter and select specific data using various techniques. To select specific columns, you can use either DataFrame column names or the loc and iloc methods.

YouTube Video

💡 Recommended: Pandas loc() and iloc() – A Simple Guide with Video

For example, if you need to select columns A and B from your DataFrame, you can use the following approach:

selected_columns = df[['A', 'B']]

If you want to filter rows based on certain conditions, you can use boolean indexing:

filtered_data = df[(df['A'] > 5) & (df['B'] < 10)]

This will return all the rows where column A contains values greater than 5 and column B contains values less than 10. 🚀

Sorting and Grouping Data

Sorting your DataFrame can make it easier to analyze and visualize the data. You can sort the data using the sort_values method, specifying the column(s) to sort by and the sorting order:

sorted_data = df.sort_values(by=['A'], ascending=True)

Grouping data is also a powerful operation to perform statistical analysis or data aggregation. You can use the groupby method to group the data by a specific column:

grouped_data = df.groupby(['A']).sum()

In this case, I’m grouping the data by column A and aggregating the values using the sum function. These operations can help you better understand patterns and trends in your data. 📊

Applying Functions and Calculations

DataFrames allow you to easily apply functions and calculations on your data. You can use the apply and applymap methods to apply functions to columns, rows, or individual cells.

For example, if you want to calculate the square of each value in column A, you can use the apply method:

df['A_squared'] = df['A'].apply(lambda x: x**2)

Alternatively, if you need to apply a function to all cells in the DataFrame, you can use the applymap method:

df_cleaned = df.applymap(lambda x: x.strip() if isinstance(x, str) else x)

In this example, I’m using applymap to strip all strings in the DataFrame, removing any unnecessary whitespace. Utilizing these methods will make your data processing and analysis tasks more efficient and easier to manage. 💪


To keep improving your data science skills, make sure you know what you’re going yourself into: 👇

💡 Recommended: Data Scientist – Income and Opportunity

Posted on Leave a comment

How I Created a Customer Churn Prediction App to Help Businesses

5/5 – (1 vote)

Many businesses will agree that it takes a lot more time, money, and resources to get new customers than to keep existing ones. Hence, they are very much interested in knowing how many existing customers are leaving their business. This is known as churn.

Churn tells business owners how many customers are no longer using their products and services. It is also the rate at which an amount of money is lost as a result of customers or employers leaving the company. The churn rate gives companies an idea of business performance. If the churn rate is higher than the growth rate, it means that the business is not growing.

There are many reasons offered to explain customer churn. These include poor customer satisfaction, finance issues, customers not feeling appreciated, and customers’ need for a change. Understandably, companies have no absolute control over churn. But they can work to reduce to the barest minimum churn rate as regards the ones they have greater control.

As data scientists, your role is to assist these companies by building a churn model tailored to the company’s goals and expectations to predict customer churn. Due to the lack of data available to meet a company’s specific needs, it becomes challenging for data scientists to design an effective churn model.

However, we will make do with sample data for a fictional telecommunication company. You know, it is membership-based businesses performing subscription-based services that are mostly affected by customer churn. This data sourced by the IBM Developer Platform is available on my GitHub page.

The dataset has 7043 rows and 21 columns which comprise 17 categorical features, 3 numerical features, and the prediction feature. Check my GitHub page for more information about the dataset.

Data Preprocessing

This step will be taken to make the data suitable for machine learning. We will start by getting an overview of the dataset.

import pandas as pd
df = pd.read_csv('churn.csv') # get the shape of the dataset
df.shape
(7043, 21) # print the columns
df.columns
Index('customerID', 'gender', 'SeniorCitizen', 'Partner', 'Dependents', 'tenure', 'PhoneService', 'MultipleLines', 'InternetService', 'OnlineSecurity', 'OnlineBackup', 'DeviceProtection', 'TechSupport', 'StreamingTV', 'StreamingMovies', 'Contract', 'PaperlessBilling', 'PaymentMethod', 'MonthlyCharges', 'TotalCharges', 'Churn'], dtype='object') # check for missing values df.isna().sum() '''
customerID 0
gender 0
SeniorCitizen 0
Partner 0
Dependents 0
tenure 0
PhoneService 0
MultipleLines 0
InternetService 0
OnlineSecurity 0
OnlineBackup 0
DeviceProtection 0
TechSupport 0
StreamingTV 0
StreamingMovies 0
Contract 0
PaperlessBilling 0
PaymentMethod 0
MonthlyCharges 0
TotalCharges 0
Churn 0
dtype: int64 ''' #check for duplicates
df.customerID.nunique()
7043

Next, we drop the customerID column which was just there for identification purposes.

df.drop(['customerID'], axis=1, inplace=True)

The axis=1 means the columns. The inplace parameter is directly applied to the dataset.

If you take a look at the dataset using the head() method, you will notice that many features including the target feature have rows with values of Yes and No. We will transform them to 0 and 1 using LabelEncoder from the Scikit-learn library. We will also do the same with columns that have more than two categories.

from sklearn.preprocessing import LabelEncoder label_encoder = LabelEncoder()
obj = (df.dtypes == 'object')
for col in list(obj[obj].index): df[col] = label_encoder.fit_transform(df[col])

Model Building

It’s now time to train our data using Machine Learning algorithms. As we don’t know which model will perform well on our dataset, we will first test using different models.

from sklearn.model_selection import train_test_split
from sklearn.preprocessing import StandardScaler
from sklearn.metrics import accuracy_score
from sklearn.linear_model import LogisticRegression
from sklearn.tree import DecisionTreeClassifier
from sklearn.neighbors import KNeighborsClassifier
from sklearn.discriminant_analysis import LinearDiscriminantAnalysis
from sklearn.naive_bayes import GaussianNB
from sklearn.svm import SVC
from sklearn.ensemble import AdaBoostClassifier
from sklearn.ensemble import RandomForestClassifier
from sklearn.ensemble import ExtraTreesClassifier
from sklearn.ensemble import GradientBoostingClassifier
from xgboost import XGBClassifier X = df.drop([‘Churn’], axis=1)
Y = df.Churn X_train, X_test Y_train, Y_test = train_test_split(X, Y, test_size=0.2, random_state=7) models = [LogisticRegression(), RandomForestClassifier(),AdaBoostClassifier(), SVC(), DecisionTreeClassifier(), KNeighborsClassifier(), GaussianNB(), ExtraTreesClassifier(), LinearDiscriminantAnalysis(), GradientBoostingClassifier(), ] scaler = StandardScaler()
rescaledX = scaler.fit_transform(x_train) for model in models: model.fit(rescaledX, Y_train.values) preds = model.predict(X_test.values) results = accuracy_score(Y_test, preds) print(f'{results}') '''
0.2753726046841732
0.7388218594748048
0.7388218594748048
0.7388218594748048
0.2753726046841732
0.26330731014904185
0.47906316536550747
0.27324343506032645
0.7388218594748048
0.30376153300212916
0.6593328601845281
0.7402413058907026 '''

The results show that XGBoost performed better than the other models in this dataset. Therefore, we will use XGBoost as our Machine Learning algorithm to predict customer churn.

Tuning XGBoost

The XGBoost algorithm achieved a 74% accuracy score. Can it do better? Let’s try tuning the model using learning curves. To understand what we meant by the learning curve, please read this article.

models = [LogisticRegression(), RandomForestClassifier(),AdaBoostClassifier(), SVC(), DecisionTreeClassifier(), KNeighborsClassifier(), GaussianNB(), ExtraTreesClassifier(), LinearDiscriminantAnalysis(), GradientBoostingClassifier(), ] scaler = StandardScaler()
rescaledX = scaler.fit_transform(x_train) for model in models: model.fit(rescaledX, Y_train.values) preds = model.predict(X_test.values) results = accuracy_score(Y_test, preds) print(f'{results}')

The results show that XGBoost performed better than the other models in this dataset. Therefore, we will use XGBoost as our Machine Learning algorithm to predict customer churn.

Tuning XGBoost

The XGBoost algorithm achieved a 74% accuracy score. Can it do better? Let’s try tuning the model using learning curves. To understand what we meant by the learning curve, please read this article.

# define the model
model = XGBClassifier() # define the datasets to evaluate each iteration
evalset = [(X_train, Y_train), (X_test, Y_test)] # fit the model
model.fit(X_train, Y_train, eval_metric='logloss', eval_set=evalset) # evaluate performance
preds = model.predict(X_test)
score = accuracy_score(y_test, preds) print(f'Accuracy: {round(score*100, 1)}%')
# Accuracy: 77.9%

Wow, the model has improved with 77.9% accuracy score. Can it still do better? Let’s increase the number of iterations from 100 (default) to 200 and reduce the eta hyperparameter to 0.05 (default is 0.3) to slow down the learning rate.

model = XGBClassifier(n_estimators=200, eta=0.05) # fit the model
model.fit(X_train, Y_train, eval_metric='logloss', eval_set=evalset) preds = model.predict(x_test) score = accuracy_score(y_test,preds) print(f'Accuracy: {round(score*100, 1)}%')
# Accuracy: 78.6%

This is the extent we can go. Of course, we can go on tuning the model to achieve a higher score. An accuracy score of 78.6% is not bad.

Create a new folder and save the following to a file named model.py.

#Import libraries
import pandas as pd
from xgboost import XGBClassifier
import pickle
from sklearn.model_selection import train_test_split
from sklearn.preprocessing import LabelEncoder df = pd.read_csv('churn.csv') # Drop customerID
df.drop(['customerID'], axis=1, inplace=True) # Convert to int datatype label_encoder = LabelEncoder()
obj = (df.dtypes == ‘object’)
for col in list(obj[obj].index): df[col] = label_encoder.fit_transform(df[col]) X = df.drop(['Churn'], axis=1)
Y = df.Churn # splitting the dataset
X_train, X_test, Y_train, Y_test = train_test_split(X, Y, test_size=0.2, random_state=7) model = XGBClassifier(n_estimators=200, eta=0.05) # define the datasets to evaluate each iteration
evalset = [(X_train, Y_train), (X_test, Y_test)] # fit the model
model.fit(X_train, Y_train, eval_metric='logloss', eval_set=evalset) # saving the trained model
pickle.dump(model, open('lg_model.pkl', 'wb'))

Notice we save the trained model as a pickle object to be used later. We want the model to be running on Streamlit local server. So, we will create a Streamlit application for this. Create other files called app.py and predict.py in your current folder. Check my GitHub page to see the full content of the files.

Please remember to manually run the model.py to generate the pickle file as I won’t be pushing it to GitHub. After running the model.py file, the accuracy was 80.4% showing the model learned the data very well.

Conclusion

In this tutorial, we created a customer churn prediction app to help businesses deal with some of the challenges facing them. We use the XGBoost model to train the data and generate the model. There are many things we didn’t do. Data visualization, feature engineering, and dealing with imbalance classification are some of them.

You may wish to try them out and see if they can improve the model’s performance. Unfortunately, I wasn’t able to deploy the app because I couldn’t push the heavy pickle file to GitHub. Try pushing yours and then, you deploy it on Streamlit Cloud. Alright, enjoy your day.

Posted on Leave a comment

How I Built a Back-Link Checker Using ChatGPT and Google Colab

5/5 – (1 vote)

I recently started a new website and to rank up in the search engines I hired an SEO expert. He suggested several activities out of which one was building lots of backlinks. We agreed on the budget and the timeframe in which he delivers 200 links in a month. These links are a mix of social bookmarks, profile pages, and guest articles. After he delivers the Links, I have to verify the work done and give feedback. The process of checking a URL containing the backlink is as follows –

  • Open a URL from a list of URLs in the sheet
  • Search for my “mydomain.com” in the source code or click on the visible link pointing to my domain
  • In the sheet, mark it as LINK FOUND or LINK NOT FOUND

Only if it was this easy.

The link-building project will go on for several months. He will be building several hundred links so I must have some tool to do the checking for me. So, I came up with the idea of asking ChatGPT to give me a code in Python. Here is my prompt:

Prompt

Give me a Python code that scrapes all given URLs and looks for any link that contains "mydomain.com" and prints out the URL and the link it found

ChatGPT reply: 🤖

import requests
from bs4 import BeautifulSoup # list of URLs to scrape
urls = ['https://example.com', 'https://example.net', 'https://example.org'] # loop through each URL
for url in urls: # send a request to the URL response = requests.get(url) # parse the HTML content with BeautifulSoup soup = BeautifulSoup(response.content, 'html.parser') # find all links in the page links = soup.find_all('a') # loop through each link for link in links: # check if the link contains "mydomain.com" if 'partymap.in' in link.get('href', ''): # print the URL and link found print(f"{url} - {link.get('href')}")

Choosing Google Colab as Web-Based Python Interface

Now I have to run this code in a web interface. The interface should have an input box and an output box.

I find Google Collab to be the best option to do this in a quick, easy, and time-efficient manner. But I need the code to read the list of URLs from an input widget box. So I returned to ChatGPT and defined my environment along with many improvisations. There were several trials and errors.

Here are some of the prompts

Improvisation Prompt 1: 👩‍💻

Also add the following Display domains that are duplicate
Display unique list of domains in which the string was not found

Improvisation Prompt 2: 👩‍💻

I got this error ssl.SSLCertVerificationError: [SSL: CERTIFICATE_VERIFY_FAILED] certificate verify failed: unable to get local issuer certificate (_ssl.c:992)

Improvisation Prompt 3: 👩‍💻

Check for Redirection, if the URL redirects, print "E:REDIRECTED" and skip iteration

Improvisation Prompt 4: 👩‍💻

I got a mod_security error in request.get, how can I fix it

Improvisation Prompt 5: 👩‍💻

Add a try catch block around request and beautiful soup

Improvisation Prompt 6: 👩‍💻

If there are no Links found, print "E:ZERO LINKS" and skip iteration

Improvisation Prompt 7: 👩‍💻

The list of URLs will come from a google collab input box can you make the change

And there were many more prompts to achieve the final results. But, since I am a Python coder, I could exit the back and forth with ChatGPT and change the code my way.

ERROR/STATUS CODES

Explanation of error codes is as follows

Errors found in URL given in the sheet

  • UNRESOLVED – The URL in the sheet is malformed
  • DUPLICATE DOMAIN – There are multiple URLs from the same domain
  • REDIRECTED – The URL redirected to another URL, if this happens ask the SEO analyst to post the final URL in the sheet

Errors found in Links found in the source code of the URL

  • FOUND – Our domain backlink was found
  • NOT FOUND – Our domain backlink was not found
  • BAD LINK – Our domain backlink was not found
  • ZERO LINKS – No links were found in the source code

I begin each error code with ‘E:’ to easily identify them in sheet for conditional formatting process.

So here is the final code:

The Code

This goes in the first code cell of Google Colab

from IPython.display import display
import ipywidgets as widgets url_box = widgets.Textarea( placeholder='Enter URLs here', description='URLs:', layout=widgets.Layout(width='70%')
) # display the text box widget
display(url_box)

This goes in the second code cell of Google Colab

/enl

import requests
from bs4 import BeautifulSoup
from urllib.parse import urlparse # disable SSL certificate verification
requests.packages.urllib3.disable_warnings() # get the input URLs as a list
urls = url_box.value.split()
# create lists to store URLs and domains
scraped_urls = []
unique_domains = []
duplicate_domains = []
notfound_domains = []
inputstring = "" headers = { 'User-Agent': 'Mozilla/5.0 (Windows NT 10.0; Win64; x64) AppleWebKit/537.36 (KHTML, like Gecko) Chrome/58.0.3029.110 Safari/537.3'
} # loop through each URL
for url in urls: parsed_url = urlparse(url) domain = parsed_url.netloc
# add the domain to the list of unique domains if domain not in unique_domains: unique_domains.append(domain) else: # add the domain to the list of duplicate domains if domain not in duplicate_domains: duplicate_domains.append(domain) print("Duplicate domains:", len(duplicate_domains))
print(duplicate_domains)
print() # loop through each URL and check if the backlink exists
for url in urls: inputstring = "" parsed_url = urlparse(url) domain = parsed_url.netloc if not domain: print('E:UNRESOLVED',',',domain) continue if domain in duplicate_domains: print("E:DUPLICATE DOMAIN") continue # send a request to the URL try: response = requests.get(url, headers=headers, verify=False) except Exception as e: print('REQ:',str(e)) # check if the URL is redirecting to "mydomain.com" # check if the response is a redirect if hasattr(response, 'is_redirect') and response.is_redirect: print("E:REDIRECTED",',',domain) continue # parse the HTML content with BeautifulSoup try: soup = BeautifulSoup(response.content, 'html.parser') except Exception as e: print('BS:',str(e)) # find all links in the page links = soup.find_all('a') # print(links) #if no links found if len(links) == 0: print('E:ZERO LINKS',',',domain) continue # loop through each link for link in links: # Get the domain name from the link parsed_url = urlparse(link.get('href', '')) domain_name = parsed_url.netloc # print(domain_name) # domain_name = link.get('href', '') if domain_name: # Check if the domain name is "mydomain.com" if 'mydomain.com' in domain_name: # print(domain_name) inputstring = "FOUND" break else: inputstring = "E:NOT FOUND" # if domain not in notfound_domains: # notfound_domains.append(domain) else: inputstring = "E:BAD LINK" # add the URL to the list of scraped URLs # scraped_urls.append(inputstring) print(inputstring,',',domain)

See the CELL setup in the image. Press play in the first cell. You will get a URL input box. Paste your URLs in it.

Input Box:

https://sketchfab.tld/mydomain https://30seconds.tld/mydomain/
https://speakerdeck.tld/mydomainus
https://www.ted.tld/profiles/<some page>/about
https://dzone.tld/users/mydomainindia.html
https://www.reddit.tld/user/mydomainusa
https://medium.tld/@mydomainusa/about
https://www.pinterest.tld/mydomainusa/
https://www.intensedebate.tld/people/mydomainusa
https://www.growkudos.tld/profile/<some page>
https://www.universe.tld/users/<some page>
https://www.dostally.tld/post/<some page>
https://www.socialbookmarkzone.info/<some page>
https://app.raindrop.io/my/-1/item/<somepage>/web
https://www.tamaiaz.tld/posts/<somepage>
https://www.socialbookmarkzone.info/<some page>/
https://gab.tld/mydomain/posts/<some page>

Now press Play in the second cell and watch output panel

Output:

Duplicate domains: 5
['www.socialbookmarkzone.tld, 'www.reddit.tld', 'www.instapaper.tld', 'www.wibki.tld', 'diigo.tld'] FOUND , sketchfab.tld
E:BAD LINK , 30seconds.tld
FOUND , speakerdeck.tld
E:BAD LINK , www.ted.tld
FOUND , dzone.tld
E:DUPLICATE DOMAIN
FOUND , medium.tld
FOUND , www.pinterest.tld
FOUND , www.intensedebate.tld
FOUND , www.growkudos.tld
E:ZERO LINKS , www.universe.tld
FOUND , www.dostally.tld
E:DUPLICATE DOMAIN
E:ZERO LINKS , app.raindrop.io
FOUND , www.tamaiaz.tld
E:DUPLICATE DOMAIN
E:NOT FOUND , gab.tld

INPUT BOX CODE [GOOGLE COLLAB]

GOOGLE COLLAB CODE CELL SETUP

PASTE THE OUTPUT IN YOUR SEO TRACKER SHEET in the same line as the URLs & APPLY SPLIT TEXT TO COLUMN

STEPS TO APPLY CONDITIONAL FORMATTING

FINAL OUTPUT

Based on the above output the SEO analyst can rework on the links or drop these sites completely.

If you like the code leave a comment and I am available on Upwork for Prompt Engineering, AI Art jobs. I use ChatGPT, Midjourney, Python and many more tools for my client jobs.

My Upwork profile is https://www.upwork.com/freelancers/~018645334d3b757e4d


👩‍💻 Recommended: 7 Effective Prompting Tricks for ChatGPT

Posted on Leave a comment

The Evolution of Large Language Models (LLMs): Insights from GPT-4 and Beyond

5/5 – (1 vote)

Playing with any large language model (LLM), such as GPT-4, is fascinating. 

But it doesn’t give you an accurate understanding of where AGI is heading because one isolated snapshot provides limited information. You can gain more insight into the growth and dynamicity of LLMs by comparing two subsequent snapshots.

Roughly speaking, it’s less interesting to see where baby AGI is and more interesting to look at how it evolves. 

To gain more insight on this, Emily has just contributed another interesting Finxter blog article:

👩‍💻 Recommended: [Blog] 10 High-IQ Things GPT-4 Can Do That GPT-3.5 Can’t

Check it out. It’s a solid read! ⭐

It’s fascinating to observe how the concept of transformers introduced in the 2017 paper “Attention is all you need” has scaled so remarkably well. 

In essence, the significant advancements made in AI over the past four years have mostly come from scaling up the transformer approach to an incredible magnitude. The concept of GPT (Generative Pre-trained Transformers) has remained largely unchanged for around six years.

They just threw more data and more hardware on the same algorithm. This was possible due to the higher amount of scalability and degree of parallelization unlocked by the transformer idea.

From the paper (highlights by me):

🚀 “In this work we propose the Transformer, a model architecture eschewing recurrence and instead relying entirely on an attention mechanism to draw global dependencies between input and output. The Transformer allows for significantly more parallelization … the Transformer is the first transduction model relying entirely on self-attention to compute representations of its input and output without using sequence-aligned RNNs or convolution.”

⚡ My main takeaway from comparing GPT-3.5 to GPT-4 is that the limits of performance improvements are not yet reached by simply throwing more and more data and hardware on these models. And when the performance (=IQ) of transformer models ultimately converges — probably at a super-human IQ level — we’ll still be able to change and improve on the underlying abstractions to eke out additional IQ.

Likely, transformers will not remain the last and best-performing model for all future AI research. We have tried only the tip of the iceberg on what scale these models go. I wouldn’t be surprised if the data sets and computational power of future GPT models increased by 1,000,000x.

Truly an exciting time to be alive! 🤖 

I’m scared and fascinated at the same time. It’s so new and so dangerous. Ubiquitous disruption of the work marketplace is already happening fast. I’d estimate that in our economy, we already have north of one billion “zombie jobs”, i.e., job descriptions that could be fully automated with ChatGPT and code. I know of closed-loop AI models under government review that classify cancer with almost zero error rate. Medical doctors with lower accuracy are still doing the classification – but for how long? 

A new era is starting. When we went from 99% to 1% farmers, we accomplished a massive leap of free work energy that led to an explosion of collective intelligence. The same is happening now: 99% of the jobs will be gone sooner than we expect. A massive amount of free energy will catapult humanity forward like we’ve never experienced in the history of humanity.

Buckle up for the ride. I’ll be here to help you navigate the waters until my job will be disrupted too and AGI will help you more effectively than I ever could. 

The future is bright! 🚀🌞

Chris


This was part of my free newsletter on technology and exponential technologies. You can join us by downloading our cheat sheets here:

Posted on Leave a comment

How to Access Multiple Matches of a Regex Group in Python?

5/5 – (1 vote)

In this article, I will cover accessing multiple matches of a regex group in Python.

💡 Regular expressions (regex) are a powerful tool for text processing and pattern matching, making it easier to work with strings. When working with regular expressions in Python, we often need to access multiple matches of a single regex group. This can be particularly useful when parsing large amounts of text or extracting specific information from a string.

To access multiple matches of a regex group in Python, you can use the re.finditer() or the re.findall() method.

  • The re.finditer() method finds all matches and returns an iterator yielding match objects that match the regex pattern. Next, you can iterate over each match object and extract its value.
  • The re.findall() method returns all matches in a list, which can be a more convenient option if you want to work with lists directly.

👩‍💻 Problem Formulation: Given a regex pattern and a text string, how can you access multiple matches of a regex group in Python?

Understanding Regex in Python

In this section, I’ll introduce you to the basics of regular expressions and how we can work with them in Python using the ‘re‘ module. So, buckle up, and let’s get started! 😄

Basics of Regular Expressions

Regular expressions are sequences of characters that define a search pattern. These patterns can match strings or perform various operations like search, replace, and split into text data.

Some common regex elements include:

  • Literals: Regular characters like 'a', 'b', or '1' that match themselves.
  • Metacharacters: Special characters like '.', '*', or '+' that have a special meaning in regex.
  • Character classes: A set of characters enclosed in square brackets (e.g., '[a-z]' or '[0-9]').
  • Quantifiers: Specify how many times an element should repeat (e.g., '{3}', '{2,5}', or '?').

These elements can be combined to create complex search patterns. For example, the pattern '\d{3}-\d{2}-\d{4}' would match a string like '123-45-6789'.

Remember, practice makes perfect, and the more you work with regex, the more powerful your text processing skills will become.💪

The Python ‘re’ Module

Python comes with a built-in module called ‘re‘ that makes it easy to work with regular expressions. To start using regex in Python, simply import the ‘re‘ module like this:

import re

Once imported, the ‘re‘ module provides several useful functions for working with regex, such as:

Function Description
re.match() Checks if a regex pattern matches at the beginning of a string.
re.search() Searches for a regex pattern in a string and returns a match object if found.
re.findall() Returns all non-overlapping matches of a regex pattern in a string as a list.
re.finditer() Returns an iterator yielding match objects for all non-overlapping matches of a regex pattern in a string.
re.sub() Replaces all occurrences of a regex pattern in a string with a specified substitution.

By using these functions provided by the ‘re‘ module, we can harness the full power of regular expressions in our Python programs. So, let’s dive in and start matching! 🚀

Working with Regex Groups

When working with regular expressions in Python, it’s common to encounter situations where we need to access multiple matches of a regex group. In this section, I’ll guide you through defining and capturing regex groups, creating a powerful tool to manipulate text data. 😄

Defining Groups

First, let’s talk about how to define groups within a regular expression. To create a group, simply enclose the part of the pattern you want to capture in parentheses. For example, if I want to match and capture a sequence of uppercase letters, I would use the pattern ([A-Z]+). The parentheses tell Python that everything inside should be treated as a single group. 📚

Now, let’s say I want to find multiple groups of uppercase letters, separated by commas. In this case, I can use the pattern ([A-Z]+),?([A-Z]+)?. With this pattern, I’m telling Python to look for one or two groups of uppercase letters, with an optional comma in between. 🚀

Capturing Groups

To access the matches of the defined groups, Python provides a few helpful functions in its re module. One such function is findall(), which returns a list of all non-overlapping matches in the string🔍.

For example, using our previous pattern:

import re
pattern = r'([A-Z]+),?([A-Z]+)?'
text = "HELLO,WORLD,HOW,AREYOU"
matches = re.findall(pattern, text)
print(matches)

This code would return the following result:

[('HELLO', 'WORLD'), ('HOW', ''), ('ARE', 'YOU')]

Notice how it returns a list of tuples, with each tuple containing the matches for the specified groups. 😊

Another useful function is finditer(), which returns an iterator yielding Match objects matching the regex pattern. To extract the group values, simply call the group() method on the Match object, specifying the index of the group we’re interested in.

An example:

import re
pattern = r'([A-Z]+),?([A-Z]+)?'
text = "HELLO,WORLD,HOW,AREYOU" for match in re.finditer(pattern, text): print("Group 1:", match.group(1)) print("Group 2:", match.group(2))

This code would output the following:

Group 1: HELLO
Group 2: WORLD
Group 1: HOW
Group 2:
Group 1: ARE
Group 2: YOU

As you can see, using regex groups in Python offers a flexible and efficient way to deal with pattern matching and text manipulation. I hope this helps you on your journey to becoming a regex master! 🌟

Accessing Multiple Matches

As a Python user, sometimes I need to find and capture multiple matches of a regex group in a string. This can seem tricky, but there are two convenient functions to make this task a lot easier: finditer and findall.

Using ‘finditer’ Function

I often use the finditer function when I want to access multiple matches within a group. It finds all matches and returns an iterator, yielding match objects that correspond with the regex pattern 🧩.

To extract the values from the match objects, I simply need to iterate through each object 🔄:

import re pattern = re.compile(r'your_pattern')
matches = pattern.finditer(your_string) for match in matches: print(match.group())

This useful method allows me to get all the matches without any hassle. You can find more about this method in PYnative’s tutorial on Python regex capturing groups.

Using ‘findall’ Function

Another option I consider when searching for multiple matches in a group is the findall function. It returns a list containing all matches’ strings. Unlike finditer, findall doesn’t return match objects, so the result is directly usable as a list:

import re pattern = re.compile(r'your_pattern')
all_matches = pattern.findall(your_string) print(all_matches)

This method provides me with a simple way to access ⚙ all the matches as strings in a list.

Practical Examples

Let’s dive into some hands-on examples of how to access multiple matches of a regex group in Python. These examples will demonstrate how versatile and powerful regular expressions can be when it comes to text processing.😉

Extracting Email Addresses

Suppose I want to extract all email addresses from a given text. Here’s how I’d do it using Python regex:

import re text = "Contact me at [email&nbsp;protected] and my friend at [email&nbsp;protected]"
pattern = r'([\w\.-]+)@([\w\.-]+)\.(\w+)'
matches = re.findall(pattern, text) for match in matches: email = f"{match[0]}@{match[1]}.{match[2]}" print(f"Found email: {email}")

This code snippet extracts email addresses by using a regex pattern that has three capturing groups. The re.findall() function returns a list of tuples, where each tuple contains the text matched by each group. I then reconstruct email addresses from the extracted text using string formatting.👌

Finding Repeated Words

Now, let’s say I want to find all repeated words in a text. Here’s how I can achieve this with Python regex:

import re text = "I saw the cat and the cat was sleeping near the the door"
pattern = r'\b(\w+)\b\s+\1\b'
matches = re.findall(pattern, text, re.IGNORECASE) for match in matches: print(f"Found repeated word: {match}")

Output:

Found repeated word: the

In this example, I use a regex pattern with a single capturing group to match words (using the \b word boundary anchor). The \1 syntax refers to the text matched by the first group, allowing us to find consecutive occurrences of the same word. The re.IGNORECASE flag ensures case-insensitive matching. So, no repeated word can escape my Python regex magic!✨

Conclusion

In this article, I discussed how to access multiple matches of a regex group in Python. I found that using the finditer() method is a powerful way to achieve this goal. By leveraging this method, I can easily iterate through all match objects and extract the values I need. 😃

Along the way, I learned that finditer() returns an iterator yielding match objects, which allows for greater flexibility when working with regular expressions in Python. I can efficiently process these match objects and extract important information for further manipulation and analysis. 👩‍💻


Python Regex Course

Google engineers are regular expression masters. The Google search engine is a massive text-processing engine that extracts value from trillions of webpages.  

Facebook engineers are regular expression masters. Social networks like Facebook, WhatsApp, and Instagram connect humans via text messages

Amazon engineers are regular expression masters. Ecommerce giants ship products based on textual product descriptions.  Regular expressions ​rule the game ​when text processing ​meets computer science. 

If you want to become a regular expression master too, check out the most comprehensive Python regex course on the planet: