Editor.js is a JavaScript solution to create a web text editor. It is a WYSIWYG editor that allows inline editing of web text content.
Online-hosted editors provide more features to create and format content in an enriched manner. The Editor.js JavaScript library helps to create our own editor in an application.
There are numerous online editors with advanced tools. But, having a custom editor can be sleeker to use and maintain.
The Editor.js has many features to embed rich text content by creating placeholders in the editor with the help of its tools. Tools are enabled by using the external libraries developed for Editor.js.
Those library tools enrich the capability of this web text editor plugin. The following table shows the tools enabled with this Editor.js JavaScript initiation. These tools are used to create different types of rich text content in different formats.
This demo allows you to experience the features of an online editor by integrating this library.
Creates the H1, H2, H3, H4, H5 and H6 heading blocks for the web editor.
Link embeds
It lets pasting URL and extracts content from the link pasted into this input.
Raw HTML blocks
It allows embedding raw HTML codes to the web text editor.
Simple image
It accepts the image full path or allows to paste of copied image content to render images without server-side processing.
Image
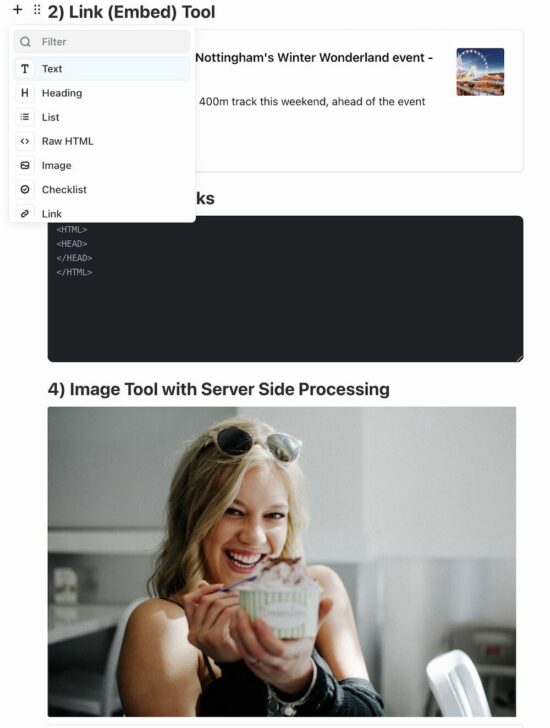
It supports choosing files, pasting URLs, pasting images or dragging and dropping images to the rich text content area.
Checklist
It is used to create checklist items.
List
It adds ordered and unordered list items.
Embeds
It embeds content by loading iFrame to the content.
Quote
It creates quote blocks that have a toolbar to format rich text content and add links.
The official getting started tutorial has detailed usage documentation about this JavaScript editor. The list of the above tools is described with appropriate linking to their 3-party library manual.
How to install and initiate Editor.js
The Editor.js and its libraries can be integrated by using one of the several ways listed below.
Node package modules.
By using the available CDN URLs of this JavaScript library.
By including the local minified library files downloaded to the application folder.
After including the required library files, the Editor.js has to be instantiated.
const editor = new EditorJS('editorjs');
[OR]
const editor = new EditorJS({ holder: 'editorjs'

});
Here, the “editorjs” is used as the holder which is referring the HTML target to render the web text editor.
Fill the editor with the initial data
If the editor has to display some default template, it requires creating a landing template to render into this. This web editor plugin class accepts rich text content template via a data property. The format will be as shown below.
Example: Integrate Editor.js with Raw HTML block, Image, Link embeds and more
This example has the code that teaches how to configure the most used tools of the Editor.js library. It renders HTML code blocks and embeds images, and link extracts.
The image upload and link extract tools are configured with the server-side endpoint. It handles backend action on the upload or the extract events.
On saving the composing rich text content, the Editor.js data will be saved to the database. The data shown in the web editor is dynamic from the database.
<?php
require_once __DIR__ . '/dbConfig.php';
$content = "''";
$sql = "SELECT * FROM editor";
$stmt = $conn->prepare($sql);
$stmt->execute();
$result = $stmt->get_result();
$row = $result->fetch_assoc();
if(!empty($row["content"])) { $content = $row["content"];
}
?>
<html>
<head>
<title>Create Web Text Editor using JavaScript with Editor.js</title>
<link href="style.css" rel="stylesheet" type="text/css" />
<link href="form.css" rel="stylesheet" type="text/css" />
<style>
#loader-icon { display: none; vertical-align: middle; width: 100px;
}
</style>
</head>
<body> <div class="phppot-container"> <h1>Create Web Text Editor using JavaScript with Editor.js</h1> <div id="editorjs" name="editor"></div> <input type="submit" onClick=save() value="save"> <div id="loader-icon"> <img src="loader.gif" id="image-size" /> </div> </div> <script src="https://cdn.jsdelivr.net/npm/@editorjs/editorjs@latest"></script> <script src="https://cdn.jsdelivr.net/npm/@editorjs/header@latest"></script> <script src="https://cdn.jsdelivr.net/npm/@editorjs/list@latest"></script> <script src="https://cdn.jsdelivr.net/npm/@editorjs/image@latest"></script> <script src="https://cdn.jsdelivr.net/npm/@editorjs/raw"></script> <script src="https://cdn.jsdelivr.net/npm/@editorjs/checklist@latest"></script> <script src="https://cdn.jsdelivr.net/npm/@editorjs/link@latest"></script> <script src="editor-tool.js"></script> <script> const editor = new EditorJS({ /** * Id of Element that should contain Editor instance */ holder: 'editorjs', tools: { header: Header, list: List, raw: RawTool, image: { class: ImageTool, config: { endpoints: { byFile: 'http://localhost/phppot/javascript/create-web-text-editor-javascript/ajax-endpoint/upload.php', // Your backend file uploader endpoint byUrl: 'http://localhost/phppot/javascript/create-web-text-editor-javascript/ajax-endpoint/upload.php', // Your endpoint that provides uploading by Url } } }, checklist: { class: Checklist }, linkTool: { class: LinkTool, config: { endpoint: 'http://localhost/phppot/jquery/editorjs/extract-link-data.php', // Your backend endpoint for url data fetching, } } }, data: <?php echo $row["content"]; ?>, });
</script>
</body>
</html>
It has the ladder of six tools of Editor.js with JavaScript code. In this example, it creates images, link embeds and more types of rich text content. Some of them are basic like header, list, the default text tool and more.
The Image and Link embed tools depend on the PHP endpoint URL to take action on the back end.
Image tool configuration keys and endpoint script
The image tool requires the PHP endpoint URL to save the uploaded files to the target folder. The JavaScript editor keys to configure the endpoint are listed below.
byFile – This endpoint is used while pasting the file.
byUrl – This endpoint is used while choosing the file, dragging and dropping files and all.
This is simple and straightforward that performs the image upload operation in PHP. The image file is posted via JavaScript links to this server-side script.
This tool is configured like below to set the PHP endpoint to extract the content.
In this example, it extracts contents like title, image, and text description from the embedded link.
tools: { linkTool: { class: LinkTool, config: { endpoint: 'http://localhost/phppot/jquery/editorjs/extract-link-data.php', // Your backend endpoint for url data fetching, } }

}
PHP endpoint to extract content from the remote file
It creates a cURL post request in the endpoint PHP file to extract the data from the link. After getting the cURL response, the below code parses the response and creates a DOM component to render the rich text content into the WYSIWYG web editor.
It uses the GET method during the cURL request to extract rich text content and image from the link. In a previous tutorial, we used the GET and POST methods on PHP cURL requests.
On clicking the “Save” button below the web text editor, it gets the editor output data and saves it to the database.
It calls the editor.save() callback to get the WYSIWYG web editor output. An AJAX call sends this data to the PHP to store it in the database.
function save() { editor.save().then((outputData) => { document.getElementById("loader-icon").style.display = 'inline-block'; var xmlHttpRequest = new XMLHttpRequest(); xmlHttpRequest.onreadystatechange = function() { if (xmlHttpRequest.readyState == XMLHttpRequest.DONE) { document.getElementById("loader-icon").style.display = 'none'; if (xmlHttpRequest.status == 200) { // on success get the response text and // insert it into the ajax-example DIV id. document.getElementById("ajax-example").innerHTML = xmlHttpRequest.responseText; } else if (xmlHttpRequest.status == 400) { // unable to load the document alert('Status 400 error - unable to load the document.'); } else { alert('Unexpected error!'); } } }; xmlHttpRequest.open("POST", "ajax-endpoint/save-editor.php", true); xmlHttpRequest.setRequestHeader('Content-type', 'application/x-www-form-urlencoded'); xmlHttpRequest.send("btnValue=" + JSON.stringify(outputData)); }).catch((error) => { console.log('Saving failed: ', error) });

}
PHP code to save Editor.js data
This is the endpoint PHP file to process the editor’s rich text output in the backend. It creates the query to prepare and execute the insert operation to save the rich text content to the database.
<?php

require_once __DIR__ . '/../dbConfig.php'; $sql = "SELECT * FROM editor";

$stmt = $conn->prepare($sql);

$stmt->execute();

$result = $stmt->get_result();

$row = $result->fetch_assoc();

if (isset($_POST['btnValue'])) { $editorContent = $_POST['btnValue']; if (empty($row["content"])) { $query = "INSERT INTO editor(content,created)VALUES(?, NOW())"; $statement = $conn->prepare($query); $statement->bind_param("s", $editorContent); $statement->execute(); } else { $query = "UPDATE editor SET content = ? WHERE id = ?"; $statement = $conn->prepare($query); $statement->bind_param("si", $editorContent, $row["id"]); $statement->execute(); }

}

?>
[www.indiegala.com] Get the best bang for your buck with the CashBack Sale! For every purchase get a little extra back until 10.10.2022 & feel like a 10/10!
[www.indiegala.com] Instagram influencers, this pack might be just for you! Get 4200+ assets that will help any aspiring creator to express themselves & even aim for professional levels of aesthetics.
Posted by: xSicKxBot - 10-21-2022, 09:46 AM - Forum: Lounge
- No Replies
Bethesda Senior Designer Ferret Baudoin Has Passed Away
On October 15, Fallout 76 lead designer Eric "Ferret" Baudoin passed away. The info came via Fallout 76 project lead Jeff Gardiner on Twitter and a Facebook tribute group memorializing Baudoin.
According to Kenneth Vigue, founder of the charity Fallout For Hope and creator of Chad: A Fallout 76 story podcast, who spoke to Baudoin's family, Baudoin passed away suddenly due to complications from cancer surgery.
I'm crushed right now. Ferret Baudoin took over as lead designer on #Fallout76 for wastelanders. An eternal optimist and a dear friend. We had lunch several times since I departed Bethesda. He will be dearly missed. https://t.co/Pi1FBiGntY
— Jeff Gardiner ➡️ SOMETHING WICKED GAMES (@jg93) October 17, 2022
"We'd text about any and all RPGs we were playing. He's the only person I know that plays more of them than [Emil Pagliarulo, design director at Bethesda] and I. He completed four runs of the most recent Pathfinder RPG alone," Gardiner said.
Embark on a journey full of danger in this action RPG, inspired by Greek and Roman mythologies. Explore the breathtaking city of Aphes and forge your way through legions of unique foes and mythical bosses to discover the truth behind the city’s curse.
Posted by: xSicKxBot - 10-20-2022, 11:44 AM - Forum: Python
- No Replies
How to Print a NumPy Array Without Scientific Notation in Python
Rate this post
Problem Formulation
» Problem Statement: Given a NumPy array. How to print the NumPy array without scientific notation in Python?
Note: Python represents very small or very huge floating-point numbers in their scientific form. Scientific notation represents the number in terms of powers of 10 to display very large or very small numbers. For example, the scientific notation for the number 0.000000321 is described as 3.21e07.
In Python, the NumPy module generally uses scientific notation instead of the actual number while printing/displaying the array items.
Expected Output: Print the given array without scientific notation in Python as:
[ 1. 5. 10. 20. 35. 5000.5]
Without further ado, let’s dive into the different ways of solving the given problem.
☛Method 1: Using set_printoptions() Function
The set_printoptions() is a function in the numpy module that is used to set how the floating-point numbers, NumPy arrays and numpy objects are to be displayed. By default, the very big or very small numbers of the array are represented using scientific notation. We can use the set_printoptions() function by passing the suppress as True to remove the scientific notation of the numpy array.
Approach:
Import the Numpy module to create the array.
Use the set_printoptions() function and pass the suppress value as True.
Print the array; it will get displayed without the scientific notation.
Code:
# Importing the numpy module

import numpy as np

# Creating a NumPy array

a = np.array([1, 5, 10, 20, 35, 5000.5])

print("Numpy array with scientific notation", a)

np.set_printoptions(suppress = True)

print("Numpy array without scientific notation", a)
Discussion: The set_printoptions() function only works for the numbers that fit in the default 8-character space allotted to it, as shown below:
Code:
import numpy as np

# Array with element index 1 having 8 digits

a = np.array([5.05e-5, 15.6, 2.1445678e5])

print("Numpy array with scientific notation", a)

np.set_printoptions(suppress = True)

print("Numpy array without scientific notation", a)
Output:
Numpy array with scientific notation [5.0500000e-05 1.5600000e+01 2.1445678e+05]

Numpy array without scientific notation [ 0.0000505 15.6 214456.78 ]
When we pass a number that is greater than 8 characters wide, exponential notation is imposed as shown below:
Code:
import numpy as np

# Array with element index 1 having more than 8 digits

a = np.array([5.05e-5, 15.6, 2.1445678e10])

print("Numpy array with scientific notation", a)

np.set_printoptions(suppress = True)

print("Numpy array without scientific notation", a)
Output:
Numpy array with scientific notation [5.0500000e05 1.5600000e+01 2.1445678e+10]

Numpy array without scientific notation [5.0500000e05 1.5600000e+01 2.1445678e+10]
☛Method 2: Using set_printoptions() Function with .format
As in method 1, the set_printoptions() function does not work when the number has more than eight characters. That is when set_printoptions(formatter) is used to specify the options for printing and rounding. We have to set the function to print the float variable.
Python’s built-in format(value, spec) function transforms the input of one format into the output of another format defined by you. Specifically, it applies the format specifier spec to the argument value and returns a formatted representation of value. Read more about the “Python format() Function.”
Code:
import numpy as np

# Creating a NumPy array

# Array with element index 1 having more than 8 digits

a = np.array([5.05e-5, 15.6, 2.1445678e10])

print("Numpy array with scientific notation", a)

np.set_printoptions(suppress = True, formatter = {'float_kind':'{:f}'.format})

print("Numpy array without scientific notation", a)
Output:
Numpy array with scientific notation [5.0500000e-05 1.5600000e+01 2.1445678e+10]

Numpy array without scientific notation [0.000051 15.600000 21445678000.000000]
We can also format the output to only have 2 units precision by using '{:0.2f}' .format as shown below:
Code:
import numpy as np

# Array with element index 1 having more than 8 digits

a = np.array([5.05e-5, 15.6, 2.1445678e10])

print("Numpy array with scientific notation", a)

np.set_printoptions(suppress = True, formatter = {'float_kind':'{:0.2f}'.format})

print("Numpy array without scientific notation", a)
Output:
Numpy array with scientific notation [5.0500000e-05 1.5600000e+01 2.1445678e+10]

Numpy array without scientific notation [0.00 15.60 21445678000.00]
Discussion: The disadvantage of using this method to suppress the exponential notion in the numpy arrays is when the array gets a very large float value. When we try to print this array, we are going to get a whole page of numbers.
☛Method 3: Using printoptions() Function
The printoption() function is a function in the Numpy module used as a context manager for setting print options. By passing the precision as 3 and suppress as True in the printoptions() function, we can remove the scientific notation and print the Numpy array.
Note: This function only works if you use NumPy versions 1.15.0 or later.
Approach:
Import the numpy module to create the array.
Use the printoption() function inside the “with” and pass the precision value as 3 and the suppress value as True.
Print the array; it will get displayed without the scientific notation.
Code:
import numpy as np

# Creating a NumPy array

a = np.array([1, 5, 10, 20, 35, 5000.5])

print("Numpy array with scientific notation", a)

print("Numpy array without scientific notation:")

with np.printoptions(precision = 3, suppress = True): print(a)
The array2string() is a function in the numpy module that returns a string representation of an array. We can use this function to print a NumPy array without scientific notation by passing the array as the argument and setting the suppress_small argument as True. When the suppress_small argument is True, it represents the numbers close to zero as zero.
Approach:
Import the numpy module to create the array.
Use the array2string() function and pass the suppress_small argument as True.
Finally, print the array. It will get displayed without the scientific notation.
Code:
import numpy as np

# Creating a NumPy array

a = np.array([1, 5, 10, 20, 35, 5000.5])

print("Numpy array with scientific notation", a)

a = np.array2string(a, suppress_small = True)

print("Numpy array without scientific notation:", a)
Hurrah! We have successfully solved the mission-critical question in numerous ways in this article. I hope you found it helpful. Please stay tuned and subscribe for more such interesting articles.
Do you want to become a NumPy master? Check out our interactive puzzle book Coffee Break NumPy and boost your data science skills! (Amazon link opens in new tab.)
THE DAWN OF A NEW OVERWATCH - Reunite and stand together in a new age of heroes. Overwatch® 2 builds on an award-winning foundation of epic competitive play, and challenges the world's heroes to team up, power up, and take on an overwhelming outbreak of threats around the globe. A VISUAL EVOLUTION: Overwatch 2 evolves the look and feel of the world, with more dynamic environments, larger scale battles, additional in-game storytelling events, and improved atmospheric effects and shadows. Heroes in Overwatch 2 will also have a brand-new look, with greater detail and higher fidelity.
A NEW ERA OF EPIC COMPETITION
In Push, a new, symmetrical map type that will launch with Overwatch 2, teams battle to take control of a robot that begins in a central location, then push it toward the enemy base. Either team may take control of the robot at any time. The team that pushes the robot furthest onto the enemy side wins the game.
POWER UP AND SAVE THE WORLD
Play an active role in the next chapter of the Overwatch saga through a series of intense four-player missions. Fight back against Null Sector, uncover the motives behind the omnic attacks, and confront a rising wave of new threats.
YOUR MISSION CONTINUES
Your accomplishments and loot collections will be carried forward to Overwatch 2. That means you'll keep your skins, player icons, sprays, emotes, and more!
NEW MAPS AND HEROES
Current Overwatch players will battle side-by-side with Overwatch 2 players in PvP multiplayer; they'll also be able to play Overwatch 2 heroes and maps.
Introducing the Java SE Subscription Enterprise Performance Pack
Oracle brings JDK 17 Performance to JDK 8 server workloads. Drop-in replacement for JDK 8. Available now, at no additional cost, to all Java SE Subscription customers and Oracle Cloud Infrastructure (OCI) users.
Posted by: xSicKxBot - 10-19-2022, 03:08 AM - Forum: Python
- No Replies
How to Count the Number of Unique Values in a List in Python?
Rate this post
Problem Statement: Consider that you have been given a list in Python. How will you count the number of unique values in the list?
Example: Let’s visualize the problem with the help of an example:
Given: li = [‘a’, ‘a’, ‘b’, ‘c’, ‘b’, ‘d’, ‘d’, ‘a’] Output: The unique values in the given list are ‘a’, ‘b’, ‘c’, ‘d’. Thus the expected output is 4.
Now that you have a clear picture of what the question demands, let’s dive into the different ways of solving the problem.
Method 1: The Naive Approach
Approach:
Create an empty list that will be used to store all the unique elements from the given list. Let’s say that the name of this list res.
To store the unique elements in the new list that you created previously, simply traverse through all the elements of the given list with the help of a for loop and then check if each value from the given list is present in the list “res“.
If a particular value from the given list is not present in the newly created list then append it to the list res. This ensures that each unique value/item from the given list gets stored within res.
If it’s already present, then do not append the value.
Finally, the list res represents a newly formed list that contains all unique values from the originally given list. All that remains to be done is to find the length of the list res which gives you the number of unique values present in the given list.
Code:
# Given list

li = ['a', 'a', 'b', 'c', 'b', 'd', 'd', 'a']

res = []

for ele in li: if ele not in res: res.append(ele)

print("The count of unique values in the list:", len(res)) # The count of unique values in the list: 4
Discussion: Since you have to create an extra list to store the unique values, this approach is not the most efficient way to find and count the unique values in a list as it takes a lot of time and space.
Method 2: Using set()
A more effective and pythonic approach to solve the given problem is to use the set() method. Set is a built-in data type that does not contain any duplicate elements.
Approach: Convert the given list into a set using the set() function. Since a set cannot contain duplicate values, only the unique values from the list will be stored within the set. Now that you have all the unique values at your disposal, you can simply count the number of unique values with the help of the len() function.
Code:
li = ['a', 'a', 'b', 'c', 'b', 'd', 'd', 'a']

s = set(li)

unique_values = len(s)

print("The count of unique values in the list:", unique_values) # The count of unique values in the list: 4
You can formulate the above solution in a single line of code by simply chaining both the functions (set() and len()) together, as shown below:
# Given list

li = ['a', 'a', 'b', 'c', 'b', 'd', 'd', 'a']

# One-liner

print("The count of unique values in the list:", len(set(li)))
Python dictionaries have a method known as fromkeys() that is used to return a new dictionary from the given iterable ( such as list, set, string, tuple) as keys and with the specified value. If the value is not specified by default, it will be considered as None.
Approach: Well! We all know that keys in a dictionary must be unique. Thus, we will pass the list to the fromkeys() method and then use only the key values of this dictionary to get the unique values from the list. Once we have stored all the unique values of the given list stored into another list, all that remains to be done is to find the length of the list containing the unique values which will return us the number of unique values.
Code:
# Given list

li = ['a', 'a', 'b', 'c', 'b', 'd', 'd', 'a']

# Using dictionary fromkeys()

# list elements get converted to dictionary keys. Keys are always unique!

x = dict.fromkeys(li)

# storing the keys of the dictionary in a list

l2 = list(x.keys())

print("Number of unique values in the list:", len(l2)) # Number of unique values in the list: 4
Method 4: Using Counter
Another way to solve the given problem is to use the Counter function from the collections module. The Counter function creates a dictionary where the dictionary’s keys represent the unique items of the list, and the corresponding values represent the count of a key (i.e. the number of occurrences of an item in the list). Once you have the dictionary all you need to do is to extract the keys of the dictionary and store them in a list and then find the length of this list.
from collections import Counter

# Given list

li = ['a', 'a', 'b', 'c', 'b', 'd', 'd', 'a']

# Creating a list containing the keys (the unique values)

key = Counter(li).keys()

# Calculating the length to get the count

res = len(key)

print("The count of unique values in the list:", res) # The count of unique values in the list: 4
We can also use Python’s Numpy module to get the count of unique values from the list. First, we must import the NumPy module into the code to use the numpy.unique() function that returns the unique values from the list.
Solution:
# Importing the numpy module

import numpy as np

# Given list

li = ['a', 'a', 'b', 'c', 'b', 'd', 'd', 'a']

res = []

# Using unique() function from numpy module

for ele in np.unique(li): res.append(ele)

# Calculating the length to get the count of unique elements

count = len(res)

print("The count of unique values in the list:", count) # The count of unique values in the list: 4
Another approach is to create an array using the array() function after importing the numpy module. Further, we will use the unique() function to remove the duplicate elements from the list. Finally, we will calculate the length of that array to get the count of the unique elements.
Solution:
# Importing the numpy module

import numpy as np

# Given list

li = ['a', 'a', 'b', 'c', 'b', 'd', 'd', 'a']

array = np.array(li)

u = np.unique(array)

c = len(u)

print("The count of unique values in the list:", c) # The count of unique values in the list: 4
There’s yet another way of solving the given problem. You can use a list comprehension to get the count of each element in the list and then use the zip() function to create a zip object that creates pairs of each item along with the count of each item in the list. Store these paired items as key-value pairs in a dictionary by converting the zip object to a dictionary using the dict() function. Finally, return the dictionary’s keys’ calculated length (using the len() function).
Code:
# Given list

li = ['a', 'a', 'b', 'c', 'b', 'd', 'd', 'a']

# List comprehension using zip()

l2 = dict(zip(li, [li.count(i) for i in li]))

# Using len to get the count of unique elements

l = len(list(l2.keys()))

print("The count of the unique values in the list:", l) # The count of the unique values in the list: 4
Conclusion
In this article, we learned the different methods to count the unique values in a list in Python. We looked at how to do this using the counter, sets, numpy module, and list comprehensions. If you found this article helpful and want to receive more interesting solutions and discussions in the future, please subscribe and stay tuned!
Python One-Liners Book: Master the Single Line First!
Python programmers will improve their computer science skills with these useful one-liners.
Python One-Linerswill teach you how to read and write “one-liners”: concise statements of useful functionality packed into a single line of code. You’ll learn how to systematically unpack and understand any line of Python code, and write eloquent, powerfully compressed Python like an expert.
The book’s five chapters cover (1) tips and tricks, (2) regular expressions, (3) machine learning, (4) core data science topics, and (5) useful algorithms.
Detailed explanations of one-liners introduce key computer science concepts and boost your coding and analytical skills. You’ll learn about advanced Python features such as list comprehension, slicing, lambda functions, regular expressions, map and reduce functions, and slice assignments.
You’ll also learn how to:
Leverage data structures to solve real-world problems, like using Boolean indexing to find cities with above-average pollution
Use NumPy basics such as array, shape, axis, type, broadcasting, advanced indexing, slicing, sorting, searching, aggregating, and statistics
Calculate basic statistics of multidimensional data arrays and the K-Means algorithms for unsupervised learning
Create more advanced regular expressions using grouping and named groups, negative lookaheads, escaped characters, whitespaces, character sets (and negative characters sets), and greedy/nongreedy operators
Understand a wide range of computer science topics, including anagrams, palindromes, supersets, permutations, factorials, prime numbers, Fibonacci numbers, obfuscation, searching, and algorithmic sorting
By the end of the book, you’ll know how to write Python at its most refined, and create concise, beautiful pieces of “Python art” in merely a single line.








 Interesting Read:


