Posted by: xSicKxBot - 11-05-2019, 01:40 PM - Forum: Windows
- No Replies
New tool gives people a powerful way to build expertise
Developing a master plan to transform John F. Kennedy International Airport in New York. Replacing a double-deck road with a massive tunnel in Seattle. Keeping beachgoers safe from polluted waters in New Zealand with advanced analytics.
Those are just a few of the thousands of complex projects delivered each year by Mott MacDonald, a global engineering, management and development consulting firm headquartered in London. With 180 principal offices in 50 countries, the company helps solve some of the world’s most urgent social, environmental and economic challenges.
Because Mott MacDonald doesn’t create physical products, its success relies on the knowledge and expertise of its 16,000 employees. To help them share and learn more easily, the company uses Project Cortex, a new service in Microsoft 365 that is part of Microsoft’s vision to transform knowledge and help people learn and grow their skills and expertise.
Simon Denton, productivity applications architect at Mott MacDonald.
Announced this week at Microsoft Ignite, Project Cortex uses artificial intelligence to create a knowledge network that automatically connects and organizes organizations’ content into topics and generates topic cards, wiki-like “topic pages” and other new experiences in Microsoft 365.
The experiences will appear seamlessly in familiar tools like Office, Outlook and Microsoft Teams to help people find information, learn quickly and get up to speed faster within the apps they use every day. When employees see an unfamiliar acronym or project in email or chat, for example, they’ll be able to hover on the word and pop out a topic card with a description and related experts, documents and videos. A click on the card will call up a topic page, curated by AI and experts, with richer information like diagrams that link related and adjacent topics.
These capabilities “are going to further enhance our ability to reach our business goals with quicker access and connection to colleagues and their expertise — what we call our connected thinking,” says Simon Denton, Mott MacDonald productivity applications architect. “They’re going to help us build an even stronger knowledge network so people can have the right knowledge at the right time to deliver more excellent project outcomes for our clients. It’s going to be brilliant.”
The company already organizes its many experts and vast business knowledge into 47 communities that cover aviation, bridges and other practice areas. It began building its initial knowledge management system a few years ago to classify content in SharePoint and add people to Yammer groups based on interest.
Project Cortex, currently in private preview, will give Mott MacDonald even more advanced capabilities. Already secure and compliant, the product will allow automated policies based on precise document tags for added security. Its knowledge experiences, which build on an organization’s existing SharePoint content services, will permeate everyday work tools in Microsoft 365 and could one day include learning content from such platforms as LinkedIn Learning.
The solution will have powerful capture technology to make ingested content smarter. Powered by AI, it can extract information from structured content like forms, receipts and invoices. With machine teaching – having experts teach the AI how to respond – Project Cortex can also pull information from unstructured content like legal contracts and employee agreements.
It then adds metadata and classifies the documents into topics, automatically doing tasks that are traditionally manual and slow.
“We’re really excited about that,” says Denton. “We’re already talking about processing 30 years’ worth of drawings with good information on how something was built and how it needs to be maintained for the future. It’s going to unlock a lot of latent knowledge.”
The knowledge vision
Scheduled for general availability in the first half of 2020, Project Cortex is the first new product to emerge from Microsoft’s knowledge vision, which includes new capabilities in other Microsoft 365 services such as Yammer, for communities of practice; Microsoft Stream, for intelligent video creation and sharing; and Workplace Analytics, for organizational insights.
As a longtime concept for organizing and re-using information, knowledge management has never fully solved the challenges it seeks to address due to disconnected information silos, technical limits and clunky end-user experiences, says Seth Patton, general manager of Microsoft 365 marketing.
But demand for knowledge has become particularly timely due to sweeping changes in the workplace. Automation, gig economies, flex work, skills shortages and retiring baby boomers have heightened the need for organizations to retain knowledge, share it with employees and help them learn new skills and expertise faster, Patton says.
“Business leaders and CEOs are recognizing the importance of their people’s skills and talent in their organizations’ ability to succeed,” he says. “It’s a recognition that upskilling and learning are the new workplace competitive advantage.”
Personal assistant Laura Smith talks with civil apprentice Shey Sewell at Mott MacDonald offices in London.
Microsoft’s advances in AI and machine learning, SharePoint’s massive cloud content repository, the intelligence of the Microsoft Graph and integration with Office 365 apps have helped overcome previous challenges in knowledge management to help customers solve unmet needs.
“All of us have had the experience of joining a new project, team or company,” Patton says. “It takes a long time to understand the language before you can contribute and participate. With Project Cortex you can get up to speed quickly and start contributing right away.”
Microsoft Search will also integrate Project Cortex, so people will be able to find topic cards and knowledge pages when they search. Microsoft Search is an important component in the company’s knowledge vision, bringing a unified, intelligent search experience across Microsoft 365 and Bing. It also extends to externally connected content, such as file shares. As content is crawled, it’s added to the knowledge network.
As video becomes an increasingly powerful way to capture and share knowledge, Microsoft Stream applies AI to provide automatic transcription for things like recorded meetings. AI-powered voice enhancement helps reduce background noise so people can better focus on what was discussed, and they can also now create short videos from mobile devices to share in Teams and Yammer.
More than a decade after it was created, Yammer has been completely redesigned with dozens of new capabilities, as well as new integrations with Teams, SharePoint and Outlook. These new features allow people to connect and share knowledge across teams and geographic locations.
Mott MacDonald connects people in Yammer communities that span 47 practice areas so they can share knowledge, ask questions and get answers.
As another way Microsoft 365 helps people share knowledge, Workplace Analytics provides business leaders insights into how people collaborate and spend their time with new self-service dashboards. These insights provide the context of industry benchmarks, as well as AI-driven analyses of business processes and networks of people.
An example of a topic card in Outlook.
This information can help identify high-performance trends such as close relationships between effective salespeople and engineers, or correlations between good onboarding experiences and more managerial one-on-ones. Leaders can then encourage and replicate similar patterns elsewhere.
The solutions are designed to be easy-to-use, customizable solutions. For the new Project Cortex, AI does the behind-the-scenes “heavy lifting” of mining and collecting useful, internal information, says Naomi Moneypenny, Microsoft director of content services and insights. Then experts can edit, update and add content to make sure knowledge pages are current and relevant.
“Our goal is to put intelligent content and knowledge services into the flow of the work you do every day to help you find the information you need, discover what you want and make your business processes more efficient,” says Moneypenny, who leads the Project Cortex product team. “All while enhancing and enforcing your security and compliance policies.”
At Mott MacDonald, Project Cortex will help build stronger connections across the company’s large, global communities and deliver timely information that helps employees create solutions to many complex challenges, build expertise and save time, all while enhancing service to customers, Denton says.
“I’m really excited by Microsoft’s vision for creating Project Cortex,” he says. “It fits completely with our strategy for knowledge networks. The idea of connecting people to content and content to people and building this network out, powered by Microsoft 365 — it’s going to be a game-changer for us.”
Lead image: From left to right, civil engineer James Balla, project principal Jonathan Hine and civil engineer Cleopatra Meade work together at Mott MacDonald offices in London. (Photos by Mark Mercer)
Nintendo has been sharing these pesky brain teasers over the last few weeks, building up to the game’s 8th November release. If you’re looking forward to picking up a copy for yourself, why not try these out for size as a little bit of practice? Good luck, though. You’re probably gonna need it.
Puzzle 1
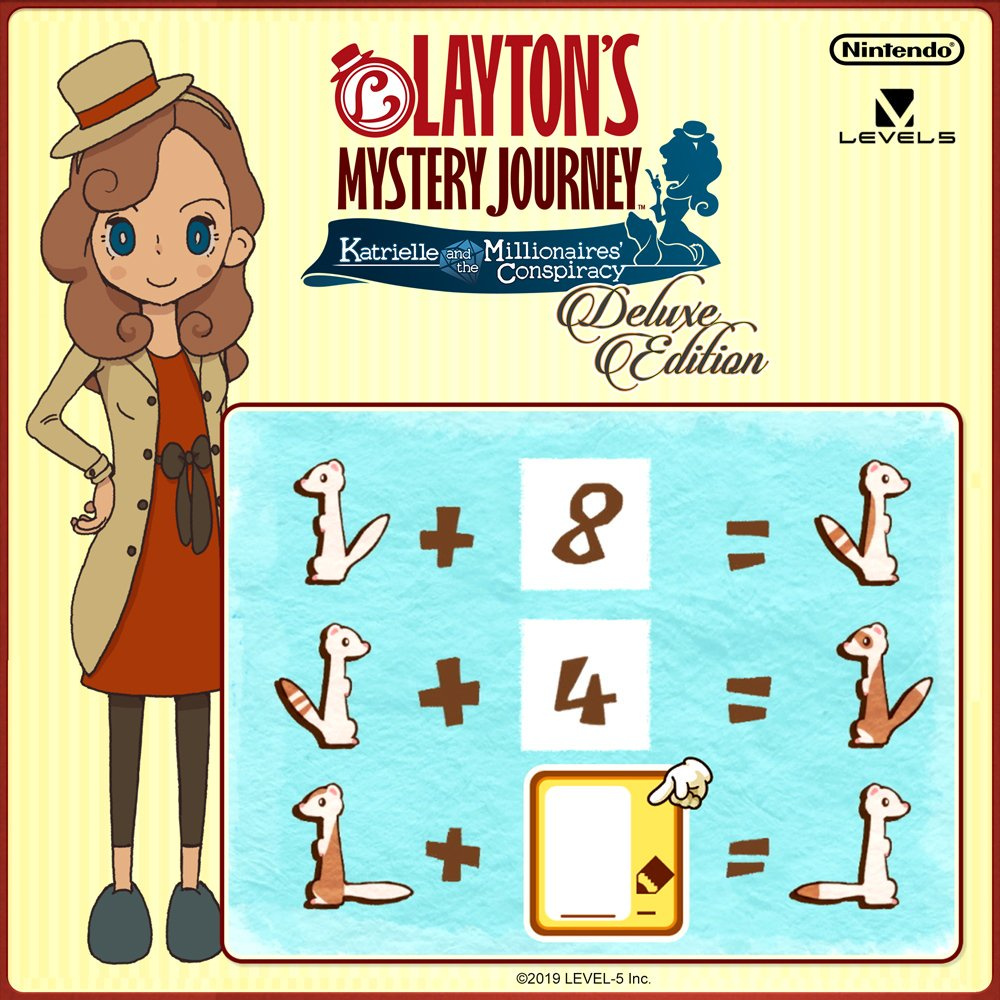
Look closely at these weaselly sums – can you work out what the missing number is?
Puzzle 2
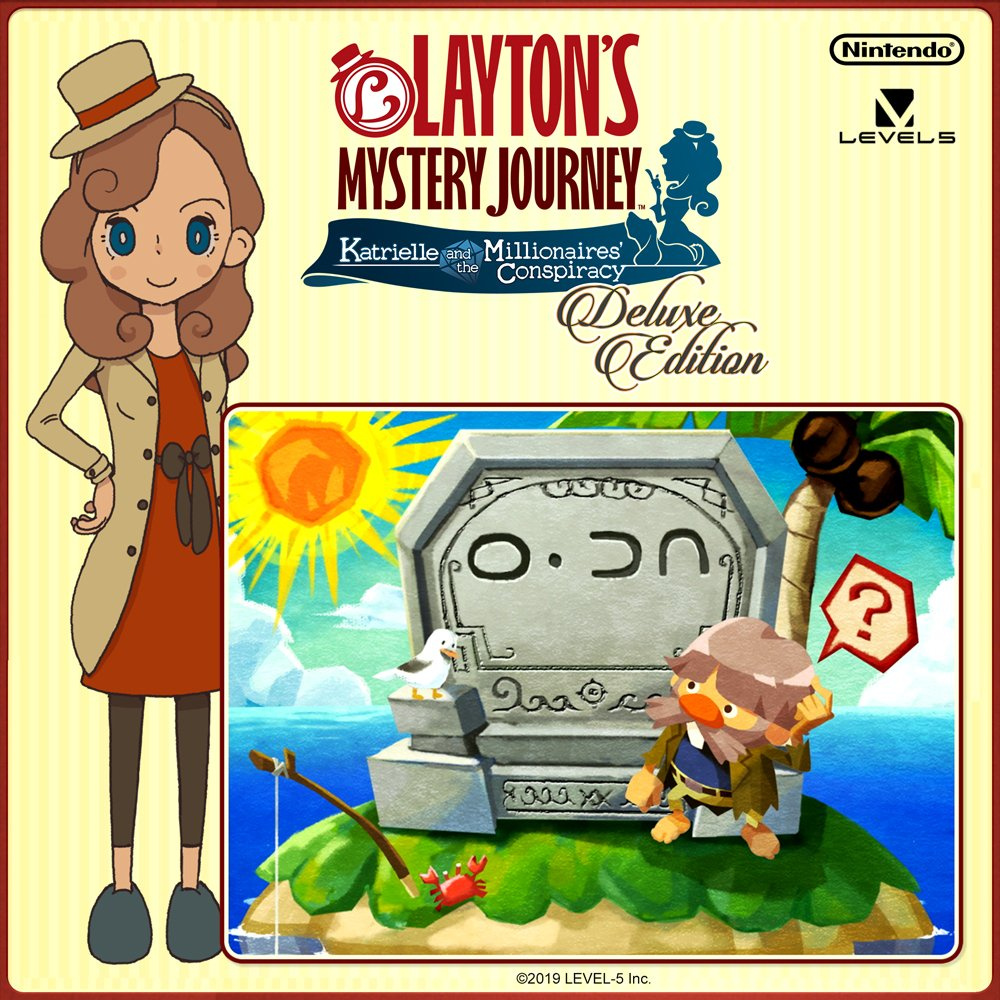
This island is submerged under the waves every day, at the time displayed on this mysterious monument. At what time does the island sink?
Puzzle 3
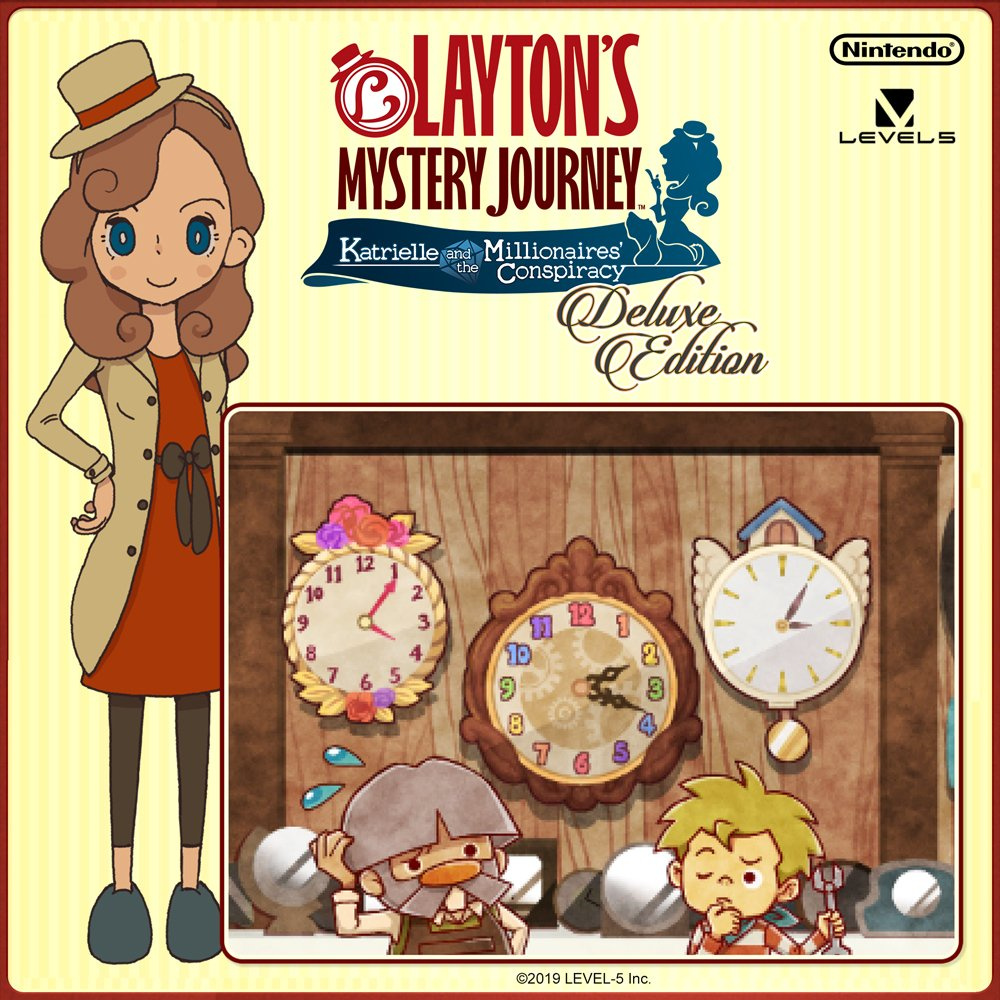
These clocks read 4:05, 2:18 and 3:05. One is 32 minutes fast, another is 28 minutes slow and the remaining one is broken. What time is it in this scene?
Puzzle 4
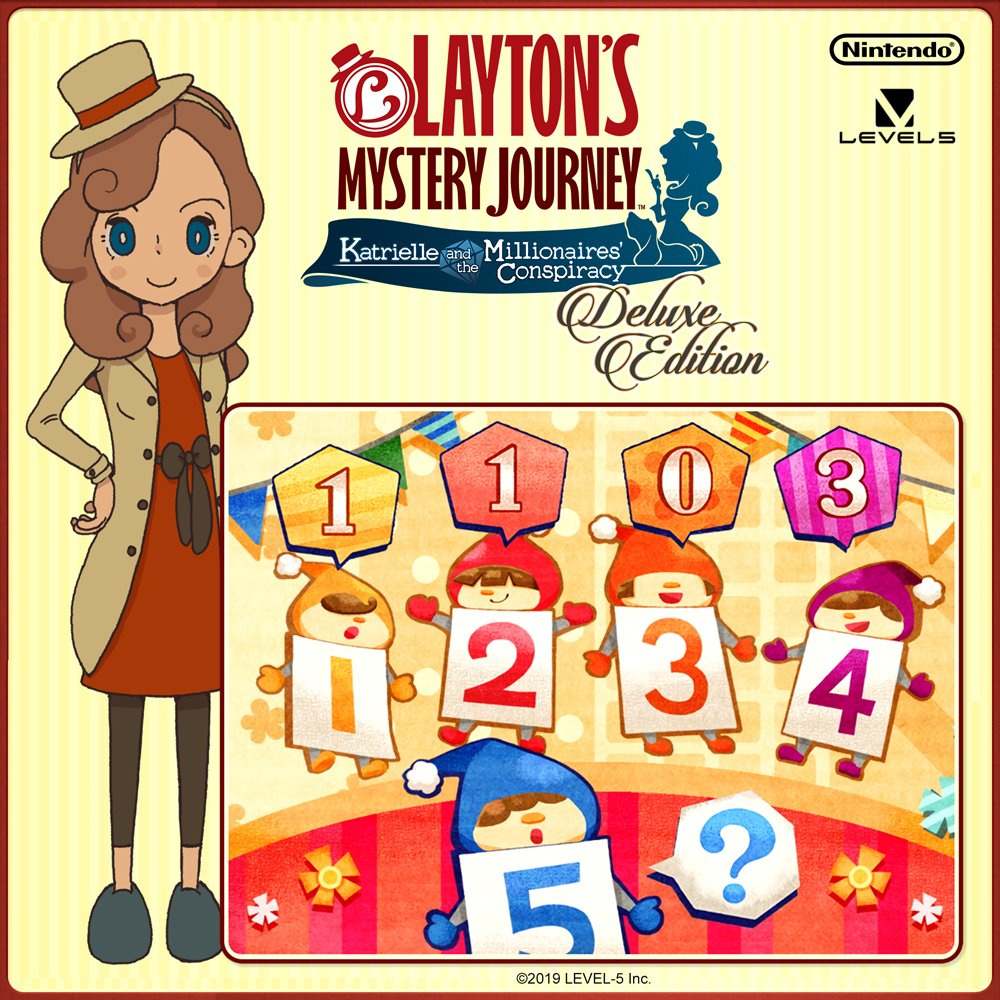
Look at the boards these characters are holding. If ‘1’ has one, ‘2’ has one, ‘3’ has none and ‘4’ has three, how many does ‘5’ have?
Think you’ve solved them? Go ahead and post your answers (and your reasoning!) in the comments below. If you’re stuck, don’t worry – these had us stumped for a good while, too!
Alongside the BlizzCon festivities and announcements like Overwatch 2 and Diablo 4, Blizzard unveiled a newly revamped version of its game launcher, Battle.net. The new version is now available in beta and makes some significant UI improvements to the app.
The most obvious change is to the game selection, which is now represented by icons across a horizontal bar, leaving more vertical space for a friends list and game detail menus. According to the announcement, the increased access to friend chats is a direct response to user feedback. It also shows more recent updates and highlights for new games.
The beta is up for anyone who has opted in to test Battle.net updates. If you want to be a part of these tests, you can opt in by going to the Beta menu under Settings in the desktop app.
The Godot open source game engine is growing at a massive rate. To properly manage that growth and to set expectations of community behaviour, Godot have released a code of conduct.
From the Godot blog, details of why they created a code of conduct:
During the past five years of free and open source, collaborative development, we’ve been blessed with one of the best-behaved online communities that I have been in contact with. The vast majority of users on all our community platforms dearly care both for the Godot project itself, but also for all their fellow participants.
Yet there are occasional outliers, and to properly moderate an ever growing community (more than doubling in size each year) we need a written statement for the de facto guidelines that our moderation teams have applied until now. This will give users a clear overview of our expectations for positive and respectful behavior. Community moderators, who are also participants donating their free time to ensure a safe environment for all users, will therefore be able to back their decisions with common guidelines.
Posted by: xSicKxBot - 11-05-2019, 06:15 AM - Forum: Lounge
- No Replies
This Week At Bungie – 10/31/2019
This week at Bungie, we’re hosting a celebration.
Festival of the Lost has been unleashed on the Tower. Cobwebs are everywhere, black cats are on the prowl, and every vendor has some candy for you to enjoy. Eva Levante went all-out this year on decorations and brought some new masks for you to earn. While candies and treats are readily available, you also have the BrayTech Werewolf to earn, packing the multikill clip punch.
The Tower isn’t the only place that’s a bit spookier. There’s been an uprising on the Moon, and Eris is calling on you to challenge the Hive in the Altars of Sorrow and the Pit of Heresy.
Xenophage made its grand entrance, bug and all. We’ve seen Guardians cracking the puzzle and claiming their Exotic in real time, but it isn’t the only new weapon for you to add to your arsenal. We’ve got some Hive-infused weapons that not only look mean, but back it up with some serious firepower.
If you’re wanting to take on opposing Guardians with a bit more lethality, Momentum Control has arrived. Fast respawns, quicker kills, and ability regeneration tied to the defeat of your opponents. Get out there and make Shaxx proud.
So, now that we’ve covered everything that went live on Tuesday, let’s see what else is on the calendar: A charity, a costume contest, a hotfix, a bounty, and more are inbound.
Trick or Treat!
Even with everything going on, we can take a moment to appreciate the little things in life. A bit of humor in the face of fear. Eva Levante is hosting the Festival of the Lost this year, and we have another opportunity for players to earn the Levante Prize. Throw on a mask, embrace your inner darkness, and join us in celebrating Festival of the Lost 2019.
Want to participate? Here’s how:
Create a costume for your Guardian and strike a pose in the perfect setting.
Snap a screenshot in any Destiny 2 destination or activity.
Play with shaders and armor combinations for the spookiest outcomes.
We’ll retweet our favorites from @Bungie and grant winners the Levante Prize.
If you do win, make sure you give us Bungie.net profile links so we can deliver the emblems!
While we’re all for fun and games, we’d love for you to try and scare us while you’re at it. Bonus points to those who do.
Pinnacle Hotfix Inbound
Destiny 2 Hotfix 2.6.1.1 is tentatively planned for Thursday, November 7. It contains some quality-of-life fixes for the sandbox and Season Pass weapon acquisition. One of the more major changes deals with your pursuit of pinnacle Power. While we’ll be providing a patch note preview below, we have some words from the team on our initial goals for pinnacle Power and why we’re making some adjustments.
Dev Team: When we designed the pinnacle band of Power for Season 8, our intent was to provide an aspirational progression that reflects participation in some of the more difficult and time-limited content of Destiny 2. This was meant to be a slower progression than the powerful reward band, but one that wasn’t a gateway to accessing content.
We’re not hitting our goals for the availability of rewards in all slots for the pinnacle-level rewards. You may have experienced getting duplicate Energy weapon drops from these sources, which is compounded by the need to get a drop in all slots in order to gain enough Power to raise your character’s overall Power by 1. To mitigate this, we have increased the Power granted by pinnacle rewards to +2 instead of +1.
Once this change goes live, only four slots will be needed to increase your character’s average Power, at which point your powerful rewards will allow those slots that you might have missed to catch up. Our goal is that the pinnacle band remains a reward for tackling the more prestigious challenges, but takes some of the sting away from receiving multiple drops in the same slot. We appreciate all the feedback that we’ve received on this, we and hope to hear more from you on how this band of progression feels with the new change.
PLEASE NOTE: As this change is currently planned for next Thursday, players should wait to earn their pinnacle rewards until this hotfix is available so they can take advantage of the +2 change.
Alongside the changes to pinnacle rewards, we’re also adding the Season Pass weapons (Pluperfect and Temporal Clause) as possible rewards from the Vex Offensive activity. While players may currently unlock the chance for these weapons to drop with random rolls from the Crucible, Gambit, and strikes, we wanted to add them to another activity to give players more agency in earning random rolls.
Additionally, we’ve developed a fix for ashes to assets to prevent Telesto from being the absolute best-o, where players could earn their Supers far more quickly than intended.
Stay tuned to @BungieHelp for updates on the exact time and date of this hotfix.
Iron Fright
Amid all this excitement, Lord Saladin wanted to get in on the action. The Iron Banner returns next week, bringing Power-enabled combat back to the Crucible. With a handful of bounties in tow, you’ll have opportunities to earn the Iron Will armor set, along with some pinnacle-tier rewards.
Iron Banner Control
Starts: 9 AM Pacific on November 5
Ends: 9 AM Pacific on November 12
Note: You may be thinking “Wait, 9 AM? What’s going on here?” – Day Light Savings ends this weekend for us in the states. I know, it’s confusing. I don’t really know why it happens either. You can find more information in the Player Support Report later in this very article.
Earlier this week, Destiny 2 Update 2.6.1 introduced changes to Heavy ammo spawning in the Crucible. The following change will also be present within the Iron Banner:
Heavy ammo initial spawn changed to 60 seconds (was 45 seconds)
Heavy ammo additional spawning changed to every 120 seconds (was every 60 seconds)
Now, to make sure we say it again, we are currently planning a hotfix that will increase pinnacle reward Power gains next Thursday. We highly recommend that players wait to redeem any Iron Banner bounties which reward pinnacle gear until the hotfix has been applied.
We also fixed an issue in 2.6.1 that was causing the Iron Banner bounties to reset daily. Players will have four bounties to complete throughout the week.
Regicide
If you follow your community news, you know that Gothalion is on the move to a new streaming platform. To ensure a nice, warm welcome in his new home on Mixer, we’re inviting the internet to hunt him down in the Crucible. We’ve placed a Bungie Bounty on his head! It seemed like the neighborly thing to do…
Bungie Bounty—King Gothalion
Saturday, November 2, 10 AM–Noon Pacific
Momentum Control on PC
Festival of the Lost has introduced a new competitive mode in the Crucible. If you play on PC, that’s your hunting ground. The rules are simple: Match with Gothalion, as either a teammate or an opponent, and win. The game must be played on his stream during the two hours allotted. To the victors go the new Bungie Bounty emblem.
This is a housewarming party and you’re all invited to attend. Bring snacks and ammunition. This is one of those rare occasions in which stream sniping is encouraged!
Charitable Endeavors
This week was also host to the inaugural Game2Give charity event, supporting the Bungie Foundation’s iPads for Kids program and Children’s Miracle Network Hospitals. We’ve been blown away by the community involvement, as we’ve raised nearly 1 million in donations from Guardians around the world. The charity is still going, and this weekend continues the event with DCPLive, joined by special guest Pete Parsons!
This Saturday, Nov. 2nd at Noon Pacific join DCP & WTFGameNation as we raise money for Seattle Children’s Hospital with special guest, Bungie CEO Pete Parsons! Donate below: pic.twitter.com/CiInJTg04y
As a reminder, we have a few incentives for each donation, 100% of which goes to the charity!
A $10 donation will earn you the NEW Mist Blossoms emblem.
A $50 donation will earn you both the Mist Blossoms emblem and our first-ever Charity Ghost, the Gilded Shell Exotic Ghost.
A $100 donation will earn you both items above and enter you to win an item from the Bungie Prize Pool.
Forge Wardens
Two-Six-One was our most recent update. We’ve got a slew of changes that have gone live, but it seems that the Izanagi’s Burden quest line continues to evade some players. Destiny Player Support is on the case, bringing the most up-to-date information on what we’re tracking.
This is their report:
Izanagi’s Burden
Earlier this week, we deployed Destiny 2 Update 2.6.1 to players. With this update, we resolved an issue that was preventing a subset of players from completing the Mysterious Box quest to receive Izanagi’s Burden.
Following this update, however, new issues have emerged which block progression further down the line for this quest. Specifically, Destiny Player Support is tracking the following two issues:
Players are not receiving progress when redeeming forge keys.
Players are not receiving progress for the Obsidian Crystal received from rare Black Armory bounties.
These issues are currently under investigation, to be addressed in a future update. Players who are encountering other issues with Black Armory forges or the Mysterious Box quest should report to the #Help forum.
Festival of the Lost
This week, Festival of the Lost returned in Destiny 2. Eva Levante has made sure that this Festival is open to all.
For anyone joining us in progress, let’s review the entry requirements outlined last week:
Brand-new players who go through the New Light experience must achieve at least 770 Power before Eva Levante will beckon them with her Festival of the Lost introductory quest. If these players are lower than 770 Power, they will not be able to interact with Eva Levante at all.
All veteran players, including those who were boosted to 750 Power at the launches of New Light and Shadowkeep, may head directly to Eva Levante to begin her quest.
Don’t forget to wear your favorite mask when completing activities around the solar system. Wearing a mask is required in order to earn candy and Chocolate Strange Coins.
Lastly, this year’s Festival of the Lost will conclude at the weekly reset on November 19. Players looking for more information on Festival of the Lost should see our official guide.
Destiny 2 Known Issues
In addition to issues with the Mysterious Box quest tracked above, Destiny Player Support is investigating the following issues to emerge in Destiny 2:
Players may intermittently experience delayed loot drops and/or pursuit progression. If a player is at activity completion and has not yet received their loot, they should make sure they do not return to Orbit early.
If a Cabal Scorpius Turret Daemon falls off the map in the Haunted Forest, it will not be killed and won’t respawn, halting progress. Players will have to wait out the remaining time to collect rewards, or return to Orbit and restart the activity.
Following the launch of Destiny 2 Update 2.6.1, we monitored elevated ANTEATER, MONKEY, and WEASEL errors. At this time, issues causing these elevated errors are expected to be resolved. For the latest information on the state of Destiny services, players should follow @BungieHelp on Twitter or monitor our support feed at help.bungie.net.
Daily and Weekly Reset Time Change
Beginning this Sunday, November 3, Daylight Savings Time in the United States will end. This means that Destiny 2’s reset time will change to 9 AM PST (1700 UTC) through March 2020.
Untitled Princess Carolyn Project
In the process of creating a masterpiece, projects often undergo multiple names before settling on a final title. x360_Noscope_Blazex may have been your first file name, but eventually you settled on “Awesome Headshot Montage MOTW Submission.”
There’s no shame in that. Let’s see who the winners are for this week.
Movie of the Week: You’re a wizard, Wumbo!
Honorable Mention: “I spent two hours playing Tire game and didn’t get a perfect score on Wednesday so this MOTW submission actually makes me kind of angry.” —dmg04
Honorable Mention: D2 Drop Edit
If you’d like to throw your project in the ring for the chance at a sweet emblem, head over to the Community Creations page.
It’s been a while since I’ve had the driver’s seat on a TWAB. It’s good to be back. What’s your favorite weapon that’s come from Shadowkeep so far? Shoot me a tweet, sound off with your favorite rolls. I just earned some sweet bread last night…
Pac-Man Turns 40 Next Year And Bandai Namco Plans To Celebrate In Style
Believe it or not, next year will see the 40th anniversary of gaming classic Pac-Man, and Bandai Namco is planning a year-long series of celebrations in honour of the ravenous yellow blob.
Pac-Man first appeared on the scene on 22nd May 1980, rising to fame as an arcade star before shifting to games consoles, mobile devices, and even Google Maps. Now you’ll find the series’ titular character appearing in games like Super Smash Bros. Ultimate, sitting side-by-side with some of gaming’s most iconic stars.
A website has been set up to keep track of the celebrations, promising “activities, partnerships, and surprises” which will appear all throughout next year. Things have kicked off slightly early, though, with the official Pac-Man 40th-anniversary theme song called ‘Join the PAC’ already being released. You can check it out below; it was composed by the famed Japanese techno producer, DJ. Ken Ishii.
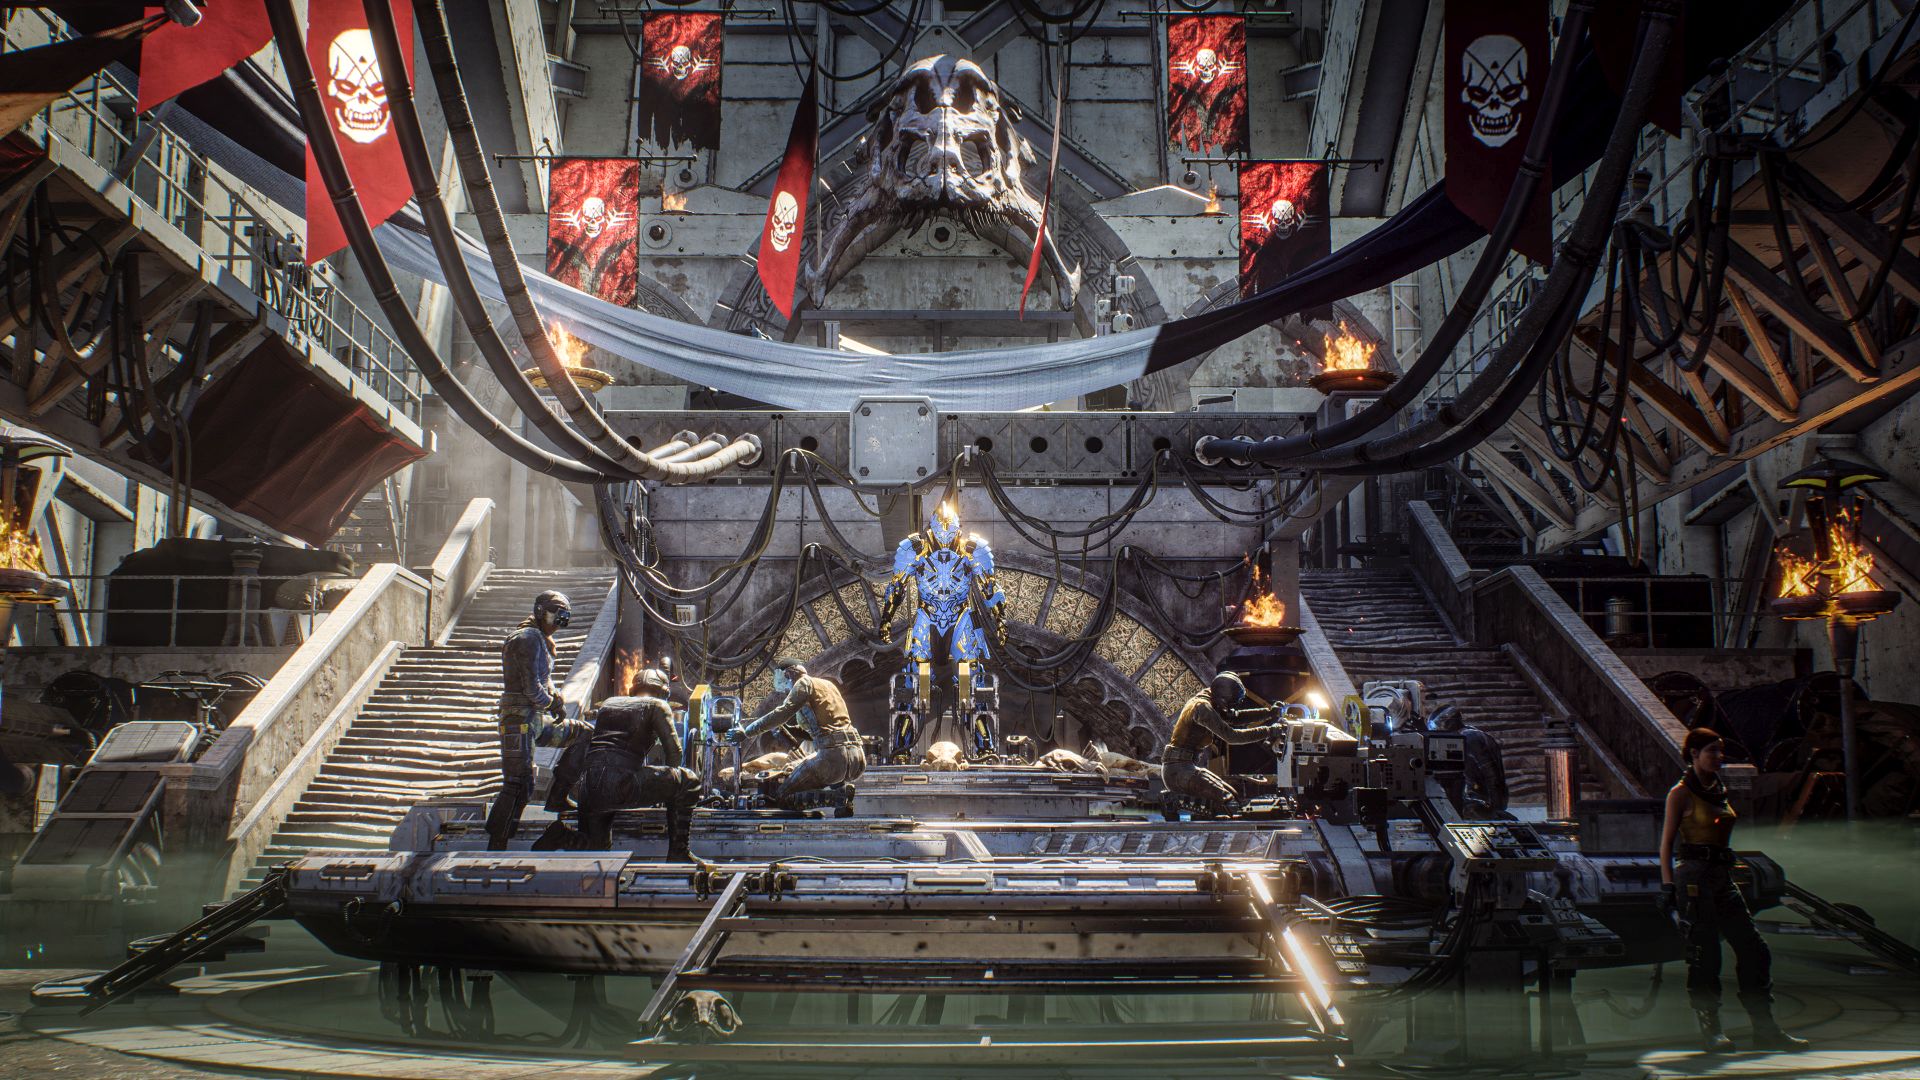
The world of Anthem is filled with dangers – both known and unknown – lurking in every shadowed corner and around every bend. So when a mysterious fog creeps through the jungle and strange sounds are heard in the distance, you’d expect the residents of Bastion to cower behind the tall, protective walls of Fort Tarsis. Instead, they rise up and face the darkness – and a select few don their javelin exo-suits to fly straight into its path. Will you join their ranks? If so, read on and discover what awaits you in the new Season of Skulls!
What is the Season of Skulls?
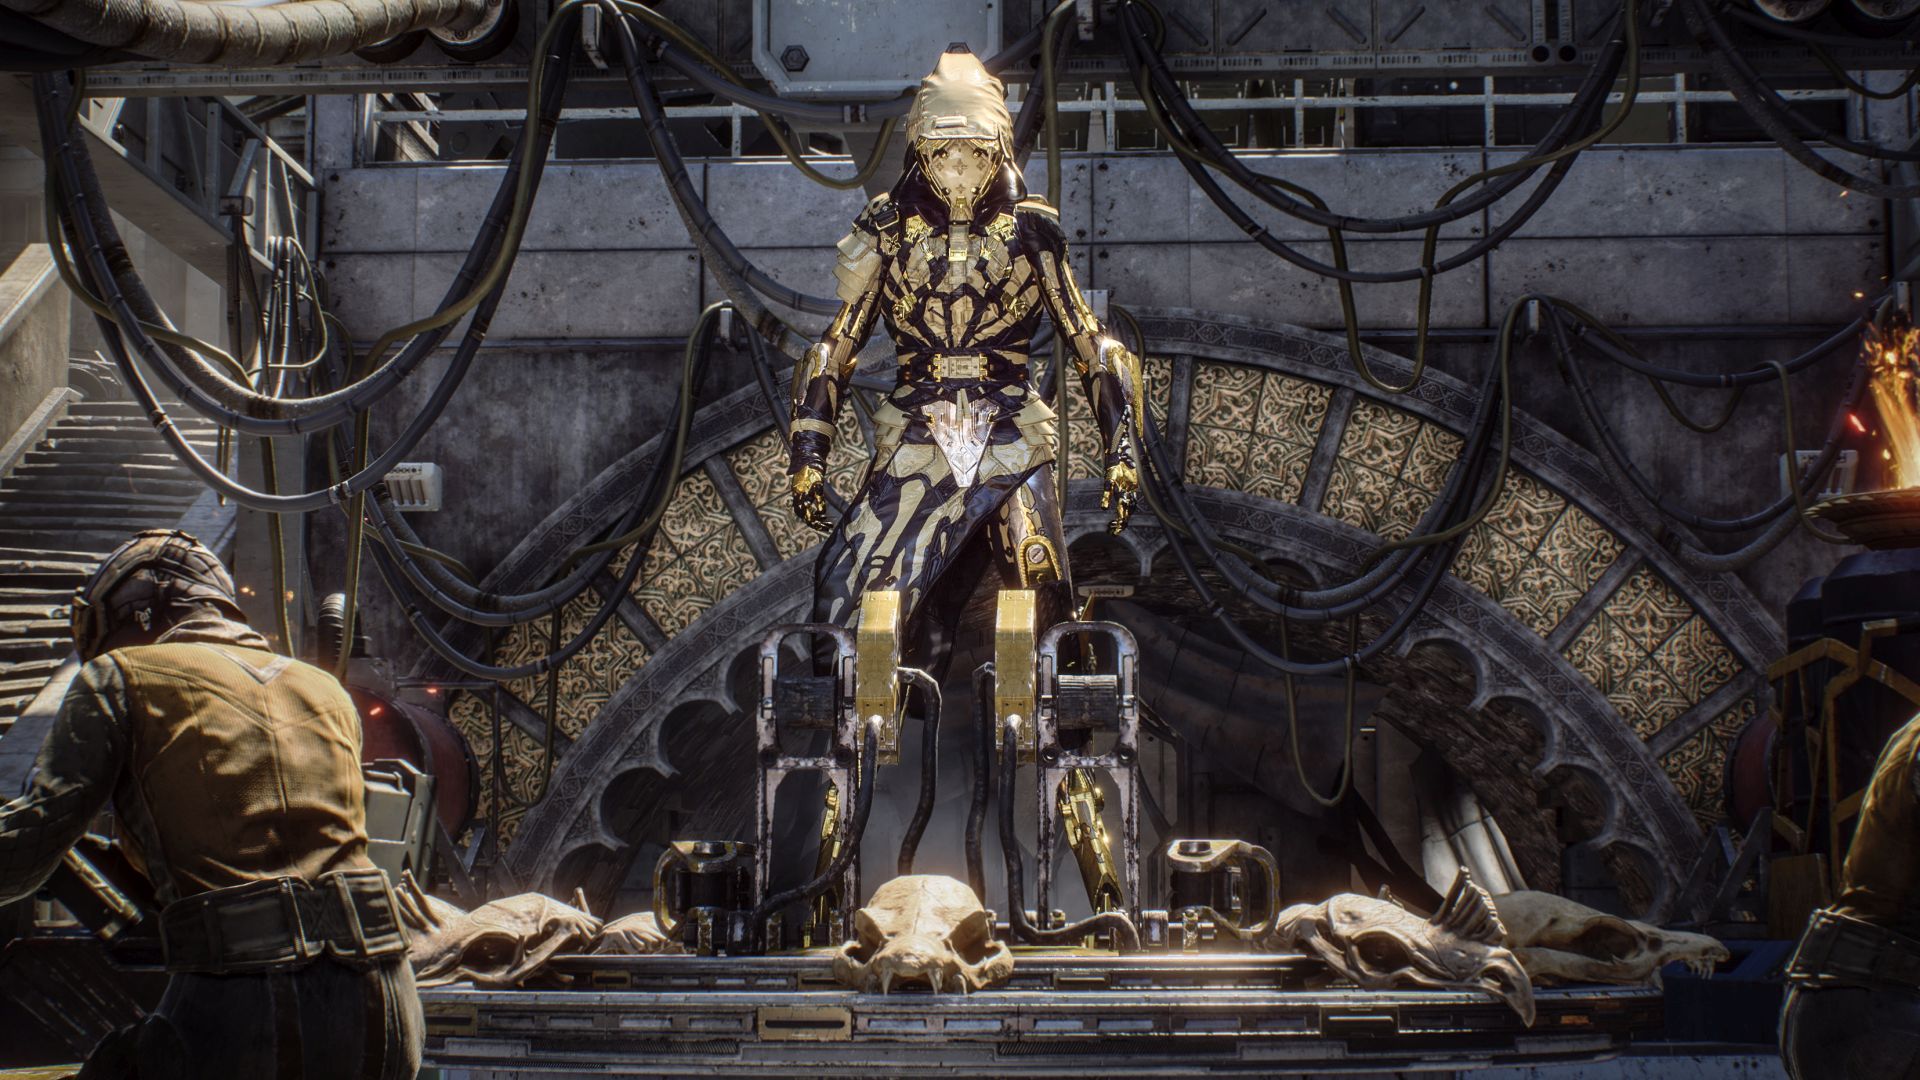
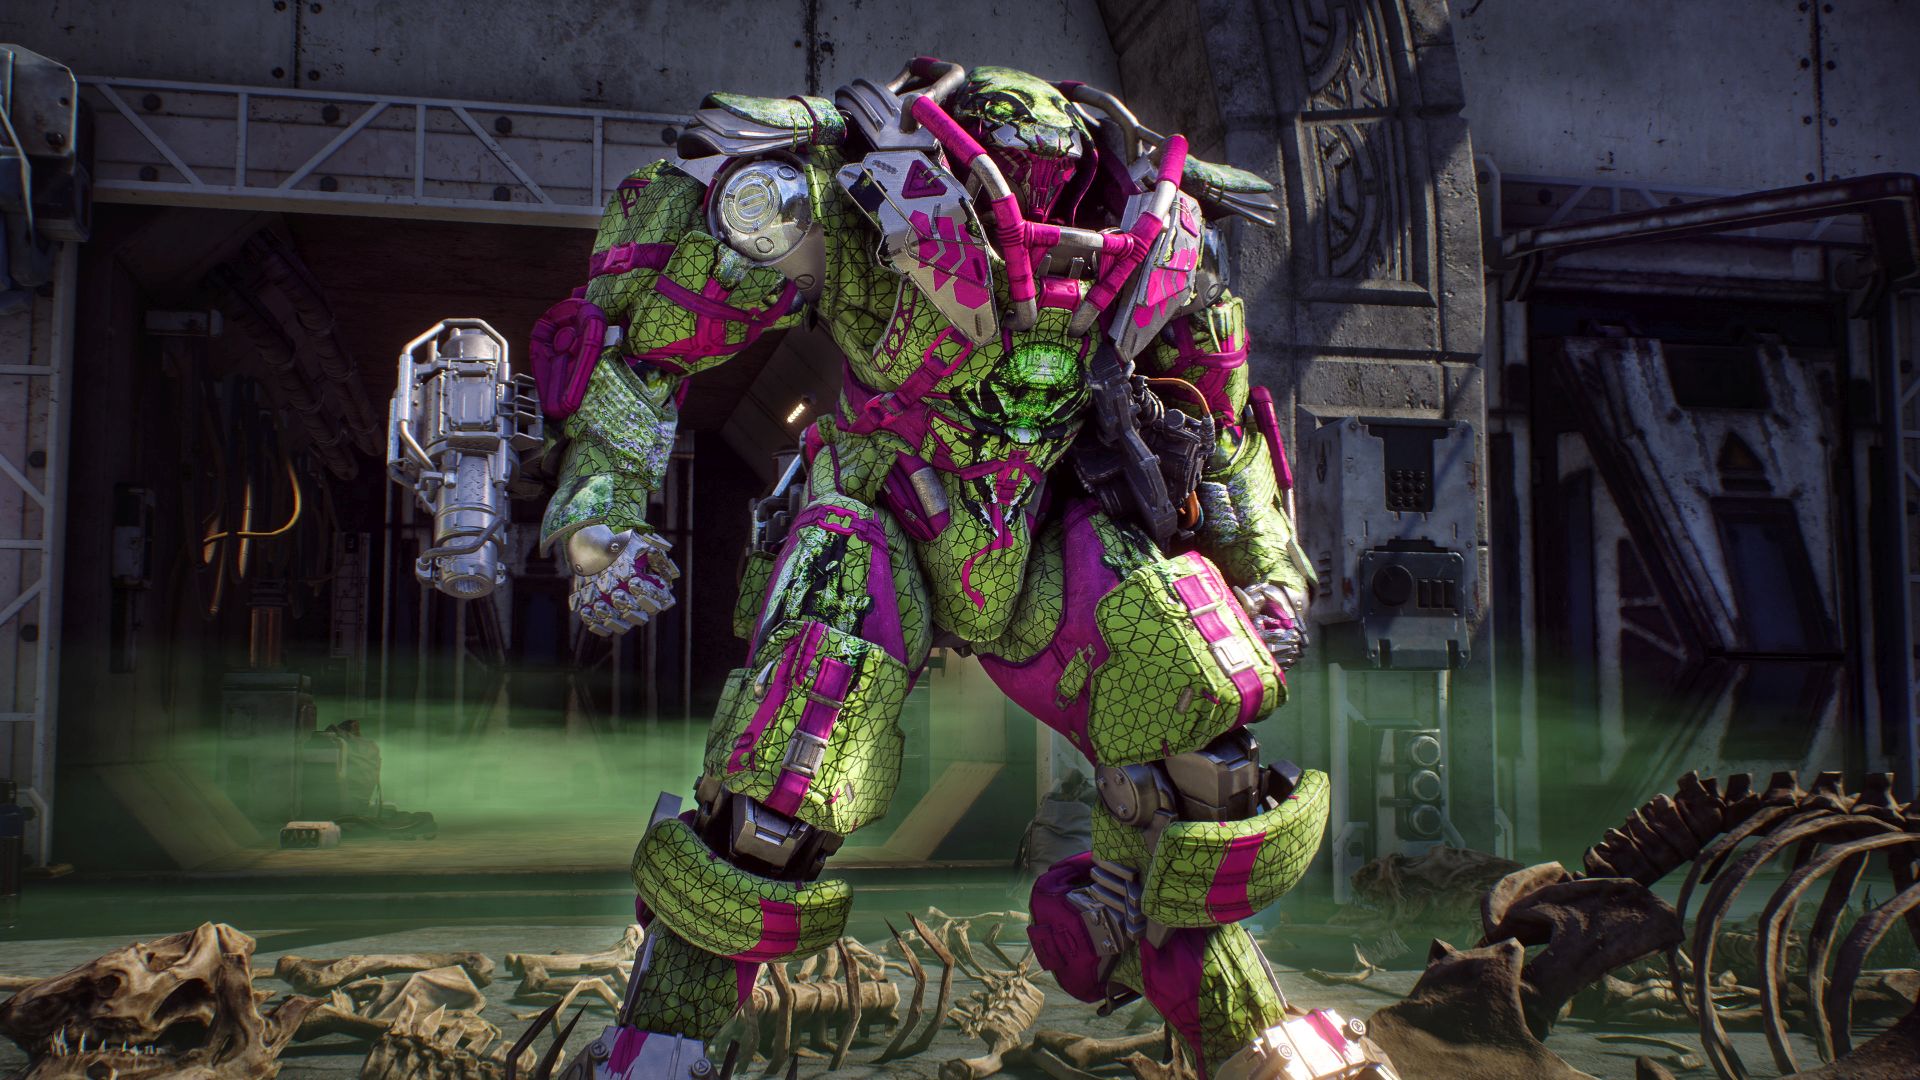
This themed, season-long event gives players a chance to face unique challenges and claim awesome rewards. Fort Tarsis will be decorated with the massive skulls of some of Bastion’s most fearsome beasts and lit with huge celebratory bonfires. What else can you find within the fort’s walls? Spend a little time exploring and you may uncover some intriguing secrets about the season!
Risks and Rewards
When you’re ready to suit up and head out into the misty jungle, you can choose to take on tough arenas or mysterious Anomalies to gain points, the season’s Crystal in-game currency, and a variety of rewards. To start your adventure choose either the “Season of Skulls” option on the Game Modes menu to begin a timed arena run or “Freeplay” (if it’s been unlocked) to face faction-themed (Arcanist, Freelancer, or Sentinel) Anomalies.
Arenas require a good strategy to truly master, especially if you want to maximize your score. Higher scores mean a place on global leaderboards – where you can show off to your fellow Freelancers – and more Crystals to spend on War Chests and other items at the seasonal store (Herschel’s Hut).
Arenas are also subject to Inversions, modifiers applied by the game every week that change how you play. One week your weapons could do twice as much damage, or picking up ammo might increase your shields. Inversions are meant to change the way you play, rewarding different gameplay styles, but they won’t ultimately impact your score.
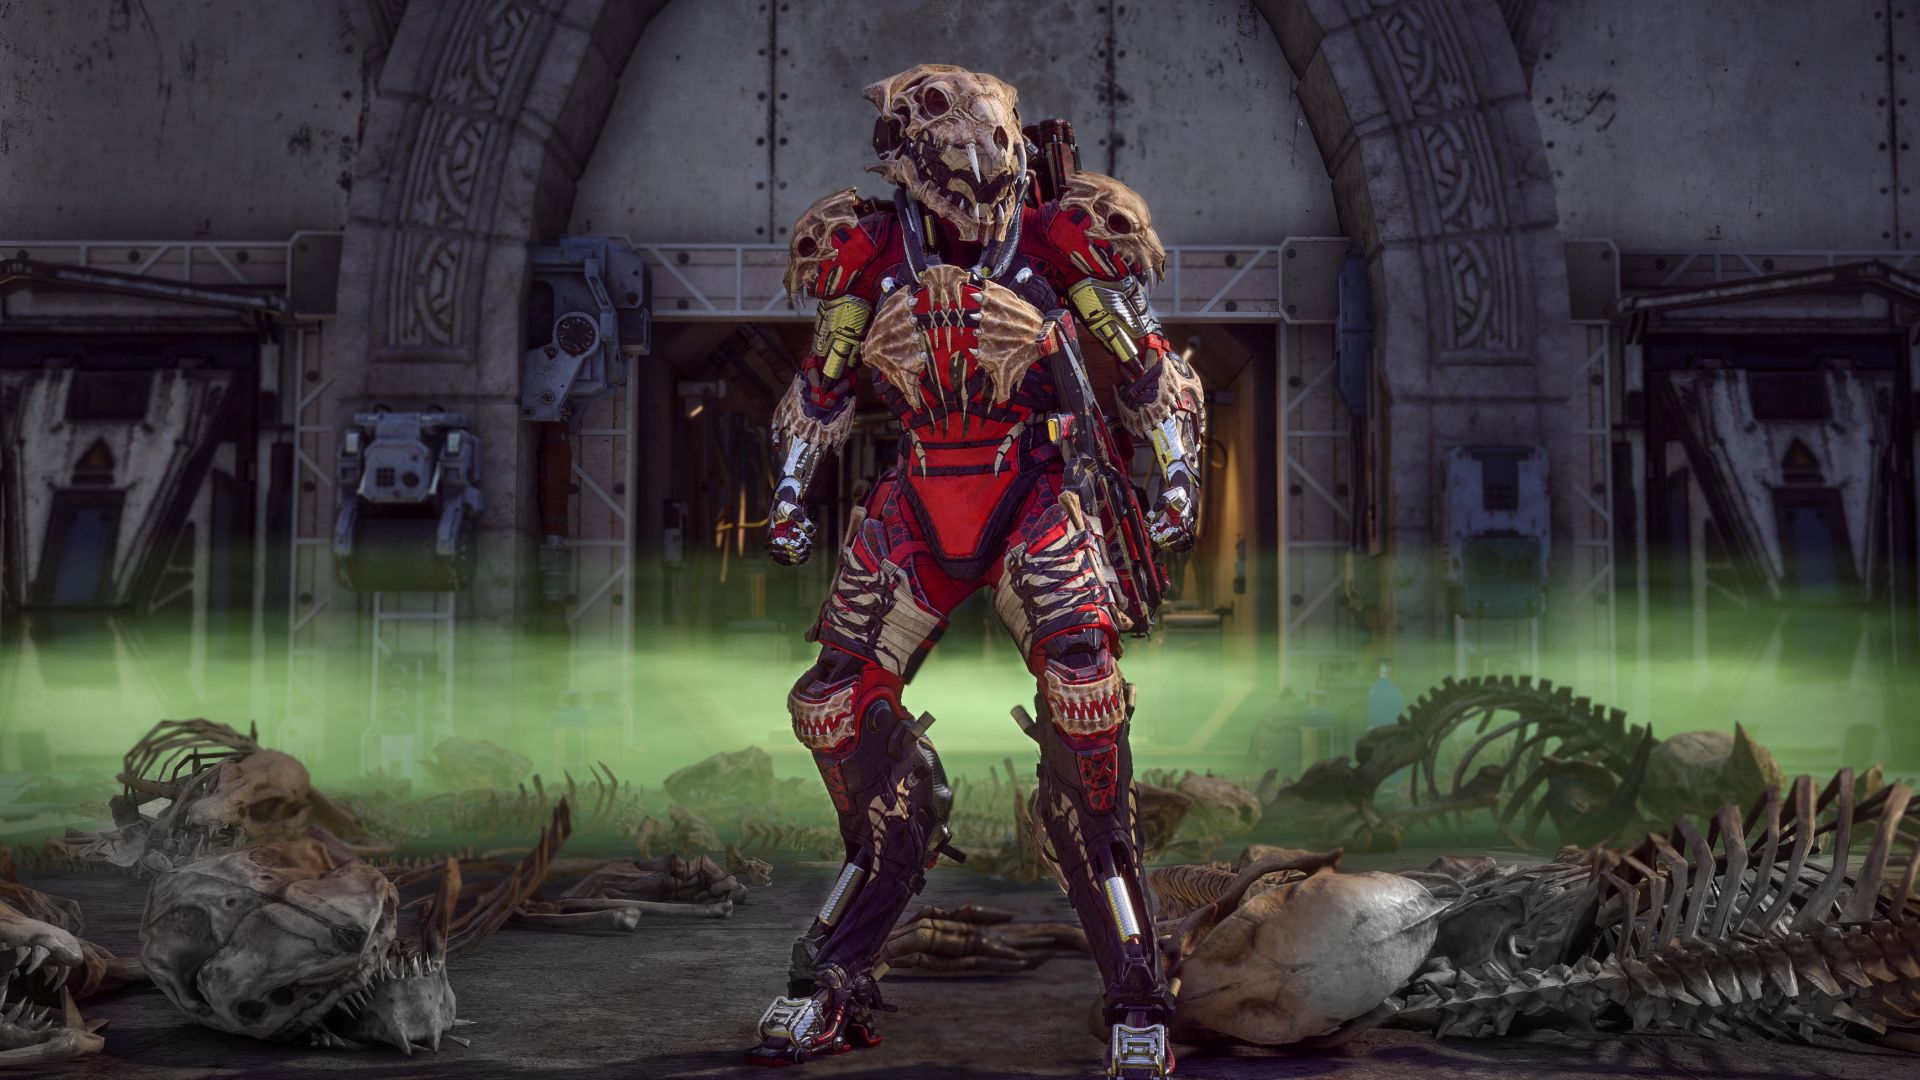
Anomalies will give you a chance to unlock tough “boss” events that will change weekly and offer up some of the best rewards. Completing weekly and seasonal challenges will let you get your hands on this season’s brand-new armor packs and vinyls. And increased Legendary drop rates combined with the opportunity to purchase a Legendary-only War Chest means more opportunities to secure the gear you really want.
How to Begin
While there aren’t any level requirements for playing the Season of Skulls content, you will need to complete the “Incursion” story to gain access to the “Echoes of Reality” level and unlock “Freeplay” (the mode where you can freely roam through the world of Anthem). After that, you’ll be ready to join in the adventure (and rewards) of this challenging new season. So suit up and join the fight, Freelancer!
Posted by: xSicKxBot - 11-05-2019, 06:14 AM - Forum: Lounge
- No Replies
Video: Inside BioWare’s embedded QA process
In this 2017 GDC session, BioWare’s Barbara Klimek explains why BioWare QA has invested in its internal QA analysts, embedding them directly in the teams they support.
This was a great talk for anyone interested in how BioWare’s QA process works, as Klimek laid out how QA embeds in game teams and tries to act as a sort of “support class”, providing feedback from the earliest stages of the game development process.
In addition to this presentation, the GDC Vault and its accompanying YouTube channel offers numerous other free videos, audio recordings, and slides from many of the recent Game Developers Conference events, and the service offers even more members-only content for GDC Vault subscribers.
Those who purchased All Access passes to recent events like GDC or VRDC already have full access to GDC Vault, and interested parties can apply for the individual subscription via a GDC Vault subscription page. Group subscriptions are also available: game-related schools and development studios who sign up for GDC Vault Studio Subscriptions can receive access for their entire office or company by contacting staff via the GDC Vault group subscription page.
Posted by: xSicKxBot - 11-05-2019, 06:14 AM - Forum: Lounge
- No Replies
Report: Embattled real estate startup WeWork mulling esports investment
Earlier this week the team at Bloomberg reported that The We Company, parent company of contentious real estate startup WeWork, has made a number of moves towards a potential investment in the eSports business.
While WeWork could potentially play a potent role in eSports given its established business of managing real and virtual gathering spaces, the company appears in rocky shape after its CEO resigned and its plans for an IPO were aborted earlier this year.
A source trusted by Bloomberg claims We Co. has hired a number of people with an eye towards putting them on a business tied to video games, a claim backed up by a patent application filed in July with the United Kingdom’s Intellectual Property Office.
The application outlines a “Play By We” trademark which could encompass “business services, namely, conducting conferences and events in the field of video gaming” as well as marketing support, real estate for offices and events, and “entertainment services in the nature of online video game playing and esports…providing online competitive, professional video games for playing; promoting the goods and services of others.”
Gamasutra has contacted WeWork representatives for confirmation and further comment.