


Fedora Linux packages a suite of graphical software for content creators. This article introduces a use case and suggestions for creating tutorial videos with Kdenlive.
Plan tutorial
A question that you need to address is whether text and images are appropriate to share your knowledge. If you create resources for learners of graphical software, a tutorial video is something to consider.
Review abstract and draft script
An abstract in content writing helps reviewers look for key points of your tutorial. Depending on your workflow, you can submit this abstract to reviewers for comments, questions, or updates.
Once an abstract of the tutorial video is agreed upon by the reviewers, a video script is created and works like a manuscript for your tutorial. Break down process steps into each sequence. Check this link for an example.
Screen recording
Use your preferred recording tool that comes with the desktop environment or enable the ‘Screen Grab’ option in Kdenlive in the ‘View’ menu. Alternatively, you can install OBS Studio.
Kdenlive can process various container formats. You should transcode to a high-quality lossless matroska file (.mkv) that ensures high quality and compression ratio.
Installation
Kdenlive supports Linux, Mac, Windows and FreeBSD, which encourages collaboration among content creators. If you are Linux users, go to the packager manager of your distro to install Kdenlive. If you use Fedora Linux, we recommend the Fedora Linux RPM version or Flatpak.
Set up Kdenlive
Let’s start with Kdenlive’s user interface and focus on three sections – Project bin, Monitors and Timeline.
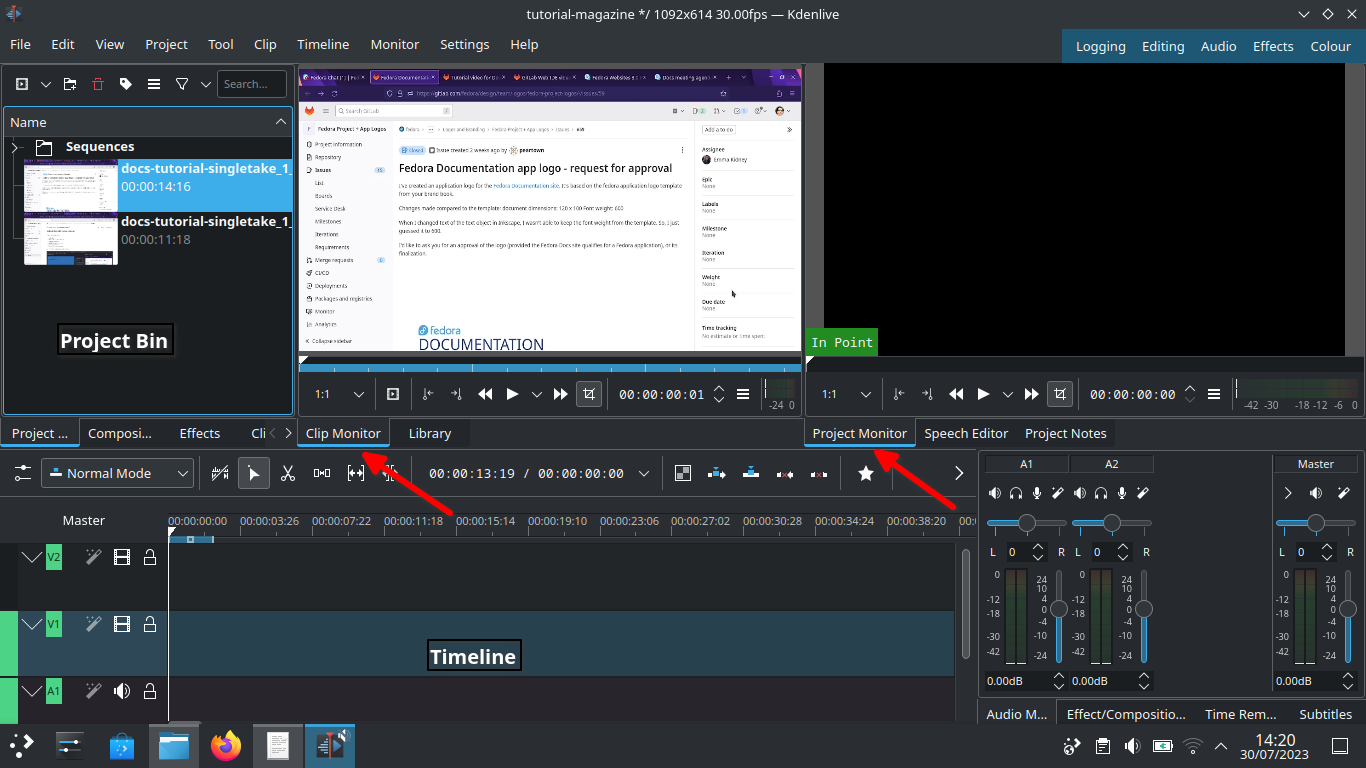
Project bin
Load video clips into Project Bin on the upper left. The Project Bin lists all the clips that are associated with your project. You can drag and drop the clips onto Project Bin.
Monitors
Clip Monitor on the left window displays the unedited clip that is currently selected in The Project Bin. If you have loaded multiple takes of the same scene (process steps), you need to know which one you’re going to choose and edit. If you changed your mind during editing processes, that’s no problem. You can move around a sequence with timeline and tracks after the initial cut.
The Project Monitor is a place to watch your edited footage.
Timeline
Timeline is a place for all selected clips you edit. Drag and drop the clips directly on to the Timeline from the Project Bin.
Editing processes
Cut and stitch
Timeline cursor, also known as playhead, indicates the position of clips you are working on and previewing in the Project Monitor.
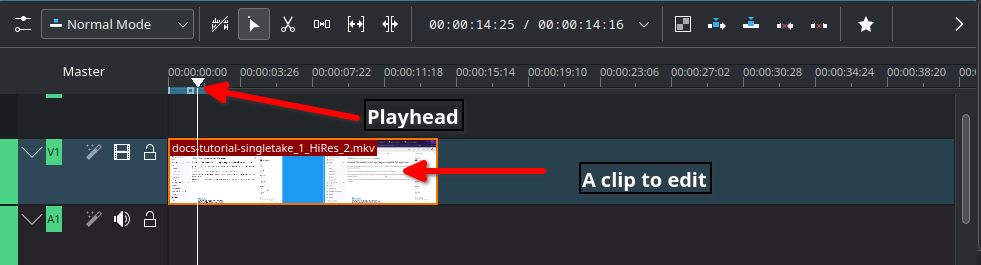
The initial cut means editing on a scene by scene basis until you’re ready to stitch tracks together into a complete piece.
Cut when;
– Delayed, boring or repetitive part was recorded. This happens often when recording a scene for loading apps or waiting for rendering on web browser
– Transition pieces when a scene starts and ends
– Trim off a few frames before you tidy up
– Ensure basic continuity – let it flow!
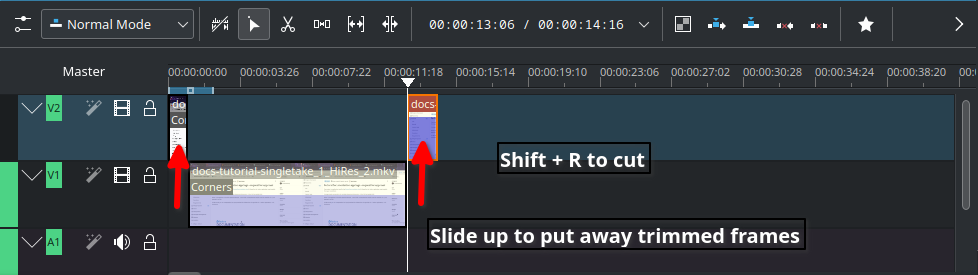
In Timeline, video tracks (V2, V1) are cascaded up whereas audio tracks (A1, A2) are cascaded down as default.
Slide up trimmed video track and stitch frames you want to keep. Delete trimmed frames when you’re sure you don’t need them.
Timeline works like chef’s chopping board and takes time for new users to get familiar with it. Check the upstream documentation on this link.
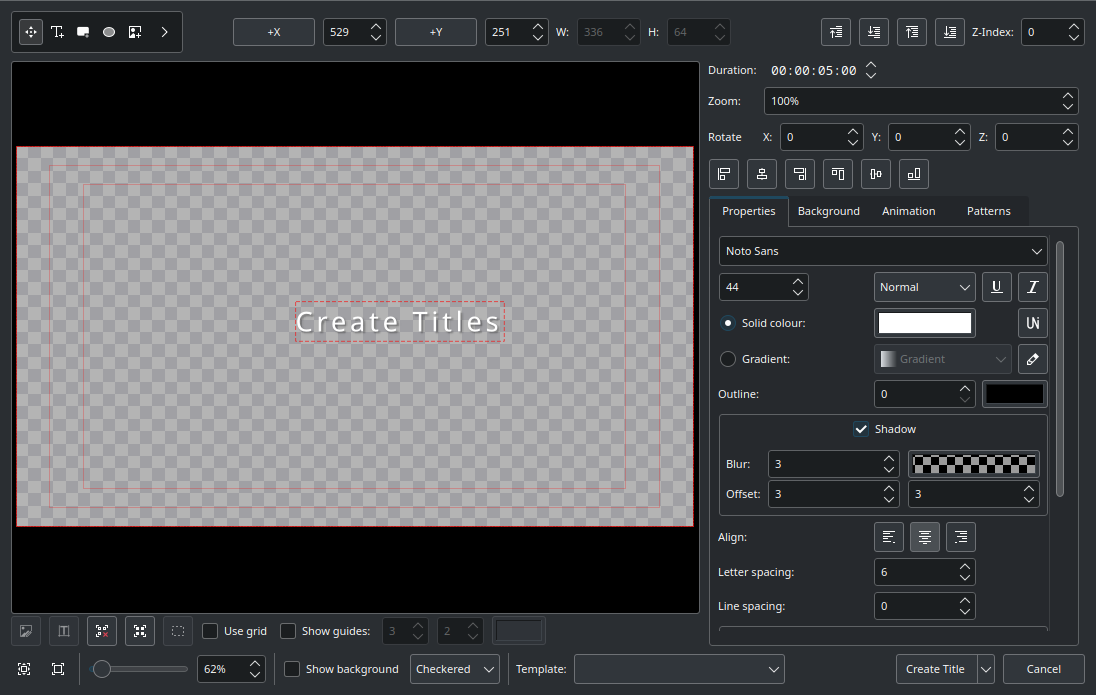
Text effects with Titles
Titles are text elements that you can overlay to the timeline. To create Titles, right-click in the The Project Bin and open the Titles window as shown below. Select ‘Create Title’ to save it. Drag and drop the Title to the video track 2 in timeline. Check this link for more information.
Sound effects
Ambient music could jazz up your video tutorial for the audience.
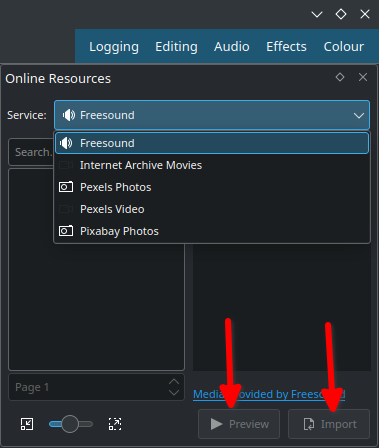
Go to top left corner of the Project Bin and select the arrow to list options. Select ‘Online Resources’. At the top right, ‘Service’ drop-down menu, choose ‘Freesound’. Select ‘Preview’ to play back and import to download and overlay to A1 audio track.
Transition and finishing touch
Text and sounds effects will blend well if tracks have transitions. Check this link for fine-tuning your final cut video.
Rendering
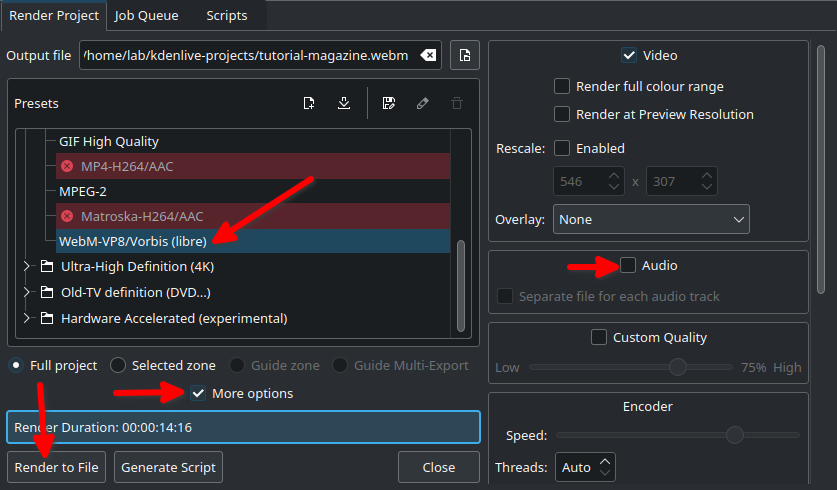
In the Render dialogue box (Ctrl + Return) on Project Bin, choose WebM as output file, select ‘More options’ to de-select the Export Audio option, and select ‘Render to File’ to save the clip.
WebM offers good compression and output.
Rendering speed is dependent on the number of CPU cores in your computer. If you work with high quality footage and visual effects in a computer with low-end CPU and RAM, adapt your workflow with proxy clips and use script for rendering.
Share your tutorial video
PeerTube is a video sharing platform that runs on GNU/Linux infra, and Open Source/Free Software. Just like Vimeo or YouTube, you can embed your content to your documentation site from PeerTube.
Credits and acknowledgements
Big thanks to Seth Kenlon who provided me with a great deal of inspiration from his publication in Opensource.com and Kdenlive workshop.
Kdenlive Version 23.04.2 was used for this article.
https://www.sickgaming.net/blog/2023/08/...-kdenlive/