



11-06-2022, 10:18 PM
Working with Markdown Files in Python
5/5 – (1 vote)
This article will show you how to create and work with markdown files using Python.
 Markdown is an excellent tool with many features to spice up a flat-text file, such as changing text colors, adding bullet points, tables, and much more. A terrific way to add pizzazz to an otherwise dull file.
To make it more interesting, we have the following running scenario:

Acme Spinners, manufacturer of the Spinner Widgets, has contacted you to create a README.md file for their software. They would like you to format the flat-text file to make it easier to navigate and more professional.
Each section of this article builds on the previous one. In the end, an entire file will be created.
 Question: How would we write code to create and populate an md file?
We can accomplish this task by performing the following steps:
Install Required Library
Before running the code in this article, the library must be installed.
To install this library, navigate to the command prompt and run the following code.
This library contains tools to assist in the creation of markdown files in Python, transforming a bland flat-text file into a fantastic-looking one!
Create Python File
Let’s start by creating a Python file called and placing this file into the current working directory.
In the IDE, navigate to and open and add the following lines.
These lines allow access to and manipulation of markdown features.
Save this file.
Create a Markdown File
The next step is to create a markdown file.
Open the file created earlier. At this point, this file should only contain two (2) lines of code.
The following code snippet appends two (2) additional lines to.
The first highlighted line calls the function and passes one (1) argument: a filename. This creates an object and saves it to . If output to the terminal, an object similar to the one below would display.
The following line appends the function to the object. When this code is run, the file is created and saved to the current working directory.
Typically, the above line is only called once all the file contents have been finalized. From hereon in, all additional code will be placed above this line.
Save the file.
Note: A file extension is not required when passing a filename to the function. By default, is assumed.
Preview a Markdown File
During the progression of our markdown file, we can preview the file in our IDE. These instructions assume you are using the VSC IDE.
In the IDE, hover over the file and right-mouse click. This action displays a pop-up.

From this pop-up, select Open Preview (or). This action displays a preview of the file. At this point, there is no data to display.

No worries! We’ll fix this in the next sections!
Note: Depending on the IDE, the Preview option may differ.
Add Logo Image
Let’s add a logo to the top of the Markdown file. Save the logo at the top of this article and place it in the current working directory.
There are two (2) ways to add an image.
Option 1: Use
The highlighted line calls the function, which adds a new line to the file. Then, is called and passed one (1) argument: path (the full path to the image).
Update, save and run.
If we preview, the logo displays on a new line (size: 411×117) and is left-aligned.

Option 2:
To change the image size and/or alignment, use the function.
The highlighted line calls the function, which adds a new line to the file. Then, is called and passed three (3) arguments: (image location/name), (image size) and (image alignment).
Update, save and run.
If we preview, the logo displays in its modified size and is center-aligned.

For this article, Option 2 is used.
Add a Paragraph
Earlier, was used to add a logo. However, we can also use this to add plain text. Let’s add a new paragraph.
The highlighted line creates a new string. This string is formatted to bold, italics and is center-aligned.
Update, save and run.
If we preview, the paragraph displays in bold italics and is center-aligned.

Add Heading and Text
A Level 1 Heading () called Overview and text is added.
In the highlighted area below, an Overview section is created.
This section shows how to use the and functions to display text, change text colors and add hyperlinks.
Update, save and run.
If we preview, the Overview heading and text displays.

Let’s open to review the code when not in Preview Mode.
Notice that the code in the file was converted to HTML.

Note: If you are unfamiliar with HTML, click here to learn more!
Add Table
A Level 2 Heading () called License, and a table is added.
In the highlighted area below, a License section was created.
This section displays details about the license in a table format. This example adds a line for each entry. However, a loop could also be used to populate the table.
Update, save and run the file.
If we preview, the following displays.

Add Bullet Points
A Level 3 Heading () called Instructions, and two (2) sets of bullet points are added.
Update, save and run the file.
If we preview, the following displays.

Note: There are additional ways to configure bullet points. For this article, the most commonly used was selected.
Add a Table of Contents
This sections combines the three (3) headings created earlier (different level for each) and from these lines, creates a Table of Contents.
On the highlighted line, the Table of Contents is created. For this function, a title (‘‘), and depth () was passed.
A depth of 3 was selected as each heading in this article was assigned a different level (example,, ).
Update, save and run the file.
If we preview, the following displays.

Summary
This article has shown you how to construct a fantastic-looking flat-text file!
Good Luck & Happy Coding!
Programmer Humor – Blockchain
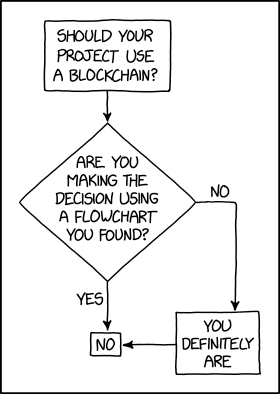 [i]“Blockchains are like grappling hooks, in that it’s extremely cool when you encounter a problem for which they’re the right solution, but it happens way too rarely in real life.” source – xkcd[/i]
5/5 – (1 vote)
This article will show you how to create and work with markdown files using Python.
Markdown is an excellent tool with many features to spice up a flat-text file, such as changing text colors, adding bullet points, tables, and much more. A terrific way to add pizzazz to an otherwise dull file.To make it more interesting, we have the following running scenario:
Acme Spinners, manufacturer of the Spinner Widgets, has contacted you to create a README.md file for their software. They would like you to format the flat-text file to make it easier to navigate and more professional.
Each section of this article builds on the previous one. In the end, an entire
Code:
README.md Question: How would we write code to create and populate an md file?We can accomplish this task by performing the following steps:
- Install Required Library
- Create a Python File
- Create a Markdown File
- Preview Markdown File
- Add Logo Image
- Add a Paragraph
- Add Heading
- Add Table
- Add Bullet Points
- Add Table of Contents
Install Required Library
Before running the code in this article, the
Code:
mdutilsTo install this library, navigate to the command prompt and run the following code.
Code:
pip install mdutilsThis library contains tools to assist in the creation of markdown files in Python, transforming a bland flat-text file into a fantastic-looking one!
Create Python File
Let’s start by creating a Python file called
Code:
acme.pyIn the IDE, navigate to and open
Code:
acme.pyCode:
from mdutils.mdutils import MdUtils
from mdutils import Html
These lines allow access to and manipulation of markdown features.
Save this file.
Create a Markdown File
The next step is to create a markdown file.
Open the
Code:
acme.pyCode:
from mdutils.mdutils import MdUtils
from mdutils import Html
The following code snippet appends two (2) additional lines to
Code:
acme.pyThe first highlighted line calls the
Code:
Mdutils()Code:
mdAcmeCode:
<mdutils.mdutils.MdUtils object at 0x00000257FEB64940>Code:
from mdutils.mdutils import MdUtils
from mdutils import Html mdAcme = MdUtils(file_name='acme') mdAcme.create_md_file()
The following line appends the
Code:
create_md_file()Code:
mdAcmeCode:
acmd.mdTypically, the above line is only called once all the file contents have been finalized. From hereon in, all additional code will be placed above this line.
Save the
Code:
acme.pyNote: A file extension is not required when passing a filename to the Code:
Mdutils()Code:
mdPreview a Markdown File
During the progression of our markdown file, we can preview the file in our IDE. These instructions assume you are using the VSC IDE.
In the IDE, hover over the
Code:
acme.mdFrom this pop-up, select Open Preview (or
Code:
CTRL+SHIFT+VCode:
acme.mdNo worries! We’ll fix this in the next sections!
Note: Depending on the IDE, the Preview option may differ.Add Logo Image
Let’s add a logo to the top of the Markdown file. Save the logo at the top of this article and place it in the current working directory.
There are two (2) ways to add an image.
Option 1: Use
Code:
new_line()The highlighted line calls the
Code:
new_line()Code:
new_inline_image()Code:
from mdutils.mdutils import MdUtils
from mdutils import Html mdAcme = MdUtils(file_name='acme')
mdAcme.new_line(mdAcme.new_inline_image(path='as_logo.png')) mdAcme.create_md_file()
Update
Code:
acme.pyIf we preview
Code:
acme.mdOption 2:
To change the image size and/or alignment, use the
Code:
Html. image()Code:
from mdutils.mdutils import MdUtils
from mdutils import Html mdAcme = MdUtils(file_name='acme')
mdAcme.new_paragraph(Html.image(path='as_logo.png', size='250', align='center')) mdAcme.create_md_file()
The highlighted line calls the
Code:
new_paragraph()Code:
Html_image()Code:
pathCode:
sizeCode:
alignUpdate
Code:
acme.pyIf we preview
Code:
acme. mdFor this article, Option 2 is used.
Add a Paragraph
Earlier,
Code:
new_paragraph()The highlighted line creates a new string. This string is formatted to bold, italics and is center-aligned.
Code:
from mdutils.mdutils import MdUtils
from mdutils import Html mdAcme = MdUtils(file_name='acme')
mdAcme.new_paragraph(Html.image(path='as_logo.png', size='250', align='center'))
mdAcme.new_paragraph('License and Installation Instructions', bold_italics_code='bi', align='center') mdAcme.create_md_file()
Update
Code:
acme.pyIf we preview
Code:
acme.mdAdd Heading and Text
A Level 1 Heading (
Code:
level=1In the highlighted area below, an Overview section is created.
This section shows how to use the
Code:
write()Code:
new_paragraph()Code:
from mdutils.mdutils import MdUtils
from mdutils import Html mdAcme = MdUtils(file_name='acme')
mdAcme.new_paragraph(Html.image(path='as_logo.png', size='250', align='center'))
mdAcme.new_paragraph('License and Installation Instructions', bold_italics_code='bi', align='center') mdAcme.new_header(level=1, title='Overview')
mdAcme.write("Welcome to <font color='red'>Acme Spinners</font>!\n\n")
mdAcme.new_paragraph("Visit our website at <a href='#'>acmespinners.ca</a> to view our videos on the latest spinner techniques.\n") mdAcme.create_md_file()
Update
Code:
acme.pyIf we preview
Code:
acme.mdLet’s open
Code:
acme.mdNotice that the code in the
Code:
acme.pyNote: If you are unfamiliar with HTML, click here to learn more!Add Table
A Level 2 Heading (
Code:
level=2In the highlighted area below, a License section was created.
This section displays details about the license in a table format. This example adds a line for each entry. However, a loop could also be used to populate the table.
Code:
from mdutils.mdutils import MdUtils
from mdutils import Html mdAcme = MdUtils(file_name='acme')
mdAcme.new_paragraph(Html.image(path='as_logo.png', size='250', align='center'))
mdAcme.new_paragraph('License and Installation Instructions', bold_italics_code='bi', align='center') mdAcme.new_header(level=1, title='Overview')
mdAcme.write("Welcome to <font color='red'>Acme Spinners</font>!\n\n")
mdAcme.new_paragraph("Visit our website at <a href='#'>acmespinners.ca</a> to view our videos on the latest spinner techniques.\n") mdAcme.new_header(level=2, title='License')
data = ["Item", "Description"]
data.extend(["License #", "ACS-3843-34-2217"])
data.extend(["Purchase Date", "Nov. 1, 2022"])
data.extend(["", ""])
mdAcme.new_table(columns=2, rows=4, text=data, text_align='left')
mdAcme.new_line()
Update, save and run the
Code:
acme.pyIf we preview
Code:
acme.mdAdd Bullet Points
A Level 3 Heading (
Code:
level=3Code:
from mdutils.mdutils import MdUtils
from mdutils import Html mdAcme = MdUtils(file_name='acme')
mdAcme.new_paragraph(Html.image(path='as_logo.png', size='250', align='center'))
mdAcme.new_paragraph('License and Installation Instructions', bold_italics_code='bi', align='center') mdAcme.new_header(level=1, title='Overview')
mdAcme.write("Welcome to <font color='red'>Acme Spinners</font>!\n\n")
mdAcme.new_paragraph("Visit our website at <a href='#'>acmespinners.ca</a> to view our videos on the latest spinner techniques.\n") mdAcme.new_header(level=2, title='License')
data = ["Item", "Description"]
data.extend(["License #", "ACS-3843-34-2217"])
data.extend(["Purchase Date", "Nov. 1, 2022"])
data.extend(["", ""])
mdAcme.new_table(columns=2, rows=4, text=data, text_align='left') mdAcme.new_header(level=3, title='Instructions')
list1 = ['Getting Started', 'Remove Battery', ['Add 2 AAA Batteries', 'Close and lock']]
mdAcme.new_list(list1)
list2 = ['1. Set Level', ['1. Scroll to view levels', '2. Press Select'], '2. Press Start', ]
mdAcme.new_list(list2) mdAcme.create_md_file()
Update, save and run the
Code:
acme.pyIf we preview
Code:
acme.mdNote: There are additional ways to configure bullet points. For this article, the most commonly used was selected.Add a Table of Contents
This sections combines the three (3) headings created earlier (different level for each) and from these lines, creates a Table of Contents.
On the highlighted line, the Table of Contents is created. For this function, a title (‘
Code:
Table of ContentsCode:
3A depth of 3 was selected as each heading in this article was assigned a different level (example,
Code:
level=1Code:
level=2, level=3Code:
from mdutils.mdutils import MdUtils
from mdutils import Html mdAcme = MdUtils(file_name='acme')
mdAcme.new_paragraph(Html.image(path='as_logo.png', size='250', align='center'))
mdAcme.new_paragraph('License and Installation Instructions', bold_italics_code='bi', align='center') mdAcme.new_header(level=1, title='Overview')
mdAcme.write("Welcome to <font color='red'>Acme Spinners</font>!\n\n")
mdAcme.new_paragraph("Visit our website at <a href='#'>acmespinners.ca</a> to view our videos on the latest spinner techniques.\n") mdAcme.new_header(level=2, title='License')
data = ["Item", "Description"]
data.extend(["License #", "ACS-3843-34-2217"])
data.extend(["Purchase Date", "Nov. 1, 2022"])
data.extend(["", ""])
mdAcme.new_table(columns=2, rows=4, text=data, text_align='left') mdAcme.new_header(level=3, title='Instructions')
list1 = ['Getting Started', 'Remove Battery', ['Add 2 AAA Batteries', 'Close and lock']]
mdAcme.new_list(list1)
list2 = ['1. Set Level', ['1. Scroll to view levels', '2. Press Select'], '2. Press Start', ]
mdAcme.new_list(list2) mdAcme.new_table_of_contents(table_title='Table of Contents', depth=3) mdAcme.create_md_file()
Update, save and run the
Code:
acme.pyIf we preview
Code:
acme.mdSummary
This article has shown you how to construct a fantastic-looking flat-text file!
Good Luck & Happy Coding!
Programmer Humor – Blockchain
[i]“Blockchains are like grappling hooks, in that it’s extremely cool when you encounter a problem for which they’re the right solution, but it happens way too rarely in real life.” source – xkcd[/i]