Welcome, Guest
You have to register before you can post on our site.

Username
  

Password


Search Forums

(Advanced Search)

Forum Statistics
» Members: 20,946
» Latest member: blackopsdlc
» Forum threads: 22,138
» Forum posts: 23,105

Full Statistics

Online Users
There are currently 1344 online users.
» 0 Member(s) | 1338 Guest(s)
Applebot, Baidu, Bing, DuckDuckGo, Facebook, Google

Latest Threads
GTA V - PANDORA 2.9.5 MOD...
Forum: Xbox Mods
Last Post: xSicKxBot

» Replies: 0
» Views: 2
[WoW Retail News] Spitefu...
Forum: World of Warcraft
Last Post: xSicKxBot

» Replies: 0
» Views: 8
WXPL - IV Placement Edito...
Forum: PC Mods
Last Post: xSicKxBot

» Replies: 0
» Views: 11
MXT Release 1.1.2 BO3 MEN...
Forum: PC Mods
Last Post: xSicKxBot

» Replies: 0
» Views: 13
Qwix 1.01 - Original Xbox...
Forum: Xbox Mods
Last Post: SickProdigy

» Replies: 0
» Views: 9
Skeleton Key Payload for ...
Forum: Xbox Mods
Last Post: SickProdigy

» Replies: 0
» Views: 6
XCAT Original Xbox Conten...
Forum: Xbox Mods
Last Post: SickProdigy

» Replies: 0
» Views: 13
Evil Blunt's GTA IV Conso...
Forum: Xbox Mods
Last Post: xSicKxBot

» Replies: 0
» Views: 13
PS5 PUP Format Reverse En...
Forum: Jailbreak
Last Post: SickProdigy

» Replies: 0
» Views: 13
(xbox) Forza Horizon 1 10...
Forum: Xbox Mods
Last Post: xSicKxBot

» Replies: 0
» Views: 14

 
  [Tut] How to Sort and Return a Python List in One Line?
Posted by: xSicKxBot - 09-09-2020, 04:08 AM - Forum: Python - No Replies

How to Sort and Return a Python List in One Line?

To sort and return a Python list in a single line of code, use the sorted(list) method that returns a new list of sorted elements. It copies only the references to the original elements so the returned list is not a deep but a shallow copy.

How to Sort and Return a Python List in One Line?

Let’s dive into the challenge to learn about more details and alternatives. Everything is not always simple. By studying the different methods that solves this, you’ll become a better coder!

Problem: Given a list of comparable objects such as integers or floats. Is there a way to sort the list and return the sorted list in a single line of Python code?

Example: Say, you’ve got the following list.

a = [4, 2, 1, 3]

You want to sort this list and return the result in a single line. If you use the list.sort() method, the return value is None:

print(a.sort())
# None

The return value of the list.sort() method is None, but many coders expect it to be the sorted list. So they’re surprised finding out that their variables contain the None type rather than a sorted list.

However, returning None makes perfect sense for the list.sort() method. Why? Because you call the method on a list object and it modifies this exact list object. It doesn’t create a new list—there won’t be a new list object in memory.

So, how to sort and return a list in a single line of Python code? As a rule of thumb, there are always multiple ways to accomplish the same thing in Python. Let’s dive into the different ways to accomplish this!

Here’s a quick overview of the methods addressed in this article:

Exercise: Change the list to be sorted by adding negative floats. Does it still work?

You’ll now learn more about each of the methods.

Method 1: sorted()


The easiest way to accomplish this task is to call Python’s built-in sorted() function that takes an iterable and returns a new list with sorted elements.

a = [4, 2, 1, 3] # Method 1: sorted()
print(sorted(a))

The sorted() function generates a new sorted list that is put into the print() function that prints the sorted list to the shell. The output is the sorted list:

[1, 2, 3, 4]

This method is the most Pythonic one. But are there alternatives?

Method 2: list.sort() + Ternary Operator


The sorted() method leaves the original list unchanged. But what if you want to sort the original list and get this original list as an output that you can assign to a variable?

The answer is simple: use a combination of the list.sort() method and the ternary operator!

a = [4, 2, 1, 3] # Method 2: list.sort() + ternary
print(a if a.sort() else a)
# [1, 2, 3, 4]

You need to understand two concepts: (1) list.sort() and (2) the ternary operator:

  1. The list.sort() method sorts the list elements in place in an ascending manner. To customize the default sorting behavior, use the optional key argument by passing a function that returns a comparable value for each element in the list.
  2. The ternary operator x if c else y consists of three operands x, c, and y. It returns x if the Boolean expression c evaluates to True. Otherwise, if the expression c evaluates to False, the ternary operator returns the alternative y.

The beautiful thing is that the one-liner print(a if a.sort() else a) modifies the original list and returns it right away. How does it do this?

Explanation: First, the a.sort() method is called to check which “branch” of the ternary operator should be visited. The return value of a.sort() will always be None. The None value is automatically converted to the Boolean False. Thus, the ternary operator always returns the list object referred to by variable a.

Note that the only purpose of the ternary operator is to make sure to call the a.sort() method before returning the value a—to make sure it is sorted!

If you print the original list to the shell, you’ll see that it is now sorted:

>>> print(a)
[1, 2, 3, 4]

Method 3: Combining Multiple Statements in a Single Line with Semicolon


An alternative is chaining the statements with a semicolon ; to one-linerize a Python code snippet. This strategy works with flat Python programs without, possible nested, blocks:

a = [4, 2, 1, 3] # Method 3: semicolon
a.sort(); print(a)
# [1, 2, 3, 4]

If you need to sort a Python list and print its return value to the shell—for example because you run this command from the command line or terminal—you can use this excellent strategy.

You can learn more about how to one-linerize any Python program in my following video:


Python One-Liners Book


Python programmers will improve their computer science skills with these useful one-liners.

Python One-Liners

Python One-Liners will teach you how to read and write “one-liners”: concise statements of useful functionality packed into a single line of code. You’ll learn how to systematically unpack and understand any line of Python code, and write eloquent, powerfully compressed Python like an expert.

The book’s five chapters cover tips and tricks, regular expressions, machine learning, core data science topics, and useful algorithms. Detailed explanations of one-liners introduce key computer science concepts and boost your coding and analytical skills. You’ll learn about advanced Python features such as list comprehension, slicing, lambda functions, regular expressions, map and reduce functions, and slice assignments. You’ll also learn how to:

•  Leverage data structures to solve real-world problems, like using Boolean indexing to find cities with above-average pollution
•  Use NumPy basics such as array, shape, axis, type, broadcasting, advanced indexing, slicing, sorting, searching, aggregating, and statistics
•  Calculate basic statistics of multidimensional data arrays and the K-Means algorithms for unsupervised learning
•  Create more advanced regular expressions using grouping and named groups, negative lookaheads, escaped characters, whitespaces, character sets (and negative characters sets), and greedy/nongreedy operators
•  Understand a wide range of computer science topics, including anagrams, palindromes, supersets, permutations, factorials, prime numbers, Fibonacci numbers, obfuscation, searching, and algorithmic sorting

By the end of the book, you’ll know how to write Python at its most refined, and create concise, beautiful pieces of “Python art” in merely a single line.

Get your Python One-Liners Now!!


https://www.sickgaming.net/blog/2020/09/...-one-line/

Print this item

  [Tut] How to Get the Client User IP Address in PHP
Posted by: xSicKxBot - 09-09-2020, 04:08 AM - Forum: PHP Development - No Replies

How to Get the Client User IP Address in PHP

Last modified on August 13th, 2020.

This is fairly a straightforward topic. Just a few lines of PHP code will do the work of getting the client user IP address. Most of the times it is true, it is all about a few lines of PHP script.

Sometimes things get tricky. We shall see about those things and also an other aspect like the privacy issue involved with it.

Following one line PHP code will get you the client user’s IP address. Then why all the fuss? Read through the article and you will know about it.

$_SERVER['REMOTE_ADDR'];

$_SERVER is a PHP array which is set by the server. Depending on this one line PHP code may not yield the best results in many a situation. For example, if a client is behind a proxy server, then this variable will not be suitable. Also be aware that, these headers can be easily spoofed by the users by setting an IP address themselves.

Following PHP script covers majority of the scenario and returns the user’s IP address.

<?php class Request
{ /** * Retrieves IP address set in the request header. * * Each ISPs sets them following their own logic. There is also a possibility for the user * to easily spoof their IP address. * * So using this for mission critical situations is not advisable. * If you are getting the IP address for casual logging purposes, then this is fine. */ public function getIpAddress() { $ipAddress = ''; if (! empty($_SERVER['HTTP_CLIENT_IP']) && $this->isValidIpAddress($_SERVER['HTTP_CLIENT_IP'])) { // check for shared ISP IP $ipAddress = $_SERVER['HTTP_CLIENT_IP']; } else if (! empty($_SERVER['HTTP_X_FORWARDED_FOR'])) { // check for IPs passing through proxy servers // check if multiple IP addresses are set and take the first one $ipAddressList = explode(',', $_SERVER['HTTP_X_FORWARDED_FOR']); foreach ($ipAddressList as $ip) { if ($this->isValidIpAddress($ip)) { $ipAddress = $ip; break; } } } else if (! empty($_SERVER['HTTP_X_FORWARDED']) && $this->isValidIpAddress($_SERVER['HTTP_X_FORWARDED'])) { $ipAddress = $_SERVER['HTTP_X_FORWARDED']; } else if (! empty($_SERVER['HTTP_X_CLUSTER_CLIENT_IP']) && $this->isValidIpAddress($_SERVER['HTTP_X_CLUSTER_CLIENT_IP'])) { $ipAddress = $_SERVER['HTTP_X_CLUSTER_CLIENT_IP']; } else if (! empty($_SERVER['HTTP_FORWARDED_FOR']) && $this->isValidIpAddress($_SERVER['HTTP_FORWARDED_FOR'])) { $ipAddress = $_SERVER['HTTP_FORWARDED_FOR']; } else if (! empty($_SERVER['HTTP_FORWARDED']) && $this->isValidIpAddress($_SERVER['HTTP_FORWARDED'])) { $ipAddress = $_SERVER['HTTP_FORWARDED']; } else if (! empty($_SERVER['REMOTE_ADDR']) && $this->isValidIpAddress($_SERVER['REMOTE_ADDR'])) { $ipAddress = $_SERVER['REMOTE_ADDR']; } return $ipAddress; } /** * To validate if an IP address is both a valid and does not fall within * a private network range. * * @access public * @param string $ip */ public function isValidIpAddress($ip) { if (filter_var($ip, FILTER_VALIDATE_IP, FILTER_FLAG_IPV4 | FILTER_FLAG_IPV6 | FILTER_FLAG_NO_PRIV_RANGE | FILTER_FLAG_NO_RES_RANGE) === false) { return false; } return true; } }

There are many options given all through this article to get the client user’s IP address. This is the best among all the possibilities given, but I highly recommend you to read the section “IP address reliability” below.

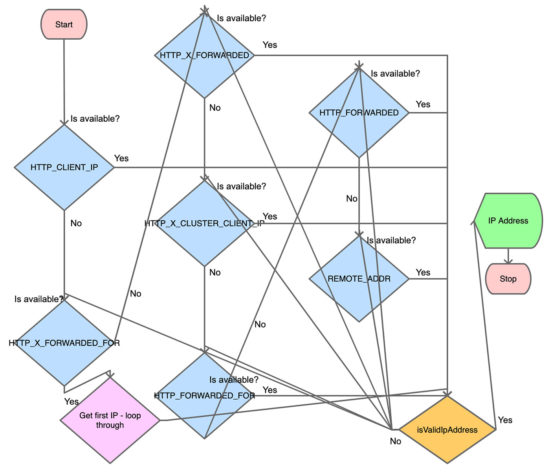
Flowchart to get client user’s IP address


I have tried my best minimize the flowchart. Please do not look for diagrammatic accuracy. It is just an attempt to present the above PHP script in a flowchart model. But after drawing I realized that the above PHP script is easier to understand than this flowchart ?

flowchart to get client user ip address in php

Minimal code to get user’s IP address


Below one line code will work in most of the situation. Read the ‘IP address reliability’ section below, must. It will give you a good idea.

$ipAddress = $_SERVER['REMOTE_ADDR']?:($_SERVER['HTTP_X_FORWARDED_FOR']?:$_SERVER['HTTP_CLIENT_IP']); 

Get user’s IP address for CloudFlare hosted websites


I have taken CloudFlare as example. There are many similar services. You need to talk to that service provider to know which request header they are setting and get the IP address accordingly.

When the website is hosted using CloudFlare service, $_SERVER['REMOTE_ADDR'] will return the CloudFlare server’s IP address and not the user’s IP address. So in such a situation, you can make use of the variable set by the CloudFlare server to get the IP address.

if (isset($_SERVER["HTTP_CF_CONNECTING_IP"])) { $_SERVER['REMOTE_ADDR'] = $_SERVER["HTTP_CF_CONNECTING_IP"]; $ipAddress = $_SERVER['REMOTE_ADDR'];
}

IP address reliability


$_SERVER['REMOTE_ADDR'] is the most reliable variable from the above list of variables. REMOTE_ADDR may not contain the real IP address of the TCP connection as well. It depends on the SAPI configuration.

If the user is behind a proxy server, HTTP_X_FORWARDED_FOR will be set. But this can be easily spoofed by the user by setting an IP address he wishes to expose.

Even the variable X-Forwarded-For or the Client-IP can be set by the user to any value he wishes. So, when you maintain a log of user’s IP address, it is better to store the IP address that is returned by $_SERVER['REMOTE_ADDR'] also.

Take an example of a shopping cart. You may display the product price according to the user’s country. In such a scenario, you may use the user’s IP address to determine the user’s country. In such a scenario, the code to get user’s IP address should be fool-proof.

So in summary, if you are building a mission critical application that depends on the user’s IP address, then this is not the way to go. For audit log of the user’s IP address, this may suffice. In essence, understand each line of these PHP code and variables used. Know your use-case well and use it accordingly.

IP address field length


When you are storing the IP address in the database, remember to have the field size as 45 for single IP. Because there is a possibility for IPv6 IP addresses. It its full form the IPv6 IP address can be 45 characters in length.

How to get the IP address of a host


Using a hostname, we can get the server’s IP address using the PHP’s built-in function gethostbyname. This returns the IPv4 address for the host given in argument.

$ipAddress = gethostbyname('www.example.com');

The reverse is possible too by using gethostbyaddr().

Client user’s IP address and privacy issues


Client’s IP address can be considered as private information in certain legislation. It depends on the land of law. Internet is public in general. You never know from which geographic region you will get users.

As per GDPR (Article 4, Point 1; and Recital 49), IP address is a personal data. I would suggest to inform the user and get consent to log the IP address. Also, call it out explicitly in your “Privacy Policy” document.

Explicitly state that you are collecting and logging the client user’s IP address and the reason for doing so.

Conclusion


Understand your use-case well. A good understanding of the scenario in which you are going to get and use the client user’s IP address is important. Then understand that the end user can easily spoof his IP address and present you something else. Third understand each line of the code, the server variables, from where the IP address is fetched, who sets it etc. Then decide how it will impact your use-case. Last but not the least, explicitly call out in your privacy policy that you are getting the client user’s IP address and storing it. Also state why you are doing it. As per GDPR, IP address is user’s personal information and so it would be better to get user’s consent before processing it.

↑ Back to Top


https://www.sickgaming.net/blog/2020/08/...ss-in-php/

Print this item

  (Indie Deal) CK3 is out, Dying Light Enchanted Edition with Techland Deals
Posted by: xSicKxBot - 09-09-2020, 04:08 AM - Forum: Deals or Specials - No Replies

CK3 is out, Dying Light Enchanted Edition with Techland Deals

Dying Light - Enhanced Edition at 75% OFF
[www.indiegala.com]
Enjoy the definitive Dying Light experience with the brand-new Legend system, improved visuals, major gameplay enhancements, and more.

https://youtu.be/xjn66Cl3pMA
Techland Publisher Sale, up to -75%
[www.indiegala.com]
Stay Inside, Stay Safe and Enjoy Good Games.
Check out IndieGala on Twitter, YouTube & Facebook[www.facebook.com]


https://steamcommunity.com/groups/indieg...2442950602

Print this item

  News - Everything We Know About Xbox All Access For Xbox Series X And S
Posted by: xSicKxBot - 09-09-2020, 02:23 AM - Forum: Lounge - No Replies

Everything We Know About Xbox All Access For Xbox Series X And S

Xbox All Access was introduced years ago as a way for customers to buy an Xbox One without having to pay the full price upfront. It allowed them to pay a monthly cost, while also getting access to Xbox Game Pass and Xbox Live Gold. With the impending release of the Xbox Series S and Series X, Windows Central reports that the service will return, giving people another option to buy the next-gen consoles. If this report is true, then that means you'll be able to sign-up for a 24-monthly payment period for both consoles with no interest.

The Xbox Series S is confirmed to release on November 10 at $299, while Windows Central reports that the Xbox Series X will cost $499 and release the same day. Microsoft hasn't confirmed any information in regards to the Series X's release date and price, but the company did detail the Xbox Series S's specs in a new trailer.

The Series S is capable of 1440p at up to 120 FPS, DirectX ray tracing, and variable refresh rate among other things. It comes with a custom 512GB SSD, which you'll need to store all of your games and content as it does not feature a disc drive.

Continue Reading at GameSpot

https://www.gamespot.com/articles/everyt...01-10abi2f

Print this item

  Quarkus: Modernize “helloworld” JBoss EAP quickstart, Part 1
Posted by: xSicKxBot - 09-09-2020, 12:48 AM - Forum: Java Language, JVM, and the JRE - No Replies

Quarkus: Modernize “helloworld” JBoss EAP quickstart, Part 1

Quarkus is, in its own words, “Supersonic subatomic Java” and a “Kubernetes native Java stack tailored for GraalVM & OpenJDK HotSpot, crafted from the best of breed Java libraries and standards.” For the purpose of illustrating how to modernize an existing Java application to Quarkus, I will use the Red Hat JBoss Enterprise Application Platform (JBoss EAP) quickstarts helloworld quickstart as sample of a Java application builds using technologies (CDI and Servlet 3) supported in Quarkus.

It’s important to note that both Quarkus and JBoss EAP rely on providing developers with tools based—as much as possible—on standards. If your application is not already running on JBoss EAP, there’s no problem. You can migrate it from your current application server to JBoss EAP using the Red Hat Application Migration Toolkit. After that, the final and working modernized version of the code is available in the https://github.com/mrizzi/jboss-eap-quickstarts/tree/quarkus repository inside the helloworld module.

This article is based on the guides Quarkus provides, mainly Creating Your First Application and Building a Native Executable.

Get the code


To start, clone the JBoss EAP quickstarts repository locally, running:

$ git clone https://github.com/jboss-developer/jboss...starts.git Cloning into 'jboss-eap-quickstarts'... remote: Enumerating objects: 148133, done. remote: Total 148133 (delta 0), reused 0 (delta 0), pack-reused 148133 Receiving objects: 100% (148133/148133), 59.90 MiB | 7.62 MiB/s, done. Resolving deltas: 100% (66476/66476), done. $ cd jboss-eap-quickstarts/helloworld/

Try plain, vanilla helloworld


The name of the quickstart is a strong clue about what this application does, but let’s follow a scientific approach in modernizing this code, so first things first: Try the application as it is.

Deploy helloworld


  1. Open a terminal and navigate to the root of the JBoss EAP directory EAP_HOME (which you can download).
  2. Start the JBoss EAP server with the default profile by typing the following command:
$ EAP_HOME/bin/standalone.sh 

Note: For Windows, use the EAP_HOME\bin\standalone.bat script.

After a few seconds, the log should look like:

[org.jboss.as] (Controller Boot Thread) WFLYSRV0025: JBoss EAP 7.2.0.GA (WildFly Core 6.0.11.Final-redhat-00001) started in 3315ms - Started 306 of 527 services (321 services are lazy, passive or on-demand)
  1. Open http://127.0.0.1:8080 in a browser, and a page like Figure 1 should appear:
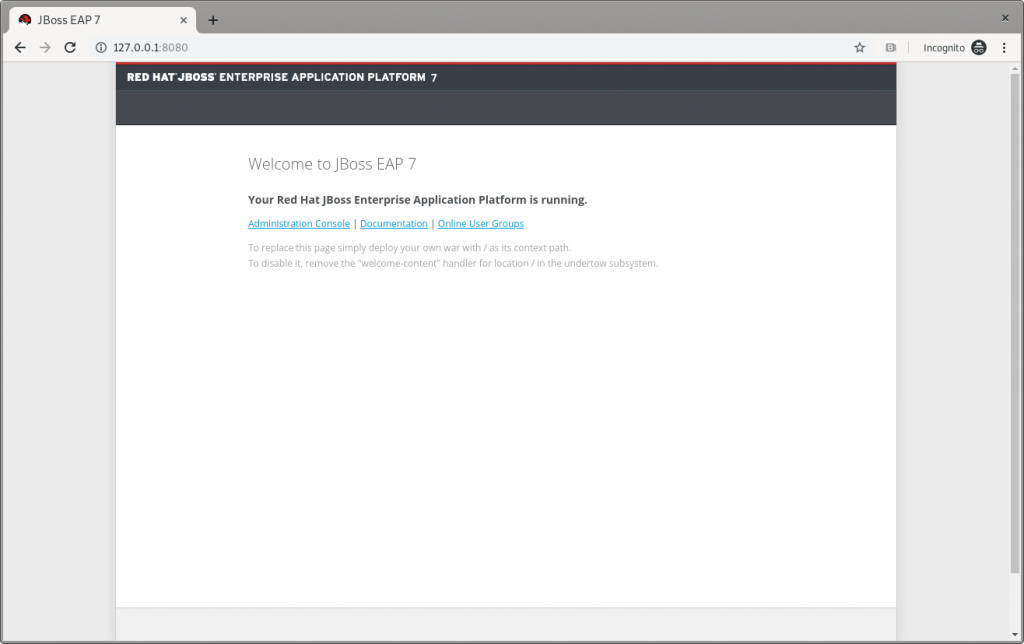
The JBoss EAP home page.

Figure 1: The JBoss EAP home page.

  1. Following instructions from Build and Deploy the Quickstart, deploy the helloworld quickstart and execute (from the project root directory) the command:
$ mvn clean install wildfly:deploy 

This command should end successfully with a log like this:

[INFO] ------------------------------------------------------------------------ [INFO] BUILD SUCCESS [INFO] ------------------------------------------------------------------------ [INFO] Total time: 8.224 s 

The helloworld application has now been deployed for the first time in JBoss EAP in about eight seconds.

Test helloworld


Following the Access the Application guide, open http://127.0.0.1:8080/helloworld in the browser and see the application page, as shown in Figure 2:
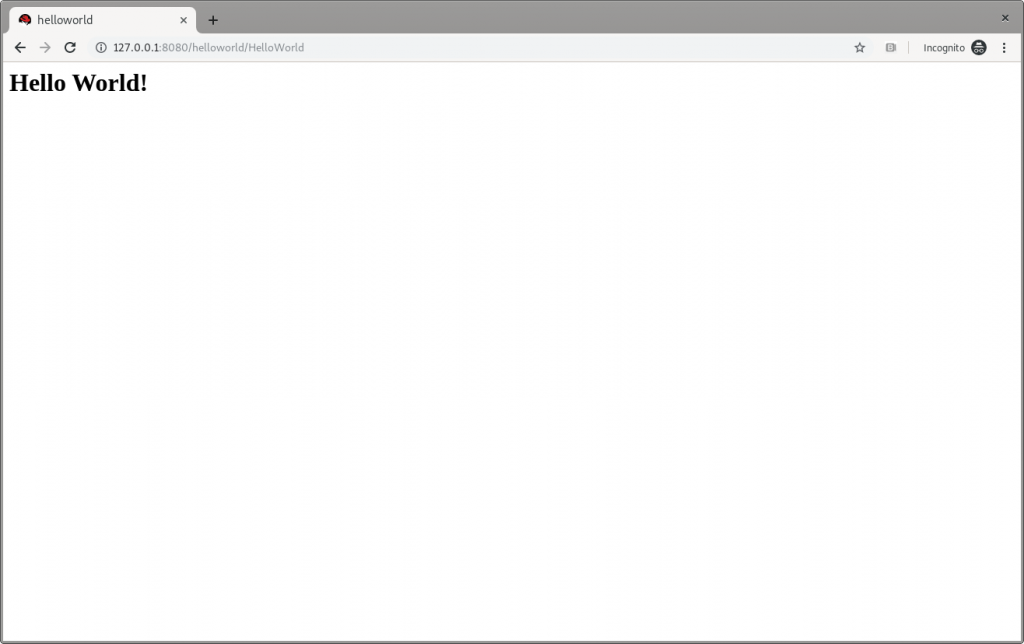
JBoss EAP's Hello World.

Figure 2: JBoss EAP’s Hello World.

Make changes


Change the createHelloMessage(String name) input parameter from World to Marco (my ego is cheap):

writer.println("<h1>" + helloService.createHelloMessage("Marco") + "</h1>");

Execute again the command:

$ mvn clean install wildfly:deploy 

and then refresh the web page in the browser to check the message displayed changes, as shown in Figure 3:
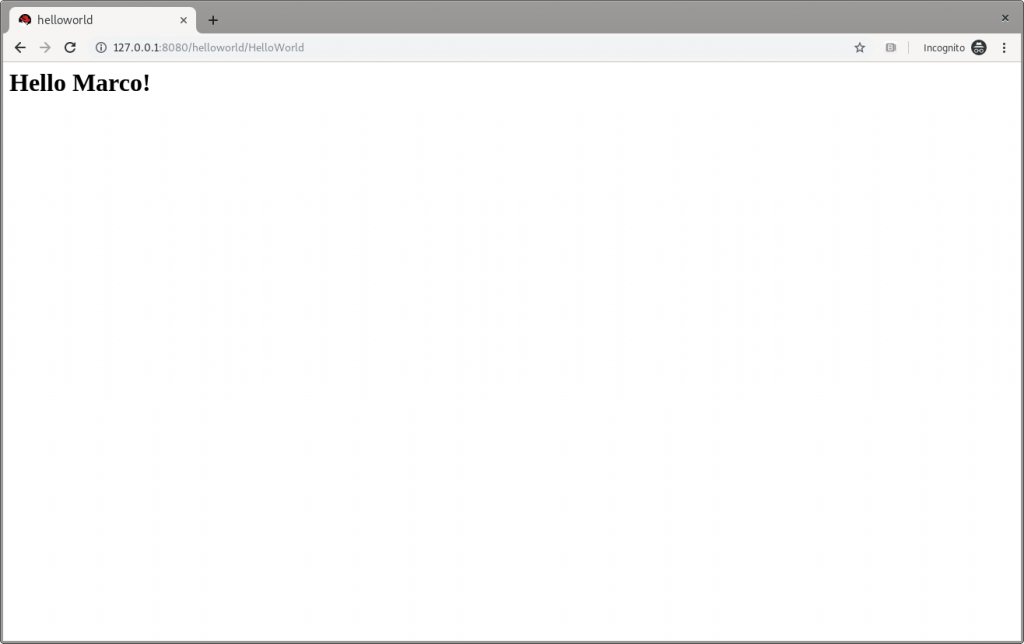
JBoss EAP's Hello Marco.

Figure 3: JBoss EAP’s Hello Marco.

Undeploy helloworld and shut down


If you want to undeploy (optional) the application before shutting down JBoss EAP, run the following command:

$ mvn clean install wildfly:undeploy 

To shut down the JBoss EAP instance, enter Ctrl+C in the terminal where it’s running.

Let’s modernize helloworld


Now we can leave the original helloworld behind and update it.

Create a new branch


Create a new working branch once the quickstart project finishes executing:

$ git checkout -b quarkus 7.2.0.GA 

Change the pom.xml file


The time has come to start changing the application. starting from the pom.xml file. From the helloworld folder, run the following command to let Quarkus add XML blocks:

$ mvn io.quarkus:quarkus-maven-plugin:0.23.2:create 

This article uses the 0.23.2 version. To know which is the latest version is, please refer to https://github.com/quarkusio/quarkus/releases/latest/, since the Quarkus release cycles are short.

This command changed the pom.xml, file adding:

  • The property <quarkus.version> to define the Quarkus version to be used.
  • The <dependencyManagement> block to import the Quarkus bill of materials (BOM). In this way, there’s no need to add the version to each Quarkus dependency.
  • The quarkus-maven-plugin plugin responsible for packaging the application, and also providing the development mode.
  • The native profile to create application native executables.

Further changes required to pom.xml, to be done manually:

  1. Move the <groupId> tag outside of the <parent> block, and above the <artifactId> tag. Because we remove the <parent> block in the next step, the <groupId> must be preserved.
  2. Remove the <parent> block: The application doesn’t need the JBoss parent pom anymore to run with Quarkus.
  3. Add the <version> tag (below the <artifactId> tag) with the value you prefer.
  4. Remove the <packaging> tag: The application won’t be a WAR anymore, but a plain JAR.
  5. Change the following dependencies:
    1. Replace the javax.enterprise:cdi-api dependency with io.quarkus:quarkus-arc, removing <scope>provided</scope> because—as stated in the documentation—this Quarkus extension provides the CDI dependency injection.
    2. Replace the org.jboss.spec.javax.servlet:jboss-servlet-api_4.0_spec dependency with io.quarkus:quarkus-undertow, removing the <scope>provided</scope>, because—again as stated in the documentation—this is the Quarkus extension that provides support for servlets.
    3. Remove the org.jboss.spec.javax.annotation:jboss-annotations-api_1.3_spec dependency because it’s coming with the previously changed dependencies.

The pom.xml file’s fully changed version is available at https://github.com/mrizzi/jboss-eap-quickstarts/blob/quarkus/helloworld/pom.xml.

Note that the above mvn io.quarkus:quarkus-maven-plugin:0.23.2:create command, besides the changes to the pom.xml file, added components to the project. The added file and folders are:

  • The files mvnw and mvnw.cmd, and .mvn folder: The Maven Wrapper allows you to run Maven projects with a specific version of Maven without requiring that you install that specific Maven version.
  • The docker folder (in src/main/): This folder contains example Dockerfile files for both native and jvm modes (together with a .dockerignore file).
  • The resources folder (in src/main/): This folder contains an empty application.properties file and the sample Quarkus landing page index.html (more in the section “Run the modernized helloworld“).

Run helloworld


To test the application, use quarkus:dev, which runs Quarkus in development mode (more details on Development Mode here).

Note: We expect this step to fail as changes are still required to the application, as detailed in this section.

Now run the command to check if and how it works:

$ ./mvnw compile quarkus:dev [INFO] Scanning for projects... [INFO] [INFO] ----------------< org.jboss.eap.quickstarts:helloworld >---------------- [INFO] Building Quickstart: helloworld quarkus [INFO] --------------------------------[ war ]--------------------------------- [INFO] [INFO] --- maven-resources-plugin:2.6:resources (default-resources) @ helloworld --- [INFO] Using 'UTF-8' encoding to copy filtered resources. [INFO] Copying 2 resources [INFO] [INFO] --- maven-compiler-plugin:3.1:compile (default-compile) @ helloworld --- [INFO] Nothing to compile - all classes are up to date [INFO] [INFO] --- quarkus-maven-plugin:0.23.2:dev (default-cli) @ helloworld --- Listening for transport dt_socket at address: 5005 INFO [io.qua.dep.QuarkusAugmentor] Beginning quarkus augmentation INFO [org.jbo.threads] JBoss Threads version 3.0.0.Final ERROR [io.qua.dev.DevModeMain] Failed to start quarkus: java.lang.RuntimeException: io.quarkus.builder.BuildException: Build failure: Build failed due to errors [error]: Build step io.quarkus.arc.deployment.ArcProcessor#validate threw an exception: javax.enterprise.inject.spi.DeploymentException: javax.enterprise.inject.UnsatisfiedResolutionException: Unsatisfied dependency for type org.jboss.as.quickstarts.helloworld.HelloService and qualifiers [@Default] - java member: org.jboss.as.quickstarts.helloworld.HelloWorldServlet#helloService - declared on CLASS bean [types=[javax.servlet.ServletConfig, java.io.Serializable, org.jboss.as.quickstarts.helloworld.HelloWorldServlet, javax.servlet.GenericServlet, javax.servlet.Servlet, java.lang.Object, javax.servlet.http.HttpServlet], qualifiers=[@Default, @Any], target=org.jboss.as.quickstarts.helloworld.HelloWorldServlet] at io.quarkus.arc.processor.BeanDeployment.processErrors(BeanDeployment.java:841) at io.quarkus.arc.processor.BeanDeployment.init(BeanDeployment.java:214) at io.quarkus.arc.processor.BeanProcessor.initialize(BeanProcessor.java:106) at io.quarkus.arc.deployment.ArcProcessor.validate(ArcProcessor.java:249) at sun.reflect.NativeMethodAccessorImpl.invoke0(Native Method) at sun.reflect.NativeMethodAccessorImpl.invoke(NativeMethodAccessorImpl.java:62) at sun.reflect.DelegatingMethodAccessorImpl.invoke(DelegatingMethodAccessorImpl.java:43) at java.lang.reflect.Method.invoke(Method.java:498) at io.quarkus.deployment.ExtensionLoader$1.execute(ExtensionLoader.java:780) at io.quarkus.builder.BuildContext.run(BuildContext.java:415) at org.jboss.threads.ContextClassLoaderSavingRunnable.run(ContextClassLoaderSavingRunnable.java:35) at org.jboss.threads.EnhancedQueueExecutor.safeRun(EnhancedQueueExecutor.java:2011) at org.jboss.threads.EnhancedQueueExecutor$ThreadBody.doRunTask(EnhancedQueueExecutor.java:1535) at org.jboss.threads.EnhancedQueueExecutor$ThreadBody.run(EnhancedQueueExecutor.java:1426) at java.lang.Thread.run(Thread.java:748) at org.jboss.threads.JBossThread.run(JBossThread.java:479) Caused by: javax.enterprise.inject.UnsatisfiedResolutionException: Unsatisfied dependency for type org.jboss.as.quickstarts.helloworld.HelloService and qualifiers [@Default] - java member: org.jboss.as.quickstarts.helloworld.HelloWorldServlet#helloService - declared on CLASS bean [types=[javax.servlet.ServletConfig, java.io.Serializable, org.jboss.as.quickstarts.helloworld.HelloWorldServlet, javax.servlet.GenericServlet, javax.servlet.Servlet, java.lang.Object, javax.servlet.http.HttpServlet], qualifiers=[@Default, @Any], target=org.jboss.as.quickstarts.helloworld.HelloWorldServlet] at io.quarkus.arc.processor.Beans.resolveInjectionPoint(Beans.java:428) at io.quarkus.arc.processor.BeanInfo.init(BeanInfo.java:371) at io.quarkus.arc.processor.BeanDeployment.init(BeanDeployment.java:206) ... 14 more 

It failed. Why? What happened?

The UnsatisfiedResolutionException exception refers to the HelloService class, which is a member of the HelloWorldServlet class (java member: org.jboss.as.quickstarts.helloworld.HelloWorldServlet#helloService). The problem is that HelloWorldServlet needs an injected instance of HelloService, but it can not be found (even if the two classes are in the very same package).

It’s time to return to Quarkus guides to leverage the documentation and understand how @Inject—and hence Contexts and Dependency Injection (CDI)—works in Quarkus, thanks to the Contexts and Dependency Injection guide. In the Bean Discovery paragraph, it says, “Bean classes that don’t have a bean defining annotation are not discovered.”

Looking at the HelloService class, it’s clear there’s no bean defining annotation, and one has to be added to have Quarkus to discover the bean. So, because it’s a stateless object, it’s safe to add the @ApplicationScoped annotation:

@ApplicationScoped public class HelloService { 

Note: The IDE should prompt you to add the required package shown here (add it manually if need be):

import javax.enterprise.context.ApplicationScoped; 

If you’re in doubt about which scope to apply when the original bean has no scope defined, please refer to the JSR 365: Contexts and Dependency Injection for Java 2.0—Default scope documentation.

Now, try again to run the application, executing again the ./mvnw compile quarkus:dev command:

$ ./mvnw compile quarkus:dev [INFO] Scanning for projects... [INFO] [INFO] ----------------< org.jboss.eap.quickstarts:helloworld >---------------- [INFO] Building Quickstart: helloworld quarkus [INFO] --------------------------------[ war ]--------------------------------- [INFO] [INFO] --- maven-resources-plugin:2.6:resources (default-resources) @ helloworld --- [INFO] Using 'UTF-8' encoding to copy filtered resources. [INFO] Copying 2 resources [INFO] [INFO] --- maven-compiler-plugin:3.1:compile (default-compile) @ helloworld --- [INFO] Changes detected - recompiling the module! [INFO] Compiling 2 source files to /home/mrizzi/git/forked/jboss-eap-quickstarts/helloworld/target/classes [INFO] [INFO] --- quarkus-maven-plugin:0.23.2:dev (default-cli) @ helloworld --- Listening for transport dt_socket at address: 5005 INFO [io.qua.dep.QuarkusAugmentor] (main) Beginning quarkus augmentation INFO [io.qua.dep.QuarkusAugmentor] (main) Quarkus augmentation completed in 576ms INFO [io.quarkus] (main) Quarkus 0.23.2 started in 1.083s. Listening on: http://0.0.0.0:8080 INFO [io.quarkus] (main) Profile dev activated. Live Coding activated. INFO [io.quarkus] (main) Installed features: [cdi] 

This time the application runs successfully.

Run the modernized helloworld


As the terminal log suggests, open a browser to http://0.0.0.0:8080(the default Quarkus landing page), and the page shown in Figure 4 appears:
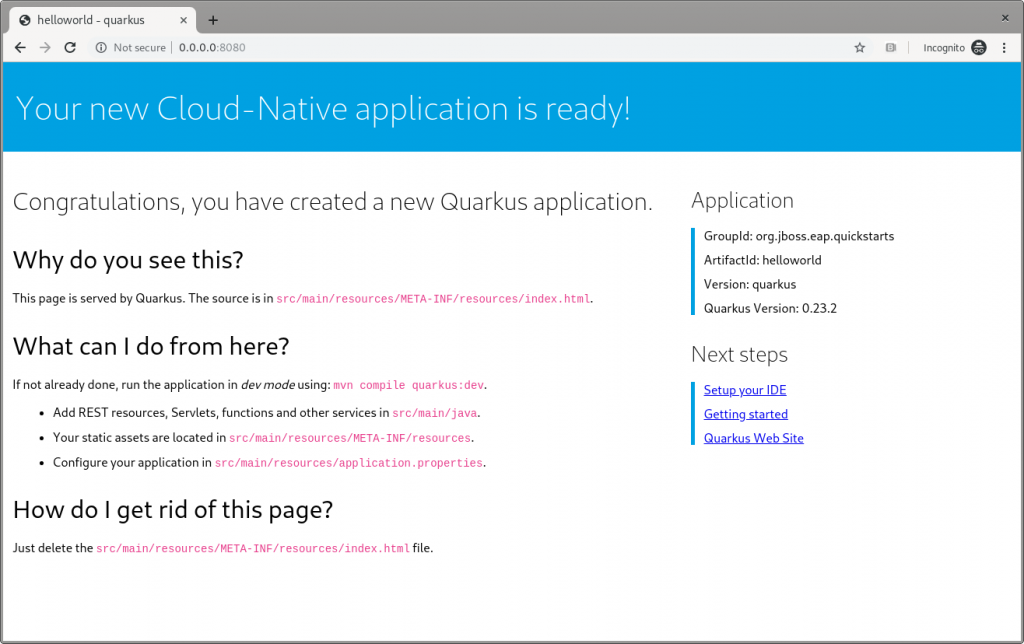
The Quarkus dev landing page.

Figure 4: The Quarkus dev landing page.

This application has the following context’s definition in the WebServlet annotation:

@WebServlet("/HelloWorld") public class HelloWorldServlet extends HttpServlet { 

Hence, you can browse to http://0.0.0.0:8080/HelloWorldto reach the page shown in Figure 5:
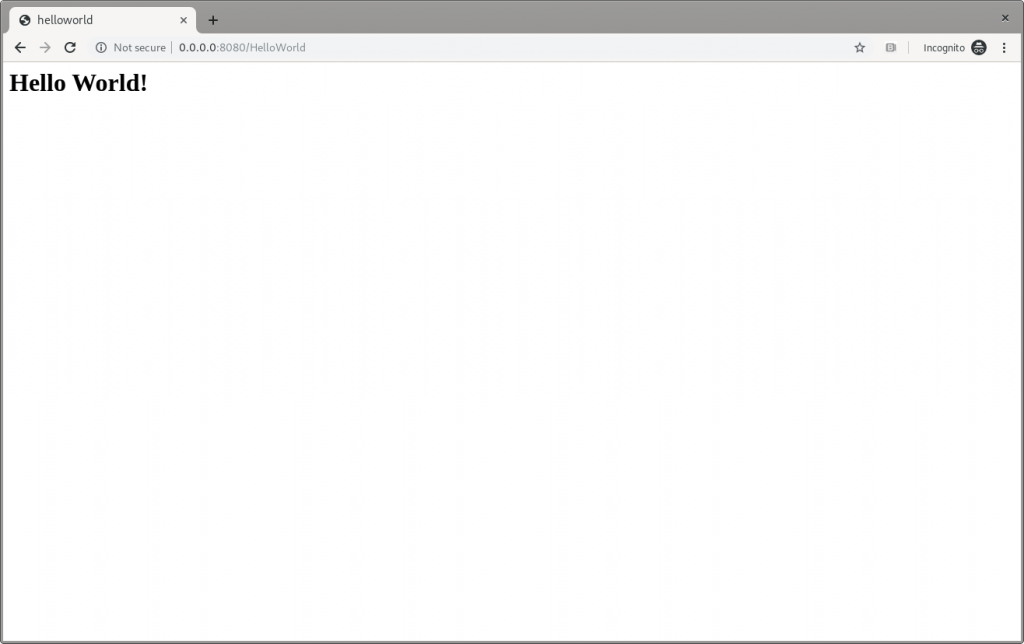
The Quarkus dev Hello World page.

Figure 5: The Quarkus dev Hello World page.

It works!

Make changes


Please, pay attention to the fact that the ./mvnw compile quarkus:dev command is still running, and we’re not going to stop it. Now, try to apply the same—very trivial—change to the code and see how Quarkus improves the developer experience:

writer.println("<h1>" + helloService.createHelloMessage("Marco") + "</h1>");

Save the file, and then refresh the web page to check that Hello Marco appears, as shown in Figure 6:
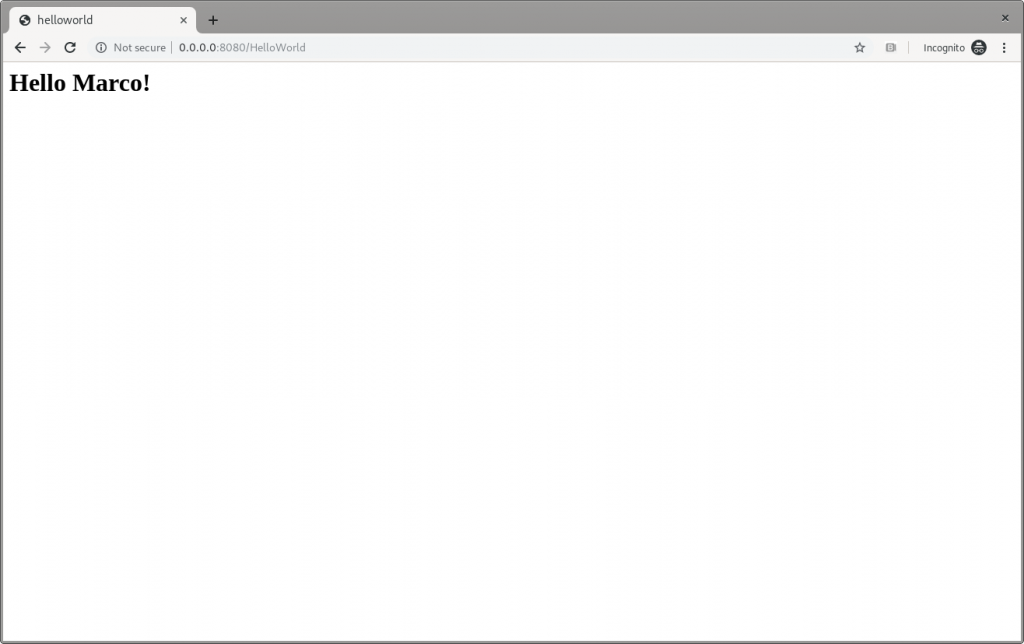
The Quarkus dev Hello Marco page.

Figure 6: The Quarkus dev Hello Marco page.

Take time to check the terminal output:

INFO [io.qua.dev] (vert.x-worker-thread-3) Changed source files detected, recompiling [/home/mrizzi/git/forked/jboss-eap-quickstarts/helloworld/src/main/java/org/jboss/as/quickstarts/helloworld/HelloWorldServlet.java] INFO [io.quarkus] (vert.x-worker-thread-3) Quarkus stopped in 0.003s INFO [io.qua.dep.QuarkusAugmentor] (vert.x-worker-thread-3) Beginning quarkus augmentation INFO [io.qua.dep.QuarkusAugmentor] (vert.x-worker-thread-3) Quarkus augmentation completed in 232ms INFO [io.quarkus] (vert.x-worker-thread-3) Quarkus 0.23.2 started in 0.257s. Listening on: http://0.0.0.0:8080 INFO [io.quarkus] (vert.x-worker-thread-3) Profile dev activated. Live Coding activated. INFO [io.quarkus] (vert.x-worker-thread-3) Installed features: [cdi] INFO [io.qua.dev] (vert.x-worker-thread-3) Hot replace total time: 0.371s 

Refreshing the page triggered the source code change detection and the Quarkus automagic “stop-and-start.” All of this executed in just 0.371 seconds (that’s part of the Quarkus “Supersonic Subatomic Java” experience).

Build the helloworld packaged JAR


Now that the code works as expected, it can be packaged using the command:

$ ./mvnw clean package

This command creates two JARs in the /target folder. The first is helloworld-<version>.jar, which is the standard artifact built from the Maven command with the project’s classes and resources. The second is helloworld-<version>-runner.jar, which is an executable JAR.

Please pay attention to the fact that this is not an uber-jar, because all of the dependencies are copied into the /target/lib folder (and not bundled within the JAR). Hence, to run this JAR in another location or host, both the JAR file and the libraries in the /lib folder have to be copied, considering that the Class-Path entry of the MANIFEST.MF file in the JAR explicitly lists the JARs from the lib folder.

To create an uber-jar application, please refer to the Uber-Jar Creation Quarkus guide.

Run the helloworld packaged JAR


Now, the packaged JAR can be executed using the standard java command:

$ java -jar ./target/helloworld-<version>-runner.jar INFO [io.quarkus] (main) Quarkus 0.23.2 started in 0.673s. Listening on: http://0.0.0.0:8080 INFO [io.quarkus] (main) Profile prod activated. INFO [io.quarkus] (main) Installed features: [cdi] 

As done above, open the http://0.0.0.0:8080 URL in a browser, and test that everything works.

Build the helloworld quickstart-native executable


So far so good. The helloworld quickstart ran as a standalone Java application using Quarkus dependencies, but more can be achieved by adding a further step to the modernization path: Build a native executable.

Install GraalVM


First of all, the tools for creating the native executable have to be installed:

  1. Download GraalVM 19.2.0.1 from https://github.com/oracle/graal/releases/tag/vm-19.2.0.1.
  2. Untar the file using the command:

$ tar xvzf graalvm-ce-linux-amd64-19.2.0.1.tar.gz

  1. Go to the untar folder.
  2. Execute the following to download and add the native image component:

$ ./bin/gu install native-image

  1. Set the GRAALVM_HOME environment variable to the folder created in step two, for example:

$ export GRAALVM_HOME={untar-folder}/graalvm-ce-19.2.0.1)

More details and install instructions for other operating systems are available in Building a Native Executable—Prerequisites Quarkus guide.

Build the helloworld native executable


As stated in the Building a Native Executable—Producing a native executable Quarkus guide, “Let’s now produce a native executable for our application. It improves the startup time of the application and produces a minimal disk footprint. The executable would have everything to run the application including the ‘JVM’ (shrunk to be just enough to run the application), and the application.”

To create the native executable, the Maven native profile has to be enabled by executing:

$ ./mvnw package -Pnative

The build took me about 1:10 minutes and the result is the helloworld-<version>-runner file in the /target folder.

Run the helloworld native executable


The /target/helloworld-<version>-runner file created in the previous step. It’s executable, so running it is easy:

$ ./target/helloworld-<version>-runner INFO [io.quarkus] (main) Quarkus 0.23.2 started in 0.006s. Listening on: http://0.0.0.0:8080 INFO [io.quarkus] (main) Profile prod activated. INFO [io.quarkus] (main) Installed features: [cdi] 

As done before, open the http://0.0.0.0:8080 URL in a browser and test that everything is working.

Next steps


I believe that this modernization, even of a basic application, is the right way to approach a brownfield application using technologies available in Quarkus. This way, you can start facing the issues and tackling them to understand and learn how to solve them.

In part two of this series, I’ll look at how to capture memory consumption data in order to evaluate performance improvements, which is a fundamental part of the modernization process.

Share

The post Quarkus: Modernize “helloworld” JBoss EAP quickstart, Part 1 appeared first on Red Hat Developer.



https://www.sickgaming.net/blog/2019/11/...rt-part-1/

Print this item

  Introducing “Web Live Preview”
Posted by: xSicKxBot - 09-09-2020, 12:48 AM - Forum: C#, Visual Basic, & .Net Frameworks - No Replies

Introducing “Web Live Preview”

Avatar

Tim

If you work on any type of app that has a user interface (UI) you probably have experienced that inner-loop development cycle of making a change, compile and run the app, see the change wasn’t what you wanted, stop debugging, then re-run the cycle again. Depending on the frameworks or technology you use, there are options to improve this experience such as edit-and-continue, Xamarin Hot Reload, and design-time editors. Of course, nothing will show the UI of your app like…well, your app!

For ASP.NET WebForms we have had designers for a while allowing you to switch from your WebForms code view to the Design view to get an idea what the UI may look like. As modern UI frameworks have evolved and relied more on fragments or components of CSS/HTML/etc. this design view may not always reflect the UI:

Screenshot of designer and rendered view of HTML

And these frameworks and UI libraries are becoming more popular and common to a web developer’s experience. We ship them in the box as well with some of our Visual Studio templates! As we looked at some of the web trends and talked with customers in our user research labs we wanted to adapt to that philosophy that the best representation of your UI, data, state, etc. is your actual running app. And so that is what we are working on right now.

Starting today you can download our preview Visual Studio extension for a new editing mode we’re calling “web live preview.” The extension is available now so head on over to the Visual Studio Marketplace and download/install the “Web Live Preview” extension for Visual Studio 2019. Seriously, go do that now and just click install, then come back and read the rest. It will be ready for you when you’re done!

Using the extension


After installing the extension, in an ASP.NET web application you’ll now have an option that says “Edit in Browser” when right-clicking on an ASPX page:

Screenshot of context menu

This will launch your default browser with your app in a special mode. You should immediately notice a small difference in that your view has some adorners on it:

Screenshot of adorners on web page

In this mode you can now interactively select elements on this view and see the selection synchronized with your source. Even if you select something that comes from a master page, the synchronization will open that page in Visual Studio to navigate to the selection.

Animation of element selection

So what you may say, well it’s not just selection synchronization, but source as well. You may have a web control and be selecting those elements and we know that, for example, that is an asp:DataGrid component. As you make changes to the source as well, they are immediately reflected in the running app. Notice no saving or no browser refresh happening:

Animation of changing styles

When working with things like Razor pages, we can detect code as well and even interact within those blocks of code. Here in a Razor page I have a loop. Notice how the selection is identified as a code loop, but I can still make some modifications in the code and see it reflected in the running app:

Animation of changing code

So even in your code blocks within your HTML you can make edits and see them reflected in your running app, shortening that inner loop to smaller changes in your process.

But wait, there’s more!

If you already use browser developer tools you may be asking if this is a full replacement for that for you. And it probably is NOT and that is by design! We know web devs rely a lot on developer tools in browsers and we are experimenting as well with a little extension (for Edge/Chrome) that synchronizes in the rendered dev tools view as well. So now you have synchronization across source representation (including controls/code/static) to rendered app, and with dev tools DOM tree views…and both ways:

Animation of browser tools integration

We have a lot more to do, hence this being a preview of our work so far.

Current constraints


With any preview there are going to be constraints, so here they are for the time of this writing. We eventually see this just being functionality for web developers in Visual Studio without installing anything else, so the extension is temporary. For now, we support the .NET Framework web project types for WebForms and MVC. Yes, we know, we know you want .NET Core and Blazor support. This is definitely on our roadmap, but we wanted to tackle some very known scenarios where our WebForms customers have been using design view for a while. We hear you and this has been echoed in our research as well…we are working on it!

For pure code changes outside of the ASPX/Razor pages we don’t have a full ‘hot reload’ story yet so you will have to refresh the browser in those cases where some fundamental object models are changing that you may rely on (new classes/functions/properties, changed data types, etc.). This is something that we hope to tackle more broadly for the .NET ecosystem and take all that we have learned from customers using similar experiments we have had in this area.

The extension works with Chromium-based browsers such as the latest Microsoft Edge and Google Chrome browsers. This also enables us to have a single browser developer tools extension that handles that integration as well. To use that browser extension, you will have to use developer mode in your browser and load the extension from disk. This process is fairly simple but you have to follow a few steps which are documented on adding and removing extensions in Edge. The location of the dev tools plugin is located at C:\Program Files (x86)\Microsoft Visual Studio\2019\Common7\IDE\Extensions\Microsoft\Web Live Preview\BrowserExtension (assuming you have the default Visual Studio 2019 install location and ensuring you specify Community/Professional/Enterprise you have installed). Please note this is also a temporary solution as we are in development of these capabilities. Any final browser tools extensions would be distributed in browser stores.

Summary


If you are one of our customers that can leverage this preview extension we’d love for you to download and install it and give it a try. If you have feedback or issues, please use the Visual Studio Feedback mechanism as that helps us get diagnostic information for any issues you may be facing. We know that you have a lot of tools at your disposal but we hope this web live preview mode will make some of your flow easier. Nothing to install into your project, no tool-specific code in your source, and (eventually) no additional tools to install. Please give it a try and let us know what you think!

On behalf of the team working on web tools for you, thank you for reading!


https://www.sickgaming.net/blog/2020/06/...e-preview/

Print this item

  Microsoft - New discounts on meeting and calling experiences in Microsoft Teams
Posted by: xSicKxBot - 09-09-2020, 12:47 AM - Forum: Windows - No Replies

New discounts on meeting and calling experiences in Microsoft Teams


Over the past 6 months, organizations around the world have adjusted to remote and hybrid work, pioneering new methods of collaboration, and transforming communication systems to stay connected and productive. By working closely with our customers, we’ve identified key requirements that define how you are using meeting and calling solutions and rethinking your costs to achieve long-term resiliency.

As we’ve shared, your organization’s communication needs likely span a spectrum—from the most basic 1:1 meetings and calls to group meetings to large virtual events and conferences. During the pandemic, organizations transformed rapidly moving meetings online and created hybrid workplaces. This environment confirmed the need for multiple ways to join online meetings. For example, participants who do not have reliable internet access to join Microsoft Teams meetings can use Audio Conferencing to join via a dial-in number. Our customers increasingly need to host large scale virtual events ranging from internal town halls to customer events, and Teams can help with these, too. The new Advanced Communications add-on enables large scale events, but also provides structure and admin control to achieve more professional, seamless, and compliant meeting experiences.

To help our customers enable these scenarios and experience the best of what Microsoft Teams can offer in meetings and voice, we’re announcing new promotional offers that deliver these experiences with significant cost savings.

New Microsoft Teams promotional offers:

  • Get Audio Conferencing for free, available now for Enterprise Agreement customers1 and starting October 1st, 2020 available for customers purchasing via partners and web2.
  • Get 35% off Advanced Communications3, available now for Enterprise Agreement customers, and will be available before the end of the calendar year for customers purchasing via partners and web.
  • For Skype for Business customers, we offer FastTrack support along with great pricing offers to help you move to Teams in a cost-effective manner.  Contact your account representative for more details.

We are committed to helping organizations everywhere stay connected and productive as you navigate new ways of work. By sharing these promotional offers, we aim to support even more of your meeting needs in a cost-efficient manner.

FAQ:

Q: Can an eligible customer use all three offers at once?
A: Yes, if the customer is eligible to all three offers, they can sign up for all three.

Q. Is there a user limit?
A: The offers described above do not have a max number of users.

Q: Are the offers available for education (EDU), GCC, DoD, or GCC High customers?
A: Audio Conferencing Offer1,2: available for GCC and EDU (A3 only) but is not available for DoD and GCC High customers.
Advanced Communication offer3: The offer is not available for EDU customers. Advanced Communications add-on is not yet available to US GOV clouds (DoD, GCC, GCC High).

Q: If I purchase Audio Conferencing via partners or web, how do I enable the offer2?
A: IT Admins can enable it for their organization via the Microsoft 365 Admin Center. First, activate the free Audio Conferencing offer2 to acquire a license and then assign it to a specific user in your tenant.

1 Get Audio Conferencing for free until the end of your enrollment. Eligible for Microsoft Enterprise Agreements customers with paid Microsoft 365 or Office 365 licenses with Microsoft Teams without Audio Conferencing add-on or Microsoft 365 E5. Available now through January 31st, 2021. Available worldwide with the exception in China and India. Talk to your Microsoft sales representative to learn more. The offer is subject to additional terms and conditions.
2 Get Audio Conferencing for free for 12 months. Eligible for CSP and Web Direct customers with paid Microsoft 365 or Office 365 licenses with Microsoft Teams without Audio Conferencing add-on or Microsoft 365 E5. Available Starting October 1st, 2020 through March 31st, 2021. Available worldwide with the exception in China and India. The offer is subject to additional terms and conditions.
3 Get 35% off Advanced Communications until the end of your current subscription terms. Eligible for customers with Microsoft Enterprise Agreements, and paid Microsoft 365 or Office 365 license with Microsoft Teams. Available now through January 31st, 2021. Available worldwide. Broader availability for customers working with our Microsoft partners and transacting on the web is coming soon. The offer is subject to additional terms and conditions.


https://www.sickgaming.net/blog/2020/09/...oft-teams/

Print this item

  News - This Animal Crossing Nook’s Cranny Set Is Being Officially Reviewed By LEGO
Posted by: xSicKxBot - 09-09-2020, 12:47 AM - Forum: Nintendo Discussion - No Replies

This Animal Crossing Nook’s Cranny Set Is Being Officially Reviewed By LEGO


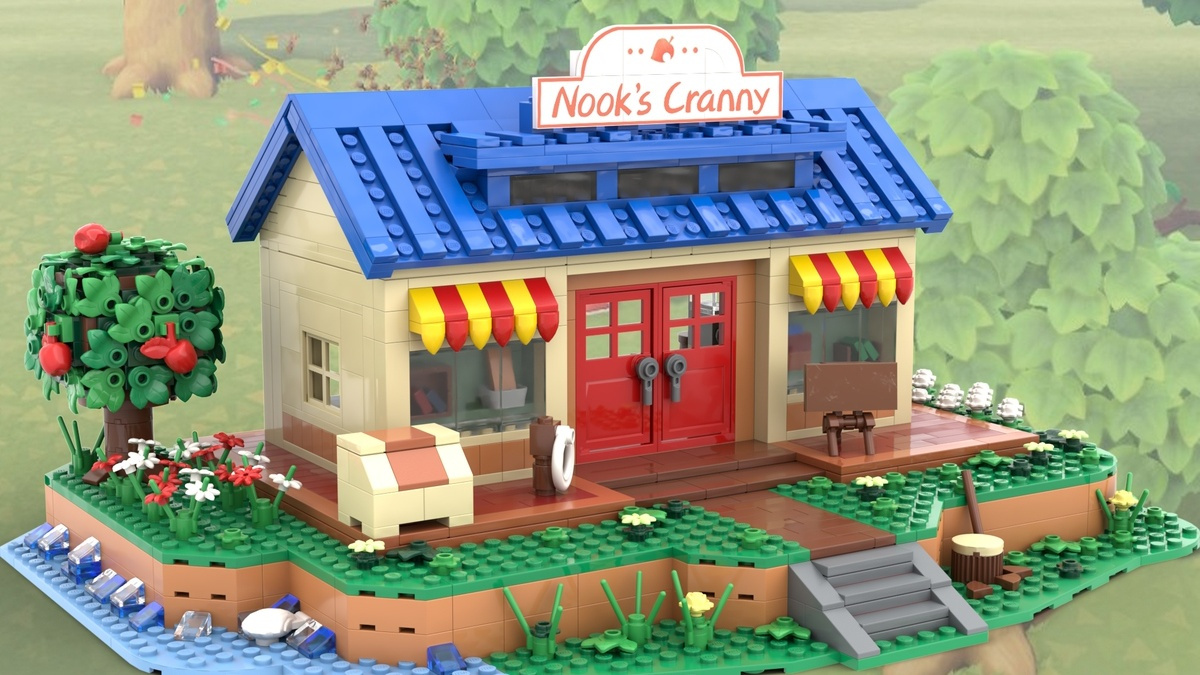
A fan-made LEGO set based on Animal Crossing‘s Nook’s Cranny shop is being officially reviewed by the company as part of its LEGO Ideas campaign.

As you may be aware, the LEGO Ideas website allows fans to submit their very own designs for approval. If a design gets 10,000 votes from the community, it’s automatically put forward for review by LEGO and can end up being a real product found on store shelves–the designer can enjoy 1% of the royalties, too.

The Nook’s Cranny design, inspired by the store’s appearance in Animal Crossing: New Horizons on Switch, is one of a whopping 35 Ideas that have made it through for review. Both the inside and outside are fully kitted out, and there’s even a Villager Minifigure sporting the classic ‘number 1’ t-shirt.

“As a fan of Animal Crossing, I have wanted to do a build from the game,” says the design’s creator, Micro_Model_Maker. “I have seen a lot of house builds from the game so I have decided to do Nook’s Cranny to shake things up a bit. The build features an interior; I tried to get it as close to the game as possible but due to size I have had to move some things around, however I believe it captures the spirit”.


The creator also wants to include Timmy and Tommy Minifigures, but didn’t have the parts needed. They say that new moulds might be required to pull that off.

As it happens, plenty of video game designs are making it through LEGO Ideas this year. A few months ago, sets based on The Legend of Zelda, Sonic, and Untitled Goose Game also passed the test and are currently under review.

We’d love to see these hit the market, but it’s important to remember that reaching this stage doesn’t guarantee success. LEGO and Nintendo may well have a pretty great relationship these days, but sets like this would still need to be approved by the Big N, too.

Would you snap one of these up given the chance? Let us know in the comments.


https://www.sickgaming.net/blog/2020/09/...d-by-lego/

Print this item

  News - You Can Preorder A $10K Gold PS5 This Week
Posted by: xSicKxBot - 09-08-2020, 08:15 PM - Forum: Lounge - No Replies

You Can Preorder A $10K Gold PS5 This Week

Let's be honest: the design of the upcoming PS5 is divisive, to say the least. It's huge, it's white, and it looks a little bit like a device that would digitize your soul in a bad sci-fi movie. That said, if you'd prefer a more luxurious design, you'll get your chance later this week.

The previously-announced gold PS5 will soon be available for preorder from a third-party UK retailer, and the price tag is a whopping £7999 for the 18K rose-gold version and £8099 for the 24K gold version. (That's around $10,500, if you're wondering.) If you just want a part of the look, you can nab a gold PS5 controller for £649 and a headset for £399. Preorders will start on Thursday, September 10.

For the rest of us plebs who can't afford a solid-gold console, we still don't know how much the PS5 is going to retail for, or even a specific release date beyond holiday 2020. The smaller Xbox Series S was confirmed for a $299 price point earlier today, but we still don't know the price of the flagship Xbox Series X, though credible reports have suggested $499. Sony also confirmed that the PS5 will be backward-compatible with PS4 games, though it will not be able to play games from previous generations beyond that. At least we're getting that Demon's Souls remake, so I can stop lugging my PS3 out of storage for that. If you want to preorder a regular PS5, you can sign up on Sony's website. Given that supplies are going to be limited, you should act fast.

Continue Reading at GameSpot

https://www.gamespot.com/articles/you-ca...01-10abi2f

Print this item

  ASP.NET Core updates in .NET 5 Preview 5
Posted by: xSicKxBot - 09-08-2020, 06:30 PM - Forum: C#, Visual Basic, & .Net Frameworks - No Replies

ASP.NET Core updates in .NET 5 Preview 5

Avatar

Sourabh

.NET 5 Preview 5 is now available and is ready for evaluation! .NET 5 will be a current release.

Get started


To get started with ASP.NET Core in .NET 5.0 Preview5 install the .NET 5.0 SDK.

If you’re on Windows using Visual Studio, we recommend installing the latest preview of Visual Studio 2019 16.7.

If you’re on macOS, we recommend installing the latest preview of Visual Studio 2019 for Mac 8.7.

Upgrade an existing project


To upgrade an existing ASP.NET Core 5.0 preview4 app to ASP.NET Core 5.0 preview5:

  • Update all Microsoft.AspNetCore.* package references to 5.0.0-preview.5.*.
  • Update all Microsoft.Extensions.* package references to 5.0.0-preview.5.*.

See the full list of breaking changes in ASP.NET Core 5.0.

That’s it! You should now be all set to use .NET 5 Preview 5.

What’s new?


Reloadable endpoints via configuration for Kestrel


Kestrel now has the ability to observe changes to configuration passed to KestrelServerOptions.Configure and unbind from existing endpoints and bind to new endpoints without requiring you to restart your application.

See the release notes for additional details and known issues.

Give feedback


We hope you enjoy this release of ASP.NET Core in .NET 5! We are eager to hear about your experiences with this latest .NET 5 release. Let us know what you think by filing issues on GitHub.

Thanks for trying out ASP.NET Core!


https://www.sickgaming.net/blog/2020/06/...preview-5/

Print this item