



07-31-2022, 10:34 PM
How to Display a Progress Bar in Python
5/5 – (1 vote)
[ ] 100%
Problem Formulation and Solution Overview
In this article, you’ll learn how to configure and display a progress bar.
A progress bar is commonly used in Python or, for that matter, any other programming language to show the user an application’s progress. For example, an installation, a transferring of files, or any other commands.
The Finxter Academy recommends implementing this to visually display to the user what is happening behind the scenes.
 Question: How would we write code to display a progress bar?
We can accomplish this task by one of the following options:
Method 1: Use a For Loop

This method imports the and libraries combined with a loop to display a custom progress bar output on a single line.
Above imports, the library to call the sleep command and the library to write the contents to the terminal.
Next, a loop is instantiated. This loop uses the function to set the start position (0 by default) and the stop position (21-1). Inside this loop, the following occurs:
The loop continues until 100% has been attained. Below is the end result.
[] 100%
 Note: Any emoji or another symbol can be substituted for the above selection.
Method 2: Use apytl Library
This method imports the and libraries to generate a custom progress bar.
To run this code error-free, install the required library. Click here for installation instructions.
Above imports the library to call the sleep command and the library to display the progress bar.
Next, the total number of iterations to carry out is declared as and saved to .
To understand what is going on in the loop, let’s write some test code to see what the values of , and are doing:
As you can see from the output, the and variables count from 0 ( default start position) to the stop position of 9 (10-1). Notice the value of does not change.
Referring back to the code directly below the Method 2 heading, the next line is:.
This function is passed three (3) arguments:
Progress |***********************************| 100.0% Complete
Method 3: Use alive-progress
The library moves progress bars to the next level! With its many display options, it’s a must-a-try!
To run this code error-free, install the required library. Click here for installation instructions.
Above imports the library to use the progress bar and the library to call the command.
Next, a loop is instantiated. This loop uses the function to set the stop position at 9 (10-1). Inside this loop, the following occurs:
The loop continues until 100% has been attained.
<■■■■■■■■■■■■■■■■■■■■■■■■■■■■■■■■> 0 in 0.0s (0.00/s)
<■■■■■■■■■■■■■■■■■■■■■■■■■■■■■■■■> 1/1 [100%] in 0.0s (333.28/s)
<■■■■■■■■■■■■■■■■■■■■■■■■■■■■■■■■> 2/2 [100%] in 0.0s (62.48/s)
<■■■■■■■■■■■■■■■■■■■■■■■■■■■■■■■■> 3/3 [100%] in 0.0s (63.96/s)
<■■■■■■■■■■■■■■■■■■■■■■■■■■■■■■■■> 4/4 [100%] in 0.1s (62.39/s)
<■■■■■■■■■■■■■■■■■■■■■■■■■■■■■■■■> 5/5 [100%] in 0.1s (63.32/s)
<■■■■■■■■■■■■■■■■■■■■■■■■■■■■■■■■> 6/6 [100%] in 0.1s (64.84/s)
<■■■■■■■■■■■■■■■■■■■■■■■■■■■■■■■■> 7/7 [100%] in 0.1s (63.79/s)
<■■■■■■■■■■■■■■■■■■■■■■■■■■■■■■■■> 8/8 [100%] in 0.1s (63.53/s)
<■■■■■■■■■■■■■■■■■■■■■■■■■■■■■■■■> 9/9 [100%] in 0.1s (64.09/s)
Note: To view a list of all available progress bars, click here.
Method 4: Use tqdm
A simple yet elegant progress bar, is a must-see!
To run this code error-free, install the required library. Clickhttps://pypi.org/project/alive-progress/1.0/here for installation instructions.
Above imports the library for the progress bar and the library to call the command.
Next, a loop is instantiated. This loop uses the library with the function to set the stop position at 99 (100-1). Inside this loop, the following occurs:
The progress bar displays on one line. Each iteration increases the progress by a percentage.

Method 5: Use progress Library
This method uses the library to display a progress bar. This library has many fun options to select from.
To run this code error-free, install the required library. Clickhttps://pypi.org/project/tqdm/here for installation instructions.
Above imports the library to call the sleep command and thehttps://pypi.org/project/apytl/ library to display a progress bar, specifically the .
The following code displays the word at the terminal, and the rotates, sleeps, and continues until the value of the stop position (100-1) is attained.
Processing…◑
Note: Spend some time on this library page to test the different types of progress bars.
Summary
There is so much more to Python Progress Bars than was covered in this article. May we suggest you take time to delve into each method outlined above to determine the best one for your requirements.
Happy Coding!
Programming Humor – Python
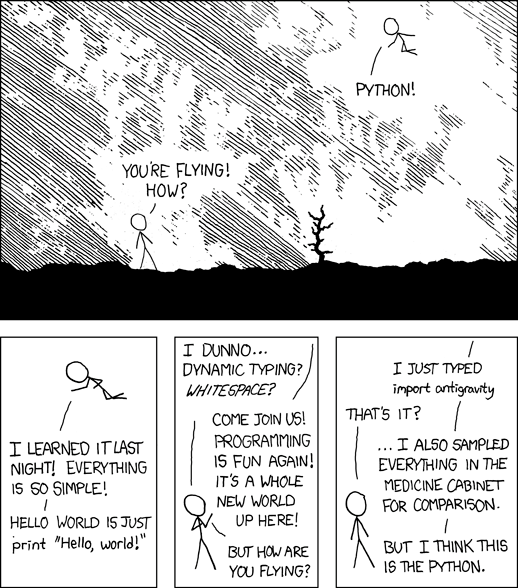 [i]“I wrote 20 short programs in Python yesterday. It was wonderful. Perl, I’m leaving you.” — xkcd[/i]
5/5 – (1 vote)
[
] 100%Problem Formulation and Solution Overview
In this article, you’ll learn how to configure and display a progress bar.
A progress bar is commonly used in Python or, for that matter, any other programming language to show the user an application’s progress. For example, an installation, a transferring of files, or any other commands.
The Finxter Academy recommends implementing this to visually display to the user what is happening behind the scenes.
Question: How would we write code to display a progress bar?We can accomplish this task by one of the following options:
- Method 1: Use a loopCode:
for
- Method 2: Use libraryCode:
apytlfunctionCode:Bar().drawbar()
- Method 3: Use Code:
alive-progress
- Method 4: Use Code:
tqdm
- Method 5: Use Code:
progress
Method 1: Use a For Loop
This method imports the
Code:
timeCode:
sysCode:
forCode:
from time import sleep
import sys for x in range(0,21): sys.stdout.write('\r') sys.stdout.write("[%-20s] %d%%" % (''*x, 5*x)) sys.stdout.flush() sleep(0.75)
Above imports, the
Code:
timeCode:
sysNext, a
Code:
forCode:
range- The first line uses a carriage return () to start the code on a new line.Code:
\r
- The following line determines how the progress bar appears by:
- Left-aligning the emoji(s) inside the square brackets .Code:
[%-20s]
- Configuring the progress percentage (exampleCode:
%d%%" %).Code:15%
- Determining the visual emoji progress .Code:
(':beaming_face_with_smiling_eyes:'*x, 5*x)
- Left-aligning the emoji(s) inside the square brackets
- Then writes everything in the buffer to the terminal.Code:
sys.stdout.flush()
- The code pauses for the stated period ().Code:
0.75
The loop continues until 100% has been attained. Below is the end result.
[
] 100%Note: Any emoji or another symbol can be substituted for the above selection.Method 2: Use apytl Library
This method imports the
Code:
timeCode:
apytlTo run this code error-free, install the required library. Click here for installation instructions.
Code:
import time
import apytl total_iterations = 10 for index, value in enumerate(range(total_iterations)): apytl.Bar().drawbar(value, total_iterations, fill='*') time.sleep(0.75)
Above imports the
Code:
timeCode:
apytlNext, the total number of iterations to carry out is declared as
Code:
10Code:
total_iterationsTo understand what is going on in the
Code:
forCode:
indexCode:
valueCode:
total_iterationsCode:
total_iterations = 10 for index, value in enumerate(range(total_iterations)): print(index, value, total_iterations)As you can see from the output, the
Code:
indexCode:
valueCode:
rangeCode:
total_iterationsCode:
0 0 101 1 102 2 103 3 104 4 105 5 106 6 107 7 108 8 109 9 10Referring back to the code directly below the Method 2 heading, the next line is:
Code:
apytl.Bar().drawbar(value, total_iterations, fill='*')This function is passed three (3) arguments:
- The variable , which you can see from the above, increments by one (1) each iteration.Code:
value
- The variable , which remains constant atCode:
total_iterations.Code:10
- The fill value. This example uses the asterisk () character. However, feel free to use an emoji or other symbol.Code:
*
Progress |***********************************| 100.0% Complete
Method 3: Use alive-progress
The
Code:
alive-progressTo run this code error-free, install the required library. Click here for installation instructions.
Code:
from alive_progress import alive_bar
from time import sleep for x in range(10): with alive_bar(x, bar='solid') as bar: for i in range(x): sleep(.001) bar()
Above imports the
Code:
alive-progressCode:
timeCode:
sleepNext, a
Code:
forCode:
range- The is called and passed the argumentCode:
alive_barand the bar type. For this example,Code:xwas selected.Code:solid- A new loop is instantiated and loops throughCode:
forpassingCode:rangeas an argument.Code:x
- The code halts () for the stated period (Code:
sleep).Code:.001
- The bar is output to the terminal each iteration.
- A new
The loop continues until 100% has been attained.
<■■■■■■■■■■■■■■■■■■■■■■■■■■■■■■■■> 0 in 0.0s (0.00/s)
<■■■■■■■■■■■■■■■■■■■■■■■■■■■■■■■■> 1/1 [100%] in 0.0s (333.28/s)
<■■■■■■■■■■■■■■■■■■■■■■■■■■■■■■■■> 2/2 [100%] in 0.0s (62.48/s)
<■■■■■■■■■■■■■■■■■■■■■■■■■■■■■■■■> 3/3 [100%] in 0.0s (63.96/s)
<■■■■■■■■■■■■■■■■■■■■■■■■■■■■■■■■> 4/4 [100%] in 0.1s (62.39/s)
<■■■■■■■■■■■■■■■■■■■■■■■■■■■■■■■■> 5/5 [100%] in 0.1s (63.32/s)
<■■■■■■■■■■■■■■■■■■■■■■■■■■■■■■■■> 6/6 [100%] in 0.1s (64.84/s)
<■■■■■■■■■■■■■■■■■■■■■■■■■■■■■■■■> 7/7 [100%] in 0.1s (63.79/s)
<■■■■■■■■■■■■■■■■■■■■■■■■■■■■■■■■> 8/8 [100%] in 0.1s (63.53/s)
<■■■■■■■■■■■■■■■■■■■■■■■■■■■■■■■■> 9/9 [100%] in 0.1s (64.09/s)
Note: To view a list of all available progress bars, click here.Method 4: Use tqdm
A simple yet elegant progress bar,
Code:
tqdmTo run this code error-free, install the required library. Clickhttps://pypi.org/project/alive-progress/1.0/here for installation instructions.
Code:
from tqdm import tqdm
from time import sleep for i in tqdm(range(100)): sleep(0.02)
Above imports the
Code:
tqdmCode:
timeCode:
sleep()Next, a
Code:
forCode:
tqdmCode:
rangeThe progress bar displays on one line. Each iteration increases the progress by a percentage.
Method 5: Use progress Library
This method uses the
Code:
progressTo run this code error-free, install the required library. Clickhttps://pypi.org/project/tqdm/here for installation instructions.
Code:
from time import sleep
from progress.spinner import MoonSpinner with MoonSpinner('Processing…') as bar: for i in range(100): sleep(0.02) bar.next()
Above imports the
Code:
timeCode:
progressCode:
MoonSpinnerThe following code displays the word
Code:
Processing...Code:
MoonSpinnerCode:
rangeProcessing…◑
Note: Spend some time on this library page to test the different types of progress bars.Summary
There is so much more to Python Progress Bars than was covered in this article. May we suggest you take time to delve into each method outlined above to determine the best one for your requirements.
Happy Coding!
Programming Humor – Python
[i]“I wrote 20 short programs in Python yesterday. It was wonderful. Perl, I’m leaving you.” — xkcd[/i]