


Last modified on November 8th, 2020.
Internet of things (IoT) is fascinating. I am predominantly a web applications person. But sensors, LED display, chips, soldering and the collage of software with these “things” is exciting.
The credit card sized Raspberry Pi computer gives all the opportunity to experiment and explore IoT. I wrote getting started with IoT using Raspberry Pi and PHP a while back. Now I thought of extending that and write about my hobby projects that I do with Raspberry Pi.
I have been using Raspberry Pi to,
- Notify for new emails integrating GMail API.
- Show the number of unread emails.
- Monitor website uptime and notify if it’s up or down.
- Show traffic user count to my website integrating Google Analytics.
- Notify if there is a sale in my online shop.
Raspberry Pi is my hobby and I thought of sharing with you about these tiny projects. This will be a multi article series. Let us start with how to connect a I2C LCD display with the Raspberry Pi.
Then I will write about all the above items one by one.
I2C LCD display module
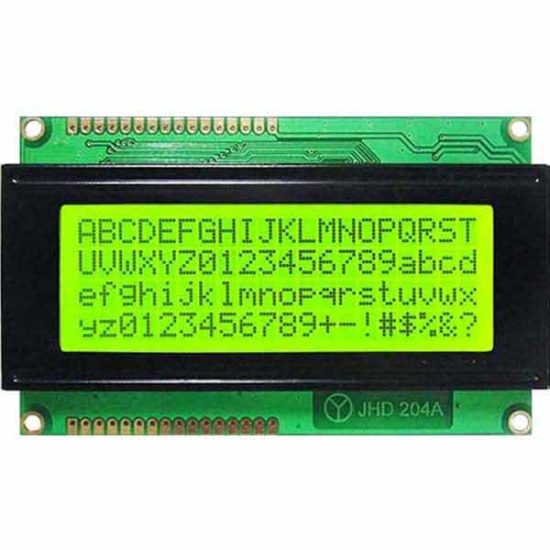
Widely popular are 16×2(LCD1602) and 20×4 (LCD2004) LCD displays. The below image shows a 20×4 LCD display module.
Three main reasons to choose this type of LCD display for IoT projects using Raspberry Pi or Arduino.
- Economical to purchase. You can buy a 16×2 LCD module for just $1 USD.
- It requires 5v to run and so we can hook it to Raspberry Pi and no dedicated power source required.
- Consumes low current. You can keep it on 24×7 with backlight on without burning your purse.
Why I2C backpack?
These LCD modules have parallel interface. That will not be convenient to connect multiple pins to the chip and use them in parallel mode.
I2C is a serial bus developed by Philips. So we can use I2C communication and just use 4 wires to communicate. To do this we need to use an I2C adapter and solder it to the display.
I2C uses two bidirectional lines, called SDA (Serial Data Line) and SCL (Serial Clock Line) with 5V standard power supply requirement a ground pin. So just 4 pins to deal with.
When you buy the LCD module, you can purchase LCD, I2C adapter separately and solder it. If soldering is not your thing, then it is better to buy the LCD module that comes with the I2C adapter backpack with it.
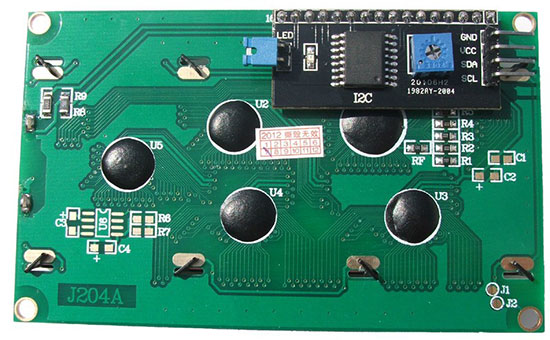
The above image is backside of a 2004 LCD module. The black thing is the I2C adapter. You can see the four pins GND, VCC, SDA and SCL. That’s where the you will be connecting the Raspberry Pi.
The square blue thing with plus mark is used for adjusting the brightness of the display. The blue jumper is used to switch on or off the backlight.
Switching off the backlight may not be necessary. If you switch off, the characters will be barely visible. You can keep it on 24×7, it will not eat up power as it is a low power consumption device.
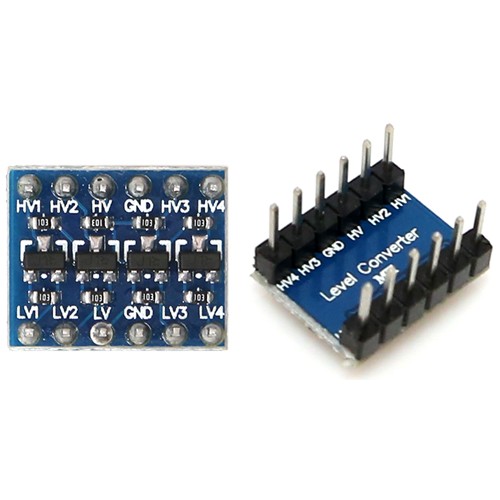
Logic converter
Raspberry Pi GPIO pins are natively of 3.3V. So we should not pull 5v from Raspberry Pi. The I2C LCD module works on 5V power and to make these compatible, we need to shift up the 3.3V GPIO to 5V. To do that, we can use a logic level converter.
Reference: https://www.raspberrypi.org/documentation/faqs/#pi-power-gpioout
This is an important point and this is where a lot of beginners fail out. You may find some conflicting information in the Internet pages.
You might see RPIs connected directly to a 5V devices, but they may not be pulling power from RPI instead supplying externally. Only for data / instruction RPI might be used. So watch out, you might end up frying the LCD module or the RPI itself.
Required hardware list
- Raspberry Pi (I have used Zero W and you can use any model you have).
- LCD display with I2C adapter backpack (I have used 20×4, you can use as per your choice).
- 3.3V to 5V bi-directional logic level converter
- Breadboard
- Jumper wires
Pre-requisite
- Micro SD card with Raspbian OS
- 5.1V power supply (Official power adapter recommended)
- Memory card reader
Why official power adapter?
Why am I recommending the official power adapter! There is a reason to it. The cheap mobile adapters though guarantee a voltage, they do not provide a steady voltage. That may not be required in charging a cellphone device but not in the case of Raspberry Pi. That is the main reason, a USB keyboard or mouse attached does not get detected. They may not get sufficient power. Either go for an official power adapter or use the best branded one you know.
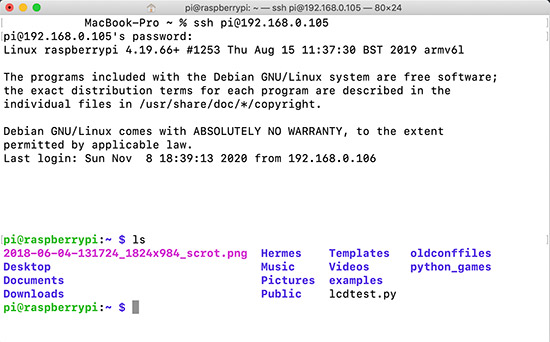
Headless
I have a headless setup. I am doing SSH from my MAC terminal and use VIM as editor. VNC viewer may occasionally help but doing the complete programming / debugging may not be comfortable. If you do not prefer SSH way, then you will need a monitor to plug-in to Raspberry Pi.
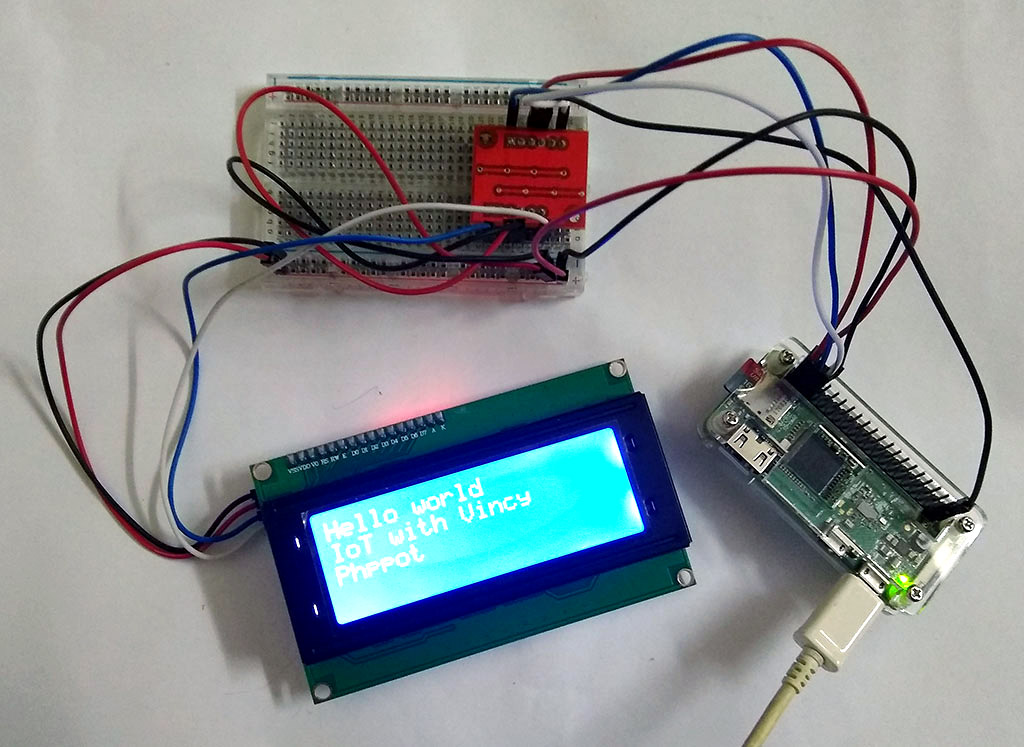
Raspberry Pi LCD I2C Circuit diagram
I have used a breadboard, logic level converter, 20×4 LCD display module with I2C backpack and Raspberry Pi Zero W in the circuit diagram.

3.3V GPIO of Raspberry Pi is converted using a logic level converter to 5V to be compatible for the LCD display.
Raspberry Pi setup with LCD display module using I2C backpack
Programming
As you know my language of choice to build website is PHP. But for IoT with Raspberry Pi, let us use Python. Reason being availability of packages and that will save ton of effort. Low level interactions via serial or parallel interface is easier via Python.
I2C
We need the below two tools for working with I2C. So install it by running the following command in the RPI terminal.
sudo apt-get install python-smbus i2c-tools
Enable I2C
sudo raspi-config
The above command opens the Raspberry Pi configuration in the terminal. Under ‘Interfacing Options’, activate I2C.
sudo vi /etc/modules
Add the following two lines at the end of the file and save it.
i2c-bcm2708

i2c-dev
Then restart Raspberry Pi.
sudo reboot
Test I2C
To check if the I2C is properly connected and detected.
sudo i2cdetect -y 1
This will return a matrix with ’27’ highlighted, that means you I2C is detected and it is the address.
Install PIP
curl https://bootstrap.pypa.io/get-pip.py -o get-pip.py
python3 get-pip.py
LCD Library
We need a library to interact with the LCD module. There are many Python libraries available. I prefer RPLCD.
sudo pip install RPLCD
This will install the RPLCD library.
Raspberry Pi LCD Hello World Python program
LCDHelloWorld.py
Following code imports the RPLCD library. Then initializes the LCD instance. Then print the “Hello World” string followed by new line. Then another two statements. Then a sleep for 5 seconds and switch off the LCD backlight. Finally, clear the LCD screen.
# Import LCD library

from RPLCD import i2c # Import sleep library

from time import sleep # constants to initialise the LCD

lcdmode = 'i2c'

cols = 20

rows = 4

charmap = 'A00'

i2c_expander = 'PCF8574' # Generally 27 is the address;Find yours using: i2cdetect -y 1 address = 0x27 port = 1 # 0 on an older Raspberry Pi # Initialise the LCD

lcd = i2c.CharLCD(i2c_expander, address, port=port, charmap=charmap, cols=cols, rows=rows) # Write a string on first line and move to next line

lcd.write_string('Hello world')

lcd.crlf()

lcd.write_string('IoT with Vincy')

lcd.crlf()

lcd.write_string('Phppot')

sleep(5)

# Switch off backlight

lcd.backlight_enabled = False # Clear the LCD screen

lcd.close(clear=True)
My next article in this series will be on how to integrate the GMail API and notify for new mails.
https://www.sickgaming.net/blog/2020/11/...-backpack/